Table of Contents
Advertisement
Advertisement
Table of Contents

Related Manuals for Husky T-124C


Summary of Contents for Husky T-124C
- Page 1 INDUSTRIAL TRICYCLES...
-
Page 3: Table Of Contents
Table of Contents Introduction Specifications Component Diagram Safety Recommendations 7-10 Major Parts and Components 11-16 Assembly Guide 18-29 Maintenance 30-32 Limited Warranty 33-34 Optional Accessories... -
Page 4: Introduction
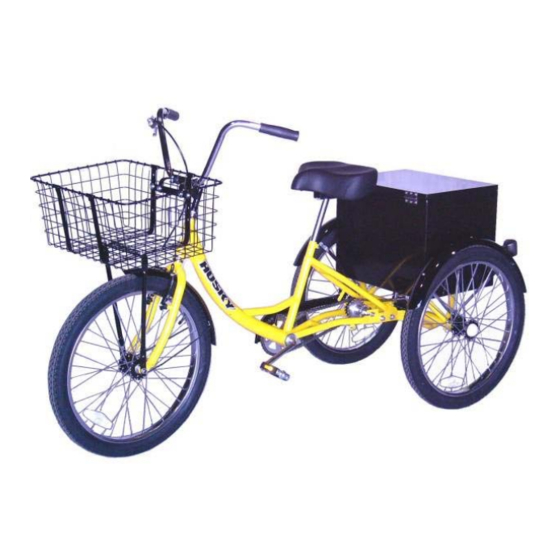
Introduction Congratulations on you purchase of your new Husky industrial tricycle. You have purchased a tricycle that has many features and qualities. Please take a few minutes and read through this manual before you ride your tricycle for the first time. Learning about this tricycle and safe riding and maintenance will return many years of enjoyment and useful life. -
Page 5: Specifications
Hubs Front Steel sealed bearing, 3/8" axle Rear Fwl Side Steel 3-notch w/ sealed bearings Rear Drive Side Steel 3-notch (T-124C), Square bore (T-326) Brake Front: linear pull, rear: coaster brake Brake Cable Extra thick 1.8mm steel cable Brake Lever... -
Page 7: Safety Recommendations
Depending on the situation, you may need one or more of these safety devices so that you can alert others of your presence. Please contact your HUSKY dealer if you need more information on safety accessories. - Page 8 Mounted on the rear axle and extending about 6 feet above the ground, they allow others to spot a rider from far distance. Safety flags are available at your HUSKY dealers. SAFE RIDING IN WET CONDITIONS You never know when you may get caught in a rainstorm or an afternoon summer shower.
- Page 9 Using gloves when riding your bike helps minimize loss of grip in wet conditions. FENDERS - HUSKY offers fenders as standard equipment for most of its products. Fenders protect the rider from water and mud splashes.
- Page 10 WARNING! Due to size and weight of Husky cargo tricycles, avoid narrow sidewalks and off-road bicycle trails. Also avoid roads or ramps with steep grade. When riding down a ramp or hill, exercise extreme caution and slow down, using both brakes.
-
Page 11: Major Parts And Components
The two sections are connected by large bolts and nuts. Make sure these bolts and nuts are tight at all times. Your HUSKY tricycle is classified as an “adult tricycle”, suitable for riding on paved or hard packed dirt surfaces. Because of the special design of the frame and fork, this product offers maximum comfort at lower speed. - Page 12 HANDLEBAR AND HANDLEBAR STEM The handlebar is designed so that you can enjoy riding your tricycle without having to bend or lean forward, thus reducing pressure on back and neck muscles. The position of the handlebar can be adjusted to raise or lower the grip for maximum comfort.
- Page 13 The size of the wrench depends on the gauge of the spoke. You can buy spokes from bicycle shops or order from Husky. Check your tires by observing any cuts or cracks on the side wall, air pressure, and amount of wear on the thread.
- Page 14 PEDALS Your bicycle is equipped with a set of pedals. Pedals should spin freely around the center spindle, which is attached to the crank arms. If pedals fail to spin or the spindle is not tightly attached to the crank arm, do not ride the bike until the pedal is secured to the crank arm.
- Page 15 The crank and bottom bracket parts must be secure. As with the headset and fork, the crank should spin on its axle through the bottom bracket freely and without any friction or resistance. To test the cranking action, have someone lift the rear end of the tricycle. You should be able to crank the bike and spin the right-side rear wheel with one hand.
- Page 16 Coaster brake REAR AXLE AND BEARINGS T-124C model has a 17mm solid steel rear axle. The axle is supported by eight sealed cartridge bearings on the axle housing and rear wheels. The rear drive sprocket is mounted on the axle using an axle key and a set screw.
- Page 17 T-326 Axle and Pillow Block Bearing 3-SPEED OPTION - Models with 3-speed coaster brake hub use Shimano® Nexus® internal gear shifting system that is pre-set and adjusted at the factory. Components unique to a 3-speed model are (1) 3-speed handlebar grip shifter, (2) shifter cable, (3) bell crank, and (4) push rod.
-
Page 18: Assembly Guide
ASSEMBLY GUIDE This assembly guide is intended for use by bicycle technicians or experienced mechanics. HUSKY ASSUMES THAT THE PERSON ASSEMBLING THIS PRODUCT HAS THE BASIC KNOWLEDGE OF PROPER ASSEMBLY AND AJUSTMENT OF A BICYCLE. THIS ASSEMBLY GUIDE ONLY PROVIDES THE BASIC STEPS IN ASSEMBLING THIS PRODUCT. - Page 19 TOOLS NEEDED 10, 13, 14, 15, 17 and 22 mm box wrench 12 and 13 mm open end wrench Phillips and flat-head screwdriver Pliers 4, 5, 6, and 8mm hex key wrench Bicycle pump or air compressor Bearing grease (optional) There are 4 basic steps in assembly.
- Page 20 Your tricycle has been packed into two boxes, Frame Box and Wheels/Basket Box. On the side of the Frame Box, you will find the tricycle’s serial number, beginning with “GM”. Write the number somewhere on this manual for future reference. This number should match the number stamped at the bottom of crank housing.
- Page 21 Please check to make sure the components listed above are identified. If you are missing any parts or having difficulty identifying a part, please contact HUSKY Customer Service at (800) 392-3337. FOR COMPLETE INFORMATION ON PARTS AND PART NUMBERS FOR ALL HUSKY PRODUCTS, VIST...
- Page 22 STEP 1 - ASSEMBLE THE FRAME 1. Place the front and rear frames on a bench and position each part so that the connecting brackets face each other. 2. Slide the frame brackets so that they overlap. Insert 4 large square keyed frame bolts through the inside of the brackets (2 on each side) and install washers and nylon insert nuts.
- Page 23 STEP 2 - Mounting the Wheels Your tricycle has one "Drive Wheel" (Right) and one "Freewheel" (Left). Both rear wheels on T-124C use the same hubs and are identical. You can use them on either side. Drive side of the axle has a flange with 3 pins that fit into the rear wheel’s hub.
- Page 24 Mount freewheel side wheel on the left axle. Make sure that the spacer is placed between the wheel's sealed bearing and axle bearing (for T-124C only). T-326 does not require a spacer washer. Replace the washer and tighten the axle nut.
- Page 25 the stem bolt making sure that the front wheel is lined up with the frame tube. BRAKE - Install the brake lever on the right side of handlebar (left side for 3-speed models) at a position easy to reach while holding the handlebar grip area.
- Page 26 DRUM BRAKE – If you have purchased your tricycle with a front drum brake, please follow these steps for attaching brake cable: Mount the front wheel with drum brake on the fork and secure it with the axle nuts (do not tighten yet) 2.
- Page 27 PEDALS - Make sure that the right-hand pedal is attached to right and left-hand pedal is attached to the left crank arms. Pedal spindles are marked "R" and "L" for right and left hand. Left hand pedal is tightened counter clockwise. You may apply a small amount of grease to the threaded area of the pedal axle to protect the threads from corrosion.
- Page 28 After you have finished the assembly, remove all wrappings and pads on the frame and fenders. Check all the bolts to make sure they are tightened. Ride the tricycle around and make sure it rides smoothly. INSTALLING REAR BASKET, PLATFORM AND CABINET To install the basket, check to make sure you have two long and two short basket brackets along with the bolts and nuts (see the...
- Page 29 QUESTIONS? If you have any questions or need assistance in assembling this tricycle, please call Husky at (713) 932-9320 or (800) 392-3337 between 8:30 AM and 5:30 PM Central Time.
-
Page 30: Maintenance
Owners' Manual for suggestions and guidelines. BASIC MAINTENANCE You have made a wise decision on purchasing a HUSKY tricycle. To make sure that it stays in good condition for many years of service and riding pleasure, we suggest the following:... - Page 31 Special attention should be given to crank locknut and coaster brake axle nuts. We do recommend that you take your bicycle to an authorized HUSKY dealer for all major adjustments, wheel alignment and truing, component replacement, tire repair or replacement.
- Page 32 Also make sure that the shoes are centered on the side-wall. BRAKE SHOES MUST NOT RUB AGAINST THE TIRE OR HANG BELLOW THE WHEEL'S SIDE- WALL. VISIT www.huskybicycles.com to find parts and accessories for your Husky tricycle.
-
Page 33: Limited Warranty
HUSKY LIMITED WARRANTY Husky tricycles are warranted to be free from defects in materials and workmanship with the following limitation: TIME PERIOD This warranty covers defective parts, materials, and labor for a period of one year from the date of original retail purchase. Proof of original retail purchase from an authorized HUSKY dealer is required on all warranty claims. - Page 34 No warranty work can be performed without presenting the proof of purchase. The cost of transportation of the bicycle to and from an authorized HUSKY dealer is the responsibility of the owner.
-
Page 36: Optional Accessories
FOR MORE INFORMATION ON THESE ANDOTHER PARTS & ACCESSORIES VIST: www.huskybicycles.com © 2018 - Reproduction without permit is prohibited.
Need help?
Do you have a question about the T-124C and is the answer not in the manual?
Questions and answers