
Related Manuals for Matrox Extio F1220

Summary of Contents for Matrox Extio F1220
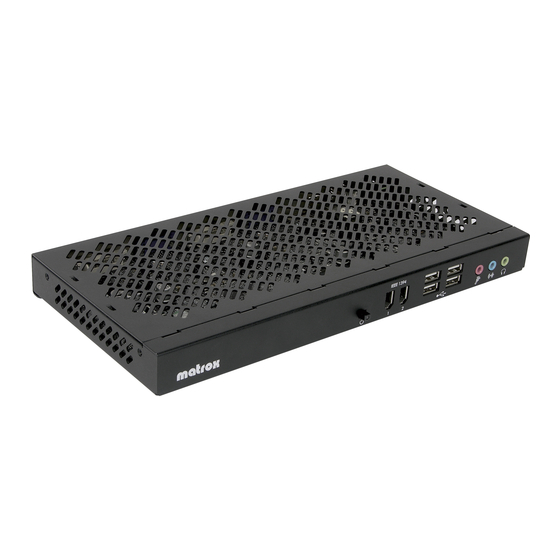
- Page 1 ENGLISH Graphics Solutions for Professionals matrox Extio Series Extio F1220 • Extio F1400 • Extio F1420 User Guide 10970-301-0111 2008.01.11 www.matrox.com/graphics...
-
Page 2: Hardware Supplied
Overview Thank you for purchasing a Matrox Extio product. This product is a complete remote graphics solution that supports up to 2 or 4 computer monitors at a time. As a remote graphics solution, it separates the CPU and hard disks of your system from the computer peripherals – monitors, keyboard, mouse, and audio hardware. -
Page 3: Installation Overview
To install your Matrox product: Install your interface card – see “Hardware installation”, page Connect your Extio unit, monitors, and other peripherals – see “Connection setup”, page Install the software – see “Software setup”, page Matrox Extio Series – User Guide... -
Page 4: Hardware Installation
Hardware installation This section describes how to install a Matrox interface card in your host computer. If your Matrox interface card is already installed in your computer, skip to “Connection setup”, page 7. For information specific to your computer, like how to remove its cover, see your system manual. - Page 5 Choose a PCI or PCI (×16) Express (PCIe) ×1 slot, depending on the Express type of Matrox card you have. If you have a slots (×1) PCI card, your card supports both 64-bit and 32-bit PCI slots. Your system manual...
- Page 6 Your Matrox card is now installed. Before restarting your computer, first connect your Extio unit to your computer, then connect your monitors and your peripherals to your unit (see “Connection setup”, page 7). After connecting, restart your computer and install your Matrox software (see “Software setup”, page...
-
Page 7: Connection Setup
Connection setup This section describes how to connect monitors and other peripherals to your Matrox Extio unit. Connection overview Audio cable Monitor connectors (stereo or SPDIF) (4 DVI for Extio F1400/F1420, 2 DVI + 2 HD-15 for Extio F1220) Power cable... - Page 8 Make sure Cable B your connectors are properly connected. Cable A Note: The maximum length of optical cable supported by your Matrox product is 250 meters/750 feet. For more information, see “Product information”, page Connect your monitors...
- Page 9 Extio F1220 – Connect your monitors to the Monitor monitor connectors at the back of your connector (DVI) Extio unit. If your monitors have DVI connectors, connect them directly to the DVI monitor connectors ( ) at the back of your unit.
- Page 10 Plug the other end of the cable in your audio device. For information on the type of connector supported by your audio device, see its documentation. Your Matrox product is now installed. Restart your computer, and install your Matrox software (see “Software setup”, page...
-
Page 11: Software Setup
Software setup Note: This guide has references that are specific to the Matrox installation CD-ROM. If your Matrox product wasn’t packaged by Matrox (for example, if it was included with your computer), your product may not include this CD-ROM. If you don’t have this CD-ROM, certain references in this guide may not reflect the software you have. - Page 12 Settings Advanced Troubleshoot Hardware Acceleration Full Configure your audio settings If you’ve installed an audio driver for your Matrox product, make sure the audio hardware in your unit is enabled. Open the Windows property sheet: Audio Windows 2000 – Click "...
-
Page 13: Troubleshooting
Your Matrox card may not be properly installed. Solution Make sure your Matrox card is properly installed. Specifically, make sure the card is firmly inserted in its expansion slot and that all connections to it are firmly in place. For more information, see “Hardware installation”, page... - Page 14 Solution If graphics hardware is built into your computer motherboard, your system may not have automatically disabled it when you inserted your Matrox card. Check your system manual for instructions on how to disable your computer built-in graphics hardware. Cause The problem may be specific to the motherboard in your computer.
- Page 15 Problem Wrong color balance, screen image off-center, or no picture at all Cause Windows XP Service Pack 2 – Windows Service Pack 2 has installed a version of the Matrox display driver that doesn’t support your Matrox product. Solution You need to install a display driver that supports your Matrox product. To reinstall the display driver, you first need to restart your computer in VGA mode (see “Restarting in VGA mode”,...
- Page 16 (blank screen, rolling or overlapping screen images) Cause Analog monitors only – The Matrox display driver may be trying to use settings your monitor doesn’t support. This can happen if the display resolution was changed to one your monitor doesn’t support or if the monitor connected to your computer was changed without changing the display or monitor settings in the software.
- Page 17 Solution If none of your displays are available, reinstall your Matrox display drivers. For more information on reinstalling your display driver, see the following solution. Cause Files on your system may have been deleted or corrupted. Solution Remove, then reinstall Matrox software:...
- Page 18 Many motherboard or computer manufacturers have software updates available on their Web site. Cause Files on your system may have been deleted or corrupted. Solution Remove, then reinstall Matrox software. For more information, see page Problem Monitor settings aren’t automatically detected WARNING: If incorrect software monitor settings are used, your display may become unusable and some monitors can be permanently damaged.
- Page 19 Solution Try moving your Matrox interface card to another PCI (or PCIe depending on your product) slot in your computer. For instructions on how to safely install your Matrox card, “Hardware installation”, page Problem Using multiple displays under Windows 2000/XP/Vista, program doesn’t work with your Matrox product...
- Page 20 Cause If you’re using graphics hardware other than the graphics hardware in your Matrox Extio product, your display driver may not support both the graphics hardware in your Matrox product and the one in your computer.
- Page 21 Effects Click " Solution Windows Vista – Disable the Windows Aero features. Right-click your Windows background, then click " . Under , select Windows Vista Personalize Theme Desktop theme or Windows Classic. Matrox Extio Series – User Guide 21...
- Page 22 Solution If possible, update your Matrox display driver. Matrox makes new display drivers available on the Matrox Technical Support Web site (www.matrox.com/graphics/support/drivers). Note: If your Matrox product was provided by the manufacturer of your computer, check the Web site of that manufacturer for the latest display driver. A display driver provided by the manufacturer of your computer is more likely to be tested with your computer model.
- Page 23 Windows desktop. The program window or dialog box should appear where you clicked. Solution Windows 2000/XP/Vista – Click the Matrox PowerDesk icon ( ) on your Windows taskbar, then click Desktop Management Matrox Extio Series – User Guide 23...
- Page 24 Open program windows Center dialog boxes and message boxes Choose where you want the program window or dialog box to appear. For more information, see Matrox PowerDesk help. Problem Display on digital monitor appears blurry or uses only a portion of the...
- Page 25 Windows 2000/XP – To access display settings, right-click your Windows desktop background, then click " Properties Settings Windows Vista – To access display settings, right-click your Windows desktop background, then click " Personalize Display Settings Matrox Extio Series – User Guide 25...
- Page 26 Windows may be using the audio hardware in your computer rather than the audio hardware in your Matrox product. Solution Make sure the audio hardware of your Matrox product is set as the default audio device and that only the default audio device is used. For more information, see “Configure your audio settings”, page...
- Page 27 (if you’re not sure, try half level), and the check boxes are Mute cleared. Close the dialog box. Note: Depending on your sound driver, certain labels may be different. For example, may be labeled Line In Line Matrox Extio Series – User Guide 27...
- Page 28 The volume meter should be between 60 and 100%.) Cause The problem may be specific to the audio hardware of your computer. Solution For more information, see the documentation for the audio hardware of your computer. 28 Matrox Extio Series – User Guide...
- Page 29 Under , right-click your built-in audio hardware and Sound, video and game controllers select . For more information on the audio hardware in your system, see your Disable system manual. Click Matrox Extio Series – User Guide 29...
-
Page 30: Product Information
VBE 2.0 (Super VGA modes), DPMS (energy saving), and DDC-2B (Plug- and-Play monitor). To get the most of your Matrox product, we recommend using the highest color palette setting (a 32-bit color palette) for all your displays. The display resolutions and refresh rates available depend on your Matrox graphics hardware, display driver, software monitor settings, and monitor. - Page 31 If you’re using multiple monitors, your Matrox hardware uses the same display resolution and monitor settings for all your monitors. The display resolution and monitor settings (such as refresh rate) will be the ones selected in Matrox PowerDesk multi-display settings.
-
Page 32: Customer Support
Customer support Matrox Web Matrox is on the Internet with a World Wide Web (WWW) site. Our Web site has product literature, press releases, technical material, a sales office list, trade show information, and other relevant material. Visit the Matrox Graphics Web site at www.matrox.com/graphics. -
Page 33: Where To Get Information
Windows Vista – Click " " " Start Settings Control Panel System and Maintenance . (* Depending on your configuration of Windows, this part of the step may " System not be necessary.) Matrox Extio Series – User Guide 33... - Page 34 (2) years from the date of purchase. This warranty applies only to the original end- user purchaser and is non-transferable. Conditions and limitations of Matrox’s warranty are stated below. 2. Matrox’s limited warranty covers only those defects which arise as a result of normal use of the hardware and does not apply to any: a.
- Page 35 3. If you are still experiencing difficulties, please contact your dealer where you purchased your Matrox product. 4. If you must return a Matrox product, leave the configuration as it was when you were using it, and leave all identification stickers on the product. Pack the product in its original box and return to your Matrox dealer where the product was purchased, together with your proof of purchase.
-
Page 36: Software License Agreement
Making telecommunication data transmissions of the Software. Matrox reserves the right to terminate this license if there is a violation of its term or default by the Original Purchaser. Upon termination, for any reason, all copies of the Software must be immediately returned to Matrox, and the Original Purchaser shall be liable to Matrox for any and all damages suffered as a result of the violation or default. - Page 37 Customer support Video PCI Express PowerDesk Primary display Expansion slots VESA – Product information Video – Troubleshooting Graphics Software – Troubleshooting – Setup Sound Warning – Troubleshooting – Warranty Hardware Web, Matrox Acceleration Matrox Extio Series – User Guide 37...
- Page 38 Thank you for choosing Matrox Please register online (http://www.matrox.com/graphics/registration) to be eligible for customer support, new product announcements, and information on special offers and upcoming events.
- Page 39 FCC Compliance Statement Compliance Remark for the Matrox hardware products supported by this guide This equipment has been tested and found to comply with the limits for a Class A digital device, pursuant to Part 15 of the FCC Rules. These limits are designed to provide reasonable protection against harmful interference when the equipment is operated in a commercial environment.
- Page 40 Bitte wenden Sie sich an der Matrox-Website (www.matrox.com/environment/weee) für Recycling-Informationen. (Italiano) Informazioni per gli utenti europei – Direttiva sui rifiuti di apparecchiature elettriche ed elettroniche (RAEE) Si prega di riferirsi al sito Web Matrox (www.matrox.com/environment/weee) per le informazioni di riciclaggio.
- Page 41 FRANCE Avertissement sur l’épilepsie À lire avant toute utilisation d’un jeu vidéo par vous-même ou votre enfant Certaines personnes sont susceptibles de faire des crises d’épilepsie ou d’avoir des pertes de conscience à la vue de certains types de lumières clignotantes ou d’éléments fréquents dans notre environnement quotidien.
- Page 42 Copyright © 2008 Matrox Graphics Inc. • (English) All rights reserved. • (Français) Tous droits réservés. • (Deutsch) Alle Rechte vorbehalten. • (Italiano) Tutti i diritti riservati. • (Español) Reservados todos los derechos. Trademarks • Marques déposées • Warenzeichen • Marchi registrati •...
- Page 43 However, no responsibility is assumed by Matrox Graphics Inc. for its use; nor for any infringements of patents or other rights of third parties resulting from its use.
- Page 44 Matrox Graphics Inc. 1055 Saint Regis Boulevard Web site: www.matrox.com/graphics Dorval, Quebec, Canada H9P 2T4 Technical support: North America: 1-800-361-1408 www.matrox.com/graphics/support International: (514) 822-6000 To locate the sales office nearest you, visit Email: graphics@matrox.com www.matrox.com/graphics/contact...