Table of Contents
Advertisement
Quick Links
Advertisement
Table of Contents

Related Manuals for SAWTOOTH ST-WDCP-88


Summary of Contents for SAWTOOTH ST-WDCP-88
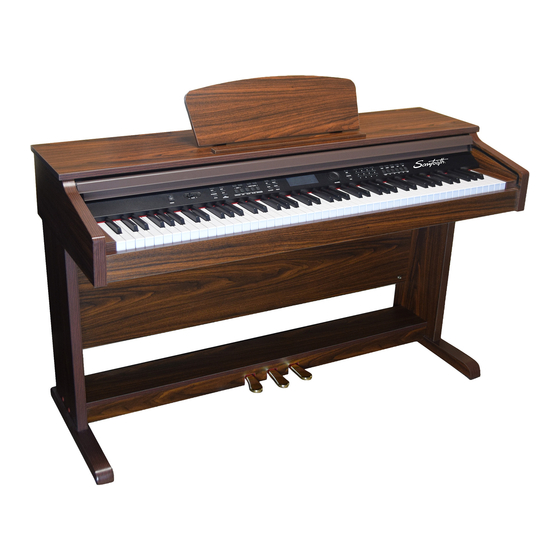
- Page 1 OPERATION INSTRUCTIONS ST-WDCP-88 DIGITAL PIANO...
- Page 2 Caution Be sure to follow the below warnings to avoid hurting yourself or others and to avoid damage to the equipment. Warning • Do not disassemble or modify this instrument. Otherwise, Electric shock, burns, or other harm may be incurred. For all internal inspections and repair, be sure to take this unit to a qualified professional.
- Page 3 • Be sure to regularly check that screws remain fastened. • Do not place power cord near high sources of heat. Avoid over wrapping the power cord. Do not place anything heavy on power cord, and do not place the power cord where people walk.
-
Page 4: Table Of Contents
Thank you for selecting our electric grand piano integrating advanced function and elegant voice. It will help you in learning traditional instrument while bring the joy of technology. Before using this instrument, please carefully read this manual to bring the piano into full play.Please keep all customer documents properly to future reference. - Page 5 3. Style --------------------------------------------------------------------------------------------------------------------------7 ① Select style-----------------------------------------------------------------------------------------------7 ② Playing style----------------------------------------------------------------------------------------------7 4. Variation-----------------------------------------------------------------------------------------------------7 ① Open auto-accompaniment--------------------------------------------------------------------------7 ② Auto-accompaniment---------------------------------------------------------------------------------8 ③ Table of chord-------------------------------------------------------------------------------------------8 ④ Intro/ending--------------------------------------------------------------------------------------------10 ⑤ Sync start------------------------------------------------------------------------------------------------10 ⑥ Adjusting accompaniment volume---------------------------------------------------------------10 ⑦ Adjusting accompaniment tempo----------------------------------------------------------------10 ⑧ Metronome--------------------------------------------------------------------------------------------11 5. Record-----------------------------------------------------------------------------------------------------11 6. Saving panel configuration (registry memory)---------------------------------------------------13 7.
-
Page 6: Panel Control
Panel Control 8.Audio track1/ Audio track 2/ Audio track 3 1.Main volume button 9.LCD display 2.Beat/Metronome/Style 3.Demo song/Keyboard split /A.B.C auto chord 10.Data wheel 11.Song/Melody off/ Voice 4.Tempo +/- 5.Accompaniment volume +/- 12.No.0-9/+、-Button 6.Start/stop/sync/Fill-In A/ Fill-In B/ 13.Touch/Chorus/Reverb/Dual/Tune intro/ending 14.Store/M1/M2/M3/M4/Bank 7.REC/Clear/Play/Stop LCD displays all operating status information for you. -
Page 7: Preparation Before Use
Preparation before use Connection of power supply 1. First make sure the power switch of electric grand piano is at OFF position. If not, put the switch to OFF position. 2. Connect power cord; insert one end of power cord in AC jack of the electric grand piano and the other end in power socket. -
Page 8: Turn On Power Switch
Caution Do not use the piano when music stand is lifted to half height. When you lower the music stand, do not release your hand until the music stand is completely put down. Preparation before use Turn On power switch Press [POWER ] button to turn on the piano. -
Page 9: Use Of Midi
Auxiliary Jack Use of MIDI 1.MIDI input: connect MIDI input to MIDI output jack of another compatible MIDI appliance with MIDI connecting line. Via MIDI input, the electric grand piano can receive the data of external compatible MIDI appliance. 2.MIDI output: Via MIDI connecting line, connect MIDI output to the MIDI input jack of another compatible MIDI appliance. -
Page 10: ② Dual Voice
3. Example of selecting No.59 voice <1> By pressing [5] and then [9] of digit buttons, voice [59] is selected. <2> Voice [59] can be selected by pressing +/- buttons or data dial. LCD will display“59”, indicating voice [59] has been selected. ■Dual voice 1.By pressing [DUAL VOICE] button, LCD will display the symbol . -
Page 11: ② Tune
■Tune 1. Press [Tune] button to enter the function of cent adjustment, and LCD displays “TUNE VAL”. 2. Press +/- buttons to heighten or lower a cent or quickly adjust via data dial. 3. Holding [Tune] button for two seconds will reset the pitch of whole keyboard to default value“00”. -
Page 12: ① Select Style
Style This electric grand piano provides various dynamic style and accompaniment styles, altogether 100 style. (Please consult the table of style in the appendix). Instructions While selecting a style, LCD will display the name of style. ■Select style 1.Press [STYLE] button to enter the status of select style. 2.Select the style you require by pressing +/- and digit buttons or data wheel. -
Page 13: ③ Table Of Chord
1. Single accompaniment: In this mode, you can decide accompanying chord with one or two fingers, including large/small chord and seven large/small chord, to produce the accompaniment effect of a whole band. The fingering is as follows (taking C chord for instance): large chord, play root note. - Page 14 MINOR ADD NINTH 1-2-3-5 MINOR MAJOR ELEVENTH 1-3-(5)-7 MINOR MAJOR SEVENTH 3-(5)-7 MINOR MAJOR NINTH 1-2-3-(5)-7 DIMINISHED 1-3-5 DIMINISHED SEVENTH dim7 1-3-5-6 SEVENTH 1-3(5)-7 SEVVENTH SUSLEND FOURTH 7sus4 1-4-5-7 SEVENTH NINTH 1-2-3-(5)-7 SEVENTH SHARP ELEVENTH 1-(2)3- 4-(5)-b7 SEVENTH THIRTEENTH 1-3-(5)-7&2-3-5-6-7 SEVENTH FLATTED NINTH 1-2-3-(5)-7 SEVENTH FLATTED THIRTEENTH...
-
Page 15: ④ Intro/Ending
Quick Guide ■Intro/ending Press [INTRO/ENDING] button and then [START/STOP] button, all kinds of rhythm may lead rhythm to normal status with appropriate intro. Used together with auto accompaniment, many intro passages can offer special chord variation and ornament to enrich your performance. -
Page 16: ⑧ Metronome
Quick Guide ■Metronome 1. Press [METRONOME] button to initiate the beat of metronome. 2. Press [METRONOME] button and then change the number of beat each bar using +/- or digit buttons. 3. specify the number of beat each bar in the range of 0-9. 4. - Page 17 Quick Guide 2. Record of melody track When you press [RECORD] button, LCD displays the symbol of and enters the status of recording standby. When you select [TRACK 2]-[TRACK 3], LCD displays corresponding symbol, indicating this track is under recording standby. Tempo beat is displayed as per current tempo with indicating LED flashes.
-
Page 18: Saving Panel Configuration (Registry Memory)
Quick Guide ■Saving panel configuration (registry memory) This instrument is provided with registry memory function that can save your favorite configuration and can be called out easily if needed. The contents saved in registry memory include the following items: ·Accompaniment setting Style, A.B.C auto chord, fill-in/ variation, metronome, accompaniment volume,tempo ·Voice setting... -
Page 19: Use Of Pedal
Quick Guide ■play of single demo song After pressing [SONG] button, you can select the number of demo song using [+][-] buttons or data wheel. Instructions ·When you play a demo song, you should gradually increase volume from the lowest volume through main volume knob. -
Page 20: Installation Of Piano Body
Quick Guide Installation of piano body 1. Using 4pcs four in one screw (3) attach the support legs to the backboard. 2. Using 4pcs M6x50 (1), attach the pedal board to the left and right support legs. 3. Using 4pcs M6X20 (2), attach the piano to the base. Do not attempt this step alone, as this is the heaviest part and can cause severe damage if dropped. -
Page 21: Table Of Voice
Table of Voice... - Page 22 Name of Voice Name of Voice No. Name of Voice PIANO Strings Ensemble2 101 Fx5 Acoustic Grand Piano Synth Strings1 102 Fx6 Bright Acoustic piano Synth Strings2 103 Fx7 Electric Grand Piano Choir Aahs 104 Fx8 Honky-Tonk Piano Voice Oohs Ethnic E.Piano1 Synth Voice...
-
Page 23: Table Of Style
Synth Bass2 Pad2 141 Ba Wu String Pad3 142 BangDi Violin Pad4 143 Qu Di Viola Pad5 144 Hu Lu Si Cello Pad6 145 Ban Hu Contrabass Pad7 146 SanXian Tremolo Strings Pad8 147 Gu Zheng pizzicato Strings Synth Effect 148 Hi-Suona Orchestral Harp Drums... -
Page 24: Demo Song Table
Slow Rock2 TRADITIONAL 092 South Asia Pop March1 093 Bolero Pop1 March2 094 5/4 Beat Pop2 6/8March CHINA Pop3 Waltz1 095 China 1 Pop4 Waltz2 096 China 2 Pop5 Waltz3 097 China 3 Pop6 Polk 098 China 4 Pop Ballad Fox Trot 099 China 5 16 BEAT... -
Page 25: Technical Specifications
output jack is connected with other appliance so that built-in speaker system is automatically shut off. Under a same voice, note and quality is This is normal situation caused by different slightly different. voice sampling systems of electric grand piano. When you use sustain function, some tones This is normal situation caused by different produce longer sustain but some tones... - Page 26 ·Function of accompaniment volume and cent Accompaniment ■ Chord control ·A.B.C.Auto chord ■ Registry Memory ·4 memory groups、can save voice and voice part、voice effect、accompaniment data ■ Other controls · Power switch、 master volume、 Control of accompaniment volume、 metronome、 tempo ■ Connectors ·DC12V、line in/out、headphone jack、pedal jack、MIDI in/out ■...
Need help?
Do you have a question about the ST-WDCP-88 and is the answer not in the manual?
Questions and answers