Table of Contents
Advertisement
Quick Links
Advertisement
Table of Contents

Subscribe to Our Youtube Channel
Related Manuals for SAWTOOTH ST-DCP-88


Summary of Contents for SAWTOOTH ST-DCP-88
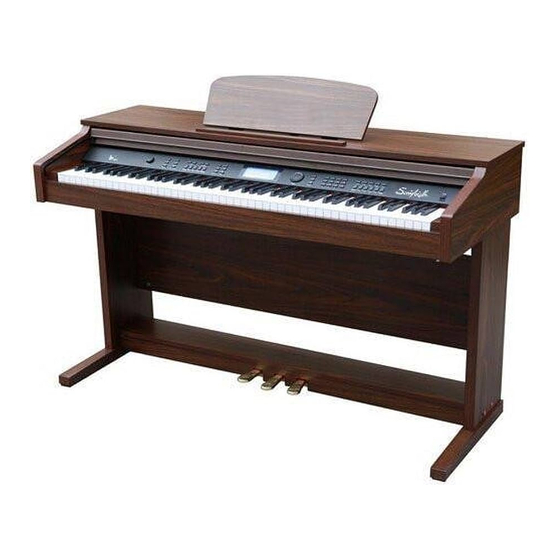
- Page 1 OPERATION INSTRUCTIONS ST-DCP-88 DIGITAL PIANO...
- Page 2 Caution Be sure to follow the below warnings to avoid hurting yourself or others and to avoid damage to the equipment. Warning • Do not disassemble or modify this instrument. Otherwise, Electric shock, burns, or other harm may be incurred. For all internal inspections and repair, be sure to take this unit to a qualified professional.
- Page 3 • Be sure to regularly check that screws remain fastened. • Do not place power cord near high sources of heat. Avoid over wrapping the power cord. Do not place anything heavy on power cord, and do not place the power cord where people walk.
-
Page 4: Table Of Contents
Thank you for selecting our electric grand piano.It combines the advanced function and exquisite voice in one. It will help you learn to grasp the traditional musical instrument and bring the happiness of enjoying the technology. Before using this instrument, please read this operation instruction carefully so that you can exert its function better.Be sure to preserve all use files properly to future reference. - Page 5 ⑤ Metronome ---------------------------------------------------------------------------------------------------------- Transpose ------------------------------------------------------------------------------------------------------------------------ Sound Console ----------------------------------------------------------------------------------------------------------------- 3. Style and the relative function of the style ----------------------------------------------------------------- ① Select style ------------------------------------------------------------------------------------------------------------- ② Intro/Ending ----------------------------------------------------------------------------------------------------------- Sync -------------------------------------------------------------------------------------------------------------------------------- Fill-in 1/Fill-in 2 ---------------------------------------------------------------------------------------------------------------- Start/Stop ----------------------------------------------------------------------------------------------------------------------- Tempo Adjustment --------------------------------------------------------------------------------------------------------- Accompaniment Volume Adjustment ------------------------------------------------------------------------------ Chord Function ------------------------------------------------------------------------------------------------------- Single Finger...
- Page 6 Appendix II. Table of Style--------------------------------------------------------------------------------15 Appendix III. Table of Demo-----------------------------------------------------------------------------16 Appendix IV. Trouble Shooting-------------------------------------------------------------------------16 Appendix V. Technical Specifications-----------------------------------------------------------------17...
-
Page 7: Panel Control
Panel Control 7.Function menu,sound console 1.Main volume 8.LCD display screen 2.Tempo 9.Demo,style,voice 3.Accompaniment volume 10.Song,,teaching 1,teaching 2,teaching 3 4.intro/ending,sync,Fill-In 1, Fill-In 2,Start/stop 11.Digit control 5.Metronome,single finger,fingered,full range 12.Keyboard split,dual,touch,reverb,chorus chord,chord close 13.Store,M1,M2,M3,memory bank 6.Recording,audio track 1,audio track 14.Power switch 2,accompaniment track,transpose+/- LCD display screen. -
Page 8: Preparation Before Use
Preparation before use Connection of power supply 1.First make sure the power switch of electric grand piano is at OFF position. If not, poke the switch to OFF position. 2.Connect power cord; insert one end of power cord in AC jack of the electric grand piano and the other end in power socket. -
Page 9: Turn On Power Switch
■Put down the music stand 1.Pull the music stand up until it was upright. 2.Fold spring bracket inwards. 3.Put down the music stand gently until it lies on the top wooden cover of the piano. Caution Do not use the piano when music stand is lifted to half height. When you lower the music stand, do not release your hand until the music stand is completely put down. -
Page 10: Use Of Audio Input/Output
Use of audio input/output This electric grand piano is equipped with built in speakers. It can amplify an external source such as a CD or MP3 player by plugging it into the “Line In” jack. You can also connect the keyboard to an amplifier or other external speaker system via the “Line Out” jack. -
Page 11: Voice
Voice The electric grand piano can provide 138 kinds of voices,including 128 kinds of GM voices, 10 kinds of Chinese folk music and 2 groups of keyboard percussion. Please refer the voice list in the appendix. ■Select Voice 1. Press [VOICE] button to enter selection status. 2. - Page 12 2. Selecting split point. Pressing the [FUNCTION MENU] button, it enters the function of keyboard split point, the LCD displays 25 Split point, select required keyboard split point by pressing +/- buttons, this point will be the new keyboard split point. 3.
-
Page 13: Transpose
Instructions After starting the electric grand piano, reverb status is automatically opened. ■Chorus Press [CHORUS] button to open default chorus effect and LCD displays the symbol. Press [CHORUS] button once again, the chord symbol fade from the LCD, the chord function close. -
Page 14: Sound Console
■Sound console Press [SOUND CONSOLE] button, the piano enters the selection state of the sound console menu. You can choose your required function by the loop choice or exit the sound console status if you hold the [SOUND CONSOLE] button. You can adjust your required parameter by the [DIGIT +/-] buttons after the piano has entered into one certain status of the sound console. -
Page 15: Sync
■Sync The function of Sync start can start the rhythm and accompaniment when you play the keyboard. Press [SYNC] button, the symbol of will flash, indicating the status of Sync waiting. Then press any key on keyboard to start the function. Use of Sync start with a prelude. -
Page 16: Single Finger
Quick Guide ■ SINGLE FINGER: In this mode, you can decide accompanying chord with one or two fingers, including large/small chord and large/small 7 chord, to produce the accompaniment effect of a whole band. The fingering is as follows (taking C chord for instance): large chord, play root sound. -
Page 17: Table Of Chord
■ CHOED CLOSE Press the [CHORD CLOSE] button after the chord was started, the chord accompaniment sound stops, the style continues to play. Quick Guide ■ table of chord Original name Normal pronunciation MAJOR 1-3-5 MAJOR SIXTH 1-3-5-6 MAJOR SEVENTH 1-3-(5)-7 MAJOR SEVENTH SHARP ELEVENTH 1-(2)3 4-(5) -
Page 18: Recording Function
• The accompaniment produced by the fifth chord, which based on the root sound and the dominant that conducted the major triad and minor triad. • The two notes have octave interval; the accompaniment only has the root sound now. •... -
Page 19: Audio Track 1/Audio Track
■ AUDIO TRACK 1/AUDIO TRACK 2 Press the [RECORDING]button,LCD displays the symbol and the piano enters the status of recording waiting. Select the [AUDIO TRACK 1] or [AUDIO TRACK 2], the LCD displays the corresponding symbol, indicating this track enters recording standby. The tempo beat point displays as per current tempo while the indicator light shines. -
Page 20: State Memory
sound will play this subsection repeatedly. It won’t stop until the song is over or if the main melody hasn’t arrived to the next subsection. Press [START/STOP] button to exit the teaching 1 mode. ■TEACHING 2 Press [teaching 2] button to enter the teaching 2 mode, then press [song] button. The song plays, after that, press the [digit +/-] button to select the teaching song. - Page 21 1. Set panel control (voice, accompaniment etc.) based on the requirement. 2. Press [MEMORY BANK] button and select required music sound bank. The music sound bank has 4 groups together, B1, B2, B3, B4. 3. Hold [STORE] button, then press any key of M1-M3 to save current panel parameters in the memory of M1-M3.
- Page 22 ■ Sustain (right) pedal Controllable Sustain Pedal has the same function as that of the traditional piano. Step down the Sustain Pedal, the playing has a prolonged effect, release the pedal, the prolonged sound will stop immediately. Installation of piano body 1.
- Page 23 Set- up guide...
-
Page 24: Appendix I. Table Of Voice
Table of Voice Name of Voice Name of Voice No. Name of Voice... - Page 25 Whistle Chinese instrument Overdriven Guitar Ocarina 129 pipa Distortion Guitar Lead 130 yunqin Guitar Harmonics square 131 midruan Bass sawtooth 132 guzhen Acoustic Bass salliope 133 erhu Finger Bass chiff 134 gaoqin Pick Bass charang 135 bangdi Fretless Bass voice...
- Page 26 String warm Violin polysynth Viola choir Cello bowed Contrabass metallic Tremolo Strings lohao pizzicato Strings sweep Orchestral Harp Effect Timpani rain String Ensemble soundtrack Strings Ensemble1 crystal Table of Style Name of Name of Name of Name of Style Style Style Style DANCE...
- Page 27 023 New age 054 twist country FUNK&SOUL jazz Country rock 2 024 Funk 1 055 Swing 1 Country ballad 025 Funk 2 056 Swing 2 Country shuffle Jazz waltz 026 Funk 3 Country waltz 027 16 beat 1 058 Jazz ballad Country waltz 028 16 beat 2 059 Slow jazz...
- Page 28 equipment so that built-in speaker system cut of automatically. In a same voice,note and note quality has This is normal phenomenon, caused by slightly different. different voice sampling systems of electric grand piano. When you use sustain function, some voice This is normal phenomenon.it is because has the long sustain,some voice has the that the sustain setting of electric grand...
- Page 29 ·Single finger、fingered、full range chord、chord close ■ Registry Memory ·4 memory groups、can save voice and voice part、voice effect、accompaniment data ■ Memory State ·Store、M1、M2、M3、memory bank ■ Other controls ·Power switch、master volume、accompaniment volume、metronome、tempo ■ External function ·Power jack、line in/out、headphone jack、pedal jack、MIDI in/out ■ Pedal ·Pianissimo Pedal、Sostenuto Pedal ■...
Need help?
Do you have a question about the ST-DCP-88 and is the answer not in the manual?
Questions and answers