
Related Manuals for SAWTOOTH ST-DCP-61


Summary of Contents for SAWTOOTH ST-DCP-61
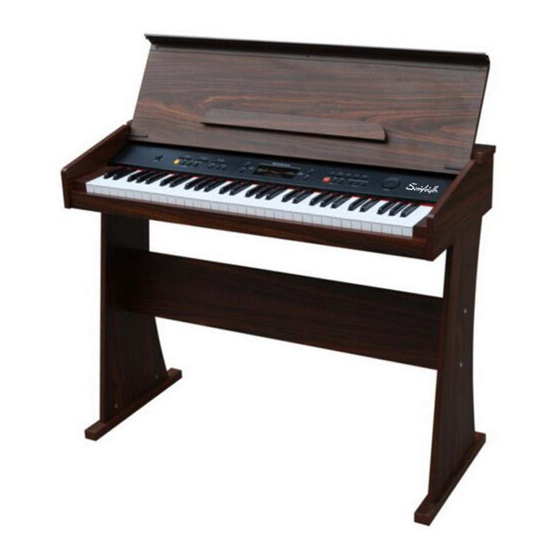
- Page 1 Operating Instructions ST-DCP-61 61-Key Multifunctional Performance LED Display Electrical Piano...
- Page 2 Caution Be sure to follow the below warnings to avoid hurting yourself or others and to avoid damage to the equipment. Warning: ------------------------------------------------------------ • Do not disassemble or modify this instrument. Otherwise, Electric shock, burns, or other harm may be incurred. For all internal inspections and repair, be sure to take this unit to a qualified professional.
- Page 3 • When not using the piano for long periods, please remove the plug. When removing the plug, be sure to pull it out by the plug and not the wires. • Be sure to follow all instructions when installing the rack. Make sure to fasten all screws and fasteners.
-
Page 4: Table Of Contents
Table of Contents Panel control and external function-----------------------------------------------------1 1、 Panel control-----------------------------------------------------------------------------1 2、 External function------------------------------------------------------------------------1 Preparation before performance---------------------------------------------------------1 1、 Power switch connect-------------------------------------------------------------------1 External function------------------------------------------------------------------------------2 1、 Pedal Sustain-----------------------------------------------------------------------------2 2、 Use of Headphone-----------------------------------------------------------------------2 3、 Connection with Amplifier of Hi-Fi Equipment--------------------------------------2 Basic Operation------------------------------------------------------------------------------2 1、 Turn on power switch ------------------------------------------------------------------2 2、... - Page 5 4、 Fill-in-------------------------------------------------------------------------------------5 5、 Intro/ending----------------------------------------------------------------------------5 6、 Tempo adjustment---------------------------------------------------------------------5 7、 Accompaniment volume adjustment------------------------------------------------5 8、 Chord Volume Adjustment------------------------------------------------------------5 Chord Function--------------------------------------------------------------------------------6 1、 Single finger-----------------------------------------------------------------------------6 2、 Fingered----------------------------------------------------------------------------------6 3、 Chord close------------------------------------------------------------------------------6 Recording function--------------------------------------------------------------------------6 1、 Record--------------------------------------------------------------------------------6 2、 Play back---------------------------------------------------------------------------------6 Demo song--------------------------------------------------------------7 Guide------------------------------------------------------------------------7 1、 Lesson 1---------------------------------------------------------------------------------7 2、 Lesson 2---------------------------------------------------------------------------------7 Installation of piano body-----------------------------------------------------------------7 Set-up Guide-----------------------------------------------------------------------------------8 Appendix I, Table of Voice------------------------------------------------------------------9...
-
Page 6: Panel Control And External Function
Panel Control and External Function 1. Panel Control 1.Power Switch 7.Recording/Play back 2.Master Volume 8.LED Display screen 3.Start/Stop/Sync/Fill-in/ 9.Style/Tone /Intro/Ending 10.Touch/Split/Dual/Sustain/Vibrato 4.Accompaniment Volume 11.Demo,Lesson 1,Lesson 2 5.Metronome, tempo 12.Single Finger/Finger Chord/Chord Close 6.Chord Volume 13.Data Wheel 2、External function ①Pedal Sustain ③Headphone output ②110V input ④Line out... -
Page 7: External Function
•Fuse replacement shall only be made by qualified person. Preparation before performance External Function 1. Use of Sustain Pedal: The function of sustain can produce natural sustain by stepping upon sustain pedal when you perform. Please insert the plug of sustain pedal into SUS PEDAL jack. -
Page 8: 2、 Adjustment Of Master Volume
Basic Operation 2.Master Volume : Press [MASTER VOLUME] "+,-"button, To adjust the volume of the piano. You can also use data wheel rotary button to adjust. The default Volume is 14, When the electrical piano is open. VOICE 1.Voice Selection: Press the voice button to enter into the tone settings use the “Data Wheel”... -
Page 9: Vibrato
Basic Operation 5. Vibrato: Press [VIBRATO] button to start vibrato function. It will produce the aquiver effect tone if you play with B/W keys at the same time. Press [VIBRATO] button again to exit the function. 6. Metronome Press [METRONOME] button, the tick-tock beat sound will occur. There are four kinds of beats that can be chosen. -
Page 10: Sync
Basic Operation 3. Sync Function: Press [SYNC] button to start sync accompaniment function and press any key of 19 keys in left hand to start style synchronously. If chord function is started, press relevant key of 19 keys in chord area to start auto chord synchronously. If a style is being played. -
Page 11: Chord Function
Basic Operation Chord Accompaniment 1. Single Finger: When style is started, press [SINGLE FINGER] button to enter the function of single finger auto chord. Now in chord area 1~19, keys, apply different fingerings to hear different chord/Accompaniments. Press [START/STOP] button to exit this function. -
Page 12: Demo Song
Basic Operation Demo song playing: Press [DEMO] button to play song. Press this button again, It will play the next song. (Please refer the 11 page DEMO Appendix). Press [START/STOP] button, the Demo song play will stop. Intelligent guide: 1. Lesson-1:When you press any button for learning, no matter whether the performance is right or wrong. -
Page 13: Set-Up Guide
Set-up Guide Parts:... -
Page 14: Appendix I, Table Of Voice
Strings Vibraphone Pizzicato Ocarina Agogo Strings Marimba Orchestral Lead Steel Drums Harp 1(square) Xylophone Timpani Lead Wood Block 2(sawtooth Tubular Bell String Lead Taiko Drum Ensemble 1 3(calliope) Dulcimer String Lead Melodic Ensemble 2 4(chiff) Drawbar Synth Strings Lead Synth Drum... - Page 15 Acoustic Tuba Applause Guitar(Nylon) 5(bowed) Acoustic Muted Gun shot Guitar(Steel) Trumpet 6(metallic) Electric French Horn Pad 7(halo) Guitar(jazz) Electric Brass Section Guitar(clean) 8(sweep) Electric SynthBrass1 FX1(rain) Guitar(muted Overdrvien SynthBrass2 FX2(soundt Guitar rack) Distortion Soprano Sax FX3(crystal Guitar Guitar Alto Sax FX4(atmos Harmonics phere)
-
Page 16: Appendix Ii, Table Of Style
Appendix II. Table of Style Name of Style Name of Name of Name of Style Style Style Club Pop Pop Waltz Calypso Disco Party 16 Beat Pop USA March Guad Dance Disco Samba 8 Beat Pop Hully Gully Reggae 12 UK Pop Beat 8 Beat Soul... -
Page 17: Appendix Iv.trouble Shooting
Blue Grass 3 Salsa 102 Disco Hands Appendix III. Table of Demo Song Code of song Code of song Turkish March The Song Of Season Impromptu Serenade Red River Lieder Oh Susanna Katyusha American Patrol Espano Haw-Tree Mozart Piano Sonata Appendix IV.Trouble Shooting Trouble Possible reason/eliminating method... -
Page 18: Appendix V, Technical Specifications
Appendix V. Technical Specifications ■Standard GB8898-2011、GB13837-2012、GB17625.1-2012 ■Display LED display ■Tone 128 voice ■Style 128 auto accompaniments ■Demo song 12 demo songs ■Effect control Touch, Split, Dual, Sustain, Vibrato, Metronome, Data wheel ■Recording and program Record, Play ■Intelligent guide Lesson 1,Lesson 2 ■Accompaniment control Start/Stop, Sync, Fill-in, Intro/Ending ■chord control... - Page 19 ■Diapason C3~C8 ■Accuracy in musical tuning ≤3cents ■Specifications 1070X490X265(mm) ■Power AC230V 50Hz ■Output power 6W×2 ■Parts provided with electrical piano Mounting screw, Instruction...
Need help?
Do you have a question about the ST-DCP-61 and is the answer not in the manual?
Questions and answers