Lenovo IdeaCentre 5i User Manual
Hide thumbs
Also See for IdeaCentre 5i:
- Manual (6 pages) ,
- Hardware maintenance manual (86 pages) ,
- User manual (64 pages)
Table of Contents
Advertisement
Advertisement
Table of Contents

Related Manuals for Lenovo IdeaCentre 5i


Summary of Contents for Lenovo IdeaCentre 5i
- Page 1 IdeaCentre 5i (14L, 6), IdeaCentre 5 (14L, 6) User Guide...
- Page 2 • Setup Guide First Edition (July 2021) © Copyright Lenovo 2021. LIMITED AND RESTRICTED RIGHTS NOTICE: If data or software is delivered pursuant to a General Services Administration “GSA” contract, use, reproduction, or disclosure is subject to restrictions set forth in Contract No. GS-...
-
Page 3: Table Of Contents
Frequently asked questions ..Lenovo Vantage....9 Self-help resources ... . . - Page 4 IdeaCentre 5i (14L, 6), IdeaCentre 5 (14L, 6) User Guide...
-
Page 5: About This Documentation
About this documentation • This guide applies to the Lenovo product models listed below. Illustrations in this guide may look slightly different from your product model. Model name Machine types (MT) IdeaCentre 5 14IOB6 90RJ IdeaCentre 5 14ACN6 90RX • For further compliance information, refer to the Generic Safety and Compliance Notices at https:// pcsupport.lenovo.com/docs/generic_notices... - Page 6 IdeaCentre 5i (14L, 6), IdeaCentre 5 (14L, 6) User Guide...
-
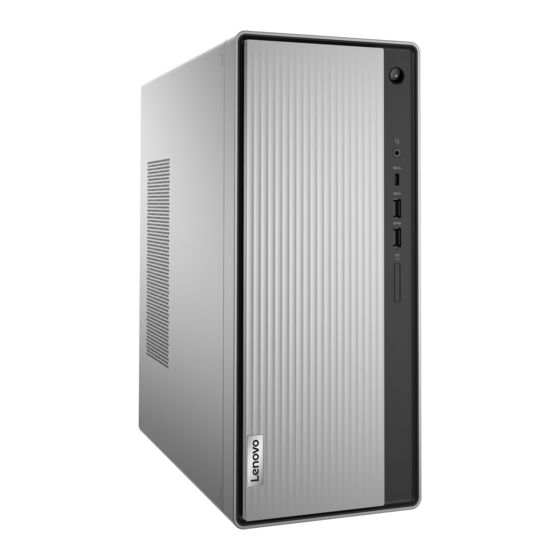
Page 7: Chapter 1. Meet Your Computer
Headset connector (for IdeaCentre 5 14IOB6 only) The headset connector is compatible with: • Headphones or earphones with a 3.5mm (0.14 inch), TRS (3-pole) plug • Headsets with a 3.5mm (0.14 inch), CTIA-compliant TRRS (4-pole) plug © Copyright Lenovo 2021... - Page 8 Related topics • “Use the optical drive (for selected models)” on page 10. • “Use a media card (for selected models)” on page 11. • “USB specifications” on page 4. IdeaCentre 5i (14L, 6), IdeaCentre 5 (14L, 6) User Guide...
-
Page 9: Rear
Rear 2. PCI-Express card area 1. Ethernet connector 3. Padlock loop 4. Power cord connector 5. Security-lock slot 6. USB 2.0 connectors (4) 8. HDMI™ 2.0 connector (HDMI 1.4 connector for 7. VGA-out connector IdeaCentre 5 14ACN6) 9. Audio line-out connector Related topics •... -
Page 10: Features And Specifications
• Bluetooth Network features • Ethernet LAN • Wireless LAN * for selected models USB specifications Note: Depending on the model, some USB connectors might not be available on your computer. IdeaCentre 5i (14L, 6), IdeaCentre 5 (14L, 6) User Guide... - Page 11 – USB-C to DP: 3840 x 2160 pixels, 60 Hz • Connect to USB-C accessories to help expand your • USB-C (3.2 Gen 1) connector computer functionality. To purchase USB-C accessories, go to https://www.lenovo.com/accessories • USB-C (3.2 Gen 2) connector • Thunderbolt 3 connector (USB-C) •...
-
Page 12: Operating Environment
• Operating: 20%-80% (non-condensing) • Storage: 10%–90% (non-condensing) Altitude • Operating: -15.2 m (-50 ft) to 3048 m (10,000 ft) • Storage: -15.2 m (-50 ft) to 12192m (40,000 ft) IdeaCentre 5i (14L, 6), IdeaCentre 5 (14L, 6) User Guide... -
Page 13: Chapter 2. Get Started With Your Computer
If night light mode is turned on, you can adjust the color temperature of the temperature screen. Note: Selected Lenovo computers are low blue light certified. These computers are tested with night light turned on and color temperature set to the default value of 48. -
Page 14: Connect An External Display
To manage cables of devices (such as the keyboard and the mouse) with a smart cable clip: 1. Pull the cables through the dents in the clip. 2. Install the clip as shown. IdeaCentre 5i (14L, 6), IdeaCentre 5 (14L, 6) User Guide... -
Page 15: Chapter 3. Explore Your Computer
Access Lenovo Vantage Type Lenovo Vantage in the search box and then press Enter. To download the latest version of Lenovo Vantage, go to Microsoft Store and search by the app name. Key features Lenovo Vantage enables you to: •... -
Page 16: Transfer Data
Record a disc 1. Insert a recordable disc into the optical drive that supports recording. 2. Do one of the following: • Open Windows Media Player. IdeaCentre 5i (14L, 6), IdeaCentre 5 (14L, 6) User Guide... -
Page 17: Use A Media Card (For Selected Models)
To remove a media card, type remove hardware and eject media in the Windows search box and then press Enter. Purchase accessories Lenovo has a number of hardware accessories and upgrades to help expand the capabilities of your computer. Options include memory modules, storage devices, network cards, power adapters, keyboards, mice, and more. - Page 18 IdeaCentre 5i (14L, 6), IdeaCentre 5 (14L, 6) User Guide...
-
Page 19: Chapter 4. Cru Replacement
If you intend on installing the CRU, Lenovo will ship the CRU to you. CRU information and replacement instructions are shipped with your product and are available from Lenovo at any time upon request. You might be required to return the defective part that is replaced by the CRU. -
Page 20: Remove Or Replace A Cru
Replacement procedure 1. Turn off the computer and remove all connected peripheral devices and cables. 2. Remove the power cord. 3. Connect the new power cord to the computer. IdeaCentre 5i (14L, 6), IdeaCentre 5 (14L, 6) User Guide... -
Page 21: Computer Cover
4. Reinstall all removed parts. 5. Place the computer in an upright position. Then, reconnect the power cord and all disconnected cables to the computer. Note: If a locking device is available, use it to lock the computer. Computer cover Prerequisite Before you start, read Generic Safety and Compliance Notices, and print the following instructions. -
Page 22: Front Bezel
1. Turn off the computer and remove all connected devices and cables. 2. Remove the computer cover. See “Computer cover” on page 15. 3. Remove the front bezel by releasing the three plastic tabs as shown. IdeaCentre 5i (14L, 6), IdeaCentre 5 (14L, 6) User Guide... - Page 23 4. Install the front bezel by securing the three plastic tabs as shown. 5. Reinstall all removed parts. 6. Place the computer in an upright position. Then, reconnect the power cord and all disconnected cables to the computer. Note: If a locking device is available, use it to lock the computer. Chapter 4 CRU replacement...
-
Page 24: Storage Drive
4. Remove the optical drive. See “Optical drive” on page 28. 5. Pivot the drive bay assembly upward. 6. Disconnect the data cable and power cable from the storage drive. 7. Remove the screws, then remove the storage drive. IdeaCentre 5i (14L, 6), IdeaCentre 5 (14L, 6) User Guide... - Page 25 8. Install the storage drive and secure it with screws. 9. Pivot the drive bay assembly downward until it snaps into position. Chapter 4 CRU replacement...
-
Page 26: Storage Drive Bracket
4. Disconnect the data cables and power cables for optical drive and storage drive. 5. Remove the optical drive. See “Optical drive” on page 28 6. Remove the storage drive. See “Storage drive” on page 18 7. Pivot the drive bay assembly upward. IdeaCentre 5i (14L, 6), IdeaCentre 5 (14L, 6) User Guide... - Page 27 8. Remove the storage drive bracket. 9. Install the new storage drive bracket and pivot the drive bay assemble downward. Chapter 4 CRU replacement...
-
Page 28: M.2 Solid-State Drive
The following illustration shows the location of the M.2 solid-state drive on the system board. Replacement procedure 1. Turn off the computer and remove all connected devices and cables. IdeaCentre 5i (14L, 6), IdeaCentre 5 (14L, 6) User Guide... - Page 29 2. Remove the computer cover. See “Computer cover” on page 15. 3. Remove the front bezel. See “Front bezel” on page 16. 4. Remove the screw from M.2 solid-state drive. 5. Slide the M.2 solid-state drive out. 6. Install the M.2 solid-state drive in. 7.
-
Page 30: Power Supply Assembly
4. Remove the storage drive bracket. See “Storage drive bracket” on page 20. 5. Disconnect the power supply cables from the system board. 6. Remove the screws then, press the lock button and slide the power supply assembly out of the computer. IdeaCentre 5i (14L, 6), IdeaCentre 5 (14L, 6) User Guide... -
Page 31: Coin-Cell Battery
7. Connect the new power supply assembly cables to the system board. 8. Install the power supply assembly and then, install the screws. 9. Reinstall all removed parts. 10. Place the computer in an upright position. Then, reconnect the power cord and all disconnected cables to the computer. - Page 32 If the coin-cell battery is incorrectly replaced, there is danger of an explosion. The coin-cell battery contains a small amount of harmful substance. To avoid possible injury: • Replace only with a battery of the type recommended by Lenovo. • Keep the battery away from fire.
- Page 33 5. Install the coin-cell battery. 6. Secure the coin-cell battery with the latch. 7. Reinstall all removed parts. 8. Place the computer in an upright position. Then, reconnect the power cord and all disconnected cables to the computer. Note: If a locking device is available, use it to lock the computer. Chapter 4 CRU replacement...
-
Page 34: Optical Drive
4. Press the release button and push the optical drive straight out of the front of the chassis. 5. Detach the optical drive bracket from the optical drive. 6. Install the optical drive bracket on the optical drive. IdeaCentre 5i (14L, 6), IdeaCentre 5 (14L, 6) User Guide... -
Page 35: Heat Sink Assembly
7. Install the optical drive and reconnect the cables. 8. Reinstall all the removed parts. 9. Reconnect the power cord and all disconnected cables to the computer. Note: If a locking device is available, use it to lock the computer. Heat sink assembly Prerequisite Before you start, read Generic Safety and Compliance Notices, and print the following instructions. -
Page 36: Pci-Express Card
3. Remove the front bezel. See “Front bezel” on page 16. 4. Remove the storage drive bracket. See “Storage drive bracket” on page 20. 5. Pivot the card retaining latch and the card latch to remove the PCI-Express card. IdeaCentre 5i (14L, 6), IdeaCentre 5 (14L, 6) User Guide... -
Page 37: Memory Module
6. Install the PCI-Express card then, secure it by closing the card latch. 7. Reinstall all removed parts. 8. Reconnect all disconnected cables to the computer and reconnect the power cord to the electrical outlet. Note: If a locking device is available, use it to lock the computer. Memory module Prerequisite Before you start, read Generic Safety and Compliance Notices, and print the following instructions. - Page 38 3. Remove the front bezel. See “Front bezel” on page 16. 4. Disengage the latches and remove the memory module. 5. Install a memory module and secure the memory module with the latches. IdeaCentre 5i (14L, 6), IdeaCentre 5 (14L, 6) User Guide...
- Page 39 6. Reinstall all removed parts. 7. Reconnect all disconnected cables to the computer and reconnect the power cord to the electrical outlet. Note: If a locking device is available, use it to lock the computer. Chapter 4 CRU replacement...
- Page 40 IdeaCentre 5i (14L, 6), IdeaCentre 5 (14L, 6) User Guide...
-
Page 41: Chapter 5. Help And Support
Where can I get the latest device • Lenovo Vantage or Lenovo PC Manager drivers and UEFI/BIOS? • Lenovo Support Web site at https://support.lenovo.com... - Page 42 • Knowledge base and frequently asked questions • Use Get Help or Tips. ® • Use Windows Search or the Cortana personal Windows help information assistant. • Go to Microsoft support Web site: https:// support.microsoft.com IdeaCentre 5i (14L, 6), IdeaCentre 5 (14L, 6) User Guide...
-
Page 43: Call Lenovo
Call Lenovo If you have tried to correct the problem yourself and still need help, you can call Lenovo Customer Support Center. Before you contact Lenovo Prepare the following before you contact Lenovo: 1. Record the problem symptoms and details: •... -
Page 44: Purchase Additional Services
• Installation and maintenance of network operating systems (NOS) • Installation and maintenance of programs For the terms and conditions of the Lenovo Limited Warranty that apply to your Lenovo hardware product, see “Warranty information” in the Safety and Warranty Guide that comes with your computer. -
Page 45: Appendix A. Notices And Trademarks
Lenovo representative for information on the products and services currently available in your area. Any reference to a Lenovo product, program, or service is not intended to state or imply that only that Lenovo product, program, or service may be used. Any functionally equivalent product, program, or service that does not infringe any Lenovo intellectual property right may be used instead. - Page 46 Actual results may vary. Users of this document should verify the applicable data for their specific environment. This document is copyrighted by Lenovo and is not covered by any open source license, including any Linux agreement(s) which may accompany software included with this product. Lenovo may update this document at any time without notice.
Need help?
Do you have a question about the IdeaCentre 5i and is the answer not in the manual?
Questions and answers