
Related Manuals for Krone KWT 1600


Summary of Contents for Krone KWT 1600
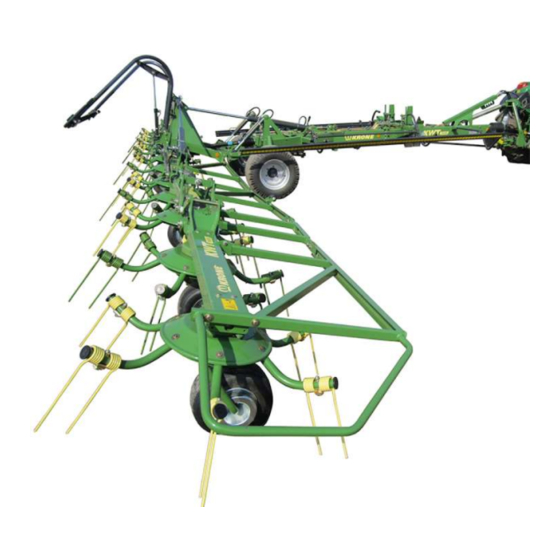
- Page 1 Original Operating Instructions Document no.: 150000169_04_en Status: 01/08/2019 Rotary Tedder KWT 1600 From machine no.: 1021425...
- Page 2 Contact Maschinenfabrik Bernard Krone GmbH & Co. KG Heinrich-Krone-Straße 10 48480 Spelle Germany Telephone main office + 49 (0) 59 77/935-0 Telefax main office + 49 (0) 59 77/935-339 Telefax spare parts warehouse na- + 49 (0) 59 77/935-239 tional territory...
-
Page 3: Table Of Contents
Identification plate ........................ 32 Road travel lighting ........................ 33 Overload protection ........................ 33 Technical data .......................... 35 Consumables .......................... 36 4.1.1 Oils............................. 37 4.1.2 Lubricating greases ........................ 37 Tyres ............................ 37 Operating and display elements..................... 38 KWT 1600 Original Operating Instructions 150000169_04_en... - Page 4 Maintenance – every 50 hours .................... 69 11.1.5 Maintenance – Every 1000 hours .................... 69 11.2 Tightening torques ........................ 69 11.3 Check the screws on the tines .................... 72 11.4 Checking/maintaining tyres...................... 73 11.5 Cleaning the machine ........................ 75 KWT 1600 Original Operating Instructions 150000169_04_en...
- Page 5 Malfunction, cause and remedy ..................... 85 Repairs, maintenance and settings by technicians ............. 86 16.1 Car jack contact points ...................... 86 Waste disposal......................... 88 Appendix........................... 89 18.1 Hydraulic diagram ........................ 89 Index............................ 91 Declaration of conformity ....................... 95 KWT 1600 Original Operating Instructions 150000169_04_en...
-
Page 6: Information On This Document
Information on This Document Validity This document is valid for machines of type: KWT 1600 All information, illustrations and technical data in this document correspond to the latest state at the time of publication. We reserve the right to make design changes at any time and without notification of reasons. -
Page 7: Figures
Magnification of display detail H = height, L = length) Left side of machine Right side of machine Direction of travel Direction of motion Reference line for visible material Reference line for covered mater- KWT 1600 Original Operating Instructions 150000169_04_en... - Page 8 When cleaning with compressed air, dirt particles are ejected at high speed and could get into the eyes. Therefore eyes could be hurt. „ Keep people away from the working area. „ Wear personal protective equipment when performing cleaning work with compressed air (e.g. eye protection). KWT 1600 Original Operating Instructions 150000169_04_en...
-
Page 9: Conversion Table
1.3410 Horsepower Pressure Kilopascal 0.1450 Pounds per square inch Megapascal 145.0377 bar (non-SI) 14.5038 Torque Newtonmeter 0.7376 pound-foot or ft∙lbf foot-pound 8.8507 pound-inch or in∙lbf inch-pound Temperature Degrees Celsius °C °Cx1.8+32 Degrees °F Fahrenheit KWT 1600 Original Operating Instructions 150000169_04_en... - Page 10 Kilometres per km/h 0.6215 Miles per hour hour Volumes Litres 0.2642 US gallon US gal. Millilitre 0.0338 US ounce US oz. Cubic centi- cm³ 0.0610 Cubic inch in³ metre Weight Kilogram 2.2046 Pound KWT 1600 Original Operating Instructions 150000169_04_en...
- Page 11 Information on This Document How to use this document This page has been left blank deliberately. KWT 1600 Original Operating Instructions 150000169_04_en...
-
Page 12: Safety
• Attachment of unauthorised or unapproved additional equipment • Use of spare parts which are not KRONE original spare parts • Stationary operation of the machine Unauthorised modifications to the machine may affect the properties of the machine or disrupt proper operation. -
Page 13: Service Life Of The Machine
He has read the operating instructions and can implement the information in the operating instructions accordingly. • He is familiar with driving vehicles safely. • For road travel he has adequate knowledge of the highway code and has the stipulated driving licence. KWT 1600 Original Operating Instructions 150000169_04_en... -
Page 14: Personnel Qualification Of The Technicians
Additional equipment and spare parts that do not correspond to the requirements of the manufacturer may affect the operational safety of the machine and cause accidents. „ To ensure operational safety, use original parts or standard parts which correspond to the requirements of the manufacturer. KWT 1600 Original Operating Instructions 150000169_04_en... -
Page 15: Jobs On The Machine
„ Determine the cause of damage according to these operating instructions and repair the damage, if possible, refer to page 85. „ In case of damage which may affect operational safety and cannot be repaired according to these operating instructions: Have damage repaired by a qualified service centre. KWT 1600 Original Operating Instructions 150000169_04_en... -
Page 16: Danger Zones
This also applies to brief inspection work. „ Consider the information in all relevant operating instructions: • The operating instructions of the tractor • The operating instructions of the machine • The operating instructions of the universal shaft KWT 1600 Original Operating Instructions 150000169_04_en... - Page 17 „ Before starting the machine, instruct all people to leave the danger zone of the machine. „ In case of dangerous situations, immediately switch off drives and instruct people to leave the danger zone. KWT 1600 Original Operating Instructions 150000169_04_en...
-
Page 18: Ensuring Functionality Of Safety Devices
„ Use only personal protective equipment which is in proper condition and offers effective protection. „ Adjust personal protective equipment to the person, for example the size. „ Remove unsuitable clothing and jewellery (e.g. rings, necklaces) and cover long hair with a hairnet. KWT 1600 Original Operating Instructions 150000169_04_en... -
Page 19: Safety Markings On The Machine
„ Consider the overall width of the combined tractor and machine. „ Consider the larger swivel range when cornering. „ Adjust the driving speed when cornering. „ When turning, watch out for people, oncoming traffic and obstacles. KWT 1600 Original Operating Instructions 150000169_04_en... -
Page 20: Parking The Machine Safely
„ Fill consumables in a liquid-tight labelled container and dispose of according to the official regulations. „ Absorb leaked consumables with an absorbent material, fill them in a liquid-tight labelled container and dispose of according to the official regulations. KWT 1600 Original Operating Instructions 150000169_04_en... -
Page 21: Dangers Arising From Environment
„ Specify rules for the use of hearing protection and for the working time. „ During operation keep windows and doors of the cabin closed. „ Remove hearing protection for road travel. KWT 1600 Original Operating Instructions 150000169_04_en... - Page 22 The following components may become hot during operation and may burn people: „ Maintain an adequate distance from hot surfaces and adjacent components. „ Leave machine parts to cool down and wear protective gloves. KWT 1600 Original Operating Instructions 150000169_04_en...
-
Page 23: Dangers In Connection With Certain Activities: Working On The Machine
„ Prior to all work on raised machines or machine parts, lower the machine or machine parts. „ Before performing any work under raised machines or machine parts, secure the machine or machine parts with rigid safety support or with hydraulic shut-off device or by supporting against lowering. KWT 1600 Original Operating Instructions 150000169_04_en... -
Page 24: Dangers In Connection With Certain Activities: Working On Wheels And Tyres
The fitting of wheels and tyres requires adequate knowledge and approved mounting tools. „ If there is a lack of knowledge, have the wheels and tyres fitted by the KRONE dealer or by a qualified tyre service. -
Page 25: Safety Routines
„ Bricks and hollow blocks are not suitable for safely supporting the machine and machine parts. Therefore they must not be used. „ Car jacks are also not suitable for safely supporting the machine and machine parts. They must not be used, as well. KWT 1600 Original Operating Instructions 150000169_04_en... -
Page 26: Carrying Out Oil Level Check And Oil And Filter Element Changes Safely
Safety Labels on the Machine Every safety label is provided with an order number and can be ordered directly from the authorised KRONE dealer. Immediately replace missing, damaged and unrecognisable safety labels. When attaching safety labels, the contact surface on the machine must be clean and free of dirt, oil and grease to ensure optimum adhesion of the labels. - Page 27 Safety Safety Labels on the Machine KWT 1600 Original Operating Instructions 150000169_04_en...
- Page 28 Safety Safety Labels on the Machine Position and meaning of safety labels KWG000-001 KWT 1600 Original Operating Instructions 150000169_04_en...
- Page 29 There is a risk of accidents if the regulating valves of the tractor are not locked. „ To avoid that functions are triggered by mistake, the regulating valves of the tractor must be in neutral position and locked during road transport journeys. KWT 1600 Original Operating Instructions 150000169_04_en...
-
Page 30: Safety Equipment
Overload protection • The overload protection protects the tractor and the machine from load peaks „ To avoid damaging the machine, switch off the PTO shaft if the overload clutch engages continuously. KWT 1600 Original Operating Instructions 150000169_04_en... -
Page 31: Smv Emblem
The SMV emblem (1) is at the rear in the centre or on left. If the machine is transported on transport vehicles (for example lorry or train), the SMV emblem must be covered or dismounted. KWT 1600 Original Operating Instructions 150000169_04_en... -
Page 32: Machine Description
Trailing arm Overload protection Universal shaft bracket Warning panel Universal shaft drive Lighting Three-point hitch Identification plate INFORMATION The entire identification plate represents a legal document and should not be altered or rendered illegible! KWT 1600 Original Operating Instructions 150000169_04_en... -
Page 33: Road Travel Lighting
(flashing light, rear light and brake light) at the rear. Overload protection INFORMATION It is not permissible to change the overload protection. The warranty is void if other than the factory-specified overload protections are used. KWT 1600 Original Operating Instructions 150000169_04_en... - Page 34 „ To avoid early wear of the overload protection, switch the PTO shaft off if the overload protection responds for a longer period of time (>1 s). „ Shut down and safeguard the machine, refer to page 25. „ Possible causes and elimination refer to page 85. KWT 1600 Original Operating Instructions 150000169_04_en...
-
Page 35: Technical Data
Technically permitted maximum speed (road travel) 40 km/h The technically permitted maximum speed may be restricted by different equipment features (e.g. coupling device, axle, brake, tyres, etc.) or by statutory regulations in the country of use. KWT 1600 Original Operating Instructions 150000169_04_en... -
Page 36: Consumables
If oils, which have different specifications, are mixed with each other, the machine may be damaged. „ Never mix oils, which have different specifications, with each other. „ Contact your KRONE service partner before using an oil with a different specification after changing the oil. KWT 1600... -
Page 37: Oils
Tyres Tyres Tyre designation Tyre pressure Running gear 19.0/45-17 (standard) 1.5 bar 500/50-17 (optional) Running wheels single axle 16 x 6.50-8 1.7 bar Running wheels single axle in- 18 x 8.50-8 2.0 bar side KWT 1600 Original Operating Instructions 150000169_04_en... -
Page 38: Operating And Display Elements
Press (red 1+): Fold out the deflector curtain from transport to working position. Press (red 1-): Fold in the deflector curtain from working to transport position. 2 Red warning light Is lit when the operation panel is switched on. KWT 1600 Original Operating Instructions 150000169_04_en... -
Page 39: Crank Handle
Operating and display elements Crank handle Crank handle KW000-172 Designation Function 1 Crank handle Increase or reduce working height of the rotor tines KWT 1600 Original Operating Instructions 150000169_04_en... -
Page 40: Initial Operation
ü The universal shaft length has been checked and adjusted, refer to page 41. ü The hydraulic system has been checked for leaks. ü The road travel lighting has been checked for function and cleanliness, refer to page 49 KWT 1600 Original Operating Instructions 150000169_04_en... -
Page 41: Adjusting The Universal Shaft
(cornering with maximum steering angle). Remove the preservation wax from the tines INFORMATION Preservation wax at the tines leads to clumping of the cut crops at the tines, resulting in impairment of the working process. KWT 1600 Original Operating Instructions 150000169_04_en... -
Page 42: Mounting Tine Security System
„ Attach the rope (1) to the rotor tines (3) using the rope clamps (2). INFORMATION The rope (1) must be behind the rotor tine (3) with respect to the direction of rotation. The nuts (4) of the rope clamps (2) must face outwards. INFORMATION Additional tine security system ord. no.: 153 479 0 KWT 1600 Original Operating Instructions 150000169_04_en... -
Page 43: Adjusting Direction Of Travel
„ In order to increase the height when folding in the outrigger arms, adjust the cam disc (1) in the direction "+". „ In order to reduce the height when folding in the outrigger arms, adjust the cam disc (1) in the direction "-". „ Tighten the screw (2). KWT 1600 Original Operating Instructions 150000169_04_en... -
Page 44: Set The Lifting Speed Of The Top Link Cylinder
„ Do not adjust the screw (1) by more than one turn. „ To increase the speed, turn out the screw (1) by one quarter turn. „ To reduce the speed, turn in the screw (1) by one quarter turn. KWT 1600 Original Operating Instructions 150000169_04_en... -
Page 45: Start-Up
Depending on the type of tractor, the top link of the tractor and/or the universal shaft of the machine may collide with the tow coupling and damage the tractor and/or the machine. „ If necessary, remove the tow coupling. For additional information, please refer to the tractor manufacturer's operating instructions. KS000-021 KWT 1600 Original Operating Instructions 150000169_04_en... -
Page 46: Connecting Machine To Tractor
„ Shut down and safeguard the machine, refer to page 25. „ Pull the linch pin (5). „ Pull out the bolt (6). „ Mount the top link (3) with the bolt on three-point hitch (4) and secure with the linch pin (5). KWT 1600 Original Operating Instructions 150000169_04_en... -
Page 47: Setting Height Of The Tractor Lower Links
„ Swivel the universal shaft bracket (2) downwards. „ Push the universal shaft (1) onto the PTO shaft of the tractor and allow it to engage. „ Secure the universal shaft guards against turning by using supporting chains (3). KWT 1600 Original Operating Instructions 150000169_04_en... -
Page 48: Night Swathing Gearbox Universal Shaft Attachment
„ Clean and dry the connections of the hydraulic quick connector. „ Connect the hydraulic hoses (1+/1-) to a double-acting control unit of the tractor. „ Connect the hydraulic hose (2+) to a single-acting control unit of the tractor. KWT 1600 Original Operating Instructions 150000169_04_en... -
Page 49: Connecting Road Travel Lighting
Attach the safety chain with the respective mounting parts to the hitching device holder of the tractor or to another specified coupling point. The safety chain should have enough play when driving around curves. KWT 1600 Original Operating Instructions 150000169_04_en... - Page 50 Start-up Mounting safety chain KS000-031 „ Install the safety chain (1) at a suitable position (for example: [I] or [II]) on the tractor. KWG000-011 „ Mount the safety chain (1) on the machine. KWT 1600 Original Operating Instructions 150000169_04_en...
-
Page 51: Operation
ü The machine has been parked, refer to page 62. KS000-413 Removing „ Remove the padlock (1) and take it with you. Mounting „ Mount the padlock (1) and keep the key in a safe place. KWT 1600 Original Operating Instructions 150000169_04_en... -
Page 52: Releasing/Applying The Parking Brake
„ Push in the key (1) and apply the parking brake (2) until the resistance has increased noticeably. Releasing the parking brake (2) „ Push in the key (1) and press parking brake (2) all the way down. Mounting safety cable KW000-109 KWT 1600 Original Operating Instructions 150000169_04_en... -
Page 53: Fitting Wheel Chocks
„ Place the wheel chocks (1) tightly up against the wheel, in front of and behind it, to prevent the machine from rolling away. Locking/releasing stop cock KSG000-047 Locking „ Move stop cock (1) into position (I). Releasing „ Move the stop cock (1) into position (II). KWT 1600 Original Operating Instructions 150000169_04_en... -
Page 54: Operating The Support Jack
Moving support jack into support position „ Shut down and safeguard the machine, refer to page 25. KW000-160 „ Pull the tension bar (2), swivel the support jack (1) downwards by 90° and lock it using the tension bar (2). KWT 1600 Original Operating Instructions 150000169_04_en... -
Page 55: Lowering Machine From Transport To Working Position
„ Swivel the outer wheels (1) into the same borehole of the axle support (2) as the other wheels. „ Push the bolt (4) in and secure it with the linch pin (3). „ Open the stop cocks on the hydraulic hoses. KWT 1600 Original Operating Instructions 150000169_04_en... -
Page 56: Deflector Curtain From Transport To Working Position
„ Before the machine is moved from transport position to headland position, ensure that the toggle switch of the operation panel is set to "0" position. From transport to working position The operation panel is used to preselect the On (1)/Off (0) function of the deflector curtain (3). KWT 1600 Original Operating Instructions 150000169_04_en... -
Page 57: Field Mode On Slopes
„ To avoid accidents, the basic safety instructions must be read and observed, refer to page 13. KWG000-012 „ Do not move the machine from transport into working position or from working into transport position as long as the machine is operated diagonal to the slope. KWT 1600 Original Operating Instructions 150000169_04_en... -
Page 58: Using The Machine For Work
„ Adjust the driving speed (6 - 8 km/h) and the PTO speed to the forage condition. For narrow swaths select a steeper spreading angle. INFORMATION These specifications are only guide values and must be adjusted in practice to the local conditions. KWG000-024 KWT 1600 Original Operating Instructions 150000169_04_en... -
Page 59: Deflector Curtain From Working To Transport Position
„ Before raising the outrigger arms into transport position, switch off the PTO shaft and wait until the rotors have come to a stop. „ Do not raise the outrigger arms until everybody is outside the swivel range. KWT 1600 Original Operating Instructions 150000169_04_en... - Page 60 From headland to transport position KWG000-026 „ Actuate the double-acting control unit (1+) until the outrigger arms are positioned on the buffers (1) on both sides of the machine. „ Close the stop cocks on the hydraulic hoses. KWT 1600 Original Operating Instructions 150000169_04_en...
-
Page 61: Driving And Transport
ü The parking brake has been released, refer to page 52. ü The control units on the tractor are in neutral position and locked. ü The PTO shaft drive is switched off. ü The rotors have come to a standstill. KWT 1600 Original Operating Instructions 150000169_04_en... -
Page 62: Reducing The Transport Width
„ Loosen the safety chains of the universal shaft on the tractor side, decouple the universal shaft and place it on the support provided for this purpose. „ Depressurise the tractor hydraulics. „ Disconnect the hydraulic hose lines and hook them into the support at the machine. KWT 1600 Original Operating Instructions 150000169_04_en... -
Page 63: Preparing The Machine For Shipment
„ Ensure that the hoist is mounted correctly on the anchor points. „ Use a hoist with a minimum lifting capacity (depending on the approved total weight of the machine), see machine rating plate, refer to page 32. KWT 1600 Original Operating Instructions 150000169_04_en... -
Page 64: Lashing The Machine
The machine is equipped with 3 lashing points. • The lashing point (1) is located at the front on the frame. • The lashing points (2) are located at the rear right and left on the running gear. KWT 1600 Original Operating Instructions 150000169_04_en... -
Page 65: Settings
Steepest spreading angle (I) • Long discharge distance • Long crops • Better discharge effect for mown swaths • Wilted silage • Forage with more than 40% moisture content KWT 1600 Original Operating Instructions 150000169_04_en... -
Page 66: Setting The Working Height
„ To reduce the distance (X) of the rotor tines (1) to the ground, turn the crank handle (2) clockwise (+). „ To increase the distance (X) of the rotor tines (1) to the ground, turn the crank handle (2) anticlockwise (-). KWT 1600 Original Operating Instructions 150000169_04_en... -
Page 67: Setting The Tines
The tines (2) must be aligned vertical to the ground. The tine position can be changed by rotating the eccentric (3). „ Loosen the screw (1). „ Rotate the eccentric (3) one step further. „ Tighten the screw to a tightening torque of M =95 Nm. KWT 1600 Original Operating Instructions 150000169_04_en... -
Page 68: Maintenance - General
Visually inspect tyres for cuts and breaks refer to page 73 Check the hydraulic hoses for leaks and, if ne- refer to page 76 cessary, have them replaced by a KRONE service partner. Check the electrical connection cables and, if necessary, have them repaired or changed by... -
Page 69: Maintenance - Once After 10 Hours
Deviations from the tables are marked accordingly. Metric thread screws with control thread INFORMATION The table does not apply to countersunk screws with hexagon socket in case the countersunk screw is tightened via hexagon socket. KWT 1600 Original Operating Instructions 150000169_04_en... - Page 70 Strength class on screw head Strength class 10.9 12.9 Tightening torque (Nm) 1,050 1,220 1,100 1,550 1,800 1,450 2,100 2,450 Metric thread screws with fine thread DV000-001 Thread size Strength class on screw head KWT 1600 Original Operating Instructions 150000169_04_en...
- Page 71 Metric thread screws with countersunk head and hexagon socket INFORMATION The table applies only to countersunk screws with hexagon socket and metric thread tightened via hexagon socket. DV000-000 Thread size Strength class on screw head Strength class 10.9 12.9 Tightening torque (Nm) KWT 1600 Original Operating Instructions 150000169_04_en...
-
Page 72: Check The Screws On The Tines
This can lead to serious accidents and damage to the machine. „ Before initial commissioning, check that all screw connections are tight and tighten to the specified tightening torque. KWT 1600 Original Operating Instructions 150000169_04_en... -
Page 73: Checking/Maintaining Tyres
Inspect the tyres visually „ Visually inspect tyres for cuts or breaks. Æ If there are cuts or breaks in the tyres, have the tyres repaired or replaced by a KRONE service partner. Maintenance intervals for visual inspection of the tyres, refer to page 68. - Page 74 27 mm 8 units 380 Nm 420 Nm M20x1.5 30 mm 8 units 380 Nm 420 Nm M22x1.5 32 mm 8/10 units 510 Nm 560 Nm M22x2 32 mm 10 units 460 Nm 505 Nm KWT 1600 Original Operating Instructions 150000169_04_en...
-
Page 75: Cleaning The Machine
ü The machine is shut down and safeguarded, refer to page 25. „ After each use, remove husk and dust from the machine. Æ Under very dry working conditions, repeat the cleaning several times a day. KWT 1600 Original Operating Instructions 150000169_04_en... -
Page 76: Maintenance - Hydraulic System
When checking hydraulic hoses, the state-specific conditions (e.g., BGVU) must be observed. Performing a visual inspection „ Visually inspect all hydraulic hoses for damage and leaks and have them replaced by an authorised specialist if necessary. KWT 1600 Original Operating Instructions 150000169_04_en... -
Page 77: Maintenance - Gearbox
ð If the oil does not reach up to the inspection hole (1): „ Refill with fresh oil up to the inspection hole (1) via the inspection hole (1). „ Screw the locking screw into the inspection hole (1), tightening torque refer to page 72. KWT 1600 Original Operating Instructions 150000169_04_en... - Page 78 „ Mount the drain plug (2), tightening torque refer to page 72. „ Refill with fresh oil up to the inspection hole (1) via the inspection hole (1). „ Mount the locking screw of the inspection hole (1), Anziehdrehmoment refer to page 72. KWT 1600 Original Operating Instructions 150000169_04_en...
-
Page 79: Maintenance - Lubrication
Bearing positions will be damaged If different lubricating greases are used, the lubricated components may be damaged. „ Do not use lubricating greases which contain graphite. „ Do not use different lubricating greases. 14.1 Lubricating universal shaft KW000-069 KWT 1600 Original Operating Instructions 150000169_04_en... -
Page 80: Lubrication Chart - Machine
The types of lubrication are marked by means of icons in the lubrication chart, refer to table. Type of lubrication Lubricant Comment Grease Multi-purpose grease • Two strokes from the grease gun per grease nipple. • Remove superfluous grease from grease nipple. KWT 1600 Original Operating Instructions 150000169_04_en... - Page 81 Maintenance - Lubrication Lubrication chart - Machine 14.2 RH+LH RH+LH RH+LH RH+LH KWG000-016 KWT 1600 Original Operating Instructions 150000169_04_en...
- Page 82 Maintenance - Lubrication 14.2 Lubrication chart - Machine Every 50 operating hours KWT 1600 Original Operating Instructions 150000169_04_en...
- Page 83 Maintenance - Lubrication Lubrication chart - Machine 14.2 RH+LH RH+LH RH+LH RH+LH KW000-102 KWT 1600 Original Operating Instructions 150000169_04_en...
- Page 84 Maintenance - Lubrication 14.2 Lubrication chart - Machine Every 50 operating hours Every 100 operating hours KWT 1600 Original Operating Instructions 150000169_04_en...
-
Page 85: Malfunction, Cause And Remedy
The driving speed is too high. „ Reduce the driving speed. The ground is uneven. „ Drive around the uneven ground. „ Remove the foreign object and replace the tine arm. The tine arm is bent. KWT 1600 Original Operating Instructions 150000169_04_en... -
Page 86: Repairs, Maintenance And Settings By Technicians
„ Note the information on the suspension points provided. „ Make sure the lifting means are properly secured. „ Never stay under the suspended machine. „ If work has to be performed under the machine, securely support the machine, refer to page 25. KWT 1600 Original Operating Instructions 150000169_04_en... - Page 87 Repairs, maintenance and settings by technicians Car jack contact points 16.1 KWG000-020 1 Car jack contact point at rear left 2 Car jack contact point at rear right KWT 1600 Original Operating Instructions 150000169_04_en...
-
Page 88: Waste Disposal
All synthetic materials must be brought to a recycling centre for synthetic materials. Rubber • Rubber parts (hoses, tyres, …) must be brought to a rubber recycling centre. Electronic scrap • All electronic parts must be brought to a disposal point for electronic scrap. KWT 1600 Original Operating Instructions 150000169_04_en... -
Page 89: Appendix
Legend for the following hydraulic diagram Tractor hydraulics Rotor LS = Load Sensing Transport position Single-acting control unit Headland position Double-acting control unit Lower link Free return Steering axle adjustment Lighting carrier Top link >>> 2 150100783_02 [} 90] KWT 1600 Original Operating Instructions 150000169_04_en... -
Page 91: Index
Contact ..............2 Ensuring functionality of safety devices ..... 18 Contact data of your dealer ........2 Environmental protection and disposal ....20 Conversion table ..........9 Crank handle ............39 Cross references ..........6 KWT 1600 Original Operating Instructions 150000169_04_en... - Page 92 Mounting safety cable ........52 Mounting safety chain ........49 Mounting the universal shaft ......47 Mounting tine security system ......42 Moving support jack into support position ..54 Moving support jack into transport position ..54 KWT 1600 Original Operating Instructions 150000169_04_en...
- Page 93 Settings .............. 65 Shutting down and safeguarding the machine ... 25 SMV emblem ............31 Sources of danger on the machine ....21 Start-up............... 45 Structural modifications on the machine .... 14 Support jack ............54 KWT 1600 Original Operating Instructions 150000169_04_en...
- Page 94 Using the machine for work ........ 58 Validity ..............6 Warning signs............8 Warnings of property damage/environmental damage ..............9 Waste disposal ........... 88 Working at or on heights of the machine .... 23 KWT 1600 Original Operating Instructions 150000169_04_en...
-
Page 95: Declaration Of Conformity
Declaration of conformity Declaration of conformity EC Declaration of Conformity Maschinenfabrik Krone Beteiligungs-GmbH Heinrich-Krone-Straße 10, D-48480 Spelle hereby declare, as manufacturer of the product named below, under our sole responsibility, that the Machine: Rotary Tedder Series: KWT 1600 to which this declaration refers is in compliance with the following relevant provisions of: •... - Page 96 Maschinenfabrik Bernard Krone GmbH & Co. KG * Heinrich-Krone-Straße 10 D-48480 Spelle * Postfach 11 63 D-48478 Spelle ' +49 (0) 59 77 / 935-0 6 +49 (0) 59 77 / 935-339 ü www.landmaschinen.krone.de...
Need help?
Do you have a question about the KWT 1600 and is the answer not in the manual?
Questions and answers