Stihl BGA 200 Instruction Manual
Hide thumbs
Also See for BGA 200:
- Instruction manual (28 pages) ,
- Instruction manual (88 pages) ,
- Instruction manual (20 pages)
Table of Contents
Advertisement
Available languages
Available languages
Quick Links
Advertisement
Chapters
Table of Contents

Subscribe to Our Youtube Channel
Related Manuals for Stihl BGA 200


Summary of Contents for Stihl BGA 200
- Page 1 STIHL BGA 200 Instruction Manual Notice d’emploi...
- Page 2 G Instruction Manual 1 - 38 F Notice d’emploi 39 - 79...
-
Page 3: Table Of Contents
21.2 Cleaning the Contact Surfaces of the Connecting 11.2 STIHL AP Battery ........18 Cord . -
Page 4: Introduction
24.1 STIHL BGA 200........37... -
Page 5: Symbols In Text
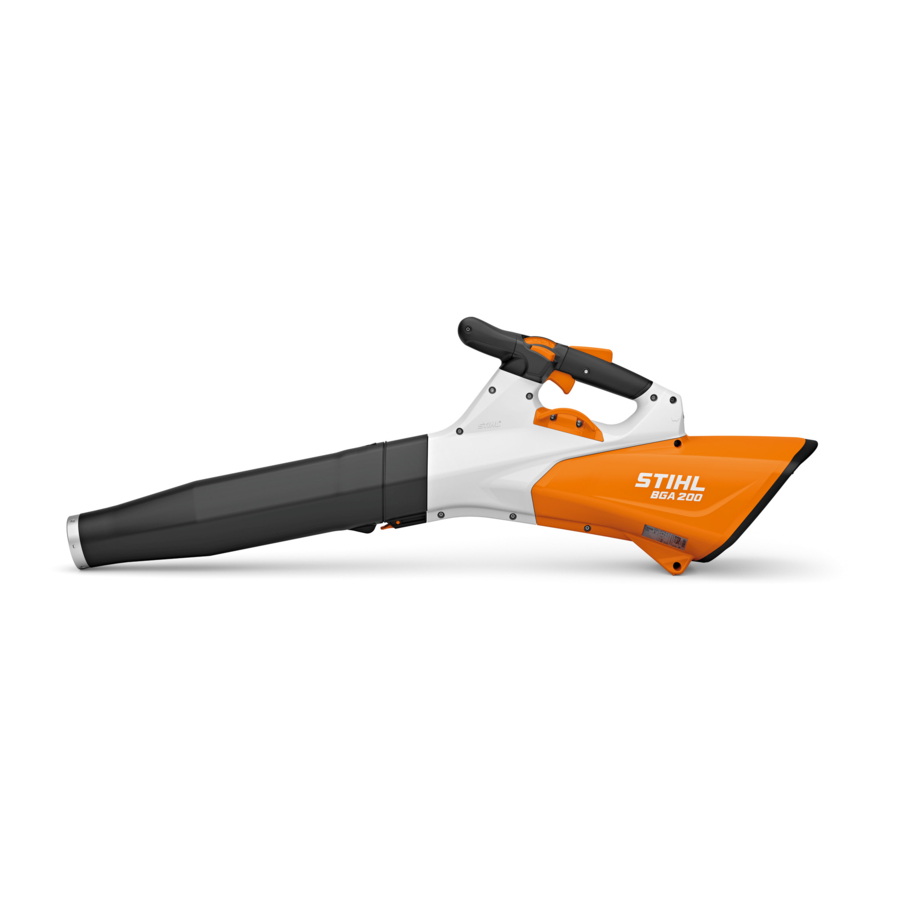
English 3 Main Parts 4 Control Handle WARNING The blower's handle. Indicates a hazardous situation that, if not avoided, could 5 Socket result in death or serious injury. Socket for the battery connecting cord. NOTICE 6 Intake Screen Covers the air intake opening and reduces risk of contact Indicates a risk of property damage, including damage to the machine or its individual components. -
Page 6: Battery Harness Options
4 Safety Symbols on the Products Blower The following safety symbols are found on the blower. The BGA 200 may be powered by a STIHL AR series To reduce the risk of injury, follow the specified backpack battery. Alternatively, it may be powered by a safety precautions. -
Page 7: Battery
5 IMPORTANT SAFETY INSTRUCTIONS Read and follow all safety precautions in the battery's instruction manual and the manual for the STIHL tool powered by this battery. Improper Introduction use can lead to serious or fatal personal injury or property damage. -
Page 8: Intended Use
■ This power tool may be powered by a STIHL AR series this blower. backpack battery. Alternatively, it may be powered by a STIHL AP series battery in combination with a STIHL AP Battery Bag with Connecting Cord. -
Page 9: Blower
STIHL or expressly approved by – Wear substantial footwear with non-slip STIHL for use with this specific model are recommended. soles. Do not wear sandals, flip-flops, – Use only attachments supplied or expressly open-toed or similar footwear. -
Page 10: Using The Blower
– If your blower or any part is damaged or does not performance requirements. Use of parts that are not function properly, take it to your authorized STIHL authorized or approved by STIHL may cause serious or servicing dealer. Do not use the blower until the fatal injury or property damage. - Page 11 English 5 IMPORTANT SAFETY INSTRUCTIONS WARNING – Read and follow the instructions on switching on the blower, @ 15.1. ■ To maintain a firm grip and properly control your blower: ■ To help reduce the risk of serious personal injury from –...
- Page 12 – If working with the STIHL AP Battery Bag with ■ Operating the blower in certain dry, dusty conditions may Connecting Cord, make sure it is attached securely...
- Page 13 English 5 IMPORTANT SAFETY INSTRUCTIONS inhalation of dust or other airborne contaminants, ■ The air flow from the blower can propel small objects at especially those with a smaller particle size, may cause high speed. To reduce the risk of eye or other serious respiratory or other illnesses.
-
Page 14: Maintenance, Repair And Storage
English 6 Maintenance, Repair and Storage ■ Use of parts that are not authorized or approved by STIHL 6 Maintenance, Repair and Storage may cause serious or fatal injury or property damage. – STIHL recommends that only identical replacement parts be used for repair or maintenance. - Page 15 ■ Use of STIHL AR or AP series batteries for any purpose ■ To reduce the risk of personal injury and property damage other than powering STIHL power tools could be in the event the battery emits smoke, an unusual smell or extremely dangerous.
-
Page 16: General Warnings And Instructions
■ A battery fire can be dangerous. To reduce the risk of ■ Recharge only with the charger specified by STIHL. A severe personal injury and property damage in the event charger that is suitable for one type of battery may create of fire: a risk of fire when used with another battery. -
Page 17: Before Starting Work
► Fully charge the battery, @ 10. To set up the charger: ► Adjust the nozzle, @ 13.1. ► Put on and adjust the STIHL AR backpack battery, STIHL Battery Belt or STIHL Battery Backpack, @ 12. ► Check the controls for proper function and condition, @ 16.1. -
Page 18: Charging
A battery is not fully charged when it ships from the factory. process is complete and the charger will shut itself off. The STIHL recommends that you fully charge the battery before AP Adapter can be removed from the charger. -
Page 19: Led Diagnostics And Acoustic Signals
► Charge STIHL AP series batteries only with genuine 20 °C). STIHL AL 101, AL 300 or AL 500 series chargers. If the four right side LEDs flash red and a rapid succession of several short beeps is emitted: the 11 LED Diagnostics and Acoustic Signals battery has a malfunction and must be replaced. -
Page 20: Stihl Ap Battery
Allow the motor to cool down. If three LEDs flash red when you activate the trigger switch: the power tool has an electrical malfunction. Do not operate the power tool. Have it checked by an authorized STIHL 100 % servicing dealer before use or storage. -
Page 21: Using A Battery Harness
► Adjust the slide at the left and right shoulder straps to the 12 Using a Battery Harness same position. 12.1.2 Positioning the Connecting Cord 12.1 STIHL AR L Backpack Battery WARNING 12.1.1 Adjusting the Battery Harness to Suit the Operator’s To reduce the risk of injury from tripping on the connecting... -
Page 22: Stihl Ar Backpack Battery
To avoid damage, ease the battery to the ground when practicing. Do not allow the battery to drop to the ground and do not throw it. 12.2 STIHL AR Backpack Battery 12.2.1 Positioning and Adjusting the Connecting Cord WARNING ► Put the backpack battery on your back. - Page 23 English 12 Using a Battery Harness described below. Position and secure the connecting cord so that it will not interfere with proper working technique or your ability to maintain control of the power tool. WARNING Manage the cord to prevent it from contacting the cutting/working attachment or catching on objects, which could cause you to lose balance or control of the power tool, resulting in serious personal injury and property damage.
-
Page 24: Attaching The Comfort Hip Pad To The Battery
The blower is properly positioned for work when the operator‘s arm is slightly angled. 12.3 Attaching the Comfort Hip Pad to the Battery 12.4 STIHL Battery Backpack Harness The comfort hip pad is used to convert the AR L or AR 12.4.1 Mounting the AP Battery Bag with Connecting Cord... - Page 25 Never transport metallic, pointed or sharp objects in the battery bag or battery backpack. They may bridge the The STIHL Extra AP Battery Bag can be mounted at the electrical contacts in the battery and cause a short circuit top (Illustration D) or bottom (Illustration E) fastening points once a battery is inserted.
- Page 26 English 12 Using a Battery Harness To run the connecting cord through the guide in the shoulder strap: ► If you attach the battery bag at the bottom position, pull the horizontal belt strap (6) through the ring (5) and close the hook and eye fastener to secure it.
-
Page 27: Attaching The Hip Pad To The Battery Harness
English 12 Using a Battery Harness 12.4.3 Putting on and Adjusting the Battery Backpack ► Thread the end of the waist belt through the loop (3). ► To remove the harness, open the quick-release fasteners on the waist belt and chest strap and loosen the harness WARNING straps by lifting the sliding adjusters. -
Page 28: Stihl Battery Belt
12.6 STIHL Battery Belt ► Pull the strap (1) back through the ring (2) and battery belt (3). 12.6.1 Mounting the AP Battery Bag to the STIHL Battery Belt ► Fasten the hook and eye fastener. WARNING To reduce the risk of injury from tripping or losing control of the power tool, always secure the connecting cord with the hook and eye fasteners. -
Page 29: Adjusting The Blower
Never operate your blower without a properly bag (3) with the hook and eye buckle (2). mounted blower tube and nozzle, @ 5.6.4. Use only attachments supplied or expressly approved by STIHL, ► Always position and secure the connecting cord so that it @ 5.5. -
Page 30: Inserting And Removing The Connecting Cord
English 14 Inserting and Removing the Connecting Cord To mount the nozzle: To insert the connecting cord: ► Push the locking lever (2) and hold it in this position. ► Line up the arrow on the connecting cord plug (2) with the ►... -
Page 31: Switching The Blower On And Off
English 15 Switching the Blower On and Off To remove the connecting cord: ► Always operate the blower with your right hand firmly on the control handle. If using the hip pad or comfort hip pad, ► Release trigger switch. always operate the blower with your right hand firmly on the gripping surface. -
Page 32: Switching Off
(1), retaining latch (2) and the trigger switch (3) are The blower should switch on. If it does not, take the blower undamaged and functioning properly. to an authorized STIHL servicing dealer to be repaired before use. ► Release the trigger switch. -
Page 33: Using The Power Hold Button
English 17 During Operation To set the power level: ► Switch the blower on. ► Select the power level. ► Squeeze the trigger switch (1) until you reach the desired blowing force for your task. ► While holding the trigger switch, depress the power hold button (2). -
Page 34: Using The Blower
English 18 After Finishing Work 17.4 Using the Blower 18 After Finishing Work WARNING Always wear proper clothing and protective apparel, 18.1 Preparing for Transportation or Storage including proper eye protection, @ 5.4. Never direct the air flow toward bystanders. Keep bystanders at least 16 ft. WARNING (5 m) away from the work area, @ 5.6.4. -
Page 35: Storing
English 20 Storing ► Keep the socket free from foreign matter and clean as 20 Storing necessary with a soft brush or soft, dry cloth. NOTICE 20.1 Blower Never spray the power tool with water. Spraying it with a stream of water could result in damage to the electronics WARNING and other systems. -
Page 36: Inspection And Maintenance
@ 6.1. Carry out only the maintenance operations described in this manual. There are no user-authorized repairs. STIHL recommends that repair work be performed by authorized STIHL servicing dealers. To properly maintain the blower: ►... -
Page 37: Troubleshooting Guide
@ 21.2. 1 LED flashes Battery has low ► Charge the battery as described in its instruction manual. green. charge. STIHL AR Series: four long beeps are emitted (AR L - six beeps). 1 LED glows Battery too hot / too ►... - Page 38 20 °C). Runtime is too short. Battery not fully ► Charge the battery as described in its instruction manual. charged. Useful life of battery ► Have the battery checked by an authorized STIHL servicing has been reached or dealer. exceeded. 0458-812-8221-A...
-
Page 39: Specifications
STIHL's philosophy is to continually improve all of its – STIHL AR series products. As a result, engineering changes and – STIHL AP series in combination with the STIHL AP improvements are made from time to time. Therefore, some Battery Bag with Connecting Cord changes, modifications and improvements may not be –... -
Page 40: Battery Recycling
STIHL lithium ion batteries in the United States and Canada. The RBRC seal indicates that STIHL has prepaid for battery recycling. RBRC has a toll free phone number (1-800-822- 8837) that connects you to information on battery recycling locations and information on battery disposal bans or restrictions in your area. - Page 41 Table des matières 11.2 Batterie STIHL AP ....... . . 58 Préface .
-
Page 42: Préface
24.1 STIHL BGA 200........78... -
Page 43: Symboles Employés Dans Le Texte
français 3 Principales pièces 3 Surface de prise en main DANGER Pour contrôler le souffleur lorsqu'il est fixé à un Indique une situation dangereuse qui, si elle n’est pas protecteur de hanche. évitée, entraînera la mort ou des blessures graves. 4 Poignée de commande La poignée du souffleur. -
Page 44: Options De Harnais De Batterie
Pour transporter jusqu' à deux batteries de la série AP sur la hanche. 4 Symboles de sécurité sur les produits Le BGA 200 peut être alimenté par une batterie en sac à dos Souffleur STIHL série AR. Il peut également être alimenté par une Les symboles de sécurité... -
Page 45: Batterie
Pour réduire tout risque de blessures ou de sécurité dans le présent manuel de la batterie et dommages matériel résultant d’un court-circuit, dans le manuel de l’outil électrique STIHL d’un incendie ou d’une explosion, gardez-la au alimenté par cette batterie. Une utilisation sec. -
Page 46: Consignes De Sécurité Importantes
■ Cet outil électrique peut être alimenté par une batterie en sac à dos STIHL série AR. Il peut également être alimenté Utilisation prévue par une batterie STIHL série AP en combinaison avec un AVERTISSEMENT sac de batterie STIHL AP avec cordon de connexion. -
Page 47: Utilisateur
– N’autorisez pas les mineurs à utiliser le souffleur. – Portez toujours des lunettes protectrices ou des lunettes de sécurité étanches ■ D’après les connaissances actuelles de STIHL, le moteur avec protection latérale adéquate qui électrique de ce souffleur ne devrait pas provoquer sont résistantes aux chocs et marqués... -
Page 48: Souffleur
■ Bien que certains accessoires non autorisés puissent être ■ Si le souffleur ou la batterie est endommagé, ne utilisés avec les souffleurs STIHL, leur utilisation peut fonctionne pas correctement, a été laissé à l’extérieur, s’avérer extrêmement dangereuse. Seuls sont exposé... -
Page 49: Utilisation Du Souffleur
– Si la prise est encrassée ou corrodée, apportez – Utilisez le souffleur uniquement de la manière l’appareil à votre distributeur agréé STIHL avant de décrite dans le présent manuel. l’utiliser. ■ L’utilisation d’un souffleur modifié, endommagé, mal réglé... - Page 50 AP avec les sangles de transport sur une à@ 12.3. épaule. – Si vous travaillez avec le sac à batterie STIHL AP avec cordon de raccordement, assurez-vous qu’il soit solidement fixé à la ceinture à batterie STIHL, au sac à dos pour batterie STIHL ou à une ceinture de travail à...
- Page 51 à batterie AP avec cordon de raccordement, ceinture – N’utilisez jamais le souffleur dans un endroit où se à batterie STIHL ou sac à dos pour batterie STIHL. trouvent des gaz, liquides, vapeurs, poussières inflammables ou autres matières et substances –...
- Page 52 français 5 CONSIGNES DE SÉCURITÉ IMPORTANTES contaminants aérosols, notamment ceux ayant une taille – Tenez les cheveux, les vêtements flottants, les de particules plus petites, peut causer des maladies doigts et toutes les parties du corps à distance des respiratoires ou autres. ouvertures et des pièces mobiles du souffleur.
-
Page 53: Maintenance, Réparation Et Rangement
– Respectez scrupuleusement les instructions de nettoyage et de maintenance dans la section 7 Sécurité de la batterie appropriée du présent manuel d’utilisation. – STIHL recommande de faire effectuer toutes les opérations de réparation par un distributeur agréé Avertissements et instructions STIHL. - Page 54 AP authentiques avec cet outil électrique. produire de la chaleur, se rompre, fuir, prendre feu ou ■ L’utilisation de batteries STIHL séries AR ou AP à des fins exploser, entraînant des blessures graves ou mortelles et autres que l’alimentation des outils électriques STIHL des dommages matériels.
-
Page 55: Avertissements Généraux Et Instructions
8 Avertissements généraux et instructions – Si le liquide pénètre dans vos yeux : ne pas frotter. – Si une batterie STIHL AP ou AR L a été Rincez les yeux ouverts à l’eau pendant au moins 15 exposée à la pluie pendant le travail, minutes et consultez un médecin. -
Page 56: Avant D'entreprendre Le Travail
► Réglez la buse,@ 13.1. explosion. ► Fixez et ajustez la batterie en sac à dos STIHL AR, la ■ Dans certaines circonstances, un usage abusif peut ceinture à batterie STIHL ou le sac à dos pour batterie provoquer des projections de liquide de la batterie. -
Page 57: Charge
La capacité d’un circuit électrique domestique classique est rouge avant de s’éteindre. Une fois que la DEL s’éteint, de 15 à 20 A. Un seul chargeur STIHL AL 500 consomme l’auto-test terminé et le chargeur est prêt à charger la environ 4,8 A. -
Page 58: Del De Diagnostic Et Signaux Sonores
► Chargez uniquement les batteries série STIHL AP avec Les DEL sur la batterie AR s'allument en vert et indiquent des chargeurs originaux de la série STIHL AL 101, AL 300 l'état de charge. ou AL 500. - Page 59 Si trois DEL clignotent lorsque vous actionnez la gâchette : ..l’outil électrique présente un dysfonctionnement électrique. N’utilisez pas l’outil électrique. Faites-la vérifier par un distributeur agréé STIHL avant de l’utiliser ou de l’entreposer. Pour les informations de dépannage, @ 23. 1 Un bip court Le signal acoustique fonctionne comme il se doit.
-
Page 60: Batterie Stihl Ap
électrique présente un dysfonctionnement électrique. N’utilisez pas l’outil électrique. Faites-la vérifier par un distributeur agréé STIHL avant de l’utiliser ou de 12.1 Batterie en sac à dos STIHL AR L l’entreposer. Pour les informations de dépannage, @ 23. 12.1.1 Réglage du harnais de batterie en fonction de la hauteur de l'opérateur... - Page 61 français 12 Utilisation d’un harnais de batterie dessous.. Positionnez et fixez toujours le cordon de raccordement de manière à ce qu'il n'interfère pas avec la technique de travail décrite dans le manuel d'instructions de l'outil électrique que vous utilisez ou avec votre capacité à garder le contrôle de l'outil électrique.
- Page 62 français 12 Utilisation d’un harnais de batterie ► Attachez la sangle pectorale (1) et réglez-la de manière à ce qu'elle s'adapte confortablement mais solidement à votre poitrine. Vous pouvez ajuster la longueur du cordon de raccordement en faisant une boucle autour du sommet (illustration C) ou du côté...
-
Page 63: Batterie En Sac À Dos Stihl Ar
12 Utilisation d’un harnais de batterie 12.2 Batterie en sac à dos STIHL AR lequel l'outil électrique est maintenu et contrôlé. Ne laissez pas le cordon de raccordement osciller le long de votre 12.2.1 Positionnement et réglage du cordon de raccordement corps ni pendre sur votre côté. -
Page 64: Fixation Du Protège-Hanche Confort Au Harnais De
français 12 Utilisation d’un harnais de batterie ► Serrez et réglez la ceinture (2) de manière à ce qu’elle Le protège-hanche doit être monté sur le côté droit de repose confortablement mais fermement sur vos hanches. l'opérateur. ► Attachez la sangle pectorale (1) et réglez-la de manière à Pour fixer le protège-hanche : ce qu'elle s'adapte confortablement mais solidement à... -
Page 65: Sac À Dos Pour Batterie Stihl
AVERTISSEMENT Arrangez le cordon de raccordement de manière appropriée Le sac à batterie STIHL Extra AP peut être monté au points pour l’empêcher d’entrer en contact avec l’outil de coupe ou d’attache en haut (illustration D) ou en bas (illustration E) d’être saisi par d’autres objets, ce qui risquerait de vous... - Page 66 français 12 Utilisation d’un harnais de batterie ► Répétez le processus avec la sangle horizontale (4) et Pour faire passer le cordon de raccordement à travers le son anneau (3). guide dans la bretelle : ► Si vous fixez le sac de batterie en position basse, tirez la ►...
-
Page 67: Fixation Du Protège-Hanche Au Harnais De
français 12 Utilisation d’un harnais de batterie 12.4.3 Passage et ajustement du sac à dos pour batterie ► Réglez les sangles du harnais de manière à ce que le sac à dos repose fermement et de manière stable contre votre dos. -
Page 68: Ceinture À Batterie Stihl
12 Utilisation d’un harnais de batterie 12.6 Ceinture à batterie STIHL ► Fixez l’attache rapide (5) fournie avec le protège-hanche à la sangle du harnais (4). 12.6.1 Montage du sac à batterie AP sur la ceinture à batterie ► Fixez l’autre attache rapide (6) fournie avec le protège- STIHL hanche à... -
Page 69: 13 Réglage Du Souffleur
français 13 Réglage du souffleur La longueur du cordon de raccordement peut être réglée en faisant une boucle (1) et en la fixant au dessus du sac de batterie (3) avec le crochet et la boucle à oeillet (2). ► Positionnez et fixez toujours le cordon de raccordement de façon à... -
Page 70: Insertion Et Retrait Du Cordon De Raccordement
Pour insérer le cordon de raccordement : uniquement les accessoires livrés ou expressément autorisés par STIHL, @ 5.5. La buse peut être réglée sur le tube du souffleur dans trois positions différentes pour s’adapter à la hauteur et la portée des bras de l’utilisateur et à... -
Page 71: Mise En Marche Et Arrêt Du Souffleur
français 15 Mise en marche et arrêt du souffleur Pour retirer le cordon de raccordement : Avant la mise en marche : ► Relâchez le bouton de déclenchement. ► Assurez-vous d’avoir une position stable et sécurisée. ► Tenez-vous debout. ► Utilisez toujours le souffleur avec votre main droite placée fermement sur la poignée de commande. -
Page 72: Mise À L'arrêt
électroniquement par verrou de retenue dès que les DEL bouton de blocage de la gâchette, apportez le souffleur cessent de clignoter (après environ 5 secondes). chez un distributeur agréé STIHL pour la faire réparer avant de l’utiliser. 16 Vérification des commandes ►... -
Page 73: Pendant L'utilisation
français 17 Pendant l’utilisation 17.2 Utilisation du bouton de maintien de 17 Pendant l’utilisation l’alimentation Vous pouvez régler et maintenir la force de soufflage sélectionnée en appuyant sur le bouton de maintien de 17.1 Sélection du niveau de puissance l'alimentation. L’appareil peut fonctionner à... -
Page 74: Utilisation Du Souffleur
français 18 Après avoir terminé le travail Pour activer la fonction Boost : ► Maintenez fermement l’appareil avec votre main, en gardant la poignée prise en tenaille entre le pouce et les ► Passez outre la position de fin de course (1) de la doigts. -
Page 75: Transport
français 19 Transport ► Si le souffleur devient humide pendant le fonctionnement, AVERTISSEMENT laissez-le sécher séparément et complètement avant la Pour réduire tout risque d’activation involontaire, charge ou l’entreposage. n’entreposez jamais le souffleur avec le cordon de raccordement inséré. Retirez toujours le cordon de 19 Transport raccordement avant l’entreposage. -
Page 76: Nettoyage Des Surfaces De Contact Du Cordon De
français 21 Nettoyage AVIS Ne jamais arroser l’outil électrique avec de l'eau. L'arroser avec un jet d'eau pourrait endommager l'électronique et d'autres systèmes. 21.2 Nettoyage des surfaces de contact du cordon de raccordement ► Retirez le cordon de raccordement, @ 14.2. ►... -
Page 77: Inspection Et Maintenance
@ 6.1. Effectuez uniquement les opérations de maintenance décrites dans le présent manuel. Aucune réparation ne peut être effectuée par l’utilisateur. STIHL recommande de faire effectuer les opérations de réparation par un distributeur agréé STIHL. Pour une maintenance correcte du souffleur : ►... -
Page 78: Guide De Dépannage
La charge de la ► Chargez la batterie de la manière décrite dans le manuel en vert. batterie est d’utilisation. insuffisante. Série STIHL AR : quatre bips longs sont émis (AR L - six bips). 1 DEL s’allume Batterie trop chaude ►... - Page 79 La batterie n’est pas ► Chargez la batterie de la manière décrite dans le manuel insuffisante. entièrement d’utilisation. chargée. La durée de vie utile ► Faites vérifier la batterie par un distributeur agréé STIHL. de la batterie est atteinte ou dépassée. 0458-812-8221-A...
-
Page 80: Spécifications
Pour des informations techniques concernant les batteries dans votre région pour obtenir de l’assistance. de la série STIHL AP et de la série STIHL AR / AR L voir les informations produit qui accompagnent votre batterie. Pour des informations techniques concernant les chargeurs 24.4 Déclaration de conformité... -
Page 81: Élimination
Le scellé de la RBRC indique que le recyclage de la batterie 26 Élimination a été prépayé par STIHL. Le RBRC dispose d’un numéro d’appel gratuit (1-800-822-8837) qui vous permet d’obtenir des informations sur les centres de recyclage des batteries 26.1 Mise au rebut de l’outil électrique... - Page 82 français 26 Élimination 0458-812-8221-A...
- Page 84 0458-812-8221-A www.stihl.com *04588128221A* 0458-812-8221-A...
Need help?
Do you have a question about the BGA 200 and is the answer not in the manual?
Questions and answers