Table of Contents
Advertisement
Quick Links
Advertisement
Table of Contents

Related Manuals for Carrier 16LJ-01


Summary of Contents for Carrier 16LJ-01
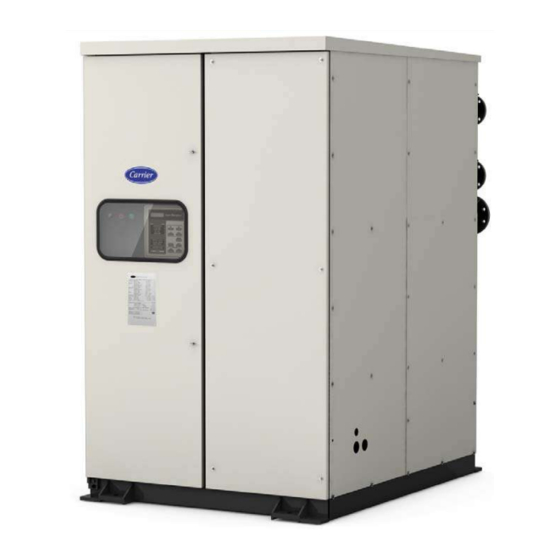
- Page 1 Absorption Chiller INSTALLATION MANUAL 16LJ-01,02,03 Original instructions...
- Page 2 Notes to Users Thank you for purchasing Carrire Absorption Chiller. Refer to this manual before Absorption Chiller would be installed. Product Information If you have problems of questions concerning your chiller, you will need the following information. Model and serial numbers are on the nameplate on the bottom of the control panel.
-
Page 3: Table Of Contents
Absorption Chiller Installation Manual < Hot water Fired type> Contents 0. SUMMARIERS OF PRODUCT CHARACTERISTICS ………………………………………0 1. INSTALLATION 1-1. USE ENVIRONMENT ………………………………………………………………1 1-2. SAFETY INSTALLATION ………………………………………………………………7 1-3. DELIVERY INSPECTION ………………………………………………………………7 1-4. RIGGING ………………………………………………………………8 1-5. SLIDING ………………………………………………………………8 1-6. SETTING ON THE FOUNDATION ………………………………………………………………8 1-7. -
Page 4: Summariers Of Product Characteristics
0-3. Business name and address (1) Manufacturer Business name : Panasonic Corporation Address : 1-1-1 Sakata, Oizumi-machi,, Ora-gun,,Gunma 370-0596,Japan (2) Importer Business name: Carrier S.A.S Address : BP 49-Route de Thil Q1122 MONTLUEL Cedex , France 0-4. Noise data Model : 16LJ-... -
Page 5: Installation
For CE, please connect to power source by overvoltage category Ⅲ, and to other wiring by overvoltage category Ⅱ. 1-1-3. Altitude Please install Absorption Chiller at a height of less than 1000m above sea level. If the location is higher than 1000m above sea level, please contact Carrier agent. - Page 6 SAFETY PRECAUTIONS 1-1-4. SAFETY PRECAUTIONS * Before operating this chiller, you should first thoroughly read the following instructions. * All precautions are classified into either WARNING or CAUTION. WARNING: Failure to observe this instruction may result in serious injury or death. CAUTION : Failure to observe this instruction may cause an injury or failure of chiller.
- Page 7 SAFETY PRECAUTIONS DO NOT TOUCH HIGH VOLTAGE LEAD WIRE Do not touch high voltage lead wire to prevent electric shocks. Do not touch KEEP FLAMMABLES AWAY FROM THE CHILLER Do not place any flammables (gasoline, thinner, etc.) close to the chiller, flue, chimney and oil tank to prevent a fire.
- Page 8 SAFETY PRECAUTIONS CAUTION SOLVE ALL THE PROBLEMS BEFORE DO NOT PLACE HEAVY OBJECTS ON THE RESTARTING THE CHILLER CHILLER OR CONTROL PANEL Solve all the problems before restarting the Do not place heavy objects on the chiller when the safety device or chiller or control panel to avoid security device operates, to prevent a fire.
- Page 9 SAFETY PRECAUTIONS NEVER CHANGE THE SET VALUE STOP THE OPERATION WHEN BLACK SMOKE RISES Never change the set value of the safety Stop the operation when black smoke and/or protective devices. Wrong setting rises and call service agent, to prevent may damage the chiller/heater or cause a a fire by poor combustion.
- Page 10 SAFETY PRECAUTIONS 1-1-2. Safety precautions for repair, moving or rejection WARNING ONLY AUTHORIZED PERSONNEL SHOULD OVERHAUL THE CHILLER Only those who are authorized should overhaul the chiller. Incomplete service could result in electric shocks or a fire. Prohibited CAUTION ONLY AUTHORIZED PERSONNEL SHOULD ONLY AUTHORIZED PERSONNEL SHOULD REMOVE OR REPAIR THE CHILLER DISPOSE OF THE CHILLER...
-
Page 11: Safety Installation
Take measures to prevent unauthorized people from entering installation site during installation work. 1-3. DELIVERY INSPECTION Upon delivery of the Carrier Chiller/Heater(s) to the job site, the owner or his designated representative should carefully inspect the Chiller for the following items: 1-3-1. -
Page 12: Rigging
1-4. RIGGING In case that a chiller is lifted up, check first weight of the chiller by referring its contract specifications and then choose and use suitable lifting wires and shackles. Since 4 holes are provided on the conners of upper tube sheet, use the holes to lift the chiller. Note that the angle of wires shall be within 60 deg. -
Page 13: Leveling
1-7.LEVELING ・Turn bolts for level adjustment until the sinker fit the center of the pipe. ・The pipe for level adjustment appier the bottom of control panel side(LJ-01) or power box side(LJ-02/03). ・Insert plates between level adjustment bolts and foundation. ・Don't implant level adjustment bolts into the foundution. ・Be sure to install the chiller horizontally. -
Page 14: Field Piping
1-8. FIELD PIPING 1-8-1. Connect each pipe according to Exhibit E. (1) Make all necessary connections to the building water systems: chilled, hot and cooling water. Ensure that all piping is adequately supported and that no strain is placed on the Chiller nozzles and connecting flanges. - Page 15 Pipe for non-condensable gas going from Pipe for non-condensable gas going from Pipe for diluted LiBr solution to purge lower shell (Abso + Evap) to purge unit lower shell (Abso + Evap) to purge unit from absorbent pump to purge unit Scope of customer Rupture disk Driving hot water...
- Page 16 Exhibit B Shipping dimensions Weight Weight Weight TSA-16 Bottle LJ-01 1,745 1,255 1,820 1,665 LJ-02 2,450 1,255 2,380 2,135 LJ-03 2,450 1,435 2,720 2,420 Note. 1) Above dimensions are not included packing size. 2) Weight data is included solution for initial charge. 3) Weight data is dry shipping (without solution) of the chiller .
-
Page 17: Exhibit C
Exhibit C Foundation 1490 LJ-01 1140 Anchor bolt foundation 1240 1490 1670 LJ-02 LJ-03 1040 1220 1240 1420 Note) indicates the machine base. The machine base has a 30 mm diameter hole for the anchor bolt. The anchor bolt should be fixed as shown in the detail drawing. There should be a drain channel around the foundation. - Page 18 General remarks on piping 1) Equipment and parts outside the area surrounded by 11) Provide an air vent valve in each of the chilled, the broken line are not supplied by Carrier. cooling and hot water line at a point higher than 2) For pipe connections and diameter refer to the the header.
- Page 19 Connections Size CHW in 2 inch CHW out 2 inch Exhibit D Dimensions LJ-01 COW in 3 inch COW out 3 inch HOW in 2 inch Tube removal HOW out 2 inch Rupture disc 2 inch For Power supply φ53(hole) For Signal wire φ35(hole) Connections are used DIN 10 flange.
- Page 20 Connections Size CHW in 2 1/2 inch CHW out 2 1/2 inch Exhibit D Dimensions LJ-02 COW in 4 inch COW out 4 inch HOW in 2 1/2 inch Tube removal HOW out 2 1/2 inch Rupture disc 2 inch For Power supply φ53(hole) For Signal wire...
- Page 21 Connections Size CHW in 2 1/2 inch CHW out 2 1/2 inch Exhibit D Dimensions LJ-03 COW in 4 inch COW out 4 inch Tube removal HOW in 2 1/2 inch HOW out 2 1/2 inch Rupture disc 2 inch For Power supply φ53(hole) For Signal wire...
- Page 22 Exhibit D Rupture disk Remarks 1 Rupture disk 2 Field supply 3 Discharge pipe 4 Support 5 Tank (Above 1 m (35 cubic feet)) 6 Vent pipe 7 Drain Notes) 1) The rupture disk is factory-mounted on the chiller(/heater). 2) Install a receiver tank for the solution. The tank volume is approx.
- Page 23 Exhibit F Field electric wiring Power panel of Field supply panel chiller To power sauce CE: 3phase 50Hz 400V Chilled water pump interlock 52CH (Synchronized with the pump running) DC 24V 10mA Cooling water pump interlock 52CO (Synchronized with the pump running) Control panel of In case of hot water chiller...
- Page 24 Exhibit F Power supply connection Chiller Power panel Terminal in the Power panel 3 phase 400V 50Hz...
- Page 25 Exhibit F Pump start/stop & interlock connection Be sure to connect wires below. Chiller Control panel Terminal in the control panel 52CH Chilled water pump interlock 52CO Cooling water pump interlock Chilled water pump start/stop signal Cooling water pump start/stop signal In the control panel Field wiring Terminal in the control panel...
- Page 26 Exhibit F Remote signal connection Unit can be operate by following signals; 1) Non-voltage Normal open contact for start & stop (DC24V 10mA) Wiring the terminal 324 and 323, connect 170 and 326. Continuous signal Jump 2) Non-voltage Normal open contact for start (DC24V 10mA) Wiring the terminal 324 and 323, connect 170 and 326.
- Page 27 Exhibit F Remote setting of Chilled water outlet temp. Control panel of Chiller 732 733 Terminal strips in the control panel Input current : DC 4-20mA DC 4 - 20 mA Cooling mode : +0 to +5 C(+9 (Field supply) Heating mode : (TSA-16DJ only) -0 to -10...
- Page 28 Exhibit H LiBr solution material safty data sheet...
Need help?
Do you have a question about the 16LJ-01 and is the answer not in the manual?
Questions and answers