Hikmicro G Series User Manual
Handheld thermal camera
Hide thumbs
Also See for G Series:
- User manual (96 pages) ,
- Quick start manual (87 pages) ,
- User manual (65 pages)
Table of Contents
Advertisement
Quick Links
Advertisement
Table of Contents

Related Manuals for Hikmicro G Series


Summary of Contents for Hikmicro G Series
- Page 1 Handheld Thermal Camera HIKMICRO G Series User Manual Contact Us...
- Page 2 WITHOUT LIMITATION, MERCHANTABILITY, SATISFACTORY QUALITY, OR FITNESS FOR A PARTICULAR PURPOSE. THE USE OF THE PRODUCT BY YOU IS AT YOUR OWN RISK. IN NO EVENT WILL HIKMICRO BE LIABLE TO YOU FOR ANY SPECIAL, CONSEQUENTIAL, INCIDENTAL, OR INDIRECT DAMAGES,...
- Page 3 Handheld Thermal Camera HIKMICRO G Series User Manual ESPECIALLY, YOU ARE RESPONSIBLE, FOR USING THIS PRODUCT IN A MANNER THAT DOES NOT INFRINGE ON THE RIGHTS OF THIRD PARTIES, INCLUDING WITHOUT LIMITATION, RIGHTS OF PUBLICITY, INTELLECTUAL PROPERTY RIGHTS, OR DATA PROTECTION AND OTHER PRIVACY RIGHTS.
- Page 4 Handheld Thermal Camera HIKMICRO G Series User Manual Regulatory Information Note These clauses apply only to the products bearing the corresponding mark or information. FCC Compliance Statement Please take attention that changes or modification not expressly approved by the party responsible for compliance could void the user's authority to operate the equipment.
- Page 5 Handheld Thermal Camera HIKMICRO G Series User Manual under the EMC Directive 2014/30/EU, RE Directive 2014/53/EU, the RoHS Directive 2011/65/EU This product and - if applicable - the supplied accessories too are marked with "UKCA" and comply therefore with the following directives: Radio Equipment...
- Page 6 Handheld Thermal Camera HIKMICRO G Series User Manual 2012/19/EU (WEEE directive): Products marked with this symbol cannot be disposed of as unsorted municipal waste in the European Union. For proper recycling, return this product to your local supplier upon the purchase of equivalent new equipment, or dispose of it at designated collection points.
- Page 7 Handheld Thermal Camera HIKMICRO G Series User Manual *For G31, G41, G61, please pay attention to ce matériel est conforme aux limites de dose the following notes when the device is d'exposition aux rayonnements, CNR-102 operating in 5 GHz: énoncée dans un autre environnement.
- Page 8 Handheld Thermal Camera HIKMICRO G Series User Manual Symbol Conventions The symbols that may be found in this document are defined as follows. Symbol Description Indicates a hazardous situation which, if not avoided, will or could Danger result in death or serious injury.
- Page 9 Handheld Thermal Camera HIKMICRO G Series User Manual Safety Instruction These instructions are intended to ensure that user can use the product correctly to avoid danger or property loss. Laws and Regulations Use of the product must be in strict compliance with the local electrical safety regulations.
- Page 10 ● Technical Support The https://www.hikmicrotech.com/en/contact-us/ portal will help you as a HIKMICRO customer to get the most out of your HIKMICRO products. The portal gives you access to our support team, software and documentation, service contacts, etc. Emergency If smoke, odor, or noise arises from the device, immediately turn off the power, unplug the ●...
- Page 11 Handheld Thermal Camera HIKMICRO G Series User Manual Laser maintenance: It is not necessary to maintain the laser regularly. If the laser does not work, the laser assembly needs to be replaced in the factory under warranty. Keep the device power off when replacing laser assembly.
-
Page 12: Table Of Contents
Handheld Thermal Camera HIKMICRO G Series User Manual Contents Chapter 1 Overview ........................1 1.1 Device Description ......................... 1 1.2 Main Function ........................1 1.3 Appearance ..........................3 Chapter 2 Preparation ........................ 5 2.1 Charge Device ........................5 2.1.1 Charge Device via Cable Interface ................. 5 2.1.2 Charge Device via Charging Base .................. - Page 13 Handheld Thermal Camera HIKMICRO G Series User Manual 3.4.1 Set Alarm Mode Palettes .................... 23 3.4.2 Set Focus Mode Palettes ..................... 23 3.5 Adjust Display Temperature Range ..................24 3.6 Adjust Digital Zoom ......................26 3.7 Display OSD Info ........................26 Chapter 4 Temperature Measurement ..................
- Page 14 Handheld Thermal Camera HIKMICRO G Series User Manual 6.3.3 Edit Images ........................48 6.4 Export Files ........................... 49 Chapter 7 Calculate Area Size ....................50 Chapter 8 Distance Detection ....................51 Chapter 9 Geographic Location Display ..................52 Chapter 10 Direction Display ....................53 10.1 Calibrate Compass ......................
- Page 15 Handheld Thermal Camera HIKMICRO G Series User Manual 19.4 Device Communication Matrix ..................65...
-
Page 16: Chapter 1 Overview
Handheld Thermal Camera HIKMICRO G Series User Manual Chapter 1 Overview 1.1 Device Description Handheld Thermal Camera is a device with both optical images and thermal images. It can measure temperature and distance, record videos, take snapshots, and trigger alarms. It can also connect to Wi-Fi, hotspot and Bluetooth. - Page 17 Client Software Connection Mobile Phone: Use HIKMICRO Viewer to view live image, capture snapshots, and record videos ● on your phone. You can also, analyze pictures offline, generate and share a report via the app.
-
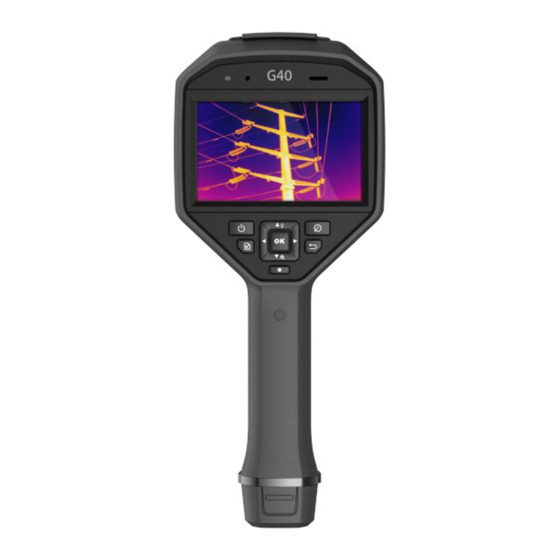
Page 18: Appearance
Handheld Thermal Camera HIKMICRO G Series User Manual 1.3 Appearance Figure 1-1 Appearance Note The interface of the device may vary according to different models. Please refer to the actual ● product. The warning sign is under the laser and on the left of the device. - Page 19 Handheld Thermal Camera HIKMICRO G Series User Manual Table 1-1 Interface Description Component Function Laser Button Hold the button to turn on laser, and release the button to turn off laser. Navigation Menu Mode: Button Press , and to select parameters.
-
Page 20: Chapter 2 Preparation
Handheld Thermal Camera HIKMICRO G Series User Manual Chapter 2 Preparation 2.1 Charge Device Caution The built-in cell battery that powers the real time clock (RTC) of the device may drain during longtime transportation or storage. It is recommended to recharge the RTC battery for the well- functioning of the device clock. -
Page 21: Mount Hand Strap
Handheld Thermal Camera HIKMICRO G Series User Manual Figure 2-1 Remove Battery Base 2. Hold the lock catches, and draw the battery base to take out the battery. 3. Insert the battery into the charging base. You can see the charging status via the pilot lamp on the charging base. - Page 22 Handheld Thermal Camera HIKMICRO G Series User Manual Figure 2-3 Insert Upper Part of Hand Strap 2. Fit the buckle on the device and tighten the screw with the supplied wrench. 3. Thread the lower part of the hand strap through the hole at the base of the device. Secure the hand strap with the hook-and-loop fastener.
-
Page 23: Mount Protective Cover
Handheld Thermal Camera HIKMICRO G Series User Manual 2.3 Mount Protective Cover Attach the protective cover when the device is not in use. Steps 1. Align the threaded hole of the device with the mounting hole of the lens cover. - Page 24 Handheld Thermal Camera HIKMICRO G Series User Manual Figure 2-6 Rotate the Decorative Ring 2. Align the two dots on the interchangeable lens and the device. Figure 2-7 Align the Dots 3. Rotate the interchangeable lens clockwise to fix it.
-
Page 25: Calibrate Interchangeable Lens
Handheld Thermal Camera HIKMICRO G Series User Manual Figure 2-9 Dismount the Lens Note When a new interchangeable lens is mounted on the device, it takes about 2 minutes to achieve accurate temperature measurement. Before that, ~ is added before the temperature value. ~ disappears after the device can accurately measure the temperature. - Page 26 Handheld Thermal Camera HIKMICRO G Series User Manual Note The instruction window pops up immediately after mounting the lens. If you accidentally exit the calibration program, go to Settings → Capture Settings → Calibrate for Interchangeable Lens to enter again.
-
Page 27: Power On/Off
Handheld Thermal Camera HIKMICRO G Series User Manual What to do next After the lens is calibrated, you can check the lens information at Settings → Device Settings → Device Information and see the lens type (0.5×, 2×, etc.) on the observation interface. -
Page 28: Operation Method
Handheld Thermal Camera HIKMICRO G Series User Manual Press to wake the device up. Device Sleep, Scheduled Capture and Video Recording When the device is recording a video clip or on scheduled capturing, auto sleep will not be triggered. However, press will stop the video recording or scheduled capture and force the device into sleep mode. -
Page 29: Menu Description
Handheld Thermal Camera HIKMICRO G Series User Manual 2.8 Menu Description Live View Interface Device screen display the live view of thermal camera after starting-up. Figure 2-13 Live View Table 2-1 Live View Interface Description Descriptions Status bar, where device working status, such as, battery and connections, are displayed. - Page 30 Handheld Thermal Camera HIKMICRO G Series User Manual Descriptions Note If a "~" appears before a temperature value, it means that your device is not well prepared for accurate temperature measurement. Take target temperatures when the sign disappears. Main menu icon. Press or tap to call main menu.
- Page 31 Handheld Thermal Camera HIKMICRO G Series User Manual Figure 2-15 Swipe-down Menu Table 2-3 Swipe-down Menu Description Descriptions Turn on/ o ff Wi-Fi. For Wi-Fi configuration, see Connect Device to Wi-Fi for instructions. Turn on/ o ff bluetooth. For bluetooth configuration, see Pair Bluetooth Devices for instructions.
- Page 32 Handheld Thermal Camera HIKMICRO G Series User Manual Descriptions Enter/exit route inspection mode. For route instruction introduction and usage guide, see Route Inspection for more information. Adjust screen brightness.
-
Page 33: Chapter 3 Display Settings
Handheld Thermal Camera HIKMICRO G Series User Manual Chapter 3 Display Settings Note Your device will periodically perform a self-calibration to optimize image quality and measurement accuracy. In this process the image will pause briefly and you'll hear a "click" as a shutter moves in front of the detector. -
Page 34: Laser Assisted Focus
Handheld Thermal Camera HIKMICRO G Series User Manual 3.1.2 Laser Assisted Focus Aim the laser at the target and the device focuses automatically. Before You Start It is recommended to use this function in a non-glare environment, such as indoor environment. -
Page 35: Continuous Autofocus
Handheld Thermal Camera HIKMICRO G Series User Manual Figure 3-2 Switching Focus Note DO NOT adjust the focus ring when the device is auto focusing, otherwise it will interrupt the ● auto focusing process. If the target is not clearly focused in this mode, adjust the focus ring to fine-tune the image. -
Page 36: Set Display Mode
Handheld Thermal Camera HIKMICRO G Series User Manual Table 3-1 Screen Brightness Adjustment Method Operation Manual Go to Settings → Device Settings → Screen Brightness to adjust the screen brightness. Or tap , and drag it to adjust the screen brightness. -
Page 37: Set Palettes
Handheld Thermal Camera HIKMICRO G Series User Manual In Visual mode, the device displays the optical view. In Blending mode, the device displays the mixture view of thermal and optical channels. Press to adjust the Optical Level. The lower the value is, the denser the optical effect is. -
Page 38: Set Alarm Mode Palettes
Handheld Thermal Camera HIKMICRO G Series User Manual 3.4.1 Set Alarm Mode Palettes Alarm mode palettes allows to mark the targets of certain temperature range with a different color from the rest. Steps 1. Select Palettes from the main menu. -
Page 39: Adjust Display Temperature Range
Handheld Thermal Camera HIKMICRO G Series User Manual Table 3-3 Icon Description Icon Palettes Mode Description Above Focus Set the temperature threshold, and the targets with the temperature higher than the set value are displayed with fusion palettes. Below Focus... - Page 40 Handheld Thermal Camera HIKMICRO G Series User Manual Figure 3-3 Level Only Adjustment You can adjust the temperature range in this mode by the following steps: a. Tap on an interest area of the screen. A circle is displayed around the area, and the temperature range readjusts to show as many details of the area as possible, according to the selected area.
-
Page 41: Adjust Digital Zoom
Handheld Thermal Camera HIKMICRO G Series User Manual a. Tap on an interest area of the screen. A circle is displayed around the area, and the temperature range readjusts to show as many details of the area as possible, according to the selected area. - Page 42 Handheld Thermal Camera HIKMICRO G Series User Manual The brand logo is a manufacturer logo displayed on the upper right corner of the screen. You can turn it off if not needed. Inspection Image Display the inspection image.
-
Page 43: Chapter 4 Temperature Measurement
Handheld Thermal Camera HIKMICRO G Series User Manual Chapter 4 Temperature Measurement The thermography (temperature measurement) function provides the real-time temperature of the scene and display it on the left of your screen. The thermography function is turned on by default. -
Page 44: Set Unit
Handheld Thermal Camera HIKMICRO G Series User Manual Set temperature of the external optical material (e.g.: germanium window). 3. Return to previous menu to save the settings. Note You can go to Settings → Device Settings → Device Initialization → Remove All Measurement Tools to initialize the temperature measurement parameters. -
Page 45: Set Measurement Tool
Handheld Thermal Camera HIKMICRO G Series User Manual Figure 4-1 Image Measurements 4.3 Set Measurement Tool You can set temperature measurement parameters to improve the accuracy of temperature measurement. Before You Start Set parameters such as Humidity, External Optics Transmittance and Reflection Temperature. For detailed explanations, see Set Measurement Parameters . -
Page 46: Measure By Custom Spot
Handheld Thermal Camera HIKMICRO G Series User Manual Figure 4-2 Temperature Measurement Tool What to do next Set temperature alarm, then alarm actions such as audible warning and flashing alarm will be triggered when the tested temperature exceeds the set alarm value. See Temperature Alarm . -
Page 47: Measure By Line
Handheld Thermal Camera HIKMICRO G Series User Manual 7. Optional: Modify the set custom spot tools, hide or display the tools and measurement results, etc. Tap to enter the editing interface and modify temperature measurement parameters such as emissivity and distance. -
Page 48: Measure By Rectangle
Handheld Thermal Camera HIKMICRO G Series User Manual Tap to hide or display the tool and measurement results. Tap to delete the tool. 8. Press to save and exit. 4.3.3 Measure by Rectangle Steps 1. Select 2. Press or tap to generate a default rectangle. -
Page 49: Measure By Circle
Handheld Thermal Camera HIKMICRO G Series User Manual 4.3.4 Measure by Circle Steps 1. Select 2. Press or tap to generate a default circle. 3. Move the circle to the required position. - Tap the circle, and press , and to move the circle up/down/left/right. -
Page 50: Measure Δt And Δt Alarm
Handheld Thermal Camera HIKMICRO G Series User Manual 4.4 Measure ΔT and ΔT Alarm By comparing the temperature difference (ΔT) between measurement tools, or between a measurement tool and a fixed temperature, device can recognize temperature exception more accurately and rapidly. This function is commonly applied to measure temperature-sensitive targets such as current transformers. -
Page 51: Temperature Alarm
Handheld Thermal Camera HIKMICRO G Series User Manual 4.5 Temperature Alarm When the temperature of targets triggers the set alarm, the device will perform configured actions, such as, flashing the rule frame, making an audible warning, or sending notification to the client software. -
Page 52: Chapter 5 Route Inspection
- Connect your PC to the device hotspot. Turn on and set up device hotspot by Settings → Connections → Hotspot . See Set Device Hotspot for more instructions. 4. Click Device Management to add your device into the client. See the user manual of HIKMICRO Inspector for instructions. -
Page 53: Perform Route Inspection
Connect the device to the PC client, and make sure that your device has received inspection ● tasks from the PC client. See the user manual of HIKMICRO Inspector for instructions of applying inspection task to the device. Use HIKMICRO Inspector v1.2.0.100 or newer versions to acquire full product functionality. - Page 54 Handheld Thermal Camera HIKMICRO G Series User Manual Figure 5-2 Inspection Task List 3. Select a task and press to switch to the task. Note The font of task in progress is blue on the list. 4. Browse the inspect points and check the inspection requirements for each point.
- Page 55 Handheld Thermal Camera HIKMICRO G Series User Manual Table 5-1 Inspect Point Details Descriptions Inspection task name. Inspect point list. Press to select an inspect point and check the point details. Display inspect point details. Point reference images. They show the parts and angles of targets required for inspection.
-
Page 56: Upload Inspection Result And View Report
Handheld Thermal Camera HIKMICRO G Series User Manual 5.3 Upload Inspection Result and View Report Upload the inspection results to the client software for central management and report generation. Before You Start Connect your device with the PC that has the client software installed. See the step of device connection in Create Inspection Route and Send Task to Device for instructions. - Page 57 HIKMICRO Analyzer should be installed in your PC. Download the program from https:// ● www.hikmicrotech.com/en/industrial-products/hikmicro-analyzer-software/ . For the operations instructions in HIKMICRO Analyzer, read the user manual from Help → ● User Manual . Please keep HIKMICRO Analyzer up-to-date for the best compatibility and user experience.
-
Page 58: Chapter 6 Picture And Video
Handheld Thermal Camera HIKMICRO G Series User Manual Chapter 6 Picture and Video Insert memory card into the device, and then you can record videos, capture images, and mark and save important data. Note Device does not support capturing or recording when the menu is shown. - Page 59 Handheld Thermal Camera HIKMICRO G Series User Manual Figure 6-1 Editing Image Before Saving Table 6-1 Editing Options Descriptions Text Note Select text note and enter the editing page. Tap on screen to input content and press to save. Voice Note a.
-
Page 60: Record Video
Handheld Thermal Camera HIKMICRO G Series User Manual Objective Settings Note If the targets are in poor light condition, enable Flashlight. The device turns on the flashlight when capturing images. Set the naming rule The default image naming is filename header + saving time. Filename for images. -
Page 61: View And Manage Local Files
Handheld Thermal Camera HIKMICRO G Series User Manual Recorded videos are saved in .mp4 format. These video clips can be played on local device, and any player that support this format (HIKMICRO Analyzer does not support playing this video format.). -
Page 62: Manage Files
Handheld Thermal Camera HIKMICRO G Series User Manual 1) Tap in upper right corner to add an album. 2) Edit the album name. 3) Press to save the album. 3. Rename, delete or set an album as the default saving album. -
Page 63: Edit Images
Handheld Thermal Camera HIKMICRO G Series User Manual If you tap delete, files are deleted after confirmation. ● If you tap move, select a target album to start moving. ● 6.3.3 Edit Images Editing the text or voice notes saved with the images, and changing the thermal parameters are allowed on your thermal camera. -
Page 64: Export Files
For the first time connection, the driver will be installed automatically. What to do next You can import the captured snapshots to HIKMICRO Analyzer for further data analysis. See the User Manual of HIKMICRO Analyzer (embedded in the client software, Help → User Manual ) for the operation guide. -
Page 65: Chapter 7 Calculate Area Size
Handheld Thermal Camera HIKMICRO G Series User Manual Chapter 7 Calculate Area Size The device can calculate the size of rectangles and show results on screen. Steps 1. Go to Settings → Measurement Settings → Area Size Calculation . 2. Enable Area Size Calculation. -
Page 66: Chapter 8 Distance Detection
Handheld Thermal Camera HIKMICRO G Series User Manual Chapter 8 Distance Detection The laser range finder consists of a laser transmitter and a laser receiver. The device detects the distance to a target by measuring the time it takes for a laser pulse to reach the target and return to the laser receiver. -
Page 67: Chapter 9 Geographic Location Display
Handheld Thermal Camera HIKMICRO G Series User Manual Chapter 9 Geographic Location Display Equipped with satellite positioning modules, the device is able to display its longitude and latitude on the live image and in the captured images. Note The function is only supported by certain models. -
Page 68: Chapter 10 Direction Display
Handheld Thermal Camera HIKMICRO G Series User Manual Chapter 10 Direction Display Equipped with a compass, the device is able to display its direction on the live image and in the captured images. Note The function is supported by certain models. -
Page 69: Magnetic Declination Correction
Handheld Thermal Camera HIKMICRO G Series User Manual Note During calibration, keep moving and rotating the device to make sure that the device faces every possible directions. 3. Stop moving the device when calibration success message pops up. Result The status bar in the live view interface shows after successful calibration. -
Page 70: Chapter 11 Thermal View Mobile Client Connection
Handheld Thermal Camera HIKMICRO G Series User Manual Chapter 11 Thermal View Mobile Client Connection The device supports both Wi-Fi connection and hotspot. Connect the device to HIKMICRO Viewer, and you can control the device via mobile client. 11.1 Connect via Wi-Fi Before You Start Download and install HIKMICRO Viewer on your phone. -
Page 71: Chapter 12 Connect Device To Wi-Fi
Handheld Thermal Camera HIKMICRO G Series User Manual Chapter 12 Connect Device to Wi-Fi Steps 1. Go to Settings → Connections → WLAN . 2. Tap to enable Wi-Fi, and the searched Wi-Fi will be listed. Figure 12-1 Wi-Fi List 3. -
Page 72: Chapter 13 Set Device Hotspot
Handheld Thermal Camera HIKMICRO G Series User Manual Chapter 13 Set Device Hotspot With the device hotspot, other equipment with Wi-Fi function can join the device for data transmission. Steps 1. Go to Settings → Connections → Hotspot . 2. Tap to enable hotspot function. -
Page 73: Chapter 14 Pair Bluetooth Devices
Handheld Thermal Camera HIKMICRO G Series User Manual Chapter 14 Pair Bluetooth Devices Pair your camera with an external bluetooth device to play the audio recorded together with the videos and the images. Steps 1. Select from the main menu. -
Page 74: Chapter 15 Set Led Light
Handheld Thermal Camera HIKMICRO G Series User Manual Chapter 15 Set LED Light Press in live view to turn on/off the LED light. Or tap in the swipe-down menu to quickly turn on/off LED light. -
Page 75: Chapter 16 Cast Device Screen To Pc
Handheld Thermal Camera HIKMICRO G Series User Manual Chapter 16 Cast Device Screen to PC The device supports casting screen to PC by UVC protocol-based client software or player. You can connect the device to your PC via a type-C cable, and cast the real-time live view of the device to your PC. -
Page 76: Chapter 17 Image Local Output
Handheld Thermal Camera HIKMICRO G Series User Manual Chapter 17 Image Local Output You can view the image on the display unit for details with this function. Before You Start This function is only supported by the models with CVBS out interface or micro HDMI output ●... -
Page 77: Chapter 18 Maintenance
Handheld Thermal Camera HIKMICRO G Series User Manual Chapter 18 Maintenance 18.1 View Device Information Go to Settings → Device Settings → Device Information to view the device information. 18.2 Set Date and Time Steps 1. Go to Settings → Device Settings → Time and Date . -
Page 78: Initialize Memory Card
Handheld Thermal Camera HIKMICRO G Series User Manual 18.5 Initialize Memory Card When a memory card is use on the handheld thermal camera for the first time, it needs to be initialized first. Go to Settings → Device Settings → Device Initialization to initialize the memory card. -
Page 79: Chapter 19 Appendix
Handheld Thermal Camera HIKMICRO G Series User Manual Chapter 19 Appendix 19.1 Common Material Emissivity Reference Material Emissivity Human Skin 0.98 Printed Circuit Board 0.91 Concrete 0.95 Ceramic 0.92 Rubber 0.95 Paint 0.93 Wood 0.85 Pitch 0.96 Brick 0.95 Sand 0.90... -
Page 80: Device Command
Handheld Thermal Camera HIKMICRO G Series User Manual 19.3 Device Command Scan the following QR code to get device common serial port commands. Note that the command list contains the commonly used serial port commands for HIKMICRO thermal cameras. 19.4 Device Communication Matrix Scan the following QR code to get device communication matrix. - Page 81 Facebook: HIKMICRO Thermography LinkedIn: HIKMICRO Instagram: hikmicro_thermography YouTube: HIKMICRO Thermography E-mail: support@hikmicrotech.com Website: www.hikmicrotech.com UD32372B...
Need help?
Do you have a question about the G Series and is the answer not in the manual?
Questions and answers