Table of Contents
Advertisement
Quick Links
Advertisement
Table of Contents

Related Manuals for Silex technology SX-AP-4800AN2


Summary of Contents for Silex technology SX-AP-4800AN2
- Page 1 Access Point SX-AP-4800AN2 User's Manual...
- Page 2 Copyright© 2016 silex technology, Inc. All rights reserved. WA103160XB...
-
Page 3: Table Of Contents
1-2. Safety Instructions ................2 1-3. Product Information and Customer Services ......5 Product Information ................5 Customer Support Center ..............5 2. About SX-AP-4800AN2 ..........7 2-1. Features ....................7 2-2. Parts and Functions ................9 2-3. Hardware Specification ..............11 2-4. - Page 4 Starting in Configuration Mode ............19 Setup ......................21 Connecting to Network ...............25 3-2. Setup via a Network ...............26 Connecting to Network ...............26 Changing Network Settings on the PC ..........28 Setup ......................30 3-3. Setup Using an External Registrar ..........41 Setup Using Windows Network Setup Feature ......41 Setup Wirelessly from the PC ............44 4.
- Page 5 Getting Started ..................61 Log Output Settings ................62 Retrieving the Log saved into USB storage device ....64 Notice When Using the Log Output ..........68 5-3. Configuration Import/Export ............69 Exporting/Importing Using the Web Page ........70 Exporting/Importing Using the FTP Client ........76 5-4. Product Search Utility ..............81 Downloading &...
- Page 6 5-9. VLAN Feature ...................116 VLAN Configuration ................117 A. Appendix ............123 A-1. List of All Settings ................123...
-
Page 7: Introduction
Thank you for purchasing the Access Point SX-AP-4800AN2 (called "SX-AP-4800AN2" below). 1-1. Introduction This manual provides information on how to configure and use SX-AP-4800AN2. Please read the Safety Instructions carefully before you begin. Disclaimers - The unauthorized transfer or copying of the content of this manual, in whole or in part, without prior written consent is expressly prohibited by law. -
Page 8: Safety Instructions
SX-AP-4800AN2 User's Manual 1-2. Safety Instructions This page provides the safety instructions for safe use of SX-AP-4800AN2. To ensure safe and proper use, please read the following information carefully before using SX-AP-4800AN2. The safety instructions include important information on safe handling of SX-AP-4800AN2 and on general safety issues. - Page 9 * Do not allow physical impact: When damaged, turn off your network device, unplug the AC plug of SX-AP-4800AN2 from power outlet (unplug the network cable from Ethernet HUB when receiving power over the Ethernet) and contact your point of purchase.
- Page 10 SX-AP-4800AN2 User's Manual Warning * When unplugging SX-AP-4800AN2, do not pull on the cord. The cord may break resulting in fire and/or electric shock. Pull only on the plug. * When moving SX-AP-4800AN2, turn off your network device and SX-AP-4800AN2 by unplugging the power cables from the outlet (if you are receiving power over the Ethernet (PoE), unplug the network cable from the HUB).
-
Page 11: Product Information And Customer Services
If you cannot find the relevant problem in this manual or on our website, or if the corrective procedure does not resolve the problem, please contact Silex Technology Customer Support. Contact Information +1-657-218-5199 support@silexamerica.com Europe +49-2154-88967-0 support@silexeurope.com - Refer to the Silex Technology website ( https://www.silextechnology.com/ ) for the latest FAQ and product information. Note... - Page 12 SX-AP-4800AN2 User's Manual (Blank Page)
-
Page 13: About Sx-Ap-4800An2
- Easy configuration using Smart Wireless Setup feature - Web configuration interface - DHCP server function - USB Device Server feature allows sharing of various USB devices connected to SX-AP-4800AN2. - WDS (Wireless Distribution System) feature allows wireless communication between the Access Points (SX-AP-4800AN2). - Page 14 SX-AP-4800AN2 User's Manual - Supports the total management software, AMC Manager (non-free program / free program) / AMC Finder (free program) - Using the AMC Manager, you can maintain as well as monitor the Silex devices from a remote place, including the bulk configuration, firmware update, etc.
-
Page 15: Parts And Functions
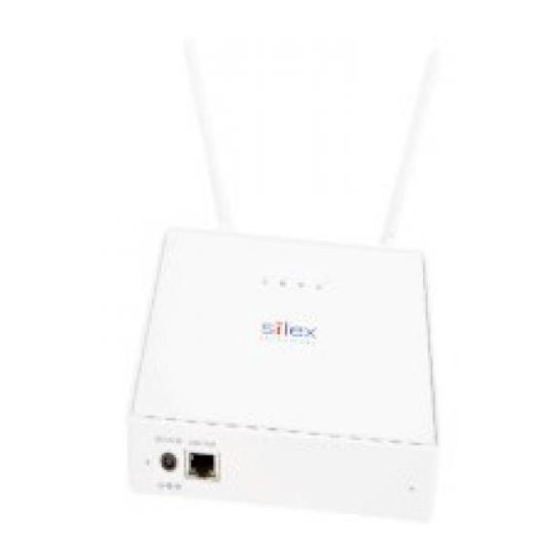
⑧ (1) Wireless LAN Antenna Wireless antenna for wireless communication (2) Smart Wireless Setup When pressed together with the one on your wireless device while SX-AP-4800AN2 is active, wireless configuration can be performed. (Smart Wireless Setup) Switch (SET2) Power LED... - Page 16 SX-AP-4800AN2 User's Manual Bottom ⑨ ⑩ ⑪ ⑫ (9) AC Connector Connect an AC adaptor. (10) Network Port Connect a network cable. (11) Status LED (Yellow) Blinks while communicating in a wired LAN. (12) Link LED (Green) Turns on when connected to a wired LAN.
-
Page 17: Hardware Specification
2. About SX-AP-4800AN2 2-3. Hardware Specification Operating environment Temperature : +0 C to +40 C , +32 F to +104 F Humidity : 20% to 80%RH (Non-condensing) Storage environment Temperature : -10 C to +50 C , +14 F to +122 F... - Page 18 SX-AP-4800AN2 User's Manual FCC / IC Notice FCCID : N6C-SXPCEAN2 IC : 4908A-SXPCEAN2 Channel Selection For product available in the USA/Canada market, only channel 1~11 can be operated. Selection of other channels is not possible. Fcc Rules Part 15 FCC CAUTION Changes or modifications not expressly approved by the party responsible for compliance could void the user’s authority to operate the...
-
Page 19: Software Specification
2. About SX-AP-4800AN2 The FCC / The Industry Canadaregulations provide that changes or modifications not expressly approved by the party responsible for compliance could void the user’sauthority to operate the equipment. CE Notice 2-4. Software Specification TCP/IP Network layer ARP, IP, ICMP... -
Page 20: Power Supply
- When receiving power over Ethernet, you do not have to use the AC adaptor that came with SX-AP-4800AN2. - Please remember that power is supplied from the AC adaptor if it is connected to SX-AP-4800AN2. Sample connection1: When using a PoE supported HUB... -
Page 21: Wireless Interference Information
- Licensed radio station in a factory - Small power radio station (A non-licensed radio station) These devices may use the same band. If you use SX-AP-4800AN2 near these devices, the radio waves emitted from SX-AP-4800AN2 may interfere with them. - Page 22 The same frequency band of SX-AP-4800AN2 is used for a microwave, industry, science, medical equipment and licensed in room or low power (non-licensed) radio stations. - Before you use SX-AP-4800AN2, check that it does not interfere with other devices. - If interference occurs, stop using SX-AP-4800AN2 or change the wireless band. Please consider to create a wall between these devices to avoid interference.
-
Page 23: Dfs
+ 100 > 108 > 116 > 132 > 149 - 104 > 112 > 136 > 153 - SX-AP-4800AN2 checks if there are radar signals on the DFS channels when it is powered on. During this time, no wireless communication is allowed to SX-AP-4800AN2. - Page 24 SX-AP-4800AN2 User's Manual (Blank Page)
-
Page 25: Setup
- Setup using an external registrar 3-1. Setup Using Configuration Mode How to configure SX-AP-4800AN2 using the Configuration Mode is explained. In this setup method, you have to connect SX-AP-4800AN2 directly to the PC and configure it one by one. Starting in Configuration Mode Connect SX-AP-4800AN2 and the PC (to use for setup) using a network cable. - Page 26 SX-AP-4800AN2 User's Manual Connect the AC adapter to SX-AP-4800AN2, and the AC adapter's plug to an electrical outlet. Electrical Outlet SX-AP-4800AN2 ② ① AC Adaptor - If wireless LAN is enabled on your PC, please disable it. When the front Power LED starts blinking in Orange and then turns on to Green, press and hold the push switch with a fine tipped object such as a pen or pencil.
-
Page 27: Setup
- If the Web page is not displayed, enter "http://silex" in the address bar of the Web browser and press the Enter key. Note - If a password is set to SX-AP-4800AN2, the login page is displayed. Enter the password and click Login. - Page 28 SX-AP-4800AN2 User's Manual The login page of SX-AP-4800AN2 is displayed. Enter the password of SX-AP-4800AN2 and click Login. The Web page of SX-AP-4800AN2 is displayed. In the Web page, configure the necessary settings. For details on each setting, see Appendix - A-1. List of All Settings on this User's...
- Page 29 3. Setup If "Setting is completed" is displayed, the configuration is finished. Unplug the AC plug from the outlet and then AC adaptor from SX-AP-4800AN2. Electrical Outlet SX-AP-4800AN2 ① ② AC Adaptor...
- Page 30 SX-AP-4800AN2 User's Manual Unplug the network cable from SX-AP-4800AN2 and PC. SX-AP-4800AN2 Network Cable...
-
Page 31: Connecting To Network
3. Setup Connecting to Network Connect SX-AP-4800AN2 and Ethernet Hub via a network cable. SX-AP-4800AN2 Ethernet HUB Network Cable Connect the AC adapter to SX-AP-4800AN2 and AC plug to a power outlet. Electrical Outlet SX-AP-4800AN2 ② ① AC Adaptor... -
Page 32: Setup Via A Network
SX-AP-4800AN2 User's Manual 3-2. Setup via a Network How to setup SX-AP-4800AN2 from your PC via a network is explained. In this method, two or more of SX-AP-4800AN2 can be configured at once by connecting them to a network. - To continue this configuration, the network settings on your PC needs to be changed temporarily. - Page 33 Ethernet HUB Network Cable Connect the AC adapter to SX-AP-4800AN2 and AC plug to a power outlet. Electrical Outlet SX-AP-4800AN2 ② ① AC Adaptor - Repeat the same process if you are to configure two or more of SX-AP-4800AN2. Note...
-
Page 34: Changing Network Settings On The Pc
SX-AP-4800AN2 User's Manual Changing Network Settings on the PC Change the network settings on your PC so that you can access SX-AP-4800AN2 from the Connect the PC to a network Connect the PC (to use for setup) and Ethernet Hub using a network cable. - Page 35 - Subnet Mask : 255.0.0.0 - By default, a Class A address (10.xxx.xxx.xxx) is set to SX-AP-4800AN2. Please be sure to set a unique address to your PC, that is not used for SX-AP-4800AN2. How to change the network settings on Windows 7: 1.
-
Page 36: Setup
- The default IP Address can be found on the bottom label of SX-AP-4800AN2. Note When the login password configuration page appears, enter the password to configure for SX-AP-4800AN2 and click Submit. - If a password is set to SX-AP-4800AN2, the login page is displayed. Enter the password and click Login. Note... - Page 37 3. Setup The login page of SX-AP-4800AN2 is displayed. Enter the password of SX-AP-4800AN2 and click Login.
- Page 38 After entering the settings, click Submit on the bottom right of Web page. When finished, restart SX-AP-4800AN2. - For how to restart SX-AP-4800AN2, refer to Chapter 5-7 Maintenance Feature - Restarting. - If you continue to configure the other settings, you do not have to restart. Please restart Note when you completed all other settings.
- Page 39 After entering the settings, click Submit on the bottom right of Web page. When finished, restart SX-AP-4800AN2. - For how to restart SX-AP-4800AN2, refer to Chapter 5-7 Maintenance Feature - Restarting. - If you continue to configure the other settings, you do not have to restart. Please restart Note when you completed all other settings.
- Page 40 After entering the settings, click Submit on the bottom right of Web page. When finished, restart SX-AP-4800AN2. - For how to restart SX-AP-4800AN2, refer to Chapter 5-7 Maintenance Feature - Restarting. - If you continue to configure the other settings, you do not have to restart. Please restart Note when you completed all other settings.
- Page 41 - The Smart Wireless Setup tab provides easy wireless configuration. - Please be sure to use encryption when you connect SX-AP-4800AN2 to the wireless network. - Wireless bands for IEEE 802.11b/g or IEEE 802.11b/g/n are often in use by other people because the number of devices supporting these standards is growing rapidly.
- Page 42 After entering the settings, click Submit on the bottom right of Web page. When finished, restart SX-AP-4800AN2. - For how to restart SX-AP-4800AN2, refer to Chapter 5-7 Maintenance Feature - Restarting. - If you continue to configure the other settings, you do not have to restart. Please restart Note when you completed all other settings.
- Page 43 By using SX-AP-4800AN2 and the switching HUB supporting a tagged VLAN (hereinafter, the "VLAN HUB"), virtual network groups can be established. As SX-AP-4800AN2 supports Multi SSID, up to 4 virtual network groups can be created. For details, refer to 5-9. VLAN Feature.
- Page 44 After entering the settings, click Submit on the bottom right of Web page. When finished, restart SX-AP-4800AN2. - For how to restart SX-AP-4800AN2, refer to Chapter 5-7 Maintenance Feature - Restarting. - If you continue to configure the other settings, you do not have to restart. Please restart Note when you completed all other settings.
- Page 45 After entering the settings, click Submit on the bottom right of Web page. When finished, restart SX-AP-4800AN2. - For how to restart SX-AP-4800AN2, refer to Chapter 5-7 Maintenance Feature - Restarting. - If you continue to configure the other settings, you do not have to restart. Please restart Note when you completed all other settings.
- Page 46 After entering the password, click Submit on the bottom right of Web page. When finished, restart SX-AP-4800AN2. - For how to restart SX-AP-4800AN2, refer to Chapter 5-7 Maintenance Feature - Restarting. - If you continue to configure the other settings, you do not have to restart. Please restart Note when you completed all other settings.
-
Page 47: Setup Using An External Registrar
3-3. Setup Using an External Registrar Setup Using Windows Network Setup Feature How to setup SX-AP-4800AN2 via network using the network setup feature of Windows 7 is explained. - To continue this configuration, External Registrar must be set to ENABLE and Wireless LAN config status needs to be Unconfigured on SX-AP-4800AN2. - Page 48 SX-AP-4800AN2 User's Manual Select Set up a new network and click Next. Select SX-AP-4800AN2 and click Next. - If two or more of SX-AP-4800AN2 are displayed, select the correct one by checking the host name on the right. Note...
- Page 49 3. Setup Enter the PIN code of SX-AP-4800AN2 to PIN: field and click Next. - PIN code is a 8-digit number that can be found on the bottom label of SX-AP-4800AN2. Enter an SSID to Type your network name. Click the down arrow button on the right of Change passphrase, security level and encryption type (advanced) to configure Security key, Security level, Encryption type and Connect automatically.
-
Page 50: Setup Wirelessly From The Pc
Click Close. Setup Wirelessly from the PC SX-AP-4800AN2 can be configured via a wireless LAN using the wireless connection of your PC. In case of this configuration, please use your own wireless configuration utility. - To continue this configuration, External Registrar must be set to ENABLE and Wireless LAN config status needs to be Unconfigured on SX-AP-4800AN2. -
Page 51: Connecting Your Wireless Device
This chapter explains how to connect your PC and wireless devices to SX-AP-4800AN2. 4-1. Connecting Your PC How to connect your PC to SX-AP-4800AN2 by changing the wireless settings of the PC using the wireless connection feature of Windows: Click the network icon (... - Page 52 Enter the WEP key (or Pre-Shared key if the network authentication mode is WPA-PSK, WPA2-PSK or WPA/WPA2-PSK) to Security key and click OK. - The default security key can be found on the bottom label of SX-AP-4800AN2. See the "Key" information in the label.
-
Page 53: Connecting Your Wireless Device
- To continue, Smart Wireless Setup needs to be set to ENABLE. Before you begin, please check the setting at the Smart Wireless Setup page on the Web page. - During this configuration, please place your wireless device closer to SX-AP-4800AN2 so that they can communicate better. - Page 54 - To continue, Smart Wireless Setup needs to be set to ENABLE. Before you begin, please check the setting at the Smart Wireless Setup page on the Web page. - During this configuration, please place your wireless device closer to SX-AP-4800AN2 so that they can communicate better.
- Page 55 - Please use only one wireless device. Even if two or more devices are waiting for wireless connections, SX-AP-4800AN2 can configure only one device which has replied first. SX-AP-4800AN2 will start to communicate with your wireless device and configure the same wireless settings.
-
Page 56: Making A Connection Using A Pin Code
- To continue, Smart Wireless Setup needs to be set to ENABLE. Before you begin, please check the setting at the Smart Wireless Setup page on the Web page. - During this configuration, please place your wireless device closer to SX-AP-4800AN2 so that they can communicate better. -
Page 57: Other Features
This chapter explains the other features of SX-AP-4800AN2. 5-1. Device Server Feature The USB devices connected to SX-AP-4800AN2 can be shared over the network. To use the device server feature, the USB connection utility, "SX Virtual Link" is required. How to install and use SX Virtual Link is as follows: - To use this feature, the following conditions must be met. -
Page 58: Downloading & Installing Sx Virtual Link
SX Virtual Link allows you to connect your PC to a USB device that is connected to SX-AP- 4800AN2. Use SX Virtual Link when you connect/disconnect to/from the USB device. SX-AP-4800AN2 allows you to use USB devices as if they were connected directly to your How to download SX Virtual Link: Access our website below. - Page 59 5. Other Features How to install SX Virtual Link: - Administrator privilege is required for installation. Decompress the file you have downloaded and then double-click Cosetup.exe. The User Account Control message is displayed In Windows 7, click Yes. In Windows Vista, click Continue. SX Virtual Link installer is started and the language selection menu is displayed.
- Page 60 SX-AP-4800AN2 User's Manual Read the SOFTWARE LICENSE AGREEMENT and click Yes. Select a folder to install into and click Next. - By clicking Browse, the folder can be changed. Note Enter a group name to be displayed in the start menu and click Next.
- Page 61 5. Other Features Click Start to begin the installation. - When Windows Security screen is displayed, click Install. SX Virtual Link has been installed. Click Finish. - If using a firewall function of commercial security software, please add SX Virtual Link to the exception list in your security software.
-
Page 62: Sharing Usb Devices Over The Network
SX-AP-4800AN2 User's Manual Sharing USB Devices over the Network How to start SX Virtual Link: Click the SX Virtual Link icon ( ) in the task tray. - If SX Virtual Link is not running, click Start - All Programs - silex Device Server - SX Virtual Link - SX Virtual Link. - Page 63 5. Other Features How to connect/disconnect to/from USB devices: Select the USB device in SX Virtual Link's main window and connect to it. When successfully connected to the USB device, Windows Plug and Play will run and the USB device will become ready to use. When finished using the USB device, disconnect it using SX Virtual Link.
- Page 64 SX-AP-4800AN2 User's Manual How to open the SX Virtual Link's Online Help Start SX Virtual Link. ) and select Help from In SX Virtual Link's main window, click the Help button ( the menu displayed. Online Help will open.
-
Page 65: Uninstalling Sx Virtual Link
5. Other Features Uninstalling SX Virtual Link How to uninstall the USB device connection utility, SX Virtual Link is explained. Follow the procedures below to uninstall SX Virtual Link. - To uninstall SX Virtual Link, administrator privilege is required. Click Start - Control Panel - Uninstall a program. - In Windows XP, click Add or Remove Programs. - Page 66 SX-AP-4800AN2 User's Manual A confirmation message is displayed. Click Yes to start the uninstallation. When the below window is displayed, click Finish.
-
Page 67: Log Output
- The log can be sent to the Syslog server and saved to the USB storage device at the same time. - Only one USB storage device can be connected to SX-AP-4800AN2 to save the log to the USB storage device. Also, the connected storage device cannot be used over network using SX Virtual Link. -
Page 68: Log Output Settings
Log Output Settings Login to the Web page of SX-AP-4800AN2 using your Web browser. - The Web page of SX-AP-4800AN2 can be opened using SX-Finder or SX Virtual Link. Note From the left menu on the Web page, click Log Output. - Page 69 - If you continue to configure the other settings, you do not have to restart. Please restart when you Note completed all other settings. - The log output will not be started unless SX-AP-4800AN2 is restarted. - If the log output feature is enabled, the USB storage device connected to SX-AP-4800AN2 are not displayed in SX Virtual Link.
-
Page 70: Retrieving The Log Saved Into Usb Storage Device
How to disable the USB log output: Login to the Web page of SX-AP-4800AN2 using your Web browser. - The Web page of SX-AP-4800AN2 can be opened using SX-Finder or SX Virtual Link. Note From the left menu on the Web page, click Log Output. - Page 71 Note When finished, restart SX-AP-4800AN2. - For how to restart SX-AP-4800AN2, refer to Chapter 5-7 Maintenance Feature - Restarting. - If you continue to configure the other settings, you do not have to restart. Please restart when you Note...
- Page 72 SX-AP-4800AN2 User's Manual How to retrieve the log files: Click the SX Virtual Link icon ( ) in the task tray. - If SX Virtual Link is not running, click Start - All Programs - silex Device Server - SX Virtual Link - SX Virtual Link.
- Page 73 5. Other Features When successfully connected, Windows Plug and Play will run and the USB storage device will become ready to use. Now you can retrieve the saved log files. - The log files are saved as the following formats: Note Format <Date>...
-
Page 74: Notice When Using The Log Output
- Please format the USB storage device if the data is corrupted. Note Remove the USB storage device from the PC and reconnect it to SX-AP-4800AN2. Restart SX-AP-4800AN2. - For how to restart SX-AP-4800AN2, refer to Chapter 5-7 Maintenance Feature - Restarting. -
Page 75: Configuration Import/Export
The following instructions will use the screenshots captured using Windows 7 and Internet Explorer 9.0. They may vary depending on the version of operating systems or Web browsers. - The configuration file you can import to SX-AP-4800AN2 must be the one you had exported from SX-AP- 4800AN2. -
Page 76: Exporting/Importing Using The Web Page
How to export using the Web page: Login to the Web page of SX-AP-4800AN2 using your Web browser. - The Web page of SX-AP-4800AN2 can be opened using SX-Finder or SX Virtual Link. Note From the left menu on the Web page, click Export Configuration. - Page 77 5. Other Features In the Export Configuration page, click Yes. A message dialog to confirm where to save the configuration file (config.txt) is displayed. Click Save. , you can select Save as option. - By clicking Note...
- Page 78 How to import using the Web page: Login to the Web page of SX-AP-4800AN2 using your Web browser. - The Web page of SX-AP-4800AN2 can be opened using SX-Finder or SX Virtual Link. Note From the left menu on the Web page, click Import Configuration.
- Page 79 In the Import Configuration page, click Browse. A window to select the configuration file (config.txt) is displayed. Select the file to upload and click Open. - The configuration file you can import to SX-AP-4800AN2 must be the one you had exported from SX-AP- 4800AN2.
- Page 80 SX-AP-4800AN2 User's Manual In the Import Configuration page, check the configuration file you have selected is displayed at the New Configuration File field. Click Submit. Click OK in a confirmation message.
- Page 81 5. Other Features After the import is completed, a completion message is displayed. Please restart SX-AP-4800AN2 to take effect of the changes. - For how to restart SX-AP-4800AN2, refer to Chapter 5-7 Maintenance Feature - Restarting. Note...
-
Page 82: Exporting/Importing Using The Ftp Client
SX-AP-4800AN2 User's Manual Exporting/Importing Using the FTP Client How to export using Command Prompt: Click Start - All Programs - Accessories - Command Prompt. In the Command Prompt window, connect to SX-AP-4800AN2 using the FTP command. Sample: C:\Users>ftp 192.168.20.123... - Page 83 5. Other Features Enter "root" for the user name and the password that is configured on SX-AP-4800AN2 for password. Sample User(192.168.20.123:(none)):root 331 Please specify the password Password:xxxxxxxx After you have logged in SX-AP-4800AN2, download the configuration file (config.txt) using the get command.
- Page 84 SX-AP-4800AN2 User's Manual How to import using Command Prompt: Click Start - All Programs - Accessories - Command Prompt. In the Command Prompt window, connect to SX-AP-4800AN2 using the FTP command. Sample: C:\Users>ftp 192.168.20.123...
- Page 85 5. Other Features Enter "root" for the user name and the password that is configured on SX-AP-4800AN2 for password. Sample User(192.168.20.123:(none)):root 331 Please specify the password Password:xxxxxxxx After you have logged in SX-AP-4800AN2, upload the configuration file using the put command.
- Page 86 When the file upload is finished, the import is complete. Terminate the FTP connection using the bye command. Please restart SX-AP-4800AN2 to take effect of the changes. - For how to restart SX-AP-4800AN2, refer to Chapter 5-7 Maintenance Feature - Restarting. Note...
-
Page 87: Product Search Utility
5. Other Features 5-4. Product Search Utility How to install and use the product search utility, "SX Finder" is explained. Downloading & Installing the Product Search Utility How to download the product search utility: Access our website below. https://www.silextechnology.com/ USA / Europe Go to the support section and download SX-Finder. - Page 88 SX-AP-4800AN2 User's Manual How to install the product search utility: Decompress the file you have downloaded and then double-click Setup.exe. The User Account Control message is displayed In Windows 7, click Yes. In Windows Vista, click Continue. SX-Finder installer is started and the language selection menu is displayed.
- Page 89 5. Other Features Read the SOFTWARE LICENSE AGREEMENT and click Yes. Select a folder to install into and click Next. - By clicking Browse, the folder can be changed. Note Enter a group name to be displayed in the start menu and click Next.
- Page 90 SX-AP-4800AN2 User's Manual Click Start to begin the installation. SX-Finder has been installed. Click Finish.
-
Page 91: Using Product Search Utility
- The PC used for this configuration needs to have a proper IP address to communicate with SX-AP-4800AN2. If you fail to access the Web page of SX-AP-4800AN2, check the IP address of the PC first. If the IP address is not correct, configure a correct address. - Page 92 SX-AP-4800AN2 User's Manual How to access the Web page: Select SX-AP-4800AN2 to configure and click Configure. - If two or more of SX-AP-4800AN2 are displayed, select the correct one by checking the IP address and MAC address. Note When the login password configuration page appears, enter the password to configure for SX-AP-4800AN2 and click Submit.
- Page 93 5. Other Features The Web browser runs and the login menu for SX-AP-4800AN2 is displayed. Enter the password and click Login.
-
Page 94: Uninstalling The Product Search Utility
SX-AP-4800AN2 User's Manual Uninstalling the Product Search Utility How to uninstall the product search utility, " SX-Finder" is explained. If SX-Finder is not necessary, you can uninstall it by following the instructions below. - To uninstall SX-Finder, administrator privilege is required. - Page 95 5. Other Features A confirmation message is displayed. Click Yes to start the uninstallation. When the below window is displayed, click Finish.
-
Page 96: Dhcp Server Feature
4800AN2, your PC must be set to Obtain an IP address automatically. Log in to the Web page of SX-AP-4800AN2 using your Web browser. - The Web page of SX-AP-4800AN2 can be opened using SX-Finder or SX Virtual Link. Note... - Page 97 - Default Gateway - DNS Server Address - Lease Time After entering the settings, click Submit on the bottom right of Web page. When finished, restart SX-AP-4800AN2. - For how to restart SX-AP-4800AN2, refer to Chapter 5-7 Maintenance Feature - Restarting. Note...
-
Page 98: Checking System Status At Web Page
How to check the system status from the Web page is explained. Login to the Web page of SX-AP-4800AN2 using your Web browser. - The Web page of SX-AP-4800AN2 can be opened using SX-Finder or SX Virtual Link. Note The system status page will be displayed after you have logged into the Web page. This page shows the general settings such as TCP/IP information, Wireless LAN settings, etc. -
Page 99: Maintenance Feature
5. Other Features 5-7. Maintenance Feature Restarting How to restart SX-AP-4800AN2 by unplugging the AC adaptor: Unplug the AC adaptor of SX-AP-4800AN2 from the outlet. - When receiving power over the Ethernet (PoE), unplug the network cable from the HUB. - Page 100 SX-AP-4800AN2 User's Manual How to restart SX-AP-4800AN2 using the Web Page: Login to the Web page of SX-AP-4800AN2 using your Web browser. From the left menu on the Web page, click Maintenance - Restart. In the page displayed, click Yes.
-
Page 101: Factory Default Configuration
Release Press and hold AC Adaptor - When receiving power over the Ethernet (PoE), press and hold the push switch (SET1) on SX-AP-4800AN2 while inserting the network cable back into the HUB. Note When Power LED starts blinking in Orange and then turns to Green, the factory default... - Page 102 SX-AP-4800AN2 User's Manual How to reset SX-AP-4800AN2 to factory defaults using the Web page: Login to the Web page of SX-AP-4800AN2 using your Web browser. From the left menu on the Web page, click Maintenance - Factory Default. In the page displayed, click Yes.
-
Page 103: Firmware Update
The latest firmware file can be downloaded from our website. See the instructions below to download the firmware file. For how to upload the firmware file to SX-AP-4800AN2, refer to the firmware update procedure sheet file contained in the firmware file you download. -
Page 104: Wds Feature
Display may vary depending on the Web browser. - We do not guarantee the WDS connection if wireless devices other than SX-AP-4800AN2 are used. - The version of current firmware can be identified at the bottom left of the Web page. -
Page 105: Wds Connection
5. Other Features WDS Connection The WDS(Wireless Distribution System) is composed of one Root AP (running as a host device) and plural Repeater APs (running as client devices). Root AP Repeater Repeater Repeater : WDS When connecting Access Points, use the first AP as Root AP and the second or later APs as Repeater APs. - Page 106 - AUTO (of channel setting) and DFS band channels (W53(52/56/60/64ch), W56(100/104 /108/112/116/132/136/140ch)) - Privacy Separator - When numbers of SX-AP-4800AN2 Access Points are connected in WDS, wireless communication speed may slow down. - We do not guarantee the WDS connection if wireless devices other than SX-AP-4800AN2 are used.
-
Page 107: Wds Configuration
Configure the first unit of SX-AP-4800AN2 as Root AP. Log in to the Web page of SX-AP-4800AN2 to use as Root AP using your Web browser. - The Web page of SX-AP-4800AN2 can be opened using SX-Finder or SX Virtual Link. - Page 108 SX-AP-4800AN2 User's Manual Select a wireless interface to use for WDS connection and click WDS Configuration tab. - For details on each configuration item, refer to A. Appendix - A-1. List of All Settings. - The wireless settings of the selected interface will be necessary again when you configure Repeater AP.
- Page 109 5. Other Features When finished, restart SX-AP-4800AN2. - For how to restart SX-AP-4800AN2, refer to Chapter 5-7 Maintenance Feature - Restarting. - If you continue to configure the other settings, you do not have to restart. Please restart when you Note completed all other settings.
- Page 110 AP to connect in WPS AP to connect in WDS Root AP / Repeater Log in to the Web page of SX-AP-4800AN2 to use as Repeater AP using your Web browser. - The Web page of SX-AP-4800AN2 can be opened using SX-Finder or SX Virtual Link.
- Page 111 5. Other Features From the left menu in the Web page, click Wireless LAN - General Configuration. Select a wireless interface to use for WDS connection and click WDS Configuration tab. - For details on each configuration item, refer to A. Appendix - A-1. List of All Settings. - For the wireless interface, use the same interface as the Root AP which is assigned for WDS connection.
- Page 112 SX-AP-4800AN2 User's Manual Configure the settings according to the table below and click Submit. Name Setting WDS Mode Repeater Wireless Interface Select the interface you have selected to use for WDS connection. Access Point MAC Address Enter the MAC Address of the host AP to connect in WDS.
- Page 113 5. Other Features When finished, restart SX-AP-4800AN2. - For how to restart SX-AP-4800AN2, refer to Chapter 5-7 Maintenance Feature - Restarting. - If you continue to configure the other settings, you do not have to restart. Please restart when you completed Note all other settings.
-
Page 114: What If Wds Connection Fails
How to check the settings on client AP: Check the Repeater setting on the client AP. Log in to the Web page of SX-AP-4800AN2 (client AP) using your Web browser. - The Web page of SX-AP-4800AN2 can be opened using SX-Finder or SX Virtual Link. Note... - Page 115 5. Other Features From the left menu in the Web page, click System. In the System Status page, check the status information as shown in a table below: Setting Item Wireless LAN Common Configuration Channel Wireless LAN Configuration Interface SSID Network Authentication Encryption Mode WDS Information...
- Page 116 Check the Root AP or Repeater AP settings of the host AP. Log in to the Web page of SX-AP-4800AN2 (host AP) using your Web browser. - The Web page of SX-AP-4800AN2 can be opened using SX-Finder or SX Virtual Link. Note...
- Page 117 5. Other Features In the System Status page, check that WDS Mode is set to Root AP or Repeater. Check that status information as show in a table below are the same as those you previously checked at the client AP. From the left menu in the Web page, click Wireless LAN - Security.
- Page 118 - When one or some of the wireless interfaces use TKIP or AUTO: 50 units - When using the WDS feature, the Repeater AP connected to SX-AP-4800AN2 as a client AP will consume one of the available connections, while Root AP or Repeater APs connected to SX-AP-4800AN2 as a host AP will...
-
Page 119: Checking Wds Connection Status From Web Page
Checking WDS Connection Status from Web Page To see if SX-AP-4800AN2 is connected in WDS mode properly, check the status page on the Web page in the order from the client (Repeater AP) to the host (Root AP or Repeater AP). - Page 120 SX-AP-4800AN2 User's Manual From the left menu in the Web page, click System. In the System Status page, check the WDS Information. If Access Point MAC Address and Wireless Signal Strength(dBm) are displayed, the WDS connection is established successfully. To continue to see the connection status at the host AP, repeat the same process from Step1-3 at the host AP's Web page.
- Page 121 5. Other Features - SX-AP-4800AN2 uses two MAC Addresses for the WDS connection. - The MAC Address used to connect to the host AP in WDS is displayed in the System Status page. Note - The MAC Address of the wireless interface is displayed in WDS Configuration tab of Wireless Configuration page.
-
Page 122: Vlan Feature
SX-AP-4800AN2 User's Manual 5-9. VLAN Feature A VLAN ID can be set to the SSID of wireless LAN structured by SX-AP-4800AN2. If SX-AP-4800AN2 is used with the switching HUB that supports tagged-VLAN (hereinafter the "VLAN HUB"), you can establish the virtual network groups. -
Page 123: Vlan Configuration
5. Other Features VLAN Configuration The following explains how to install SX-AP-4800AN2 to where network groups have already been established using a VLAN HUB. How to check the VLAN information on network: Check the information below of the existing network. - Page 124 - When using a VLAN HUB during the configuration, please make sure that you connect SX-AP-4800AN2 to the port that can communicate with your PC. - The Web page of SX-AP-4800AN2 can be opened using SX-Finder or SX Virtual Link. Note...
- Page 125 - For VLAN ID of the wireless LAN 1-4, enter VLAN ID of the devices connected to the HUB that you have checked beforehand. - After VLAN feature is enabled, you will not be able to configure SX-AP-4800AN2 via the network with a different VLAN ID from management VLAN ID.
- Page 126 - The VLAN setting will not take effect unless you restart SX-AP-4800AN2. How to connect SX-AP-4800AN2 to a trunk port of VLAN HUB: Connect a wired LAN port of SX-AP-4800AN2 and a trunk port of VLAN HUB (that you have checked beforehand) using a network cable.
- Page 127 Establish the Virtual Network Groups - After the VLAN feature is enabled, you will not be able to configure SX-AP-4800AN2 via the network with a different VLAN ID from management VLAN ID. If you are not sure of the VLAN ID of the management VLAN, you will need to initialize the settings and reconfigure SX-AP-4800AN2.
- Page 128 SX-AP-4800AN2 User's Manual (Blank Page)
-
Page 129: Appendix
A. Appendix Appendix A-1. List of All Settings This chapter explains each configuration item available on SX-AP-4800AN2. Some items can be configured only from the Detail Configuration page. For details, see explanation of each configuration item below. Device - Device Configuration... - Page 130 Range AUTO/10Base-T-Half/10Base-T-Full/100Base-TX-Half/10Base-TX-Full/1000Base-T-Full Default Value AUTO Note Usually, "AUTO" is used. If a LED on your HUB does not light on when SX-AP-4800AN2 is powered on, change the network type to that of the HUB. General Configuration Jumbo Frame Detail Configuration Details Enable/Disable Jumbo Frame (ON/OFF).
- Page 131 A. Appendix Wired LAN Configuration - MAC Address Filter Configuration General Configuration Filter Type Detail Configuration Details Set a security type for MAC Address filter used over a wired LAN. Range DISABLE/DENY/ALLOW Default Value DISABLE General Configuration MAC Address Detail Configuration Details Set the MAC Address filter for a wired LAN.
- Page 132 The channel you can use will differ depending on the country. If W53 or W56 channels are used when SX-AP-4800AN2 is turned on or a particular radar is detected, wireless communication is lost for certain period of time (*).
- Page 133 Default Value None Note When DFS is running on all of channels, SX-AP-4800AN2 will switch the channel in approximately 30 min, from the one specified previously to the other. While the channel switch is in process, WSTAT LED (Red) will blink.
- Page 134 SX-AP-4800AN2 User's Manual Wireless LAN - Wireless LAN Basic Configuration General Configuration Interface Detail Configuration Details Enable/Disable the wireless LAN interface 1-4. Range ENABLE/DISABLE Default Value Wireless LAN1: ENABLE, Wireless LAN2-4: DISABLE General Configuration SSID Detail Configuration Details Set the SSID of the wireless network.
- Page 135 A. Appendix Wireless LAN - Wireless LAN Basic Configuration General Configuration Network Authentication Detail Configuration Details Select the network authentication mode that will be used to connect to your wireless devices. To ensure a secure network, it is recommended to use WPA/WPA2. For IEEE 802.11n, only AES can be used Range Open, Shared, WPA-PSK, WPA2-PSK, WPA/WPA2-PSK, 802.1X, WPA-Enterprise, WPA2-Enterprise, WPA/ WPA2-Enterprise...
- Page 136 SX-AP-4800AN2 User's Manual Wireless LAN - WEP Configuration General Configuration Detail Configuration Details Enable/Disable WEP encryption. If WEP encryption is used, wireless communication will be encrypted using the settings for "WEP Key 1-4" and "Key Index". Range ON/OFF Default Value Note If encryption is not enabled, data is not encrypted and is sent as is.
- Page 137 - When one or some of the wireless interfaces use TKIP or AUTO: 50 units * When using the WDS feature, the Repeater AP connected to SX-AP-4800AN2 as client AP will consume one connection, while Root AP or Repeater APs connected to SX-AP-4800AN2 as host AP will NOT consume any connections.
- Page 138 SX-AP-4800AN2 User's Manual Wireless LAN - RADIUS Server Configuration General Configuration Server IP Detail Configuration Details Set the IP Address of RADIUS server. This needs to be set only when the network authentication is 802.1X, WPA-Enterprise, WPA2-Enterprise or WPA/WPA2-Enterprise. Range 0.0.0.0 - 255.255.255.255...
- Page 139 Note The MAC Address displayed under the Wireless Interface is the MAC Address of SX-AP-4800AN2 to use for WDS. This information will be used on Repeater AP which sets SX-AP-4800AN2 as a host AP. General Configuration Access Point MAC Address...
- Page 140 When a lower strength level is selected, the radio transmission distance is shortened and the scope of search for SX-AP-4800AN2 will be narrowed down. By narrowing down the scope of search, the risk of interference to the other wireless networks could be reduced.
- Page 141 A. Appendix General Configuration Short Preamble Detail Configuration Details Enable/Disable the Short Preamble (ON/OFF). Range ON/OFF Default Value Note This can be set only when the Wireless Mode is 802.11b or 802.11b/g. General Configuration A-MPDU Detail Configuration Details Enable/Disable the A-MPDU (ON/OFF). If this is enabled (ON), higher throughput could be achieved.
- Page 142 SX-AP-4800AN2 User's Manual Wireless LAN - QoS(WMM) Configuration (for AP) General Configuration Detail Configuration Details Change the QoS setting for BE(Best Effort) of WMM-EDCA. Range ECWmin: 1 - 15 ECWmax:1 - 15 AIFSN:1 - 15 TxOPLimit: 0 - 8192 Default Value...
- Page 143 A. Appendix Wireless LAN - QoS(WMM) Configuration (for AP) General Configuration Detail Configuration Details Change the QoS setting for (VO: Voice) of WMM-EDCA. Range ECWmin: 1 - 15 ECWmax: 1 - 15 AIFSN: 1 - 15 TxOPLimit: 0 - 8192 Default Value ECWmin: 2 ECWmax: 3...
- Page 144 SX-AP-4800AN2 User's Manual Wireless LAN - QoS(WMM) Configuration (for Station) General Configuration Detail Configuration Details Change the QoS setting for (BK: Back Ground) of WMM-EDCA. Range ECWmin: 1 - 15 ECWmax: 1 - 15 AIFSN: 1 - 15 TxOPLimit: 0 - 8192...
- Page 145 A. Appendix Wireless LAN - 802.11n Transmit Rate Configuration General Configuration 20MHz Detail Configuration Details Select the transmission rate for IEEE 802.11n HT20. Range Auto/Default/6500(MCS0)/13000(MCS1)/19500(MCS2)/26000(MCS3)/39000(MCS4)/52000(MCS5)/ 58500(MCS6)/65000(MCS7)/13000(MCS8)/26000(MCS9)/39000(MCS10)/52000(MCS11)/78000(MCS12)/ 104000(MCS13)/117000(MCS14)/130000(MCS15) Default Value Auto/Default Note This can be set only when all of the following conditions are met: - Wireless Mode is set to 802.11n/b/g or 802.11n/a - Channel bandwidth is set to 20MHz.
- Page 146 ENABLE/DISABLE Default Value DISABLE General Configuration PIN Code Detail Configuration Details Set the PIN code for SX-AP-4800AN2. Range 8 digit number (decimal) Default Value The default value can be found on the product label (see the bottom of the unit).
- Page 147 VLAN Configuration - IEEE 802.1Q VLAN Configuration General Configuration VLAN Detail Configuration Details Enable/Disable the VLAN feature. When set to ENABLE, connect a wired LAN port of SX-AP-4800AN2 and trunk port of the VLAN HUB via a network cable. Range ENABLE/DISABLE Default Value DISABLE...
- Page 148 Detail Configuration Details Enable/Disable the DHCP server function. Select ENABLE to run SX-AP-4800AN2 as a DHCP server to automatically assign an IP address to the PC. Select DISABLE if you already have a DHCP server on the network. Range ENABLE/DISABLE...
- Page 149 A. Appendix NTP Configuration General Configuration Detail Configuration Details Enable/Disable the NTP protocol. Range ENABLE/DISABLE Default Value DISABLE General Configuration NTP Server Detail Configuration Details Set the domain name or IP Address for NTP server. Range In case of the domain name; Alphanumeric character string (0-128 characters) In case of the IP Address;...
- Page 150 General Configuration Device Server Detail Configuration Details Allow/Deny access via a wired/wireless LAN when the Device Server feature of SX-AP-4800AN2 is used. When set to ENABLE, access to SX-AP-4800AN2 is allowed. When set to DISABLE, access to SX-AP-4800AN2 is denied. Range...
- Page 151 Specify the log file name. Range Alphanumeric character string (1-64 characters) Default Value Based on the specified file size and generation number, SX-AP-4800AN2 regularly creates new log files and rotates them by renaming the older version of files. Example: File Size:...
- Page 152 SX-AP-4800AN2 User's Manual Log Output - Syslog Server General Configuration Syslog Server Log Output Detail Configuration Details Enable/Disable the log output to Syslog server. Range ENABLE/DISABLE Default Value DISABLE General Configuration Syslog Server Detail Configuration Details Set the domain name or IP Address of Syslog server.
Need help?
Do you have a question about the SX-AP-4800AN2 and is the answer not in the manual?
Questions and answers