
Subscribe to Our Youtube Channel
Related Manuals for Silex technology AP-100AH


Summary of Contents for Silex technology AP-100AH
- Page 1 140-20166-100 802.11ah Wi-Fi HaLow Access Point AP-100AH User's Manual Copyright© 2021 silex technology, Inc. All rights reserved.
-
Page 2: Table Of Contents
2-5. Use of Radio Waves ..........................14 Notes on Usage ............................. 14 2-6. Notes on Security ............................ 15 3. AP-100AH Setup ............................... 16 3-1. Configuration Using AP-100AH's Web Page ..................17 Connecting AP-100AH to a computer ......................17 Configuration ............................... 18 Connecting to Network ..........................23 3-2. -
Page 5: Introduction
Introduction Thank you for purchasing the Wireless Access Point AP-100AH (hereinafter the "AP-100AH"). 1-1. Introduction This manual provides information on how to configure and use the AP-100AH. Please read the Safety Instructions carefully before you begin. Disclaimers - The unauthorized transfer or copying of the content of this manual, in whole or in part, without prior written consent is expressly prohibited by law. -
Page 6: Safety Instructions
This page provides the safety instructions for safe use of AP-100AH. To ensure safe and proper use, please read the following information carefully before using AP-100AH. The safety instructions include important information on safe handling of AP- 100AH and on general safety issues. - Page 7 * In the following cases, turn off the connected devices and unplug the AC plug of AP-100AH from a power outlet and contact your point of purchase. Failure to take this action could cause fire or an electrical shock.
- Page 8 * Use the AC adaptor supplied with AP-100AH. Other AC adaptors may cause malfunction. * Verify all codes or cables are plugged correctly before using AP-100AH. * When AP-100AH will not be used for a long time, unplug the power cables of AP-100AH and the other devices you are using with.
-
Page 9: Product Information And Customer Services
2. About AP-100AH 1-3. Product Information and Customer Services Product Information The services below are available from the Silex Technology website. For details, please visit the Silex Technology website. USA / Europe https://www.silextechnology.com/ - Latest firmware download - Latest software download... -
Page 10: About Ap-100Ah
AP-100AH User's Manual About AP-100AH AP-100AH is a wireless access point that supports 802.11ah and can be used as a base station to connect your wireless client devices to each other. With sub-GHz radio, the AP- 100AH establishes a wide-range Wi-Fi network with up to 234 802.11ah client devices, avoiding interfering with 2.4GHz/5GHz radios from the legacy Wi-Fi network. -
Page 11: Features
IoT network within the available IPv4 resources. Firmware upgradable device - The AP-100AH support the firmware update to enhance its features. The firmware update is easy through its configuration web page or AMC Manager®. Easy access to the Web configuration interface... - Page 12 - For details on the "AMC Manager", please visit our homepage. Note - To use the "AMC Manager", an IP address needs to be configured to the AP-100AH. - AP-100AH can be used in Infrastructure mode only. Ad hoc mode is not supported.
-
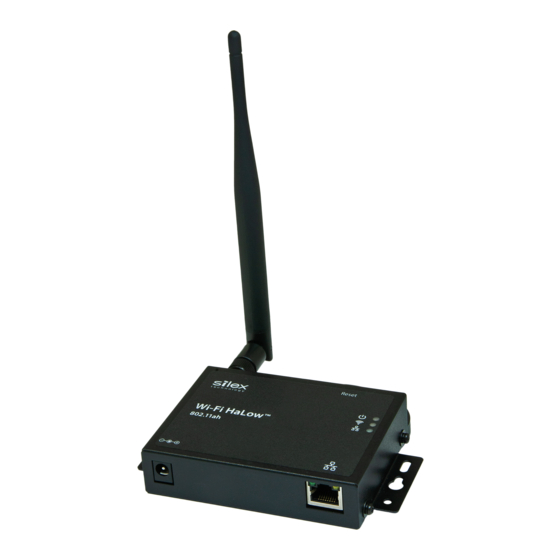
Page 13: Parts And Functions
(4) Wired LED (Green) Wired LAN port is enabled. * All 3 LEDs (Power/Wireless/Wired LEDs) turn on when the AP-100AH is turned on. Then, Wireless/Wired LEDs turn off in 1 second, and start to trun on/blink as described in the table. - Page 14 AP-100AH User's Manual Bottom (10) E/A1 (wired) Ethernet Address of the wired LAN (11) E/A2 (wireless) Ethernet Address of the wireless LAN (12) S/A Serial Number...
-
Page 15: Hardware Specification
2. About AP-100AH 2-3. Hardware Specification Temperature : 0 degrees to +40 degrees Operating environment Humidity : 20% to 80%RH (Non-condensing) Temperature : -20 degrees to +80 degrees Storage environment Humidity : 20% to 90%RH (Non-condensing) FCC Class B ICES Class B... - Page 16 Co-Location Rule This transmitter must not be co-located or operated in conjunction with any other antenna or transmitter. Antennas To prevent violation of the law, do not use antennas other than those provided or specified by Silex Technology.
- Page 17 2. About AP-100AH ISED Notice This device contains license-exempt transmitter(s)/receiver(s) that comply with Innovation, Science and Economic Development Canada's license-exempt RSS(s). Operation is subject to the following two conditions: This device may not cause interference. This device must accept any interference, including interference that may cause undesired operation of the device.
-
Page 18: Software Specification
- Please do not remove the certificate label. Using the product without a label is prohibited. Wireless devices using sub-GHz band - Before you use AP-100AH, check that it does not interfere with other devices. - If interference occurs, stop using AP-100AH or change the wireless band. Please consider to create a wall between these devices to avoid interference. -
Page 19: Notes On Security
2. About AP-100AH 2-6. Notes on Security Because a wireless LAN uses electromagnetic signals instead of a network cable to establish communication with network devices, it has the advantage of allowing devices to connect to the network easily. However, a disadvantage of this is that within a certain... -
Page 20: Ap-100Ah Setup
AP-100AH User's Manual AP-100AH Setup This chapter explains how to configure the AP-100AH. Following configuration methods are available: 1) Configuration using AP-100AH's web page 2) Configuration using AMC Manager®... -
Page 21: Configuration Using Ap-100Ah's Web Page
Connect AP-100AH and the PC (to use for setup) using a network cable. Connect the AC adaptor to AP-100AH, and the AC adaptor's plug to an electrical outlet. Confirm that the Power LED (orange: (2)) and the wired LED (green: (4)) are turned on. -
Page 22: Configuration
- An IP address of the Ethernet adapter is set for a different subnet. - If the AP-100AH configuration web page does not appear, set the IP address of the Ethernet adapter of the PC connected with the AP-100AH as following: IP Address: 169.254.111.1... - Page 23 3. AP-100AH Setup The login password configuration page appears for the first time web page access. Enter the password to configure for the AP-100AH and click Submit. Note that the AP- 100AH accepts up to eight letters for the password.
- Page 24 AP-100AH User's Manual In the Web configuration interface, click Wireless LAN from the left menu. Change SSID, channel bandwidth, Channel, Tx Power, and Network Authentication as your requirement. When WPA2-Personal or WPA3-Personal is selected as the network authentication, Pre-Shared Key configuration appears.
- Page 25 Click TCP/IP and change the configuration as your need. By default, DHCP is set to AUTO, which allows the AP-100AH to obtain its IP address from a DHCP server if available. When a DHCP is not available, the IP address in Value is used as a static IP address.
- Page 26 AP-100AH User's Manual When you use HTTPS protocol to access to the web configuration page after the initial configuration, load CA Certificate, Local Certificate and Local Private Key. Click Restart and Yes to restart the BR-100AH. The configuration set in the step 4...
-
Page 27: Connecting To Network
Connecting to Network Connect the AP-100AH with an Ethernet HUB, switch, or a router. Note that the figure below only shows an Ethernet HUB, but it does not mean the AP-100AH works only with an Ethernet HUB. Connect the AC adaptor to the AP-100AH and the AC plug to the outlet. -
Page 28: Configuration Using Amc Manager
Connect AP-100AH and the PC (to use for setup) using a network cable. Connect the AC adaptor to AP-100AH, and the AC adaptor's plug to an electrical outlet. Confirm that the Power LED (orange: (2)) and the wired LED (green: (4)) are turned on. -
Page 29: Configuration
- An IP address of the Ethernet adapter is set for a different subnet. - If the AP-100AH configuration web page does not appear, set the IP address of the Ethernet adapter of the PC connected with the AP-100AH as following: IP Address: 169.254.111.1... - Page 30 AP-100AH User's Manual In the Create Configuration File window, check the check box of the items you want to use for the configuration file, edit the settings, and click Save. In the dialog to save the configuration file, specify the file name and click Save.
- Page 31 3. AP-100AH Setup Select the AP-100AH unit to configure from the device list of AMC Manager®, and click the icon Configure multiple devices in bulk. Select the AP-100AH unit to configure from the Configuration List (1) and click the Select Config. File button (2) in the Bulk Configuration window. When a file selection...
- Page 32 AP-100AH User's Manual Check the check box of the AP-100AH unit to configure (1) and click Configure Now (2). The configuration performs and the result is displayed. Click Close. Restart the AP-100AH for your new configuration to take effect.
-
Page 33: Connecting To Network
Connecting to Network Connect the AP-100AH with an Ethernet HUB, switch, or a router. Note that the figure below only shows an Ethernet HUB, but it does not mean the AP-100AH works only with an Ethernet HUB. Connect the AC adaptor to the AP-100AH and the AC plug to the outlet. -
Page 34: List Of Functions
IP address will not be used even when the lease period is expired, and this product tries to obtain an address from DHCP server. DHCP client operates for the wired interface on the AP-100AH. 4-2. Network Address Translation (NAT) - Page 35 This product equips the Network Address Translation (NAT) with a DHCP server function. When it is on, the AP-100AH acts as a router and enables a NAT. When disabled, the AP-100AH does not do any routing or address translations. In the latter case, if the clients are using a DHCP then there should be a DHCP server running on the wired network of the AP-100AH.
-
Page 36: Radio Configuration
MCS7 3.34 Mbit/s 7.22 Mbit/s 15.0 Mbit/s MCS10 170 Kbit/s The use of 925.5 MHz and 926.5MHz is not recommended as per the AP-100AH’s implementation. Please refer to an application note in the link below for more details. https://www.silextechnology.com/hubfs/Application%20Notes/142-20159-100A_AppNote_SX- NEWAHChannelMapping_June2020_142-20142-100.pdf... -
Page 37: Ip Access Control
4. List of Functions 4-4. IP Access Control The AP-100AH can allow only specific devices to access it for the device configuration by "IP Access Control" function. The IP address range, which can access the AP-100AH for the configuration, can be set through the web configuration page or AMC Manager®. -
Page 38: Web (Http/Https)
The AP-100AH has web pages for settings. Various settings can be made from the web page. The AP-100AH can also be restarted or reset to the factory setting through the web page. Enter http://169.254.111.111 (the IP address of AP-100AH's Ethernet port) on your web browser when the computer is connected to the AP-100AH through the Ethernet port. -
Page 39: Maintenance
4. List of Functions 4-4. Maintenance Restarting How to restart AP-100AH by unplugging the AC adaptor: Unplug the AC adaptor of AP-100AH from the outlet. Plug the AC adaptor back into the outlet. When the POWER LED turns on, the restart is completed. - Page 40 AP-100AH User's Manual How to restart AP-100AH using the Web configuration interface: Login to the Web configuration interface using your web browser. From the left menu on the Web configuration interface, click Maintenance - Restart. In the page displayed, click Yes.
- Page 41 Right click the AP-100AH to restart and click Restart. Click Restart. The pop-up window appears, then click Yes. Enter the password for the AP-100AH and click OK. When the restart finishes, Status changes to Completed. (Password window appears only when the password is set.)
-
Page 42: Factory Default Configuration
Ver BB3-1.00 (2020.11.30) How to reset AP-100AH to factory defaults using the Push Switch: Press and hold the push switch on the back side of the AP-100AH for more than 5 seconds, and release it while the AP-100AH is powered on. - Page 43 4. List of Functions How to reset AP-100AH to factory defaults using the Web configuration interface: Login to the Web configuration interface using your web browser. From the left menu on the Web configuration interface, click Maintenance – Factory Default. In the page displayed, click Yes.
- Page 44 Check the check box of Restart the device after the factory default configuration, and click Reset. The pop-up window appears, then click Yes. Enter the password for the AP-100AH and click OK. When the restart finishes, Status changes to Completed.
-
Page 45: Firmware Update
The latest firmware file can be downloaded from our website. See the instructions below to download the firmware file. For how to upload the firmware file to AP-100AH, refer to the firmware update procedure sheet file contained in the firmware file you download. - Page 46 AP-100AH User's Manual Login to the AP-100AH device configuration page. Click Firmware Update and click Choose File. A pop-up window appears to select the firmware image. Please select the binary file found in step 3.
- Page 47 4. List of Functions Click Update once the firmware binary file is selected. Click OK. Please wait until the firmware update completes. Once it completes, the default page of the web configuration will appear.
-
Page 48: Appendix
Details Maximum of 16 characters Range <blank> Default Value SNMP Get Community Name A community name to be used to get SNMP information from the AP-100AH Details Maximum of 16 characters Range <blank> Default Value The value does not appear on the web page... - Page 49 A. Appendix TCP/IP Configuration – TCP/IP Configuration DHCP Details IP address setting method for the Ethernet port. To assign an IP address using DHCP, the DHCP server must be running in your subnetwork. AUTO/DHCP/STATIC Range Default Value AUTO IP Address Details Set the IP address of the wireless interface.
- Page 50 TCP/IP Configuration – NAT Configuration NAT Mode Enable Details Enable/Disable NAT functionality ON/OFF Range Default Value Wireless IP Address Details IP address of the AP-100AH’s wireless interface. Range 0.0.0.0 - 255.255.255.255 192.168.1.1 Default Value Wireless Subnet Mask Details Subnet mask for dynamic NAT Range 0.0.0.0 - 255.255.255.255...
- Page 51 TCP/IP Configuration – IP Protocol Configuration HTTP(80) Enable/Disable HTTP protocol Details ON/OFF Range Default Value Note Disabling HTTP will prevent access to the AP-100AH web server via the browser interface HTTPS(443) Enable/Disable HTTP protocol Details ON/OFF Range Default Value Disabling HTTPS will prevent access to the AP-100AH web server via the browser...
- Page 52 AP-100AH User's Manual TCP/IP Configuration - CA Certificate Current Setting Details Information of a CA certificate imported to the AP-100AH. This certificate can be deleted. Range PEM Encoded X509 file Default Value Note installed Certificate File Details Upload a CA certificate...
- Page 53 A. Appendix TCP/IP Configuration - Local Certificate Current Setting Details Information of a server certificate imported to the AP-100AH. This certificate can be deleted. Range PEM Encoded X509 file Default Value Self-signed certificate Description Item X.509 Certificate Version Public Key Algorithm...
- Page 54 AUTO / 10 Half / 10 Full / 100 Half / 100 Full AUTO Default Value Note If a LINK LED on the connected device does not light on when AP-100AH is powered on, change the network type to that of the connected device.
- Page 55 A. Appendix Wireless LAN Configuration – Wireless LAN Basic Configuration SSID Details SSID of wireless LAN that the AP-100AH connects 1 – 32 characters (alphanumeric, hyphen, underscore) Range SilexAH Default Value Channel Bandwidth Details A channel bandwidth used for the wireless LAN...
- Page 56 Up to 8 characters (None) Default Value IP Access Control Configuration – Add New Range Starting Address/Ending Address Details An address range of the remote host IP to access the AP-100AH for its configuration. Range 0.0.0.0 – 255.255.255.255 0.0.0.0 Default Value...
-
Page 57: A-2. Troubleshooting
A computer may belong to a different network from the AP-100AH Solution Please check the IP addresses of the AP-100AH and the computer. If they are in the different network, please change the IP address of one of the AP-100AH and the computer.
Need help?
Do you have a question about the AP-100AH and is the answer not in the manual?
Questions and answers