Table of Contents
Advertisement
Quick Links
Advertisement
Table of Contents

Subscribe to Our Youtube Channel
Summary of Contents for Kogan FORTIS FS27HCMEBKA
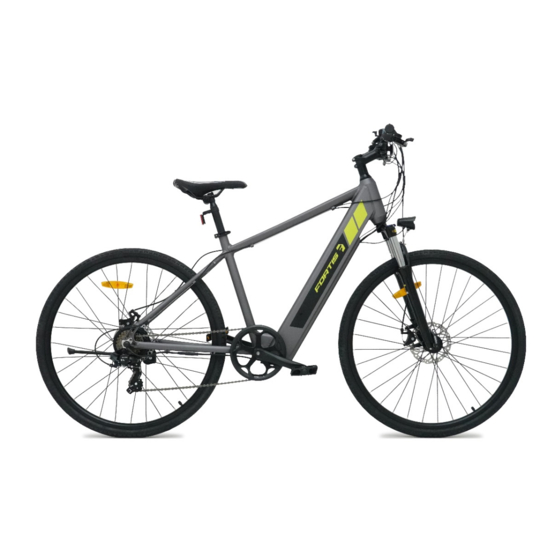
- Page 1 700C HYBRID COMMUTER ELECTRIC MOUNTAIN BIKE FS27HCMEBKA...
-
Page 3: Safety And Warnings
SAFETY & WARNINGS Electric Assisted Bike Regulations The EN 15194 EU standard or EPAC (Electric Power Assisted Cycle) conforms to the following characteristics for electric power assisted bikes: • Motor assistance only starts when the cyclist pedals. • The assistance cuts out as soon as the cyclist stops pedalling. •... - Page 4 • In order to extend battery performance and lifespan, do not half charge, and adapt your ride length to battery level. • The batteries' life will vary depending on where you ride it (inclines will reduce power rapidly) and how you ride (assistance mode chosen). The greater the assistance used, the more you'll use the battery and the shorter it will last.
- Page 5 OVERVIEW Recommendations and Component Control before Use Before using your bicycle for the first time, you must check that all adjustments have been correctly made. • Check that the front and rear brakes work; check brake pads for wear. • Check the cables and sheaths, and that the hydraulic system functions correctly.
- Page 6 Bearings • Check that all bearings are properly adjusted and lubricate if needed. Make sure that they are not too loose or that they have seized up. Check steering bearings, wheel bearings, pedal bearings and bottom bracket bearings. Crank set and Pedals •...
- Page 7 ASSEMBLY Stem Assembly Stem fitted in the head tube with an expanding bolt (figure 1). Insert the stem into the head tube, respecting the minimum insertion limit as indicated on the stem, and tighten the expanding bolt to 18Nm. Important: Before tightening the stem, make sure that it is in-line with the front wheel.
-
Page 8: Brake Adjustment
Brake Adjustment To adjust the disk brakes, loosen the bolts of the disk brake calliper, then activate the brake lever. Keep the brake lever tightened, then tighten the calliper's bolts. This enables the brake calliper to centre. Tighten the brake disks to the wheels and tighten the cable if it is a mechanical brake. - Page 9 Seat Assembly Insert the seat stem into the frame (figure 4), you can use grease to help assembly. Insert at least to the minimal indication on the seat stem using rotary movements. Pull the quick-release lever free and insert the seat-post to the minimal insertion marker indicated on the seat-post.
- Page 10 Derailleur Adjustments Your bicycle is generally fitted with one derailleur located to the rear, or sometimes a front one and a rear one. They are operated by the gear shifters; the front one on the left of the handlebars, and the rear on the right of the handlebar. There are two types of shifters; the twist style (turn towards you for easier hill ascension or away from you to go downhill), or the push and pull trigger style shifters (where you push with your thumb to go up in the gears and pull with your index finger to shift down in the gears).
- Page 11 Front Derailleur Movement: Adjusting the inner stop (figure 6). By turning the outer screw of the front derailer in direction A, the derailer range moves towards to the smallest chain ring; by turning it in direction B, it moves away from the large chain ring.
-
Page 12: Operation
OPERATION Presentation and Electrical Start-Up ELECTRONIC PAD LAYOUT Up: More assistance Down: Less assistance Mode Mode: On/Off Mode Down Starting System • Hold Up button for 3 seconds to turn on the light, hold for another 3 seconds to turn off the light •... -
Page 14: Battery Charging
Change Multifunctional indication display Press briefly on the Mode button to cycle through the different modes: Battery Management Battery status • The battery charge level is displayed by 10 segments which drain thought-out use, the speed of which depending on how (level of assistance) and where you ride (hills, wind...) Battery Mounting and Locking Use the tools which supplied in carton to release the screws and take out the battery. -
Page 15: Troubleshooting
The brake is in a power-off state. Check whether the left and right brake levers are reset. Check if the fault disappears after opening the junction box and unplugging the power-off switch. Contact Kogan.com for support if problem persists. Battery The battery is low, and the fault code disappears after the undervoltage battery is fully charged. - Page 16 The brake is in a power-off state. Check whether the left and right brake levers are reset. Check if the fault disappears after opening the junction box and unplugging the power-off switch. Contact Kogan.com for support if problem persists. Abnormal The communication sending and receiving line between the communication LCD display and the controller is blocked.
-
Page 17: Cleaning And Care
CLEANING & CARE Care and Lubrication Only use specific bicycle lubricants. Pedals: A few drops every 6 months on the axle. Chain: Spray the whole surface every 6 months. Bottom bracket: Every 6 months, please check with your authorised dealer. Motor: Every year, please check with your authorised dealer. - Page 18 NOTES...
- Page 20 Need more information? We hope that this user guide has given you the assistance needed for a simple set-up. For the most up-to-date guide for your product, as well as any additional assistance you may require, head online to help.kogan.com...


Need help?
Do you have a question about the FORTIS FS27HCMEBKA and is the answer not in the manual?
Questions and answers