Advertisement
Quick Links
Advertisement

Related Manuals for Kogan FORTIS FATBABY


Summary of Contents for Kogan FORTIS FATBABY
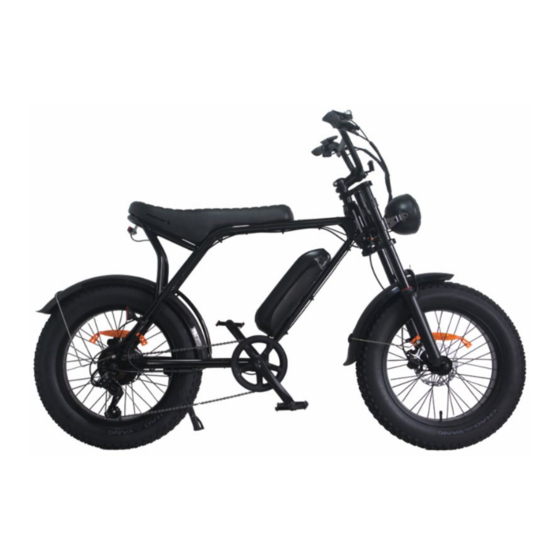
- Page 1 FATBABY 48V 10.4AH FAT TYRE ELECTRIC BIKE FSMOTEBIKEA...
- Page 2 Safety & Warnings Overview Assembly Operation Cleaning & Care Specifications Troubleshooting Notes...
- Page 3 Pre-Ride Recommendations • Check all parts of the electric bike before your first ride. If you notice any issues or are unsure, contact help.Kogan.com for support. • Regularly check tyre pressure to ensure smooth pedalling and optimise battery performance. Proper inflation reduces tyre wear and extends battery life.
- Page 4 • Always check the battery charge level before riding. Fully charge the battery before first use. • To extend battery life, avoid partial charging and adjust your ride length based on the remaining battery level. • Battery performance varies based on terrain, rider weight, and the level of motor assistance used.
- Page 5 • Only use the charger provided with the bike. Using an incompatible charger may damage the battery and void the warranty. • The charger is intended for indoor use only. Keep it away from water and avoid using it in damp or combustible environments. Always unplug the charger by pulling the metal body, not the cord.
- Page 6 Pre-Riding Safety Checklist Before every riding and after every 40-72km, it is recommended to follow the pre-ride safety checklist below. Safety Check Basic Steps • Ensure front and rear brakes work properly • Left brake is for the rear, right brake is for the front. •...
- Page 7 • Ensure pedals are securely tightened to the cranks Cranks and Pedals • Ensure the cranks are securely tightened and are not bent • Check that the derailleur is adjusted and functioning properly • Ensure shifter and brake levers are attached to the handlebar Derailleurs securely •...
- Page 8 • Ensure all reflectors are properly fitted and not obscured • Ensure all other fittings on bike are properly secured and functioning • Inspect helmet and other safety gear for signs of damage • Ensure rider is wearing helmet and other required riding safety gear •...
- Page 9 • Wear appropriate safety gear and do not ride alone in remote areas. Check local rules and regulations if off-road E-bike riding is allowed. Engaging in extreme riding is extremely dangerous and should be avoided. Failure to do so can lead to bring seriously injured or killed.
- Page 10 OVERVIEW Display Handlebar Bike frame Rear light Seat LED headlight Front fender Rear fender Disc brake Tyre Bike motor Derailleur Battery Crank Chain Front fork Pedals Gear adjustment Display Horn button Gear adjustment...
- Page 11 Display Head lamp Speed Error Battery level Mode Odometer Gear position Icon Explain Press and hold the Power button to turn the e-bike on/off. Power button Short press the Power button to cycle through the different display modes (ODO, TRIP, VOL, CUR, TIME). Press the ‘...
- Page 12 ASSEMBLY The following assembly steps are a general guide to assist in assembling your electric bike and are not a comprehensive manual covering all aspects of assembly, maintenance, and repair. It is recommend consulting a certified bike mechanic for assistance with assembly, repair, and maintenance of your bike.
- Page 13 Remove out the accessories and tooling kit. Use the M5 Allen key to loosen the screw on the handlebar stem. Release the screw and remove the trim cover. Remove the fork retainer. Install the headlight bracket and headlight on the front fork ensuring it is securely in place.
- Page 14 Align the forks so they are facing straight and forwards. Install the retainer and top cover and tighten all screws. 10. Loosen the screws and remove the handlebar stem cover. Install the handlebar, replace the stem cover and tighten all the screws.
- Page 15 12. Remove the wheels and accessories. 13. Attach the front wheel to the front forks. Ensure the brake rotor is aligned with the slot in the brake calliper. 14. Tighten the fasteners on both sides. Attach the bolt cover after tightening. 15.
- Page 16 16. ‘R’ marks the Right Pedal, and ‘L’ marks the Left Pedal. 17. Install the correct pedal on the corresponding side and tighten the fastener. Note: The pedals are side-specific and cannot be installed on the wrong side. Installing them incorrectly may damage the pedals or threads. 18.
- Page 17 19. Connect the cables connectors according to the direction of arrow. 20. Press and hold power button for 3 seconds to turn on the bike. Power button 21. Attach the front reflector to the handlebars as shown below. Ensure the fasteners are tightened.
- Page 18 • Always charge your battery in temperatures between 10°C and 25°C. Ensure that both the battery and charger are not damaged before charging. If you notice anything unusual during charging, cease use immediately and contact help.Kogan.com for support. • Fully charging the battery typically takes 3-7 hours. In certain cases, it may take longer to allow the battery management system to balance the charge, particularly if the bike is new or has been in storage for an extended period.
- Page 19 Charging Remove the rubber cover from the charging port located on the opposite side of the battery from the key switch. With the battery either attached or detached from the bike, place the charger on a flat, secure surface. Plug the charger into the wall outlet first, then into the charging port on the battery.
- Page 20 Gear Operation Multi-speed bicycles can use either internal or derailleur gear systems. Warning: Improper shifting may cause the chain to jam or derail, which could result in a loss of control or a crash. Always ensure the chain is fully engaged in the desired gear before pedalling hard.
- Page 21 Spare parts: It is highly recommended to keep spare parts such as tyres, tubes and brake pads on hand. Note: If any safety critical components (brakes etc.) need to be replaced, take the bike to a licensed bike mechanic and have them replaced using genuine parts. Contact help.Kogan.com for support.
- Page 22 Periodic Maintenance Monthly: • Check the condition of tyres, brakes, and lights. • Inspect the battery for any signs of wear or damage. • Clean and lubricate the chain and other moving parts using chain oil or WD-40. Every 3 Months: •...
- Page 23 Sound Pressure Levels The A-weighted emission sound pressure level at the rider's ears should remain below 70 dB(A) for safe operation. Chain Tension Adjustment Ensure the chain is adjusted correctly for optimal performance. Adjust the chain tension as needed by using the derailleur mechanism. Brake Adjustment and Replacement of Friction Components Adjusting brake clearance: Use the adjustment screw on the brake lever to modify the •...
- Page 24 SPECIFICATIONS Bike Dimensions 170 x 68 x 118cm Packing Dimensions 145 x 27 x 85cm Colour Black Frame Material Steel Net Weight 30.6kg (67.46lb) Gross Weight 36kg (79.36lb) Maximum Load Capacity 120kg (264.55lb) Max Speed 25KM/H Inner Tyre Pressure 20PSI / 140KPA Charger AC-DC 54.6V 2A 100-240V AC DC5.5X2.1 Battery...
- Page 25 Loose or damaged throttle Tighten or replace When powered on the motor does not • • Loose or damaged motor Secure or replace respond plug wire Contact help.Kogan.com • • Damaged motor for support • Low tyre pressure • Adjust tyre pressure •...
- Page 26 • Damaged motor bearings Wheel or motor Contact help.Kogan.com for • Damaged wheel spokes or makes abnormal support noises • Damaged motor wiring • • Sensor loose Adjust the connections Sensor Issue Contact help.Kogan.com • • Sensor or cable broken...
- Page 27 NOTES...
- Page 28 Need more information? We hope that this user guide has given you the assistance needed for a simple set-up. For the most up-to-date guide for your product, as well as any additional assistance you may require, head online to help.kogan.com...
Need help?
Do you have a question about the FORTIS FATBABY and is the answer not in the manual?
Questions and answers