Advertisement
fura
pE-340
Quick Start Guide
This guide should provide some basic information on the setup and operation
fura
of the CoolLED pE-340
Illumination System.
Before operating this product please read and observe the advice given in the
safety section of the full User Manual.
For more detailed information on the full range of options and functions
please see the full User Manual.
DOC-036 Iss 1
1
Advertisement
Table of Contents

Related Manuals for CoolLED pE-340 fura


Summary of Contents for CoolLED pE-340 fura
- Page 1 Quick Start Guide This guide should provide some basic information on the setup and operation fura of the CoolLED pE-340 Illumination System. Before operating this product please read and observe the advice given in the safety section of the full User Manual.
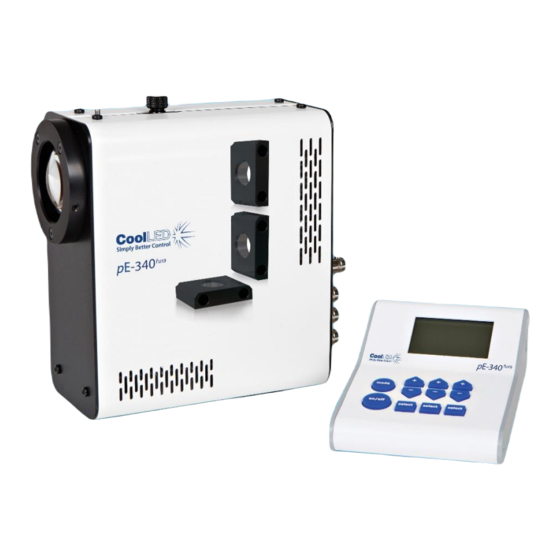
- Page 2 1. Contents fura fura pE-340 fura pE-340 pE-340 Control Pod Light Source Power Supply fura A typical pE-340 order will include the parts shown. A microscope adaptor that was fura specified when ordering will be fitted to the pE-340 Light Source (direct fit version). A mains power cable for the specified region of use shall also be included (not pictured).
- Page 3 3. Connecting the Control Pod and power supply Connect the pE- fura Control Pod cable to the light source. Ensure the correct orientation of the connector by aligning the two red dots. Insert the power supply connector into the Light Source.
- Page 4 4. Control Pod operation On/Off Channel status intensity (%) Intensity Channel Values control buttons Mode button (allows pod display & system info to be viewed) Channel On/Off selection button buttons When the system is powered up the Light Source shall be in the “Off” state. Pressing the select buttons will allow you to select or deselect different channels.
- Page 5 5. Optical adjustment To optimize the Light Source, set Thumbscrew up a sample that covers the entire field of view. Loosen the thumbscrew and slide the adjuster Pull post back back and forth and forth to whilst viewing make the sample. adjustments Once you achieve maximum...
Need help?
Do you have a question about the pE-340 fura and is the answer not in the manual?
Questions and answers