
Related Manuals for DoorBird D1101UV


Summary of Contents for DoorBird D1101UV
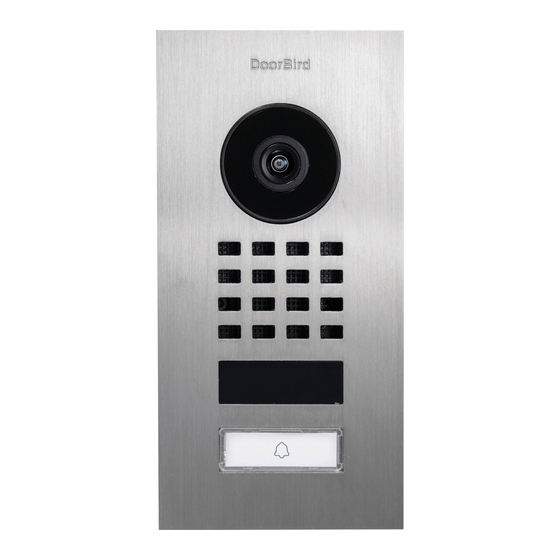
- Page 1 Page 2-12 Installation Manual IP Video Door Station D1101UV Seite 13-24 Installationsanleitung IP Video Türstation D1101UV D1101UV VERSION 1.2, MIN. HW 1.2...
- Page 2 Hazard information the operating manual as well. WARNING You can always find the most up-to-date version of the installation manual on www.doorbird.com/ • Mounting, installation and servicing work on support electrical devices may only be performed by a qualified eletrician. Failure to observe this To make things easier we use the term “device”...
- Page 3 • Do not put anything on the device or cover WARNING the device with cloth, silicone, glue, coating, separate covering etc. Fire or device issues could animals. result. • Voltage is applied to parts within the • Do not install the device in any of the following equipment.
- Page 4 • On devices with Username/Password, the For information about the device warranty, see Username/Password to access the device is www.doorbird.com/warranty the customer‘s responsibility. Make sure to use a password that cannot be easily guessed by a third party. We recommend that you...
-
Page 5: Installation
All the steps below should be carried out carefully watch our installation videos which can be found by a competent adult, taking into consideration any on http://www.doorbird.com/support applicable safety regulations. Please contact us directly or seek the advice of a competent specialist. -
Page 6: Notes On Network Connection
If you have only two wires available at the assembly location, you may use the You can connect all necessary cables and wires to the “DoorBird 2-Wire Ethernet PoE Converter device now. A1071”, sold separately. It allows you to transfer network data (Ethernet) and... - Page 7 COM 1 CB 2 Max 24V Max 0V 15VDC 0 A (NO) LAN/POE CB 1 R1 R1 E1 E1 V- V+ Port Description LAN/POE The device cannot be connected to the network via WiFi. Please refer to the section „Notes on Network Connection“ prior to step 1. Use only four wires (1, 2, 3 and 6) of a standard Network cable Cat.5 or better, coming from the Internet Router/PoE-Switch/PoE-Injector.
- Page 8 You can configure the default state of the relay (open/close) via the DoorBird App. These ports can be used to connect e.g. an electric door opener. The device does not supply power to the connected device.
-
Page 9: Diagnostic-Led
ASSEMBLE THE DEVICE TO THE If you use WiFi for connecting the device to your Internet Router, first go to the DoorBird App > ”WiFi MOUNTNG HOUSING (BACKBOX) Setup“ and follow the instructions. Assemble the front panel with the attached Main... - Page 10 Stainless Steel Only high-quality stainless steel is used for all available DoorBird door stations. However, high-quality stainless steel can also rust, as approx. 70 % of stainless steel is made of iron. Rust resistance is only achieved by a protective layer (also called passive layer), which...
- Page 11 (loose contact). If the problem still exists, please check if your PoE-Switch / PoE Injector supports the PoE Standard IEEE 802.3af Mode A, see also www.doorbird.com/poe If the device is to be supplied with power by a DIN-rail power supply, switch on the DIN-rail...
-
Page 12: Legal Notes
Since the products and software of General remarks Bird Home Automation GmbH are not explicitly customer-specific 1. DoorBird is a registered trademark of Bird Home Automation products, a customer cannot deny an automatic update if the GmbH. - Page 13 Bitte beachten: Weist auf eine gefährliche NOTI CE Situation hin, welche, falls nicht verhindert, zu Sachschäden führen kann. Wichtig: Weist auf wichtige Informationen hin, die den richtigen Betrieb des Produkts gewährleisten. Hinweis: Weist auf nützliche Informationen hin, die die optimale Verwendung des Geräts unterstützen.
- Page 14 WARNUNG Material in das Gerät. Feuer, elektrische Stromschläge oder Gerätestörungen können die • Das Gerät ist kein Spielzeug! Erlauben Sie Folge sein. Säuglingen und Kindern nicht damit zu spielen. • Bestehende Verdrahtungen wie Türgong- verdrahtung usw. können Hochspannungs- • Um Erstickungsgefahr zu vermeiden, halten Wechselstrom enthalten.
- Page 15 wird, bei dem beide Gegensprechgeräte • Halten Sie das Gerät mehr als 1 m (3,3“) auf geringer Lautstärke eingestellt sind. Ein entfernt von Mikrowelle, Radio, TV, WLAN plötzlicher Anruf etc. kann ankommen und das Router und anderen drahtlosen Geräten. Gehör schädigen. •...
- Page 16 Entsorgung zu informieren. 1x Schraub- Kleinteile Transport anschlussklemmen- stecker Bei Bedarf transportieren Sie das Gerät NOTIC E in der Originalverpackung oder einer entsprechenden Verpackung, so dass Schäden vermieden werden. Gewährleistung Informationen zur Gewährleistung des Geräts finden Sie unter www.doorbird.com/de/warranty...
- Page 17 In den Videos wird jeder Installations- mindestens 0,5 Mbit/s Uploadgeschwindigkeit verfügt. schritt einzeln und gut dokumentiert dargestellt. Sie können über die DoorBird App jederzeit auch einen Geschwindigkeitstest durchführen. Das Nutzererleb- INSTALLATION nis ist nur so gut wie die Netzwerkgeschwindigkeit, Netzwerkstabilität und Qualität Ihrer Netzwerk-...
-
Page 18: Gerät Anschliessen
Uhrzeigersinn, bis sie sich lösen. dazwischen platzieren. Wenn Sie nur zwei Drähte am Montageort zur Verfügung haben, können Sie den „DoorBird 2-Draht Ethernet PoE Konverter A1071“ verwenden, der separat erhältlich ist. Er ermöglicht es Ihnen, Netzwerkdaten (Ethernet) und Strom (PoE) über eine einfache Zweidrahtleitung über weite... - Page 19 COM 1 CB 2 Max 24V Max 0V 15VDC 0 A (NO) LAN/POE CB 1 R1 R1 E1 E1 V- V+ ANSCHLÜSSE BESCHREIBUNG LAN/POE Das Gerät kann nicht über WLAN mit dem Netzwerk verbunden werden. Bitte beachten Sie hierzu den Absatz „Hinweise zur Netzwerkverbindung“ vor Schritt 1.
- Page 20 Verdrahtung eines elektrischen Türöffners generell den Einsatz eines abgesetzten Sicherheitsrelais, das im Hausinneren montiert wird (z.B. DoorBird E/A Tür Controller A1081). E1, E1 Digitaler Eingang (0 V, 0 A (NO)), für Türöffnertaster, max. 0 V DC/AC, 0 A.
- Page 21 DOWNLOAD UND INSTALLATION MONTAGE DES GERÄTES AN DAS DER APP RÜCKGEHÄUSE Laden Sie sich die App “DoorBird“ von Bird Home Montieren Sie die Frontblende inklusive der Automation aus dem Apple App Store bzw. Google elektrischen Haupteinheit vorsichtig mit Hilfe der Play Store auf Ihr mobiles Endgerät.
- Page 22 Nach jeder Reinigung mit klarem Wasser nebelfeucht nachwischen und trockenreiben, um die Bildung Pflege und Reinigung von Kalkspuren zu verhindern. Durch Nutzung von Alle DoorBird Frontblenden werden aus hochwertigen entmineralisiertem Wasser lassen sich Kalkrückstände Materialien gefertigt und sind für eine lange vermeiden.
- Page 23 Wenn das Problem weiterhin besteht, Sie www.doorbird.com/downloads/ports.pdf überprüfen Sie bitte, ob Ihr PoE-Switch / PoE- Injektor den PoE-Standard IEEE 802.3af Mode A unterstützt, siehe auch www.doorbird.com/ de/poe Wenn das Gerät über ein Hutschinennetzteil versorgt werden soll, schalten Sie die das Hutschinennetzteil jetzt ein.
-
Page 24: Rechtliche Hinweise
RECHTLICHE HINWEISE Allgemeines bereits vorhandener Funktionen erfolgen im Normalfall nur, sofern 1. DoorBird ist ein registriertes Warenzeichen der Bird Home Bird Home Automation GmbH dies für erforderlich hält (z.B. aus Automation GmbH. Datenschutz-, Datensicherheits- oder Stabilitätsgründen oder um sie 2. Apple, das Apple Logo, Mac, Mac OS, Macintosh, iPad, Multi-Touch, auf dem Stand der Technik zu halten). - Page 25 Space for notes / Platz für Notizen...
- Page 28 www.doorbird.com...
Need help?
Do you have a question about the D1101UV and is the answer not in the manual?
Questions and answers