Table of Contents
Advertisement
IMPORTANT NOTICES AND SAFETY INSTRUCTIONS ..........i
SYSTEM CONFIGURATION ....................................................iii
EQUIPMENT LIST ....................................................................iv
1. INSTALLATION....................................................................1
1.1 Disply Unit Installation..................................................................1
1.2 Radar Sensor (DRS4W) Installation............................................4
1.3 Transducer Installation................................................................5
1.4 Speed/Temperature Sensor (Option) Installation......................14
2. WIRING...............................................................................15
2.1 Power/NMEA0183 Port.............................................................15
2.2 XDR Port.....................................................................................16
2.3 NMEA2000 (CAN bus) Connections..........................................17
3. SETTINGS AND ADJUSTMENTS .....................................18
3.1 Starting the Setup Procedure.....................................................18
3.2 How to Use the Menu................................................................19
3.3 Initial Setup Menu.......................................................................20
3.4 How to Set up the SUZUKI Gateway.........................................24
3.5 SMD 7/9 Connection Examples of Various Systems.................28
3.6 How to Set Up the Fish Finder...................................................36
3.7 How to Set Up the Radar...........................................................37
All brand and product names are trademarks, registered trademarks or service marks of their respective holders.
Installation Manual
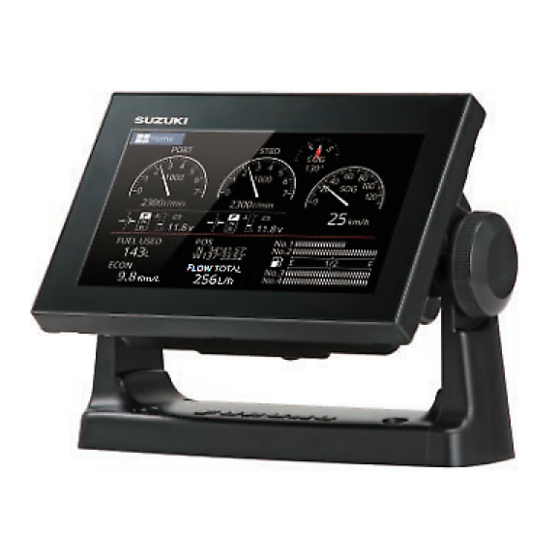
Multi-Function Display
SMD7/SMD9
Model
4. INPUT/OUTPUT DATA........................................................39
4.1 How to access the [Interface] menu...........................................39
4.2 How to set up for NMEA0183 configurations .............................39
4.3 How to select a data source.......................................................39
4.4 How to select which NMEA2000 data to output.........................40
4.5 How to select which NMEA0183 sentence to output .................40
4.6 How to calibrate (offset) the sensors .........................................41
4.7 How to reset the [Interface] menu..............................................42
4.8 NMEA0183/NMEA2000 Monitor.................................................42
5. MAINTENANCE AND TROUBLESHOOTING ....................43
5.1 General Maintenance.................................................................44
5.2 Life of Parts................................................................................44
5.3 Troubleshooting .........................................................................44
5.4 How to Restore the Default Settings..........................................46
5.5 How to View the System Information .........................................46
APPENDIX 1 MENU TREE ..................................................AP-1
APPENDIX 2 RADIO REGULATORY INFORMATION ......AP-9
SPECIFICATIONS ................................................................SP-1
PACKING LISTS.....................................................................A-1
OUTLINES ..............................................................................D-1
INTERCONNECTION..............................................................S-1
Advertisement
Table of Contents
Troubleshooting

Related Manuals for Suzuki SMD7


Summary of Contents for Suzuki SMD7
-
Page 1: Table Of Contents
3.2 How to Use the Menu..............19 APPENDIX 2 RADIO REGULATORY INFORMATION ..AP-9 3.3 Initial Setup Menu...............20 SPECIFICATIONS ..............SP-1 3.4 How to Set up the SUZUKI Gateway.........24 PACKING LISTS..............A-1 3.5 SMD 7/9 Connection Examples of Various Systems....28 OUTLINES ................D-1 3.6 How to Set Up the Fish Finder...........36 INTERCONNECTION..............S-1... -
Page 2: Important Notices And Safety Instructions
How to discard a used battery transducer mounting location. The transducer can be damaged. Some SUZUKI products have a battery(ies). To see if your product has a battery, see the chapter on Water leakage can sink the vessel. The transducer cable must handled Maintenance. -
Page 3: System Configuration
Cautions regarding configurations C332 10M 001-464-120 10m, for transducer/triducer Extension Cable* • The SMD7/SMD9 are designed to connect with a single DRS4W radar sensor. Connection NMEA Data IF-NMEA2K2 000-020-510 with multiple radar sensors in not available. • The DRS4W radar sensor can connect with up to two separate SMD7/SMD9 units. -
Page 4: Installation
520-PLD (* • 50/200-1T *10M* 000-023-020-00 525T-BSD (* • 50B-6 *10M* The Display Unit (SMD7 or SMD9) can be mounted in one of two ways: desktop 000-023-019-00 • 50B-6B *15M* 525T-PWD (* (bracket) or flush mount (in the console, etc.). - Page 5 1. INSTALLATION 1. INSTALLATION • Select a location where the cables have sufficient slack to allow for maintenance 1.1.2 Flushmount (console) installation and service. Before mounting the Display Unit in a desktop or console, remove the unit from the • A magnetic compass may receive interference if it is placed too close to this unit. attached bracket.
-
Page 6: Transducer Installation
1. INSTALLATION 1. INSTALLATION Transducer Installation 8. Fit the Display Unit to the mounting hole, taking care that the threaded rods are aligned with the bolts holes drilled at step 4. CAUTION Do not transmit with the transducer out of water. The unit and transducer may be damaged. - Page 7 1. INSTALLATION 1. INSTALLATION Installation procedure 1.3.2 Transom mount transducer 1. With the boat hauled out of the water, mark the location chosen for mounting the The optional transom mount transducer is very commonly employed, usually on rela- transducer on the bottom of the hull. tively small I/O or outboard boats.
- Page 8 1. INSTALLATION 1. INSTALLATION 1.3.3 How to mount a transducer inside the hull 9) Tap the [<] icon to return to the [Fish Finder] menu 10) At the [Transmission Power] menu item, tap [High] or [Low] as appropriate. The transducer may also be installed inside the hull on FRP boats. However, this in- stallation method affects the ability to detect the bottom, fish and other objects be- 11) Drag the right-hand side of the screen leftwards to show the slide-out menu.
- Page 9 1. INSTALLATION 1. INSTALLATION 1.3.4 Triducer Note 2: Avoid mounting the sensor where the boat may be supported during trailering, launching, haul- DO NOT over-tighten screws, to prevent damage to the transducer. ing, and storage. 525STID-MSD Note 3: For single drive boat, mount on the star- board side at least 75 mm (3") beyond the swing ra- The optional triducer 525STID-MSD is designed for thru-hull mounting.
- Page 10 1. INSTALLATION 1. INSTALLATION 19°-22° transom angle (small aluminum and fiberglass boats): Position the 3. On the outside of the hull secure the cable against the transom using the cable shim with the tapered end up. clamps. Position a cable clamp 50 mm (2") above the bracket and mark the mounting hole with a pencil.
-
Page 11: Speed/Temperature Sensor (Option) Installation
Speed/Temperature Sensor (option) Installation 1.4.1 Speed/temperature sensors ST-02MSB, ST-02PSB The SMD7/9 has three interface connectors at the rear of the unit, as shown in the fol- The speed/temperature sensors (ST-02MSB, ST-02PSB) are designed for thru-hull lowing figure. mounting. Install them as shown in this section. -
Page 12: Xdr Port
The table below shows the NMEA2000 devices which are compatible (connectible) ble assembly (type: 02S4147). with the SMD7/9 and can share information via the CAN bus network. Note: Use of the optional extension cable (type: C332 10M) may cause the following... -
Page 13: Settings And Adjustments
3. SETTINGS AND ADJUSTMENTS SETTINGS AND ADJUSTMENTS How to Use the Menu The [Settings] menu contains customizing options for this equipment. To access the [Settings] menu, follow the procedure below. About the microSD Card 1. Tap the [Home] icon to show the [Home] screen. Do not remove or insert the microSD Card when the power is turned on, to avoid loss 2. -
Page 14: Initial Setup Menu
3. SETTINGS AND ADJUSTMENTS 3. SETTINGS AND ADJUSTMENTS Alphanumeric input Menu name Description Setting range/options [Speed Filter] During position fixing, ship's ve- [Off], [Low], [Medium], [High] To enter alphanumeric characters, follow the procedure below. locity (speed) is directly mea- sured from the GPS satellite. The raw velocity data may change Go back to the previous screen/menu... - Page 15 Note: The remaining fuel calculation is for reference purposes. Do not use the results for navigation the [Initial Setup] menu’s default planning or emergency purposes. During an entire voyage, select one SMD7/9 for the calculation at settings. start-up and keep that unit powered. The calculation of remaining fuel is not done when the unit is...
-
Page 16: How To Set Up The Suzuki Gateway
Engine setup Set up and calibrate the engine with the following procedure. This section covers the installation settings for your SUZUKI Gateway and SUZUKI engines. For other SUZUKI operations, see your Operator’s Manual or eGuide. Connect to the NMEA Network 1. - Page 17 3. SETTINGS AND ADJUSTMENTS 3. SETTINGS AND ADJUSTMENTS Engine No. Station Settings 1. Tap the [Engine No.]. 1. Drag the menu to display the [Station Setting]. 2. Input the engine number to following menu. Backspace Deletes the character to Go back to the previous the left of the cutsor.
- Page 18 3. SETTINGS AND ADJUSTMENTS 3. SETTINGS AND ADJUSTMENTS Connection Examples of Various The single station of dual engine Systems 3.5.1 Connection of Mechanical Remote Control System MAIN WIRING PORT HARNESS (PORT) The single station of single engine NMEA PWR MAIN WIRING HARNESS NMEA PWR NMEA PWR MAIN WIRING...
- Page 19 3. SETTINGS AND ADJUSTMENTS 3. SETTINGS AND ADJUSTMENTS 3.5.2 Connection of SUZUKI Precision Control System The single station of dual engine The single station of single engine TO BCM HARNESS NMEA PWR PORT TO BCM HARNESS NMEA PWR Additional Part Names Part No.
- Page 20 3. SETTINGS AND ADJUSTMENTS 3. SETTINGS AND ADJUSTMENTS The single station of triple engine The single station of quad engine Additional Additional Part Names Part No. Part Names Part No. Quantity Quantity 34900-98L DISPLAY ASSY,MULTI* * ADAPTER COMP, GAUGE 36661-96L2 ADAPTER COMP, GAUGE 36661-96L2 WIRE COMP, EXTENSION (0.6 m)
- Page 21 3. SETTINGS AND ADJUSTMENTS 3. SETTINGS AND ADJUSTMENTS The dual display The dual station 1st STATION 2nd STATION SINGLE DUAL Additional Part Names Part No. Quantity WIRE COMP, EXTENSION (0.6 m) 36662-88L1 CONNECTOR COMP, BRANCH 36664-88L0 UNIT COMP, RESISTOR MALE 36665-88L1 Additional Part Names...
-
Page 22: How To Set Up The Fish Finder
When connecting to the DRS4W, the following information is required. [Transducer] Select the transducer which is connected to your SMD7/9. • DRS4W SSID, supplied with the DRS4W when installed. Drag the menu to show transducer types which are not displayed on the •... -
Page 23: Input/Output Data
How to align the antenna heading You have mounted the antenna unit facing straight ahead in the direction of the bow. The SMD7/9 can connect to temperature sensors, speed sensors and other Therefore, a small but conspicuous target dead ahead visually should appear on the NMEA0183 or NMEA2000 compatible sensors. -
Page 24: How To Select Which Nmea2000 Data To Output
4. INPUT/OUTPUT DATA 4. INPUT/OUTPUT DATA • Specific sensor selection: If a sensor is connected to the same NMEA2000 Sentence Description network, the sensor name appears in the [Input Device] list. Tap the sensor you Global Positioning System Fix Data want to use. -
Page 25: How To Reset The [Interface] Menu
4. INPUT/OUTPUT DATA MAINTENANCE AND TROUBLE- How to reset the [Interface] menu SHOOTING To restore the defaults for all settings in the Interface menu, follow the procedure be- low. Note: The [Interface] menu settings cannot be restored to default individually. 1. -
Page 26: Life Of Parts
5. MAINTENANCE AND TROUBLESHOOTING 5. MAINTENANCE AND TROUBLESHOOTING Life of Parts 5.3.3 Radar troubleshooting Problem Remedy You tapped the [TX] icon on the • Tap the [TX] icon again. (The icon is filled in white when the ra- The life of the LCD is approximately 18,000 hours. The actual number of hours de- radar display to transmit but dar is in transmit state.) nothing happens. -
Page 27: How To Restore The Default Settings
There are two methods to restore default settings. You can clear the menu settings, saving only user data such as routes and points, etc, or reset the entire SMD7/9 set- tings to factory default. To restore the default settings for both methods, follow the pro- Bold italic: Default setting cedure below. - Page 28 APPENDIX 1 MENU TREE APPENDIX 1 MENU TREE Routes End Route Notification (ON, OFF) Mode (2D, 3D) Routes Chart Keep Destination (ON, OFF) Layer (Vector, Shaded Relief, Satellite, Raster Chart) Aspect Circle Radius (NM) (0.01 to 0.54, default: 0.054) Mode Layer Transparency (0% to 100%, default: 50%) Route Planning Speed (kn)(0.2 to 194.2, default: 5) Layer Overlay (On Land, On Sea, On All)
- Page 29 APPENDIX 1 MENU TREE APPENDIX 1 MENU TREE Bottom Bottom Discrimination (Graphic Representation, Probability Graph) Notifications General Buzzer Sound Buzzer (ON, OFF) Disrimination Show Legend (ON, OFF) Interval (Short, Long, Continuous) ACCU-FISH ACCU-FISH Info (Off, Fish Size, Depth) Fish and Echo Strength (High, Medium, Low) ACCU-FISH Symbol (Small, Large, Off) Bottom...
- Page 30 APPENDIX 1 MENU TREE APPENDIX 1 MENU TREE Files Screenshots Screenshots (shows number of screenshots saved to internal memory) Manual Fuel Manual Management (ON, OFF) Export to SD Management Total Fuel Capacity (0 to 9999 US gal) Delete All Screenshots NMEA Output Instance (0, 1, 2, 3, 4, 5) User Data Export File Format (C-MAP, GPX, CSV)
-
Page 31: Appendix 2 Radio Regulatory Information
APPENDIX 1 MENU TREE APPENDIX 2 RADIO REGULATORY Slide-out and Layered Menus INFORMATION Slide-out Engine Setup Menu Event Mark Lat/Lon Ruler Tide Stations USA-Federal Communications Commission (FCC) Search Troll This device complies with part 15 of the FCC Rules. Operation is subject to the following two conditions: (1) This device may not cause harmful interference, and Plotter Chart Type (Vector, Shaded Relief, Satellite, Raster Chart) -
Page 32: Specifications
SMD7/9 SMD7/9 SPECIFICATIONS OF MULTI-FUNCTION DISPLAY Data sentences (NMEA0183) SMD7/9 Input DBT, DPT, DSC, DSE, GGA, GLL, GNS, HDG, HDT, MTW, MWV, RMC, ROT, RSA, THS, TLL, VHW, VTG, ZDA DISPLAY Output AAM, APB, BOD, BWR, DBT, DPT, GGA, GLL, GNS, GSA, GSV,... -
Page 33: Packing Lists
SHEET FLUSH MOUNT 31914-98L00 34915-98L00 ゲートウェイ 操作上の注意 E42-01804-* GUIDE SAFETY GATEWAY (KIT ONLY) INSTALLATION 34923-96L00 34919-98L00 タッピンネジ 操作要領書(多言) VTATM4.8X22TCCINX MLG-45040-* SCREW BRACKET MOUNT GUIDE OPERATION 34920-98L10 34918-98L00 SMD7 ASSY P/No. 34900-98L00 装備要領書(英) IME-45040-* P/No. 34901-98L00 SMD7 KIT MANUAL INSTALLATION 34917-98L00 19BL-X-9851... - Page 34 PACKING LIST SMD9-E 19BL-X-9852 -2 NAME OUTLINE DESCRIPTION/CODE № Q'TY NAME OUTLINE DESCRIPTION/CODE № Q'TY ケーブル(クミヒン) ユニット UNIT CBC0FS0810 マルチファンクションディスプレイ CABLE POWER SUPPLY L=1.5M SMD9-E 36663-98L00 DISPLAY COMP MULTI 9 ハ-ネスアッシ,ネットワ-クパワ- 34910-98L10 FRU-2W-FU-01A HARNESS ASSY 付属品 ACCESSORIES (KIT ONLY) NETWORK POWER 36663-88L20 ノブ(ボルト) ワイヤ,2エクステンション(NMEA)
- Page 35 SMD7 Muiti-Function Display OUTLINE (DRAWING) (Tabletop mount) (REF. No. C4498-G01-A)
- Page 36 SMD7 Muiti-Function Display OUTLINE (DRAWING) (Flushmount) (REF. No. C4498-G02-A)
- Page 37 SMD9 Muiti-Function Display OUTLINE (DRAWING) (Tabletop mount) (REF. No. C4499-G01-A)
- Page 38 SMD9 Muiti-Function Display OUTLINE (DRAWING) (Flushmount) (REF. No. C4499-G02-C)
-
Page 39: Interconnection
SMD7/9 INTERCONNECTION アナログNMEAデータ変換器 (DIAGRAM) 各種センサー 0.3m ANALOG NMEA DATA CONVERTER SENSOR 詳細はC7281C02参照 IF-NMEAFI REFER TO C7281C02 FOR DETAIL. データ変換器 航法装置 0.3m マルチファンクションディスプレイ DATA CONVERTER NAV EQUIPMENT 詳細はC4459C02参照 MULTI-FUNCTION DISPLAY IF-NMEA2K2 REFER TO C4459C02 FOR DETAIL. (NMEA0183 V3.0) SMD7/9 PWR/SIGNAL NMEA2000 CBCOFS0810,1.5m... - Page 42 Declaration of Conformity Slovenian Furuno Electric Co., Ltd. potrjuje, da je zgoraj omenjeno tip radijske opreme [SMD7/SMD9] (SL) skladen z Direktivo 2014/53/EU. Bulgarian Furuno Electric Co., Ltd. Finnish Furuno Electric Co., Ltd. vakuuttaa, että yllä mainittu radiolaitetyyppi on (BG) 2014/53/ (FI) direktiivin 2014/53/EU mukainen.
- Page 43 300 TAKATSUKA, MINAMI, HAMAMATSU, JAPAN SUZUKI Authorized Distributor/Dealer A: NOV. 15, 2018 All rights reserved. Printed in Japan Pub. No. IME-45040-A (TEHI) SMD7/9 P/No. 34917-98L00...
Need help?
Do you have a question about the SMD7 and is the answer not in the manual?
Questions and answers