
Related Manuals for Hanna Instruments HI97101


Summary of Contents for Hanna Instruments HI97101
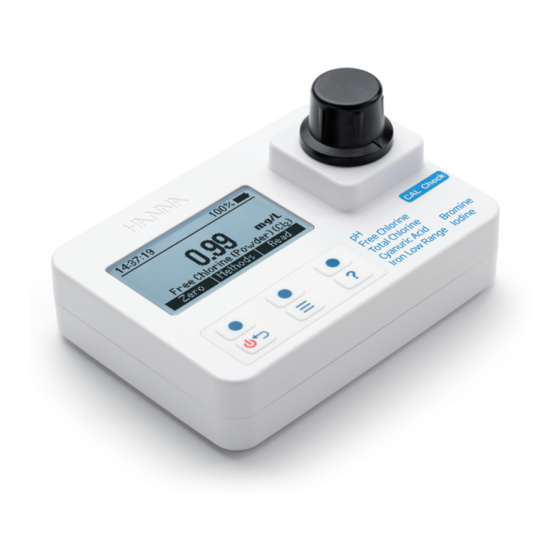
- Page 1 HI97101 pH, Free Chlorine, Total Chlorine, Cyanuric Acid, Iron Low Range, Bromine & Iodine Photometer...
- Page 2 If you need additional technical information, do not hesitate to e‑mail us at tech@hannainst.com or view our worldwide contact list at www.hannainst.com. All rights are reserved. Reproduction in whole or in part is prohibited without the written consent of the copyright owner, Hanna Instruments Inc., Woonsocket, Rhode Island, 02895, USA.
-
Page 3: Table Of Contents
TABLE OF CONTENTS 1. PRELIMINARY EXAMINATION ................5 2. SAFETY MEASURES ..................6 3. ABBREVIATIONS ................... 6 4. SPECIFICATIONS .................... 7 5. DESCRIPTION ....................9 5.1. GENERAL DESCRIPTION & INTENDED USE ..........9 5.2. FUNCTIONAL DESCRIPTION ..............10 5.3. PRECISION & ACCURACY ..............11 5.4. - Page 4 9. WARNING & ERROR DESCRIPTIONS............... 45 10. BATTERY REPLACEMENT ................47 11. ACCESSORIES .................... 48 11.1. REAGENT SETS................. 48 11.2. OTHER ACCESSORIES ............... 49 CERTIFICATION ....................50 RECOMMENDATIONS FOR USERS ............... 50 WARRANTY ...................... 50...
-
Page 5: Preliminary Examination
1. PRELIMINARY EXAMINATION Remove the instrument and accessories from the packaging and examine it carefully. For further assistance, please contact your local Hanna Instruments Office or email us at tech@hannainst.com. Each HI97101C is delivered in a rugged carrying case and is supplied with: •... -
Page 6: Safety Measures
2. SAFETY MEASURES • The chemicals contained in the reagent kits may be hazardous if improperly handled. • Read the Safety Data Sheets (SDS) before performing tests. • Safety equipment: Wear suitable eye protection and clothing when required, and follow instructions carefully. •... -
Page 7: Specifications
4. SPECIFICATIONS Range 6.5 to 8.5 pH Resolution 0.1 pH Accuracy ±0.1 pH of reading at 25 °C Method Adaptation of the Phenol Red Method Range 0.00 to 5.00 mg/L (as Cl Resolution 0.01 mg/L Chlorine Accuracy ±0.03 mg/L ±3% of reading at 25 °C (All Methods) Adaptation of the US EPA Method 330.5, Method... - Page 8 Light source Light Emitting Diode Bandpass filter 525 nm Bandpass filter 8 nm bandwidth Measurement System Bandpass filter ±1.0 nm wavelength accuracy Light detector Silicon photocell Cuvette type Round 24.6 mm diameter (22 mm inside) Auto logging 50 readings Display 128 x 64 pixel B/W LCD with backlight After 15 minutes of inactivity Auto-off...
-
Page 9: Description
With the CAL Check™ functionality, users are able to validate the performance of the instrument at any time and apply a user calibration (if necessary). Hanna Instruments CAL Check cuvettes are made with NIST traceable standards. -
Page 10: Functional Description
5.2. FUNCTIONAL DESCRIPTION 1. ON/OFF power button 3. Liquid Crystal Display (LCD) 5. Indexing mark 2. Keypad 4. Cuvette holder 6. Battery cover Keypad Description The keypad contains 3 direct keys and 3 functional keys with the following functions: Press the functional key to perform the function displayed above it on the LCD. Press and hold to power off/on. -
Page 11: Precision & Accuracy
5.3. PRECISION & ACCURACY Precision is how closely repeated measurements are to one another. Precision is usually expressed as standard deviation (SD). Accuracy is defined as the closeness of a test result to the true value and is method specific. Although good precision suggests good accuracy, precise results can be inaccurate. -
Page 12: Optical System
5.5. OPTICAL SYSTEM Instrument Block Diagram The internal reference system (reference detector) of the HI97101 photometer compensates for any drifts due to power fluctuations or ambient temperature changes, providing a stable source of light for your blank (zero) measurement and sample measurement. -
Page 13: General Operations
6. GENERAL OPERATIONS 6.1. METER VALIDATION: CAL CHECK & CALIBRATION Validation of the HI97101 involves verifying the concentration of the certified CAL Check standards. The CAL Check screen guides the user step-by-step through the validation process and user calibration (if necessary). - Page 14 Note: This value will be saved in the instrument for future validation. If a new set of calibration standards is obtained, please update the certificate value. 4. Insert the A ZERO CAL Check Cuvette A then press Next to continue. The “Please wait...“...
-
Page 15: Glp
• “OUT OF SPECIFICATION“ and Calibrate is available: The measured value is near the expected value. To update the user calibration press Calibrate. Press Accept to confirm or Cancel to return to the previous screen. • “OUT OF SPECIFICATION“: A user calibration is not allowed, the measured value is outside of the tolerance window. -
Page 16: Logging Data & Log Recall
6.3. LOGGING DATA & LOG RECALL The instrument features a data autolog function to help users keep track of all measurements. Every time a measurement is made the data is automatically saved. The data log can hold 50 individual measurements. When the data log is full (50 data points) the meter will rewrite the oldest data point. -
Page 17: General Setup
6.4. GENERAL SETUP key to enter the menu. Use the functional keys to select Setup and Press the press Select. Use the functional keys to highlight desired option. Backlight Option: 0 to 100 % Press Modify to access the backlight intensity. Use the functional keys to increase or key to return to the Setup decrease the value. - Page 18 Date Format Press Modify to change the date format. Use the functional keys to select the desired key to return to the Setup menu without format. Press Accept to confirm or the saving the new format. Decimal Separator Option: Comma ( , ) or Period ( . ) Press the functional key to select the desired decimal separator.
-
Page 19: Reagents & Accessories
Reagents / Accessories and press Select to access a list of reagents and accessories. To exit press the key. 6.6. CONTEXTUAL HELP HI97101 offers an interactive contextual help mode that assists the user at any time. To access the help screen press the key. -
Page 20: Battery Management
The meter will perform an auto-diagnostic test when it is powered on. During this test, ® the Hanna Instruments logo will appear on the LCD. If the auto-diagnostic test was successful, the meter is ready for use. The battery icon on the LCD will indicate the battery status: •... -
Page 21: Photometer
7. PHOTOMETER 7.1. METHOD SELECTION Press Methods when in measurement mode to access the list of methods. Use the functional keys to highlight the desired method then press Select. The selected method will be saved when the instrument is powered off. 7.2. -
Page 22: Cuvette Preparation
7.3. CUVETTE & CYLINDER PREPARATION Proper mixing is very important for reproducibility of the measurements. The proper mixing technique for each method is listed in the method procedure. (a) The mixing method is indicated with “shake vigorously“ using one of the following icons: (b) The mixing method is indicated with “shake gently“... - Page 23 Whenever the cuvette is placed into the measurement holder, it must be dry outside and free of fingerprints, oil or dirt. Wipe it thoroughly with HI731318 microfiber cleaning cloth or a lint-free wipe prior to insertion. Shaking the cuvette can generate bubbles in the sample, causing higher readings. To obtain accurate measurements, remove such bubbles by swirling or by gently tapping the cuvette.
-
Page 24: Method Procedure
8. METHOD PROCEDURE 8.1. pH REQUIRED REAGENTS Code Description Quantity HI93710-0 pH Reagent 5 drops REAGENT SETS HI93710-01 pH Reagent - 100 tests HI93710-03 pH Reagent - 300 tests For other accessories see ACCESSORIES section. MEASUREMENT PROCEDURE • Select the method using the procedure described in the METHOD SELECTION section. - Page 25 • Remove the cuvette. • Add 5 drops of HI93710-0 pH Reagent ×5 indicator. Replace the plastic stopper and the cap. Swirl to mix. • Insert the cuvette into the holder and ensure that the notch on the cap is positioned securely in the groove.
-
Page 26: Free Chlorine (Powder Reagent)
8.2. FREE CHLORINE (POWDER REAGENT) Note: Free and Total Chlorine have to be measured separately with fresh unreacted samples following the related procedures, if both values are desired. REQUIRED REAGENTS Code Description Quantity HI93701-0 Free Chlorine Reagent 1 packet REAGENT SETS HI93701-01 Free Chlorine Reagent - 100 tests HI93701-03... - Page 27 • Remove the cuvette. • Add the content of one packet of HI93701-0 Free Chlorine Reagent. Replace the plastic stopper and the cap. Shake gently for 20 seconds. • Insert the cuvette into the holder and ensure that the notch on the cap is positioned securely in the groove.
-
Page 28: Free Chlorine (Liquid Reagent)
8.3. FREE CHLORINE (LIQUID REAGENT) Note: Free and Total Chlorine have to be measured separately with fresh unreacted samples, following the related procedures, if both values are desired. REQUIRED REAGENTS Code Description Quantity HI93701A-F Free Chlorine Reagent A 3 drops HI93701B-F Free Chlorine Reagent B 3 drops REAGENT SETS... - Page 29 • Remove the cuvette. • To an empty cuvette add 3 drops of ×3 ×3 HI93701A-F Free Chlorine Reagent A and 3 drops of HI93701B-F Free Chlorine Reagent B. • Swirl gently to mix. • Add 10 mL of unreacted sample (up to the 10 mL mark).
- Page 30 INTERFERENCES Interference may be caused by: • Bromine, Iodine, Oxidized forms of Chromium and Manganese, Ozone • Hardness greater than 500 mg/L CaCO , to remove the interference shake the sample for approximately 2 minutes after adding the powder reagent •...
-
Page 31: Total Chlorine (Powder Reagent)
8.4. TOTAL CHLORINE (POWDER REAGENT) Note: Free and Total Chlorine have to be measured separately with fresh unreacted samples, following the related procedures, if both values are desired. REQUIRED REAGENTS Code Description Quantity HI93711-0 Total Chlorine Reagent 1 packet REAGENT SETS HI93711-01 Total Chlorine Reagent - 100 tests HI93711-03... - Page 32 • Remove the cuvette. • Add 1 packet of HI93711-0 Total Chlorine Reagent. Replace the plastic stopper and the cap. Shake gently for 20 seconds. • Insert the cuvette into the holder and ensure that the notch on the cap is positioned securely in the groove.
-
Page 33: Total Chlorine (Liquid Reagent)
8.5. TOTAL CHLORINE (LIQUID REAGENT) Note: Free and Total Chlorine have to be measured separately with fresh unreacted samples, following the related procedures, if both values are desired. REQUIRED REAGENTS Code Description Quantity HI93701A-T Total Chlorine Reagent A 3 drops HI93701B-T Total Chlorine Reagent B 3 drops HI93701C-T... - Page 34 • Remove the cuvette. • To an empty cuvette add 3 drops of ×3 ×3 ×1 HI93701A-T Total Chlorine Reagent A, 3 drops of HI93701B-T Total Chlorine Reagent B, and 1 drop of HI93701C-T Total Chlorine Reagent C. • Swirl gently to mix. •...
- Page 35 INTERFERENCES Interference may be caused by: • Bromine, Iodine, Oxidized forms of Chromium and Manganese, Ozone • Hardness greater than 500 mg/L CaCO , to remove the interference shake the sample for approximately 2 minutes after adding the powder reagent •...
-
Page 36: Cyanuric Acid
8.6. CYANURIC ACID REQUIRED REAGENTS Code Description Quantity HI93722-0 Cyanuric Acid Reagent 1 packet REAGENT SETS HI93722-01 Cyanuric Acid Reagent - 100 tests HI93722-03 Cyanuric Acid Reagent - 300 tests For other accessories see ACCESSORIES section. MEASUREMENT PROCEDURE • Select the Cyanuric Acid method using the procedure described in the METHOD SELECTION section. - Page 37 • Add the content of one packet of HI93722-0 Cyanuric Acid Reagent and mix to dissolve. • Fill the second cuvette with 10 mL of the reacted sample (up to the mark). Replace the plastic stopper and the 10 mL cap.
-
Page 38: Iron Low Range
8.7. IRON LOW RANGE REQUIRED REAGENTS Code Description Quantity HI93746-0 Iron LR Reagent 2 packets REAGENT SETS HI93746-01 Iron LR Reagent - 50 tests HI93746-03 Iron LR Reagent - 150 tests For other accessories see ACCESSORIES section. MEASUREMENT PROCEDURE • Select the Iron LR method using the procedure described in the METHOD SELECTION section. - Page 39 • Insert the cuvette into the holder and ensure that the notch on the cap is positioned securely in the groove. • Press Zero. The display will show “-0.0-” when the meter is zeroed and ready for measurement. • Remove the cuvette. •...
- Page 40 • Insert the cuvette into the holder and ensure that the notch on the cap is positioned securely in the groove. • Press Read. The display will show a 30 second countdown prior to the measurement. To skip the timer, press Read twice. When the timer ends, the meter will perform the reading.
-
Page 41: Bromine
8.8. BROMINE REQUIRED REAGENTS Code Description Quantity HI93716-0 Bromine Reagent 1 packet REAGENT SETS HI93716-01 Bromine Reagent - 100 tests HI93716-03 Bromine Reagent - 300 tests For other accessories see ACCESSORIES section. MEASUREMENT PROCEDURE • Select the Bromine method using the procedure described in the METHOD SELECTION section. - Page 42 • Add the content of one packet of HI93716-0 Bromine Reagent. Replace the plastic stopper and the cap and shake gently for about 20 seconds to dissolve most of the reagent. • Insert the cuvette into the holder and ensure that the notch on the cap is positioned securely in the groove.
-
Page 43: Iodine
8.9. IODINE REQUIRED REAGENTS Code Description Quantity HI93718-0 Iodine Reagent 1 packet REAGENT SETS HI93718-01 Iodine Reagent - 100 tests HI93718-03 Iodine Reagent - 300 tests For other accessories see ACCESSORIES section. MEASUREMENT PROCEDURE • Select the Iodine method using the procedure described in the METHOD SELECTION section. - Page 44 • Add one packet of HI93718-0 Iodine Reagent. Replace the plastic stopper and the cap. Shake gently for about 20 seconds to dissolve most of the reagent. • Insert the cuvette into the holder and ensure that the notch on the cap is positioned securely in the groove.
-
Page 45: Warning & Error Descriptions
Ensure that the notch on the cap is positioned securely in the groove before performing any measurements. If the issue persists, please contact Hanna Instruments technical support. The sample and the zero cuvettes are inverted. Swap the cuvettes and repeat the measurement. - Page 46 English is the only available language. Help function is not available. Restart the meter. If the issue persists, please contact Hanna Instruments technical support. Battery level is too low for the meter to function properly. Replace the batteries with new ones.
-
Page 47: Battery Replacement
10. BATTERY REPLACEMENT To replace the instrument’s batteries, follow these steps: • Turn the instrument off by pressing and holding the key. • Remove the battery cover by turning it counterclockwise. • Remove the old batteries, replace them with three new 1.5V AA batteries. •... -
Page 48: Accessories
11. ACCESSORIES 11.1. REAGENT SETS Code Description HI93701-01 Free Chlorine Reagent - 100 tests (powder) HI93701-03 Free Chlorine Reagent - 300 tests (powder) HI93701-F Free Chlorine Reagent - 300 tests (liquid) HI93701-T Total Chlorine Reagent - 300 tests (liquid) HI93710-01 pH Reagent - 100 tests HI93710-03 pH Reagent - 300 tests... -
Page 49: Other Accessories
11.2. OTHER ACCESSORIES Code Description HI7101417 blue carrying case for HI977xx and 7 CAL Check cuvettes HI731318 cloth for wiping cuvettes (4 pcs.) HI731331 glass cuvette (4 pcs.) HI731336N cap for cuvette (4 pcs.) HI740034P cap for 100 mL beaker (10 pcs.) plastic beaker (10 pcs.) HI740036P HI740220... -
Page 50: Certification
Damage due to accidents, misuse, tampering or lack of prescribed maintenance is not covered. If service is required, contact your local Hanna Instruments Office. If under warranty, report the model number, date of purchase, serial number (engraved on the bottom of the meter) and the nature of the problem. - Page 51 Hanna Instruments reserves the right to modify the design, construction or appearance of its products without advance notice.
- Page 52 World Headquarters Hanna Instruments Inc. Highland Industrial Park 584 Park East Drive Woonsocket, RI 02895 USA www.hannainst.com MAN97101 Printed in ROMANIA...
Need help?
Do you have a question about the HI97101 and is the answer not in the manual?
Questions and answers