
Subscribe to Our Youtube Channel
Related Manuals for Hanna Instruments HI97106


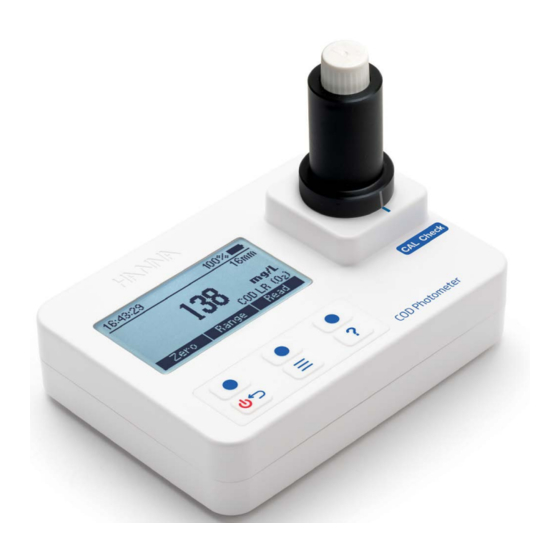
Summary of Contents for Hanna Instruments HI97106
- Page 1 INSTRUCTION MANUAL HI97106 Chemical Oxygen Demand Portable Photometer Low Range Medium Range High Range Ultra High Range Hanna Instruments Inc., 584 Park East Drive, Woonsocket, RI 02895 USA www.hannainst.com...
-
Page 2: Table Of Contents
All rights are reserved. Reproduction in whole or in part is prohibited without the written consent of the copyright owner, Hanna Instruments Inc., Woonsocket, Rhode Island, 02895, USA. Hanna Instruments reserves the right to modify the design, construction, or appearance of its products without advance notice. -
Page 3: Preliminary Examination
Preliminary Examination 1. PRELIMINARY EXAMINATION Remove the instrument and accessories from the packaging and examine it carefully. For further assistance, ® please contact your local Hanna Instruments office or email us at tech@hannainst.com. Each HI97106 is supplied with: • Adapter for 16 mm vial •... -
Page 4: Specifications
Specifications 3. SPECIFICATIONS Chemical Oxygen Demand LR Range 0 to 150 mg/L (as O Resolution 1 mg/L Accuracy ±5 mg/L or ±4 % of reading at 25 °C, whichever is greater Adaptation of the US EPA 410.4 Approved Method for the COD Determination on Method Surface Waters and Wastewaters 420 nm... - Page 5 5 Specifications Measurement System Light source Wavelength 420 nm & 610 nm Bandpass filter Bandwidth 8 nm Wavelength accuracy ±1.0 nm Light detector Silicon photocell Cuvette type round, 16 mm diameter Photometer Specifications Auto logging 200 readings Display 128 x 64 pixel B/W LCD with backlight After 15 minutes of inactivity (after 30 minutes of inactivity if a Zero has been done Auto‑off but not a Read)
-
Page 6: Description
With the CAL Check™ functionality, users are able to validate the performance of the instrument at any ® time. Hanna Instruments CAL Check cuvettes are certified against NIST‑traceable reference instrument(s). The built-in tutorial mode guides users step‑by‑step through the measurement process. The tutorial mode includes all steps required for sample preparation, the required reagents, and quantities. -
Page 7: Functional Description
4. Adapter holder 5. Adapter 6. Adapter aligning mark 7. Battery cover HI97106 SN: XXXXXXXXXXXX Keypad Description The keypad contains 3 direct keys and 3 functional keys with the following functions: Press the functional key to perform the function displayed above it on the LCD. -
Page 8: Precision & Accuracy
Description 4.3. PRECISION & ACCURACY Precision is how closely repeated measurements are to one another, usually expressed as standard deviation (SD). Accuracy is defined as the closeness of a test result to the true value and is method specific. Although good precision suggests good accuracy, precise results can be inaccurate. Precise, accurate Precise, not accurate Not precise, accurate Not precise, not accurate... -
Page 9: General Operations
The CAL Check screen guides users step‑by‑step through the validation process. Warning: Do not use any solutions or standards other than the Hanna Instruments® CAL Check standards. To ensire accuracy, please perform meter validation at room temperature, 18 to 25 ° C (64.5 to 77.0 ° F). - Page 10 HR, UHR), then press Next to continue. “Please wait...“ message will be displayed during the measurement. Note: HI97100-ZERO, HI97100-420, and HI97100-610 are in cluded in the HI97106-11 CAL Check™ standards for COD photometer - cuvette kit. Please see Accessories for ordering codes.
-
Page 11: Logging Data & Log Recall
11 General Operations 5.2. LOGGING DATA & LOG RECALL The instrument features a data autolog function to help users keep track of all measurements. Every time a measurement is made the data is automatically saved. The data log can hold 200 individual measurements. Note: When the data log is full (200 data points), the meter will rewrite the oldest data point. -
Page 12: General Setup
General Operations 5.3. GENERAL SETUP Press the key to enter the menu. Use the functional keys to select Setup and press Select. Use the functional keys to highlight desired option. Backlight Option: 0 to 100 % Press Modify to access backlight intensity. Use the functional keys to increase or decrease the percentage intensity value. - Page 13 13 General Operations Date Format Press Modify to change the date format. Use the functional keys to select the desired format. key to return to the Setup menu without saving the new format. Press Accept to confirm or the Decimal Separator Option: Comma ( , ) or Period ( .
-
Page 14: Reagents & Accessories
General Operations Restore Factory Settings Press Select to reset to factory settings. Press Accept to confirm or Cancel to exit without restoring the factory settings. 5.4. REAGENTS & ACCESSORIES Press the key to enter the menu. Use the functional keys to select Reagents / Accessories and press Select to access a list of reagents and accessories. -
Page 15: Photometer
15 Photometer 6. PHOTOMETER 6.1. RANGE SELECTION 1. Press Range when in measurement mode. 2. Use the functional keys to highlight the desired range then press Select. • If tutorial mode is disabled, follow the measurement procedure. • If tutorial mode is enabled, press Measure and follow the messages on the screen. Note: At power on the instrument starts with the previously selected range. -
Page 16: Measurement Recommendations
6.5. BATTERY MANAGEMENT ® The meter will perform an auto‑diagnostic test when it is powered on. During this test, the Hanna Instruments logo will appear on the LCD. If the auto‑diagnostic test was successful, the meter is ready for use. -
Page 17: Method Procedure
17 Chemical Oxygen Demand Low Range 7. METHOD PROCEDURE 7.1. CHEMICAL OXYGEN DEMAND LOW RANGE REQUIRED REAGENTS Code Description Quantity EPA REAGENT HI93754A‑0* COD Low Range EPA Reagent Vial 2 vials DEIONIZED120 Deionized Water 2 mL MERCURY FREE REAGENT HI93754D‑0* COD Low Range Hg Free Reagent Vial 2 vials DEIONIZED120 Deionized Water... - Page 18 Chemical Oxygen Demand Low Range • Add 2 mL of deionized water to the first vial (#1) and 2 mL of sample to the second vial (#2), while keeping the vials at a 45‑degree angle. Replace the caps and invert several times to mix. Warning: The vials will become hot during mixing, use caution when handling.
-
Page 19: Chemical Oxygen Demand Medium Range
19 Chemical Oxygen Demand Medium Range 7.2. CHEMICAL OXYGEN DEMAND MEDIUM RANGE REQUIRED REAGENTS Code Description Quantity EPA REAGENT HI93754B‑0* COD Medium Range EPA Reagent Vial 2 vials DEIONIZED120 Deionized Water 2 mL MERCURY FREE REAGENT HI93754E‑0* COD Medium Range Hg Free Reagent Vial 2 vials DEIONIZED120 Deionized Water 2 mL... - Page 20 Chemical Oxygen Demand Medium Range • Add 2 mL of deionized water to the first vial (#1) and 2 mL of sample to the second vial (#2), while keeping the vials at a 45‑degree angle. Replace the caps and invert several times to mix. Warning: The vials will become hot during mixing, use caution when handling.
-
Page 21: Chemical Oxygen Demand High Range
21 Chemical Oxygen Demand High Range 7.3. CHEMICAL OXYGEN DEMAND HIGH RANGE REQUIRED REAGENTS Code Description Quantity HI93754C‑0* COD High Range Reagent Vial 2 vials DEIONIZED120 Deionized Water 0.2 mL REAGENT SETS HI93754C‑25 Reagents COD High Range for 25 tests * Reagent vial identification: COD C, green label For other accessories see Accessories section. - Page 22 Chemical Oxygen Demand High Range • Insert the vials into the reactor and heat them for 2 hours at 150 °C (302 °F). • At the end of the digestion period switch off the reactor. Wait 20 minutes to allow the vials to cool to about 120 °C (248 °F).
-
Page 23: Chemical Oxygen Demand Ultra High Range
23 Chemical Oxygen Demand Ultra High Range 7.4. CHEMICAL OXYGEN DEMAND ULTRA HIGH RANGE REQUIRED REAGENTS Code Description Quantity HI93754J‑0* COD Ultra High Range Reagent Vial 2 vials DEIONIZED120 Deionized Water 0.1 mL REAGENT SETS HI93754J‑25 Reagents COD Ultra High Range for 25 tests COD J, blue label * Reagent vial identification: For other accessories see Accessories section. - Page 24 Chemical Oxygen Demand Ultra High Range • Insert the vials into the reactor and heat them for 2 hours at 150 °C (302 °F). • At the end of the digestion period, switch off the reactor. Wait 20 minutes to allow the vials to cool to about 120 °C (248 °F).
-
Page 25: Warning & Error Descriptions
Hanna Instruments technical support. English is the only available language. Help function is not available. Restart the meter. If the issue persists, please contact Hanna Instruments technical support. Battery level is too low for the meter to function properly. Replace the batteries... -
Page 26: Battery Replacement
The log is full (200 logs). New logs will replace the oldest. Displays before a new log would overwrite the oldest record. Press Continue to accept. A critical error has occurred. Restart the meter. ® If the issue persists, please contact Hanna Instruments technical support. 9. BATTERY REPLACEMENT To replace the instrument’s batteries: 1. -
Page 27: Accessories
COD Medium Range ISO reagents for 25 tests HI93754J-25 COD Ultrahigh Range reagents for 25 tests Reagent Standards HI97106-11 CAL Check™ standards for HI97106 photometer – cuvette kit Other Accessories HI70436M Deionized water (250 mL) HI731311 Glass vial, 16 mm external diameter (5 pcs.) HI731318 Microfiber cloth for wiping cuvettes (4 pcs.) -
Page 28: Certification
If the meter is to be returned to Hanna Instruments, first obtain a Returned Goods Authorization (RGA) number from the Technical Service department and then send it with shipping costs prepaid. When shipping any meter, make sure it is properly packed for complete protection.
Need help?
Do you have a question about the HI97106 and is the answer not in the manual?
Questions and answers