Table of Contents
Advertisement
Quick Links
BEDIENUNGSANWEISUNG
mit Montageanweisungen
INSTRUCTIONS FOR USE
and installation
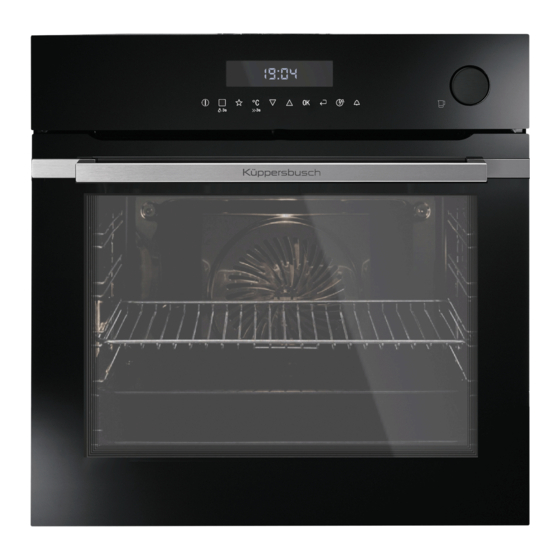
BD6750.0S
EN
Lesen Sie unbedingt die Gebrauchsanleitung
und den Montageplan vor Aufstellung,
Installation sowie Inbetriebnahme.
Please read the users and installation
instructions carefully before installation
of the appliance and before starting to use it.
Service und Kundendienst
Telefon: 0209 – 401 631
Email: kundendienst@kueppersbusch.de
Advertisement
Table of Contents

Subscribe to Our Youtube Channel
Related Manuals for Kuppersbusch BD6750.0S


Summary of Contents for Kuppersbusch BD6750.0S
- Page 1 BEDIENUNGSANWEISUNG mit Montageanweisungen INSTRUCTIONS FOR USE and installation BD6750.0S Lesen Sie unbedingt die Gebrauchsanleitung und den Montageplan vor Aufstellung, Installation sowie Inbetriebnahme. Please read the users and installation instructions carefully before installation of the appliance and before starting to use it.
-
Page 2: Table Of Contents
CONTENTS Safety information Automatic programmes Safety instructions Using the accessories Product description Additional functions Control panel Hints and tips Before first use Care and cleaning Daily use Troubleshooting Clock functions Energy efficiency Subject to change without notice. VISIT OUR WEBSITE TO: Get usage advice, brochures, trouble shooter, service and repair information: www.kueppersbusch-home.com... - Page 3 Keep children and pets away from the appliance when it • operates or when it cools down. Accessible parts become hot during use. If the appliance has a child safety device, it should be • activated. Children shall not carry out cleaning and user maintenance •...
-
Page 4: Safety Instructions
SAFETY INSTRUCTIONS Installation Built in depth of the 546 mm appliance WARNING! Only a qualified person must install this Depth with open 1017 mm appliance. door • Remove all the packaging. Ventilation opening 550 x 20 mm • Do not install or use a damaged minimum size. - Page 5 installation. Make sure that there is • Do not let sparks or open flames to access to the mains plug after the come in contact with the appliance installation. when you open the door. • If the mains socket is loose, do not •...
-
Page 6: Product Description
Internal lighting • Before maintenance, deactivate the appliance and disconnect the mains WARNING! Risk of electric plug from the mains socket. shock. • Make sure the appliance is cold. There is the risk that the glass panels can • The type of light bulb or halogen lamp break. - Page 7 Accessories To measure the temperature inside food. Wire shelf Telescopic runners For cookware, cake tins, roasts. To insert and remove trays and wireshelf more easily. Baking tray Steam set For cakes and biscuits. Grill- / Roasting pan One unperforated and one perforated food container.
-
Page 8: Control Panel
CONTROL PANEL Electronic programmer Use the sensor fields to operate the appliance. Sensor Function Comment field Display Shows the current settings of the oven. ON / OFF To turn the oven on and off. Heating Func‐ Press the sensor field once to choose a heating tions or Assisted function or the menu: Assisted Cooking. - Page 9 Sensor Function Comment field Time and addi‐ To set different functions. When a heating function tional functions works, press the sensor field to set the timer or the functions: Function Lock, Favourites, Heat + Hold, Set + Go. You can also change the settings of the core temperature sensor.
-
Page 10: Before First Use
Symbol Function Weight Automatic The display shows that the automatic weight system is on or that weight can be changed. Heat + Hold The function is on. BEFORE FIRST USE Initial Cleaning WARNING! Refer to Safety chapters. Step 1 Step 2 Step 3 Clean the oven and the ac‐... -
Page 11: Daily Use
Step 1 Step 2 Step 3 Step 4 Put the test paper Shake the test pa‐ After 1 min, check Set the water hard‐ into water for about per to remove the water hardness ness level in the 1 sec. Do not put excess of water. - Page 12 Symbol / Menu Application Symbol / Menu Description item item Contains a list of fa‐ Keeps the prepared vourite cooking pro‐ food warm for 30 mi‐ Favourites Heat + Hold grammes created by nutes after a cooking the user. cycle finished. Contains a list of Activates and deacti‐...
- Page 13 Symbol / Menu Description item Resets all settings to factory settings. Factory Settings Submenu for: Cleaning Symbol Menu item Description Tank Emptying Procedure for removing the residual water from the water drawer after use of the steam functions. Steam Cleaning Plus Procedure for cleaning stubborn dirt with the support of an oven cleaner.
- Page 14 Heating func‐ Application Heating func‐ Application tion tion To bake cakes with To preheat plates for crispy bottom and to serving. preserve food. Bottom Heat Plate Warming This function is de‐ To preserve vegeta‐ signed to save energy bles (e.g., pickles). during cooking.
- Page 15 Assisted Cooking Heating func‐ Application Food Category: Fish / Seafood tion Dish To defrost food (vege‐ tables and fruit). The Fish Fish, baked defrosting time de‐ Defrost Fish fingers pends on the amount and size of the frozen Fish fillet, thin food.
- Page 16 Dish Dish Chicken wings, Chipolatas fresh Spare ribs Chicken wings, fro‐ Pork knuckle, pre- cooked Chicken legs, fresh Pork joint Chicken legs, fro‐ Chicken Loin of pork Loin of pork Chicken breast, poached Pork Loin of pork, smoked Chicken, 2 halves Loin of pork, Whole chicken poached...
- Page 17 Dish Dish Hare Tarte flambée • Leg of hare Swiss Tarte, savou‐ • Saddle of hare • Saddle of hare Quiche lorraine Savory flan Venison Game • Haunch of veni‐ Food Category: Cake / Pastry • Saddle of veni‐ Dish Ring cake Roast game Apple cake, cov‐...
- Page 18 Food Category: Vegetables Dish Dish Cheese cake, tray Broccoli, florets Brownies Broccoli, whole Swiss roll Cauliflower, florets Yeast cake Cauliflower, whole Crumble cake Carrots Sugar cake Courgette slices Short pastry flan Asparagus, green base Flan base Asparagus, white Sponge mixture flan base Pepper strips Short pastry fruit...
- Page 19 Setting a heating function Dish 1. Turn on the oven. 2. Select the menu: Heating Functions. Terrine 3. Press to confirm. Eggs, soft boiled 4. Select a heating function. Eggs, medium 5. Press to confirm. boiled Eggs 6. Set the temperature. Eggs, hard boiled 7.
-
Page 20: Clock Functions
The signal sounds at the end of the shows that the temperature increases. cooking time. When temperature is reached the buzzer 7. Turn off the oven. sounds 3 times and the bar flashes and 8. Empty the water drawer after the then disappears. -
Page 21: Automatic Programmes
Setting the clock functions • The set temperature is more than 80 °C. Before you use the functions: • The function: Duration is set. Duration, End Time, you must The function: Heat + Hold keeps prepared set a heating function and food warm at 80 °C for 30 minutes. - Page 22 set temperature, the appliance deactivates. There are two temperatures to be set: • the oven temperature (minimum 120 °C), • the food core temperature. CAUTION! Use only the food sensor supplied and the original replacement parts. Directions for the best results: •...
- Page 23 2. Place half of the ingredients in a The display shows the food sensor baking dish. symbol. 3. Insert the tip of the food sensor exactly 6. Press in less than 5 seconds in the centre of the casserole. The to set the food core temperature.
- Page 24 Wire shelf: Push the shelf between the guide bars of the shelf support. Baking tray / Deep pan: Push the Baking tray / Deep pan be‐ tween the guide bars of the shelf sup‐ port. Wire shelf, Baking tray / Deep pan: Push the Deep pan / Deep pan between the guide bars of the shelf support and the wire shelf on the guide bars above.
-
Page 25: Additional Functions
Deep pan: Place the wire shelf and the deep pan together on the telescopic runner. Put the deep pan on the telescopic runners. Wire shelf and deep pan together: ADDITIONAL FUNCTIONS Favourites You can change the name of a programme in the menu: Edit Programme You can save your favourite settings, such Name. -
Page 26: Hints And Tips
4. Press to confirm. To turn off the function, press . The (°C) display shows a message. Press again 30 - 115 12.5 and then to confirm. 120 - 195 When you turn off the oven, the function also turns off. 200 - 230 Set + Go The Automatic switch-off does not work... - Page 27 Cooking recommendations The temperature and cooking times in the tables are guidelines only. They depend on the rec‐ ipes and the quality and quantity of the ingredients used. Your oven may bake or roast differently to the oven you had before. The tables below show recommended settings for temperature, cooking time and shelf position for specific types of the food.
- Page 28 Example: The total time of this cooking session is 40 min. First, put in Boiled VEGETABLES potatoes, quartered, after 20 min add Salmon fillets and Broccoli, florets after 30 min. Set the temperature to 99 °C. (min) (min) Broccoli, florets 20 - 25 Savoy cabbage Use the largest quantity of water required...
- Page 29 SIDE DISHES / ACCOMPANI‐ FRUIT MENTS Set the temperature to 99 °C. Set the temperature to 99 °C. (min) (min) 10 - 15 Apple slices 15 - 20 Couscous, water / couscous 10 - 15 Hot berries ratio 1:1 10 - 20 Chocolate melting 15 - 25 Tagliatelle, fresh...
- Page 30 MEAT EGGS Set the temperature to 99 °C. (min (°C) 15 - Chipolatas (min) 10 - 11 Eggs, soft-boiled 20 - Bavarian veal saus‐ 12 - 13 Eggs, medium-boiled age / White sausage 18 - 21 Eggs, hard-boiled 20 - Vienna sausage Combining function: Turbo 25 -...
- Page 31 Turbo Grilling Full Steam First step: cook meat Second step: add vegetables (°C) (min) (°C) (min) Roast pork, 1 60 - 70 30 - 40 kg / Potatoes / Vegetables, gravy Roast veal, 1 50 - 60 30 - 40 kg / Rice / Veg‐...
- Page 32 (°C) (min) (°C) (min) Pork loin, smoked, 160 - 60 - 70 Pasta 10 - 15 0.6 - 1 kg, soak for 2 Rice 10 - 15 hours Dumplings 15 - 25 Roast beef, 1 kg 180 - 60 - 90 Baking Duck, 1.5 - 2 kg 70 - 90...
- Page 33 Baking results Possible cause Remedy The cake bakes un‐ The oven temperature is Next time set a longer baking time evenly. too high and the baking and lower oven temperature. time is too short. The cake batter is not even‐ Next time spread the cake batter ly distributed.
- Page 34 CAKES / PASTRIES / BREADS ON BAKING TRAYS Preheat the empty oven unless specified otherwise. (°C) (min) Plaited bread / Conventional 170 - 190 30 - 40 Bread crown, pre‐ Cooking heating is not needed Christstollen Conventional 160 - 180 50 - 70 Cooking Rye bread:...
- Page 35 BISCUITS Use the third shelf position. (°C) (min) Short pastry / Sponge True Fan Cooking 150 - 160 15 - 25 cake mixture Meringues True Fan Cooking 80 - 100 120 - 150 Macaroons True Fan Cooking 100 - 120 30 - 50 Yeast dough biscuits True Fan Cooking...
- Page 36 CAKES / PASTRIES / BREADS BISCUITS ON BAKING TRAYS (°C) (min) (°C) (min) Puff pastries, preheat 30 - Cream puffs / Eclairs, 160 - 25 - the empty oven preheat the empty oven Dry streusel cake 150 - 30 - Rolls 20 - Tips on Roasting...
- Page 37 BEEF (°C) (min) Roast beef or fillet, 1 cm thick Turbo Grilling 180 - 190 6 - 8 medium, preheat the empty oven Roast beef or fillet, 1 cm thick Turbo Grilling 170 - 180 8 - 10 well done, preheat the empty oven PORK Use the function: Turbo Grilling.
- Page 38 LAMB Use the function: Turbo Grilling. (kg) (°C) (min) Lamb leg / Roast 1 - 1.5 150 - 170 100 - 120 lamb Lamb saddle 1 - 1.5 160 - 180 40 - 60 GAME (kg) (°C) (min) Saddle / Hare Turbo Grilling 180 - 200 35 - 55...
- Page 39 POULTRY Use the function: Turbo Grilling. (kg) (°C) (min) Turkey 2.5 - 3.5 160 - 180 120 - 150 Turkey 4 - 6 140 - 160 150 - 240 FISH (kg) (°C) (min) Whole fish 1 - 1.5 Turbo Grilling 180 - 200 30 - 50 Bread Baking...
- Page 40 Crispy baking with Pizza Function PIZZA Use the first shelf position. (°C) (min) Tarts 180 - 200 40 - 55 Spinach flan 160 - 180 45 - 60 Quiche lorraine / Swiss flan 170 - 190 45 - 55 Apple pie, covered 150 - 170 50 - 60 PIZZA...
- Page 41 GRILL (°C) (min) (min) 1st side 2nd side Roast beef 210 - 230 30 - 40 30 - 40 Beef fillet 20 - 30 20 - 30 Pork loin 210 - 230 30 - 40 30 - 40 Veal loin 210 - 230 30 - 40 30 - 40...
- Page 42 Do not use jars with twist-off and bayonet type lids or metal tins. Use the first shelf position. VEGETA‐ (min) (min) Put no more than six one-litre preserve BLES Cooking Continue jars on the baking tray. time until to cook at Fill the jars equally and close with a simmer‐...
- Page 43 FRUIT FRUIT Apricots 8 - 10 Apple slices 6 - 8 Pears 6 - 9 Food Sensor BEEF Food core temperature (°C) Rare Medium Well done Roast beef Sirloin BEEF Food core temperature (°C) Less Medium More Meatloaf PORK Food core temperature (°C) Less Medium More...
- Page 44 MUTTON / LAMB Food core temperature (°C) Less Medium More Mutton saddle Roast lamb / Lamb leg GAME Food core temperature (°C) Less Medium More Hare saddle / Venison saddle Hare leg / Hare, whole / Venison POULTRY Food core temperature (°C) Less Medium More...
- Page 45 CASSEROLES - SAVOU‐ Food core temperature (°C) Less Medium More Cannelloni / Lasagne / Pasta bake CASSEROLES - SWEET Food core temperature (°C) Less Medium More White bread casserole with / with‐ out fruit / Rice porridge casserole with / without fruit / Sweet noodle casserole Moist Fan Baking - absorption than the light colour and...
- Page 46 (°C) (min) Moussaka 170 - 190 70 - 95 Lasagne 180 - 200 75 - 90 Cannelloni 180 - 200 70 - 85 Bread pudding 190 - 200 55 - 70 Rice pudding 170 - 190 45 - 60 Apple cake, made of sponge cake mixture 160 - 170 70 - 80 (round cake tin)
- Page 47 BAKING ON ONE LEVEL. Biscuits Use the third shelf position. (°C) (min) Short bread / Pastry strips, Conventional Cooking 20 - 30 preheat the empty oven Small cakes, 20 per tray, True Fan Cooking 20 - 35 preheat the empty oven Small cakes, 20 per tray, Conventional Cooking 20 - 30...
-
Page 48: Care And Cleaning
Information for test institutes Tests according to IEC 60350. Tests for the function: Full Steam. Set the temperature to 99 °C. Container (kg) (min) (Gastro‐ norm) Broccoli, 1 x 2/3 per‐ 13 - 15 Put the bak‐ preheat the forated ing tray on empty oven the first shelf... - Page 49 Clean the cavity after each use. Fat accumulation or other residue may cause fire. Dry the cavity with a soft cloth after each use. Everyday Clean all accessories after each use and let them dry. Use a soft cloth with warm water and a mild detergent.
- Page 50 How to use: Steam Cleaning Before you start: Turn off the oven and Remove all accessories and re‐ Clean the bottom of the cavi‐ wait until it is cold. movable shelf supports. ty and the inner door glass with a soft cloth with warm water and a mild detergent.
- Page 51 Duration of the first part: around 100 min Step 1 Place the deep pan on the first shelf position. Step 2 Pour 250 ml of the descaling agent in the water drawer. Step 3 Fill the remaining part of the water drawer with water to the maximum level until the signal sounds or the display shows the message.
- Page 52 How to use: Rinsing Before you start: Turn off the oven and wait until it is cold. Remove all accessories and removable shelf supports. Step 1 Place the deep pan on the first shelf position. Step 2 Fill the water drawer with water to the maximum level until the signal sounds or the display shows the message.
-
Page 53: Troubleshooting
Before you replace the lamp: Step 1 Step 2 Step 3 Turn off the oven. Wait until Disconnect the oven from Put a cloth on the bottom of the oven is cold. the mains. the cavity. Top lamp Step 1 Turn the glass cover to remove it. - Page 54 Problem Possible cause Remedy The oven does not heat up. The Child Lock is on. Refer to "Using the Child Lock". The oven does not heat up. The fuse is blown. Make sure that the fuse is the cause of the malfunc‐ tion.
- Page 55 Problem Possible cause Remedy There is dirty water on the The grill- / roasting pan is on Remove the residual water bottom of the cavity after the a wrong shelf position. and the descaling agent descaling cycle. from the bottom of the oven. Put the grill- / roasting pan on the first shelf position.
-
Page 56: Energy Efficiency
ENERGY EFFICIENCY Product Information and Product Information Sheet* Supplier's name Küppersbusch BD6750.0S 944182186, Model identification 944182187 Energy Efficiency Index 81.0 Energy efficiency class Energy consumption with a standard load, conventional 1.09 kWh/cycle mode Energy consumption with a standard load, fan-forced 0.68 kWh/cycle... - Page 57 shows the residual heat. You can use that Cooking with the lamp off heat to keep the food warm. Turn off the lamp during cooking. Turn it on only when you need it. When the cooking duration is longer than 30 minutes, reduce the oven temperature Moist Fan Baking to minimum 3 - 10 minutes before the end...
- Page 60 867353668-C-142020 Küppersbusch Hausgeräte GmbH Postfach 10 01 32, D-45801 Gelsenkirchen, Küppersbuschstraße 16, D-45883 Gelsenkirchen Telefon: (0209) 401-0, Telefax: (0209) 401-303 www.kueppersbusch.de Teka Austria GmbH Eitnergasse 13, A-1230 Wien Telefon: (01) 86680-15, Telefax: (01) 86680-50 www.kueppersbusch.at...
Need help?
Do you have a question about the BD6750.0S and is the answer not in the manual?
Questions and answers