
Related Manuals for Electrolux KOEBP31X


Summary of Contents for Electrolux KOEBP31X
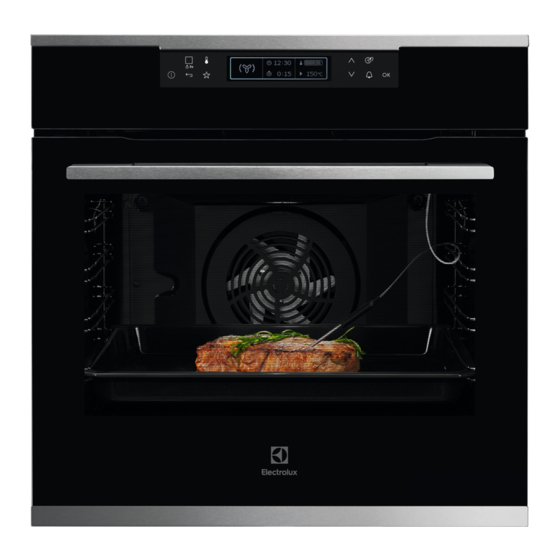
- Page 1 KOEBP31X Steam oven User Manual Get the most out of your appliance For quick access to manuals, how-to guides, support and more through our photo registration visit electrolux.com/register...
-
Page 2: Table Of Contents
15. ENERGY EFFICIENCY.................. 40 WE’RE THINKING OF YOU Thank you for purchasing an Electrolux appliance. You’ve chosen a product that brings with it decades of professional experience and innovation. Ingenious and stylish, it has been designed with you in mind. So whenever you use it, you can be safe in the knowledge that you’ll get great results every time. -
Page 3: Safety Information
ENGLISH SAFETY INFORMATION Before the installation and use of the appliance, carefully read the supplied instructions. The manufacturer is not responsible for any injuries or damage that are the result of incorrect installation or usage. Always keep the instructions in a safe and accessible location for future reference. -
Page 4: Safety Instructions
Disconnect the appliance from the power supply • before carrying out any maintenance. If the mains power supply cable is damaged, it must • be replaced by the manufacturer, its Authorised Service Centre or similarly qualified persons to avoid an electrical hazard. - Page 5 ENGLISH • The appliance is equipped with an electrical ratings of the mains power electric cooling system. It must be supply. operated with the electric power • Always use a correctly installed supply. shockproof socket. • Do not use multi-plug adapters and extension cables.
- Page 6 – do not put ovenware or other objects in the appliance directly Total power (W) Section of the ca‐ on the bottom. ble (mm²) – do not put aluminium foil directly maximum 1380 3 x 0.75 on the bottom of cavity of the appliance.
- Page 7 ENGLISH • Clean regularly the appliance to operation to a well ventilated prevent the deterioration of the area. surface material. • Small pets can also be highly • Clean the appliance with a moist soft sensitive to the localized temperature cloth.
-
Page 8: Installation
3. INSTALLATION 3.1 Building in WARNING! Refer to Safety chapters. www.youtube.com/electrolux www.youtube.com/aeg How to install your AEG/Electrolux Oven - Column installation (*mm) min. 550 min. 560 (*mm) min. 550 min. 560... -
Page 9: Product Description
ENGLISH 3.2 Securing the oven to the cabinet 4. PRODUCT DESCRIPTION 4.1 General overview Control panel Electronic programmer Socket for the food sensor Heating element Lamp Shelf support, removable Shelf positions 4.2 Accessories • Food sensor To measure how far the food is •... -
Page 10: Control Panel
5. CONTROL PANEL 5.1 Electronic programmer 9 10 Use the sensor fields to operate the oven. Sensor Function Comment field ON / OFF To turn on and off the oven. Heating Func‐ Press the sensor field once to choose a heating tions or Assisted function or the menu: Assisted Cooking. - Page 11 ENGLISH Sensor Function Comment field To confirm the selection or setting. 5.2 Display A. Heating function B. Time of day C. Heat-up indicator D. Temperature E. Duration time or end time of a function Other indicators of the display: Symbol Function Minute Minder The function works.
-
Page 12: Before First Use
6. BEFORE FIRST USE 6.1 Initial Cleaning WARNING! Refer to Safety chapters. Step 1 Step 2 Step 3 Clean the oven and the ac‐ Remove all accessories Place the accessories and cessories with a soft cloth, and removable shelf sup‐... - Page 13 ENGLISH the signal sounds 3 times, the bar flashes and disappears. Symbol / Menu Application item 7.4 Using: Fast Heat Up Contains recommen‐ Use this function before you put the food ded oven settings for Assisted Cook‐ in the oven. a wide choice of dishes.
- Page 14 Symbol / Menu Description Heating func‐ Application item tion Sets the language for To bake food on one the display. shelf position for a Set Language more intensive brown‐ Pizza Function Adjusts the volume of ing and a crispy bot‐...
- Page 15 ENGLISH 7.8 Specials ecodesign requirements according to EU 65/2014 and EU 66/2014. Tests according to EN 60350-1. Heating func‐ Application The oven door should be closed during tion cooking so that the function is not To keep food warm. interrupted and the oven operates with the highest energy efficiency possible.
- Page 16 Food Category: Meat Dish Dish Hare Braised meat • Leg of hare Beef • Saddle of hare Meatloaf Venison Rare • Haunch of veni‐ Game Rare • Saddle of veni‐ Medium Roast beef Roast game Medium Well done Loin of game...
- Page 17 ENGLISH Food Category: Cake / Pastry Dish Dish Crumble cake Ring cake Sugar cake Apple cake, cov‐ ered Short pastry flan base Sponge cake Flan base Sponge mixture Apple pie flan base Cheese cake, tin Short pastry fruit flan Brioche Fruit flan Sponge mixture Madeira cake...
-
Page 18: Clock Functions
8. CLOCK FUNCTIONS 8.1 Clock functions table 5. Press any symbol to stop the signal. 8.3 Heat + Hold Clock func‐ Application tion Conditions for the function: • The set temperature is more than To set a countdown (max. 2 h 30 min). -
Page 19: Using The Accessories
ENGLISH 9.1 Recipes with Recipe 1. Turn on the oven. 2. Select the menu: Assisted Cooking. Automatic Press This oven has a set of recipes you can 3. Select the dish with the function: use. The recipes are fixed and you Weight Automatic. - Page 20 3. Insert the tip of the core temperature sensor exactly in the centre of the casserole. The core temperature sensor should be stabilized in one place during baking. Use a solid ingredient to achieve that. Use the rim of the baking dish to support the silicone handle of the core temperature sensor.
- Page 21 ENGLISH 10.2 Inserting accessories WARNING! There is a risk of burns as A small indentation at the top increases the core temperature sensor safety. The indentations are also anti-tip becomes hot. Be careful devices. The high rim around the shelf when you unplug it and prevents cookware from slipping of the remove it from the food.
-
Page 22: Additional Functions
11. ADDITIONAL FUNCTIONS 11.1 Favourites Activating the programme You can save your favourite settings, 1. Turn on the oven. such as duration, temperature or heating 2. Select the menu: Favourites. function. They are available in the menu: 3. Press to confirm. - Page 23 ENGLISH 4. Press to confirm. If the Pyrolysis function (°C) works, the door is locked and the symbol of a key 120 - 195 comes on in the display. 200 - 245 To turn off the function, press . The 250 - maximum display shows a message.
-
Page 24: Hints And Tips
12. HINTS AND TIPS If you use two baking trays at the same Refer to Safety chapters. time, keep one empty level between them. Cooking meat and fish 12.1 Cooking recommendations... - Page 25 ENGLISH Conventional True Fan Cook‐ Cooking CAKES (min) (°C) (°C) Christmas 90 - 120 Cake mould, Ø 20 cake, preheat the empty oven Plum cake, 50 - 60 Bread tin preheat the empty oven Biscuits 140 - 25 - 45 Baking tray Meringues 80 - 100...
- Page 26 Conventional True Fan Cooking Cooking BREAD AND PIZZA (min) (°C) (°C) Rye bread, 30 - 45 Bread tin preheating is not needed Bread rolls, 6 2 (2 and 4) 25 - 40 Baking tray - 8 rolls Pizza 230 -...
- Page 27 ENGLISH Conventional True Fan Cooking Cooking MEAT (min) (°C) (°C) English roast beef, rare 50 - 60 English roast beef, medium 60 - 70 English roast beef, well done 70 - 75 Conventional Cook‐ True Fan Cooking MEAT (min) (°C) (°C) Pork shoulder, with rind 120 - 150...
- Page 28 GRILL (kg) (min) (min) 1st side 2nd side Fillet steaks, 4 pieces 12 - 15 12 - 14 Beef steak, 4 pieces 10 - 12 6 - 8 Sausages, 8 12 - 15 10 - 12 Pork chops, 4 pieces...
- Page 29 ENGLISH 12.5 Slow Cooking This function allows you to prepare lean, LAMB tender meat and fish. It is not applicable (°C) (min) for: poultry, fatty roast pork, pot roast. Food Sensor temperature should not be Lamb saddle, 1 - 160 - 180 40 - 60 higher than 65 °C.
- Page 30 12.6 Defrost (kg) Defrosting Further defrost‐ time (min) ing time (min) Chicken 100 - 140 20 - 30 Place chicken on an upturned saucer placed on a large plate. Turn halfway through. Meat 100 - 140 20 - 30 Turn halfway through.
- Page 31 ENGLISH For 2 trays use the first and fourth shelf position. VEGETA‐ (min) (min) BLES Cooking Continue VEGETA‐ time until to cook at BLES (°C) simmering 100 °C Beans 60 - 70 6 - 8 Carrots 50 - 60 5 - 10 Peppers 60 - 70 5 - 6...
- Page 32 (°C) (min) Sweet rolls, 16 baking tray or dripping 20 - 30 pieces Rolls, 9 pieces baking tray or dripping 30 - 40 Pizza, frozen, wire shelf 10 - 15 0.35 kg Swiss roll baking tray or dripping 25 - 35...
- Page 33 ENGLISH (°C) (min) Vegetables, baking tray or dripping 35 - 45 poached, 0.4 kg Vegetarian ome‐ pizza pan on wire shelf 200 25 - 30 lette Mediterranean baking tray or dripping 25 - 30 vegetables, 0.7 12.11 Information for test institutes Tests according to IEC 60350-1.
-
Page 34: Care And Cleaning
(°C) (min) Sponge True Fan Wire 40 - 50 Preheat the cake, Cooking shelf oven for 10 mi‐ cake nutes. mould Ø26 cm Sponge True Fan Wire 2 and 4 40 - 60 Preheat the cake, Cooking shelf oven for 10 mi‐... - Page 35 ENGLISH 13.1 Notes on cleaning Clean the front of the oven with a soft cloth with warm water and a mild detergent. Use a cleaning solution to clean metal surfaces. Clean stains with a mild detergent. Cleaning Agents Clean the cavity after each use. Fat accumulation or other residue may cause fire.
- Page 36 13.3 How to use: Pyrolytic CAUTION! Cleaning If there are other appliances installed in the same Clean the oven with Pyrolytic Cleaning. cabinet, do not use them at the same time as this WARNING! function. It can cause There is a risk of burns.
- Page 37 ENGLISH Step 1 Fully open the door and find the hinge to the right side of the door. Step 2 Use a screwdriver to lift and turn fully the right side hinge lever. Step 3 Find the hinge to the left side of the door.
- Page 38 Step 10 Clean the glass panels with wa‐ ter and soap. Dry the glass pan‐ els carefully. Do not clean the glass panels in the dishwasher. Step 11 After cleaning, install the glass panels and the oven door. Make sure that you put the glass panels (A and B) back in the correct sequence.
-
Page 39: Troubleshooting
ENGLISH Step 2 Clean the glass cover. Step 3 Replace the lamp with a suitable 300 °C heat-resistant lamp. Step 4 Install the glass cover. 14. TROUBLESHOOTING WARNING! Refer to Safety chapters. 14.1 What to do if... Problem Possible cause Remedy You cannot activate or op‐... -
Page 40: Energy Efficiency
Serial number (S.N.) ......... 15. ENERGY EFFICIENCY 15.1 Product Information and Product Information Sheet* Supplier's name Electrolux Model identification KOEBP31X 949498430 Energy Efficiency Index 81.2 Energy efficiency class Energy consumption with a standard load, con‐ 0.93 kWh/cycle ventional mode Energy consumption with a standard load, fan- 0.69 kWh/cycle... - Page 41 ENGLISH Heat source Electricity Volume 72 l Type of oven Built-In Oven Mass 32.1 kg * For European Union according to EU Regulations 65/2014 and 66/2014. For Republic of Belarus according to STB 2478-2017, Appendix G; STB 2477-2017, Annexes A and B. For Ukraine according to 568/32020.
- Page 42 Return the electronic appliances. Do not dispose of product to your local recycling facility or contact your municipal office. appliances marked with the symbol...
- Page 44 www.electrolux.com/shop...
Need help?
Do you have a question about the KOEBP31X and is the answer not in the manual?
Questions and answers