Table of Contents
Advertisement
Quick Links
USER MANUAL FOR YOUR BAUMATIC
60cm Induction Cooktop
BC60ITB
NOTE: This User Instruction Manual contains important information, including
safety & installation points, which will enable you to get the most out of your
appliance. Please keep it in a safe place so that it is easily available for future
reference for you or any person not familiar with the operation of the appliance.
Advertisement
Table of Contents

Related Manuals for Baumatic BC60ITB


Summary of Contents for Baumatic BC60ITB
- Page 1 USER MANUAL FOR YOUR BAUMATIC 60cm Induction Cooktop BC60ITB NOTE: This User Instruction Manual contains important information, including safety & installation points, which will enable you to get the most out of your appliance. Please keep it in a safe place so that it is easily available for future...
-
Page 2: Table Of Contents
Contents 1. Foreword ..................4 1.1 Safety Warnings ................. 4 1.2 Installation ................4 1.2.1 Electrical Shock Hazard ..........4 1.2.2 Cut Hazard ..............4 1.2.3 Important safety instructions .......... 4 1.3 Operation and maintenance ............5 1.3.1 Electrical Shock Hazard ..........5 1.3.2 Health Hazard .............. - Page 3 Contents … continued 5. Heat Settings ................. 17 6. Care and Cleaning ................17 7. Troubleshooting ................18 8. Failure Display and Inspection ............19 9. Installation ..................21 9.1 Selection of installation equipment ..........21 9.2 Before installing the hob, ensure that ........... 22 9.3 After installing the hob, ensure that..........
-
Page 4: Foreword
1. Foreword Installation and repairs to this appliance should only be carried out by a qualified technician in accordance with current regulations. 1.1 Safety Warnings Your safety is important to us. Please read this information before using your cooktop. 1.2 Installation 1.2.1 Electrical Shock Hazard ... -
Page 5: Operation And Maintenance
In order to avoid a hazard, this appliance must be installed according to these instructions for installation. This appliance is to be properly installed and earthed only by a suitably qualified person. This appliance should be connected to a circuit which incorporates an isolating switch providing full disconnection from the power supply. -
Page 6: Cut Hazard
Keep children away. Handles of saucepans may be hot to touch. Check saucepan handles do not overhang other cooking zones that are on. Keep handles out of reach of children. Failure to follow this advice could result in burns and scalds. 1.3.4 Cut Hazard ... - Page 7 should be done by a qualified technician. Do not use a steam cleaner to clean your cooktop. Do not place or drop heavy objects on your cooktop. Do not stand on your cooktop. Do not use pans with jagged edges or drag pans across the Induction glass surface as this can scratch the glass.
-
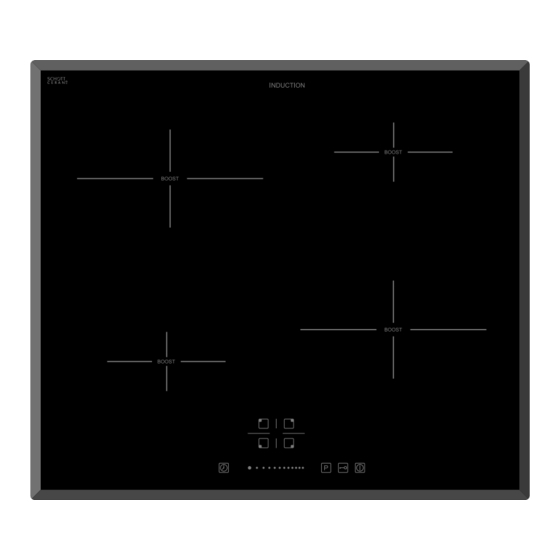
Page 8: Product Introduction
Read all the safety instructions carefully before use and keep this Instruction / Installation Manual for future reference. 2. Product Introduction Packing List USER MANUAL FOR YOUR BAUMATIC 60cm Induction Cooktop BC60ITB NOTE: This User Instruction Manual contains important information, including safety &... -
Page 9: Before Using Your New Induction Hob
• Do not burn off more than one zone at once. • You must place a saucepan filled half full with cold water on each zone as you burn it off. 2.5 Technical Specification Cooking Hob BC60ITB Cooking Zones 4 Zones Supply Voltage... -
Page 10: Choosing The Right Cookware
3.2 Choosing the Right Cookware Only use cookware with a base suitable for induction cooking. • Look for the induction symbol on the packaging or on the bottom of the pan. • You can check whether your cookware is suitable by carrying out a magnet test. Move a magnet towards the base of the pan. -
Page 11: How To Use
3.3 How to Use 3.3.1 Start Cooking Touch the ON/OFF control for three seconds. After power on, the buzzer beeps once, all displays show “–” or “– –”, indicating that the induction hob has entered the state of standby mode. Place a suitable pan on the cooking zone that you wish to use. -
Page 12: Using The Boost Function
Turn the cooking zone off by touching the slider to “○”. Make sure the displayshows”0” Turn the whole cooktop off by touching the ON/OFF control. Beware of hot surfaces H will show which cooking zone is hot to touch. It will disappear when the surface has cooled down to a safe temperature. -
Page 13: Locking The Controls
3.3.4 Locking the Controls You can lock the controls to prevent unintended use (for example children accidentally turning the cooking zones on). When the controls are locked, all the controls except the ON/OFF control are disabled. To lock the controls Touch the lock control The timer indicator will show “... - Page 14 Set the time by touching the slider control (e.g. 9), now the timer you set is 95 minutes. When the time is set, it will begin to count down immediately. The display will show the remaining time Buzzer will beep for 30 seconds and the timer indicator shows “- -”...
-
Page 15: Default Working Times
When cooking time expires, the corresponding cooking zone will be switched off automatically. Other cooking zones will keep operating if they were turned on previously. set more zones: The steps for setting more zones are similar to the steps of setting one zone; When you set the time for several cooking zones simultaneously, decimal dots of the relevant cooking zones are on. -
Page 16: Cooking Guidelines
4. Cooking Guidelines Take care when frying as the oil and fat heat up very quickly, particularly if you’re using PowerBoost. At extremely high temperatures oil and fat will ignite spontaneously and this presents a serious fire risk. 4.1 Cooking Tips ... -
Page 17: Detection Of Small Articles
4.2 Detection of Small Articles When an unsuitable size or non-magnetic pan (e.g. aluminium), or some other small item (e.g. knife, fork, key) has been left on the hob, the hob automatically go on to standby in 1 minute. The fan will keep cooling down the induction hob for a further 1 minute. -
Page 18: Troubleshooting
Stubborn deposits Remove these immediately with a • Remove stains left by melts and such as boilovers, fish slice, palette knife or razor sugary food or spillovers as soon melts, and blade scraper suitable for as possible. If left to cool on the hot sugary spills on Induction glass cooktops, but glass, they may be difficult to... -
Page 19: Failure Display And Inspection
The glass is being Rough-edged cookware. Use cookware with flat and smooth scratched. bases. See ‘Choosing the right cookware’. Unsuitable, abrasive scourer or See ‘Care and cleaning’. cleaning products being used. Some pans make This may be caused by the This is normal for cookware and crackling or clicking construction of your cookware... - Page 20 Troubleshooting 1) Failure code, diagnoses and the suggested solution; Failure code Problem Solution Auto-Recovery Please inspect whether power supply is Supply voltage is above the rated voltage. normal. Supply voltage is below the rated voltage. Power on after the power supply is normal. High temperature of ceramic plate sensor .
-
Page 21: Installation
The Cooking Mode High temperature of the Ambient temperature Indicator comes on, but hob. may be too high. Air heating does not start. Intake or Air Vent may be blocked. There is something Check whether the fan wrong with the fan. runs smoothly;... -
Page 22: Before Installing The Hob, Ensure That
L(mm) W(mm) H(mm) D(mm) A(mm) B(mm) X(mm) 56.5 52.5 560+4 490+4 50 mini Under all circumstances, make sure the Induction cooker hob is well ventilated and the air inlet and outlet are not blocked. Ensure the Induction cooker hob is in a good working state, as shown below. Note: The safety distance between the hotplate and the cupboard above the hotplate should be at least 760 mm. -
Page 23: After Installing The Hob, Ensure That
The isolating switch will be easily accessible to the customer with the hob installed. You consult local building authorities and by-laws if in doubt regarding installation. You use heat-resistant and easy-to-clean finishes (such as ceramic tiles) for the wall surfaces surrounding the hob. -
Page 24: Connecting The Hob To The Mains Power Supply
9.7 Connecting the Hob to the Mains Power Supply This hob must be connected to the mains power supply only by a suitably qualified person. Before connecting the hob to the mains power supply, check that: 1. The domestic wiring system is suitable for the power drawn by the hob. 2. - Page 26 Imported by Applico Ltd. Private Bag 92900 Onehunga, Auckland 1061, New Zealand Website www.baumatic.co.nz...
Need help?
Do you have a question about the BC60ITB and is the answer not in the manual?
Questions and answers