Table of Contents
Advertisement
Quick Links
Advertisement
Table of Contents

Related Manuals for Baumatic BHC310-ANZ


Summary of Contents for Baumatic BHC310-ANZ
- Page 1 BHC310-ANZ 30 cm Domino ceramic Cooktop...
- Page 2 User Manual for your Baumatic BHC310-ANZ 30 cm Domino ceramic cooktop with touch control operation NOTE : This User Instruction Manual contains important information, including safety & installation points, which will enable you to get the most out of your appliance. Please keep it in a safe place so that it is easily available for future reference;...
-
Page 3: Table Of Contents
Contents Environmental note Important safety information 5 – 7 Specifications 8 - 10 Product and aperture dimensions Product specifications Standard accessories Electrical details Ceramic hob surface layout Control panel Using the ceramic hob 10 - 18 Before first use Using the touch controls Cooking on a zone Power level settings Turning off the zone... -
Page 4: Environmental Note
Environmental note o The packaging materials that Baumatic uses are environmentally friendly and can be recycled. o Please discard all packaging material with due regard for the environment. -
Page 5: Important Safety Information
No modifications to the appliance are permitted by Baumatic Ltd. o You should not store or place flammable or highly flammable liquids/materials on top of or near the appliance. Items made... - Page 6 Safety o Baumatic strongly recommend that babies and young children are prevented from being near to the appliance and not allowed to touch the applian ce at any time. During and after use, all surfaces will be hot. o If it is necessary for younger family members to be in the...
- Page 7 Please see the specific section of this booklet that refers to stallation. o Baumatic Ltd. declines any responsibility for injury or damage, to person or property, as a result of improper use or installation of this appliance.
-
Page 8: Specifications
pecifications Product dimensions: Aperture dimensions: Depth: 520 mm Depth: 505 mm Width: 288 mm Width: 273 mm Height: 55 mm Product specifications o 1 x 1.80 kW hyper-speed zon e 1 x 1.20 kW hyper-speed zone o Front touch control oper ation o Residual hea t indicator... -
Page 9: Ceramic Hob Surface Layout
For future reference please record the following information which can be found on the rating plate and the date of purchase which can be found on your sales invoice. The rating plate of yo ur hob is located on e underneath of the appliance. Therefore it is a good idea to record is information before you install your appliance. -
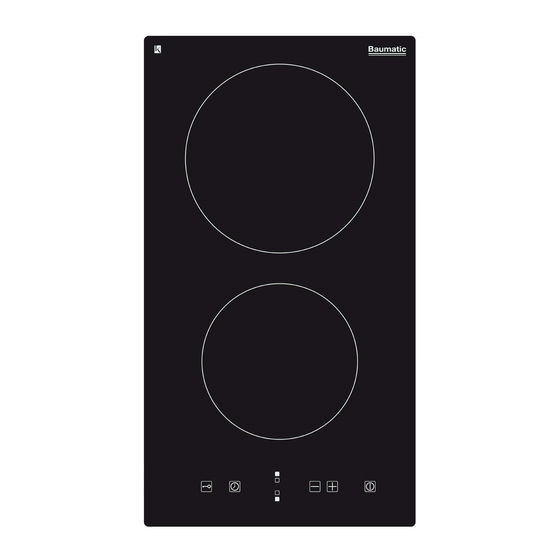
Page 10: Control Panel
Control panel = ON / OFF butt = Power / time regula tion buttons = Cooking zone selection buttons = Timer button = Safety lock button Using the ceramic hob Before first use IMPORTANT: You should clean the ceramic hob surface (see “Cleaning and maintenance”... -
Page 11: Cooking On A Zone
o A beep will sound each time a touch is registered. o You should make sure that the touch controls are always clean and dry and that the re is no object, such as utensils or cloths, covering them. Even a thin film of water may make the controls difficult to operate. -
Page 12: Power Level Settings
Power level settings o The settings below are to be used as a guideline only. Th e exact setting required will depend on several factors, including your cookware and the amount of food that you are cooking. o You should experiment with the induction hob power levels to find th e best settings to suit y Power... -
Page 13: Residual Heat Indicator
Residual heat indicator o After a zone is switched off, the display will show the letter “H”. T his means that the temperature of the indicated zone is still high enough to cause injury. o When the temperature falls to a safe temperature, then the letter “H”... -
Page 14: Using The Timer As A Minute Minder
Using the timer as a minute minder It is possi ble to use the minute minder, even if you are not turning on a cooking zone. o Touch the timer button (4) and the timer display will show “- -“. o Use the time regulation buttons (2) to set the required countdown time. -
Page 15: Setting The Timer To Turn One Cooking Zone Off
Setting the timer to turn one cooking zone off You are able to link the timer to a cooking zone so after the countdown time is complete, the cooking zone will turn off automatically. o Press the relevant co oking zone selection button (3) for the zone that you wish to link a countdown time to. -
Page 16: High Temperature Protection
o When the countdown is complete, the corresponding zone will turn off automatically. MPORTANT: When the countdown is complete, if the other cooking zone is in use, it will continue to heat. You will need to urn the other cooking zone off manually. High temperature protection o A temperature sensor in the hob can monitor the temperature inside of the hob. -
Page 17: Cooking Tips
o Always lift pans off the ceramic hob, do not slide them as they could scratch the glass. Cooking tips o IMPORTANT: Take care when frying as the oil and fat heat up very quickly. At extremely high temperatures oil an fat will ignite spontaneously and this presents a serious fire risk. -
Page 18: Hob Guidelines
o Heat up a heavy-based frying pan. Brush both sides of the steak with oil and drizzle a small amount of oil into the hot pan and then lower the meat into the hot pan. o Turn the steak only once during cooking. The exact cooking time will depend on the thickness of the steak and how well cooked you want it. - Page 19 o You should not use saucepans with rough bottoms, as this can scratch the ceramic surface. o Before use, make sure that the bottoms of the saucepans are clean and dry. o When cold, the bottom of the pans should be slightly concave, as they expand when hot and lie flat on the surface of the hob.
-
Page 20: Cleaning And Maintenance
Cleaning and maintenance Cleaning operations must only be carried out when the hob is cool. The appliance should be disconnected from your mains supply before commencing any cleaning process. Clea ing the ceramic hob top Any residues that are left on the hob top surface from cleaning agents will damage it. -
Page 21: Using A Ceramic Hob Scraper
sing a ceramic hob scraper Your appliance will be provided with a hob scraper. The following guidelines should also be followed when using the ceramic hob scraper:- o The scraper should be placed on the ceramic surface at an angle. o Residues should be removed by sliding the blade carefully over the ceramic surface. -
Page 22: Installation
Unpacking the appliance When unpacking t he appliance please check that the following items are contained wi thin the packaging:- Baumatic hob 1 Ceramic hob scraper 1 Installation and instructio n manual guarantee card 4 Fixing brackets... -
Page 23: Installing The Appliance
nstallin g the appliance o Cut a hole in the worktop tha corresponds with the drawing shown above. o IMPORTANT: You must observe ventila tion requirements shown the drawing opposite. - Page 24 o IMPORTANT: There ventilation holes around the outside of the hob. YOU MUST ens ure that these holes are not blocked by the work top, when you put the hob into position (see drawing opposite). o Carefully turn the hob upside down and place it on a cushioned mat.
-
Page 25: Electrical Connection
o Place the long screw into the fixing ho le on the outer edge of the bracket but do not fully tighten. o Carefully turn the hob back over and then gently lower it into the aperture hole that you hav e cut out. - Page 26 he brown wire must be connected to the terminal marked “L” (live), or coloured red. The blue wir e must be connected to the terminal marked “N” eutral), or coloured black. The green and yellow wire must be connected to the terminal marked “E”...
-
Page 27: My Appliance Isn't Working Correctly
My appliance isn’t working correctly Problem Possible Causes What to do The hob cannot be No power. Make sur e the hob is turned on. connected to the pow supply and that it is switched on. Check whether there is a power outage in your home or area. - Page 28 Or any installation other an the one specified by Baumatic Ltd. has been completed. Please refer to the conditions of guarantee that appear on the warranty card that you receive with the appliance.
-
Page 29: Contact Details
Service Telephone 1800 444 357 Website www.thinkappliances.com Applico Ltd. Private Bag 92900 Onehunga, Auckland 1061, New Zealand Website www.baumatic.co.nz United Kingdom Baumatic Ltd., Baumatic Buildings, 6 Bennet Road, eading, Berkshire RG2 0QX ited Kingdo Sales Telephone (0118) 933 6900 Website: www.baumatic.co.uk...
Need help?
Do you have a question about the BHC310-ANZ and is the answer not in the manual?
Questions and answers