Table of Contents
Advertisement
Quick Links
Download this manual
See also:
User Manual
Advertisement
Table of Contents

Related Manuals for Encore ENHWI-G2


Summary of Contents for Encore ENHWI-G2
- Page 1 ENHWI-G2 ENCORE 802.11g Wireless Router User’s Manual...
-
Page 2: Fcc Certifications
FCC Certifications Federal Communication Commission Interference Statement This equipment has been tested and found to comply with the limits for a Class B digital device, pursuant to Part 15 of the FCC Rules. These limits are designed to provide reasonable protection against harmful interference in a residential installation. -
Page 3: Ce Mark Warning
No part of this document can be copied or reproduced in any form without written consent from the company. Trademarks: All trade names and trademarks are the properties of their respective companies. Copyright © Encore Electronics, Inc. 2007, All Rights Reserved. -
Page 4: Table Of Contents
The Rear Panel ······················································································ 5 Power Connection ··········································································· 5 Placement (Optional) Restore Default Button Installing And Using Wireless Router Network configuration setup ··································································· 7 Computer configuration setup································································· 8 Management ··························································································· 10 Wireless Router configuration setup······················································ 10 Setup Wizard ····················································································· 12 Operation Mode··················································································... - Page 5 LAN Interface Setup ···································································· 25 WAN Interface Setup··································································· 26 Static IP Mode···························································································· 26 Firewall Configuration····································································· 31 Port Filtering··············································································· 31 IP filtering··················································································· 32 MAC filtering··············································································· 33 Port forwarding ··········································································· 34 URL Filtering ·············································································· 35 Virtual DMZ ················································································ 36 Management ······················································································ 37 Status························································································...
-
Page 6: Unpacking Information
Thank you for purchasing the product. Before you start, please check all the contents of this package. The product package should include the following: 1. One Wireless Router 2. One power adapter 3. One User Manual (CD) 4. One detachable antenna... -
Page 7: Introduction To Wireless Router
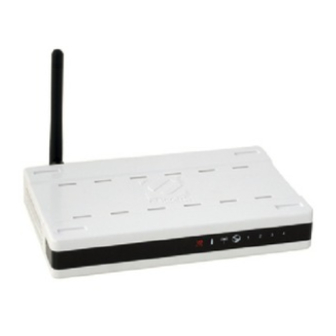
Introduction To Wireless Router General Description ENCORE Wireless Router built-in with 4-port 10/100Mbps Fast Ethernet Switch is the latest generation of Wireless router product for Home/Office and SOHO users. This full-feature and self-contained compact Wireless Router will be fully for broadband access in both of LAN and Wireless environment. This device... -
Page 8: Key Features
Key Features The switch provides the following key features: Complies with IEEE 802.11b/g wireless standards Provides one 802.11b/g wireless Reverse SMA detachable antenna High speed transfer data rate up to 54Mbps Supports turbo mode for 72Mbps data transfer Supports wireless data encryption with 64/128-bit WEP, WPA (TKIP with IEEE 802.1x), WPA2 and AES functions Supports system log Supports authentication for wireless connectivity based on ESSID... -
Page 9: The Front Panel
Status (“ i “ icon) LED The LED will be dark for a few seconds when the system is started. After that, the LED will blink periodically to show the Wireless Router is working normally. If the LED stays green/dark that means the system failed, you need to contact your agent or try to reboot the system. -
Page 10: Port Leds (Lan)
There are three ways to place the Router. The first way is to place the Router horizontally on a surface. The second way is to attach the router to the wall. The third way is to stand the Router vertically on a surface. These options are explained in further detail below. -
Page 11: Restore Default Button
Stand Option 1. The Router includes two stand parts. 2. Combine two parts into one stand. Combine it with the side of router near the power port. Push the stand up to snap it into place. 3. Place the Router. -
Page 12: Installing And Using Wireless Router
Installing And Using Wireless Router This Chapter provides a step-by-step guide to the installation and configuration of ENCORE Wireless Router. We suggest you go over the whole chapter and then do more advanced operation. Network configuration setup Steps to build up the network: Connect the ADSL or Cable modem to the Ethernet WAN port on the back of ENCORE Wireless Router by using the UTP cable. -
Page 13: Computer Configuration Setup
Computer configuration setup In order to communicate with this Wireless Router, you have to configure the IP addresses of your computer to be compatible with the device. The router supports DHCP server and it is enabled as default. Users that configure your IP address as “Obtain an IP address automatically”... - Page 14 hoose Internet Protocol (TCP/IP) and click Properties. You may choose “Obtain an IP address automatically”(recommend) to get IP address automatically or choose “Use the following IP address” to specify IP addresses manually. Please click the OK button after your configuration.
-
Page 15: Management
Wireless Router configuration setup In order to make the whole network operate successfully, it is necessary to configure ENCORE Router through your computer has a WEB browser installed. Please follow up the steps listed below. 1. Double click the Internet WEB browser icon on your desktop screen (Netscape Communicator 4.0 and Internet Explorer 3.0 or update version) - Page 16 4. The Graphic User Interaface After the password authorization, the Setup Wizard shows up as the home page of the Graphic User interface. You may click on each folder on left column of each page to get access to each configuration page.
-
Page 17: Setup Wizard
Setup Wizard If you are using the router for the first time, you may follow the procedures of the setup wizard to do a step-by-step configuration. Note: The following instruction does an overall introduction to the Setup Wizard. For detail information to each item, please refer to instruction of each page. - Page 18 Mark the check box to enable synchronizing time by NTP server. Select the religion you live and a NTP server by clicking the drop list then click “Next”. Specify an IP address and subnet mask for connecting to the router in LAN.
- Page 19 Select a WAN access type for the router to connect to Internet. Fill in the parameters that required in each blank, and then click the “Next” button. You may get those parameters from your ISP. Select the wireless parameters that are used for associating with this router and click...
- Page 20 Click the drop list to select the encryption type for your wireless network. Fill in the parameters for the encryption type you select and click finish to complete configuration.
-
Page 21: Operation Mode
Operation Mode To select an operation mode for this router, click on the mode that you want to perform and click the button to execute. -
Page 22: Wireless
SSID for the extended interface. Click <Apply changes> button at the bottom of the screen to save the above configurations. You can now configure other advance sections or start using the router (with the advance settings in place) - Page 23 Expired Time This is the time in second before dissociation. If the wireless keeps idle longer than the expired time, this wireless router will dissociate it. The wireless client station has to associate again when it is active. Refresh Refresh the "Active Wireless Client Table".
-
Page 24: Advanced Settings
Authentication Type, Fragment Threshold, RTS Threshold, Beacon Interval, Data Rate, Preamble Type, Broadcast SSID, IAPP and 802.11g Protection. We recommend not changing these parameters unless you know what changes will be there on this router. Configuration Open System... - Page 25 . Select “Auto” turns it on or off automatically. Click the <Apply Changes> button at the bottom of the screen to save the above configurations. You can now configure other advance sections or start using the router.
-
Page 26: Security
Mixed encryption modes, select the option in the drop list. If you select none, any data will be transmitted without Encryption and any station can access the router. the item. (WPA-Radius)” and “Personal (Pre-Shared Key)”. You can select the mode by clicking... -
Page 27: Pre-Shared Key
Sever Click <Apply Change> at the bottom of the screen to save the above configurations. You can now configure other advance sections or start using the router. Select the WPA Cipher Suite to be TKIP or Select the WPA2 Cipher Suite to be TKIP or To decide the format, select what you need in the drop list. -
Page 28: Access Control
Selected”. If you want to delete all stations on the list, click “Delete All” to remove all of them. Click <Apply Change> button to save the above configurations. You can now configure other advance sections or start using the router. -
Page 29: Wds Setting
APs wirelessly. To make it work, you must ensure that these APs and the Router are in the same Channel and add these APs MAC Address and Comment values into the WDS list. Don’t Forget to Enable the WDS by click the check box of “Enable WDS”... -
Page 30: Tcp/Ip Setting
TCP/IP Setting LAN Interface Setup To set up the configuration of LAN interface, Private IP of you router LAN Port and Subnet mask for your LAN segment. Configuration IP address The IP of your Router LAN port (Default 192.168.1.1) Subnet Mask Subnet Mask of you LAN (Default 255.255.255.0) To give your LAN Client an IP, you have to enable “DHCP Server”. -
Page 31: Wan Interface Setup
WAN Interface Setup This page allows users to configure those parameters for connecting to Internet. You may select the WAN Access Type from the drop list and configure parameters for each mode. Static IP Mode IP Address, Subnet Mask Fill in the IP address, Subnet Mask and Default Gateway and Default Gateway that provided by your ISP. -
Page 33: Pppoe Mode
“Manual” To connect to ISP, click “Connect” manually from the WEB user interface. The WAN connection will not disconnected due to the idle timeout. If the WAN line breaks down and latter links again, the router will not auto-connect to the ISP. Idle Time:... - Page 34 User Name and password that provided by your ISP. Name and Password MTU Size To Enable the Maximum Transmission Unit of Router setup. Any packet over this number will be chopped up into suitable size before sending. Larger number will enhance the transmission performance.
- Page 35 There are some settings are able to be configured on each WAN access types: Enable Web Server Access To Enable the user to access this Router through Internet, on WAN from port Enter the specific IP and the port number...
-
Page 36: Firewall Configuration
The firewall could not only obstruct outside intruders from intruding your system, but also restricting the LAN users. Port Filtering To restrict certain type of data packets from your LAN to Internet through the Router, add them on the Current Filtering Table. Configuration STEPS Click the check box of “Enable Port Filtering”... -
Page 37: Ip Filtering
IP filtering ENCORE Router could filter the outgoing packets for security or management consideration. You can set up the filter against the IP addresses to block specific internal users from accessing the Internet. Configuration STEPS Click the check box of “Enable IP Filtering” to enable the function. -
Page 38: Mac Filtering
MAC filtering ENCORE Router could filter the outgoing packets for security or management consideration. You can set up the filter against the MAC addresses to block specific internal users from accessing the Internet. Configuration STEPS Click the check box of “Enable MAC Filtering” to enable the function. -
Page 39: Port Forwarding
Port forwarding The Port Forwarding allows you to re-direct a particular range of service port numbers (from the Internet/WAN Ports) to a particular LAN IP address. It helps you to host some servers behind the router NAT firewall. Configuration STEPS Click the check box of “Enable port forwarding”... -
Page 40: Url Filtering
URL Filtering The URL Filter allows users to prevent certain URL from accessing by users in LAN. This filter will block those URLs that contain certain keywords. Configuration STEPS Click the check box of “Enable URL Filtering” to enable the function. Enter the URL that is going to be banned. -
Page 41: Virtual Dmz
Virtual DMZ The virtual DMZ is used to enable protocols, which need to open ports on the router. The router will forward all unspecified incoming traffic to the host specified in this page. To configure it, enter the Host IP (private IP address) and Click “Apply... -
Page 42: Management
Management Status In the home page of ENCORE Router, the left navigation bar shows the options to configure the system. In the right navigation screen is the summary of system status for viewing the configurations. System Uptime Firmware Version The version of the firmware applied on this device. - Page 43 Encryption The security encryption status of this wireless network BSSID The Basic Service Set Identity of this router.(This parameter is the same as the MAC address of LAN port) Associated Clients The number of associated clients. LAN Configuration...
-
Page 44: Statistics
Statistics On this page, you can monitor the sent & received packets counters of wireless, Ethernet LAN, and Ethernet WAN. To see the latest report, click refresh button. DDNS This page allows users to connect to DDNS. To enable DDNS, Mark the “Enable DDNS”... -
Page 45: Time Zone Setting
Time Zone Setting This page allows users to configure the time of the router. To specify manually, fill in the blanks in “Current Time” and click the “Apply Change” button. To synchronize time from a timeserver, please mark the “Enable NTP client update”... -
Page 46: Upgrade Firmware
Click “browse…” button to select the firmware you want to upgrade. Click Upload to start the upgrade process. Please don’t close the WEB-browser and wait for process to complete. When Upgrade is completed, you can start to use the router. -
Page 47: Save And Reload Settings
Save and Reload Settings To save setting to file, click “Save...” button. To load setting from file, 1. Click “Browse…” on the to select the file 2. Click upload to start the process and wait for it to complete To reset setting to Default, click reset to start the process and it will be completed till the status LED start blinking. -
Page 48: Product Specifications
Product Specifications IEEE802.3, 10BASE-T IEEE802.3u, 100BASE-TX Standard IEEE802.3x full duplex operation and flow control IEEE802.11b wireless LAN infrastructure IEEE802.11g wireless LAN infrastructure 1 * WAN port Interface 4 * 10/100 RJ-45 Fast Ethernet switching ports Antenna: 802.11b/g wireless reverse SMA detachable WAN Connection Ethernet 10/100 Mbps RJ-45 (10BASE-T): Category 3,4,5 UTP... - Page 49 Internet. Do not disable until you’ve downloaded the firmware in Step 1. Please make sure that your modem is not also a router. If it is or you do not know, please contact your ISP and change the modem to Bridge mode.
- Page 50 Step 2 Take a paperclip and perform a hard reset. With unit on, use a paperclip and hold down the reset button on the back of the unit for 15 seconds. Release it and the router will recycle, the lights will blink, and then stabilize.
- Page 51 Step 9 Turn off your DSL modem for 2-3 minutes. Turn back on. Once the modem has established a link to your ISP, plug the power back into the router. Wait about 30 seconds and log back into the router. Step 10 Click on the Status tab in the web configuration where you can view the device info.
Need help?
Do you have a question about the ENHWI-G2 and is the answer not in the manual?
Questions and answers