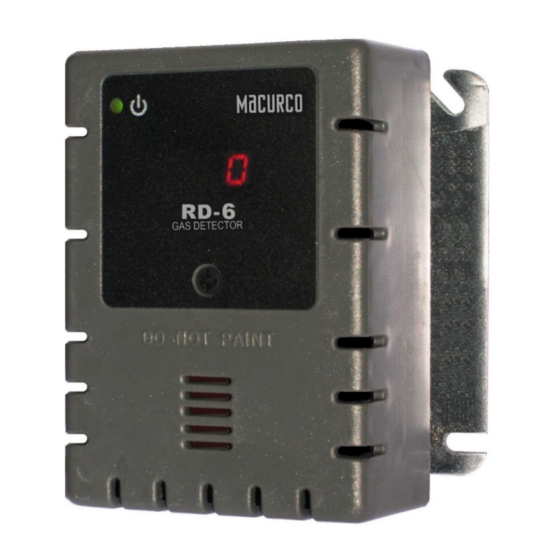
Macurco RD-6 User Instructions
Refrigerant detector, controller and transducer
Hide thumbs
Also See for RD-6:
- User instructions (63 pages) ,
- Application manual (16 pages) ,
- User instructions (72 pages)

Subscribe to Our Youtube Channel
Related Manuals for Macurco RD-6


Summary of Contents for Macurco RD-6
- Page 1 Macurco™ RD-6/RD-12 Refrigerant Detector, Controller and Transducer User Instructions IMPORTANT: Keep these user instructions for reference.
-
Page 2: Table Of Contents
Macurco RD-xx User Manual Table of Contents General Safety Information ................................ 4 List of warnings ................................. 4 Use Instructions and Limitations ..............................5 Use For ....................................5 Do NOT use for .................................. 5 Features ..................................... 6 Specifications ..................................6 2.4.1 6-Series Low Voltage .............................. - Page 3 Testing the 4-20mA loop ............................. 26 Field Calibration Procedure ............................. 26 Appendix A – Table of Figures ..............................28 Macurco Gas Detection Product limited warranty ........................29 Technical Support Contact Information ............................29 General Contact Information ................................29 REV – 2.1...
-
Page 4: General Safety Information
1 General Safety Information The following instructions are intended to serve as a general guideline for the use of the Macurco RD-6 and RD-12 refrigerant detector. This manual will refer to these devices as RD-xx unless content is specific to the 6-series or 12-series model. This manual is not to be considered all-inclusive, nor is it intended to replace the policy and procedures for each facility. -
Page 5: Use Instructions And Limitations
2.1 Use For The Macurco RD-xx is a dual relay Refrigerant (REF) detector for industrial applications. The RD-xx has selectable 4-20 mA output, and buzzer. The RD-xx has a long-life solid-state sensor (expected lifespan of 7+ years). The RD-xx is a low-level meter with alarm point set to 1000ppm of refrigerant gas. -
Page 6: Features
Macurco RD-xx User Manual 2.3 Features • ETL Listed to UL 61010-1 and CSA C22.2 No 61010-1 • Low level meter with non-adjustable alarm set to 1,000 ppm refrigerant gas • Fan and alarm relay activation set at 1000 ppm 5 A SPDT fan relay controls starters of exhaust fans •... -
Page 7: Installation And Operating Instructions
2. Connect the RD-6 to Class 2 power supply only. It is suggested to use a separate transformer for powering the unit or units because of possible interferences from other devices on the same power supply. - Page 8 Macurco RD-xx User Manual 9. The Fan Relay will engage if the refrigerant concentration is greater than 1000ppm for longer than the Fan Relay Delay time. Unless it is configured for latching, the fan relay will disengage once both of these conditions have been met: •...
- Page 9 Figure 3-4 6-Series Multiple Device Diagram 1. One sensor per 900 square feet (approximately) 2. Mount the RD-6 about one foot above the floor. 3. See application building code for fan size and air changes per period of time. 4. Make sure that there are air inlets to provide adequate airflow throughout the building.
- Page 10 2. Alarm panel provides battery backup power to the RD-6. 3. The RD-6 dry contact relay can use panel power or fan power (See Ratings). 4. Match fan relay contacts to fan size and coil voltage to a power source.
- Page 11 In this application (above) the Fan or primary relay is used as a low-level alarm relay. The Alarm or secondary relay is used as a supervisory relay when utilized in the normally closed configuration. The RD-6 monitors all critical functions of the unit through software diagnostics that continually test and verify its operations.
-
Page 12: 12-Series Line Voltage
Macurco RD-xx User Manual 3.2.2 12-Series Line Voltage 1. The RD-12 mounts on a 4” square (or 4x4) electrical box supplied by the contractor. Do not mount the RD-12 inside another box, unless it has good air flow through it. - Page 13 Macurco RD-xx User Manual Figure 3-11 12-Series Stand Alone Layout Figure 3-12 12-Series Multiple Device Diagram 13 | REV – 2.1 [34-2900-0511-7 ] P a g e...
- Page 14 Macurco RD-xx User Manual Figure 3-13 12-Series Alarm Control Panel Diagram Figure 3-14 12-Series DVP-120 Control Panel Diagram 14 | REV – 2.1 [34-2900-0511-7 ] P a g e...
- Page 15 Macurco RD-xx User Manual Figure 3-15 12-Series Alternate Alarm Panel In this application (above) the Fan or primary relay is used as a low-level alarm relay. The Alarm or secondary relay is used as a supervisory relay when utilized in the normally closed configuration. The RD-12 monitors all critical functions of the unit through software diagnostics that continually test and verify its operations.
-
Page 16: Terminal Connection
Mains Power Connection Connect the RD-6 to Class 2 power supply only. It is suggested to use a separate transformer for powering the unit or units because of possible interferences from other devices on the same power supply. Connect the RD-6 to the control cables with terminal plugs. -
Page 17: Operations
Note: The 4-20mA current loop outputs may be used with the Macurco DVP-120 control panel or other systems. The 4-20mA signal connections to detectors should be size AWG18 (minimum) for short runs. Refer to the table for recommended wire gauges. -
Page 18: 4-20Ma Loop
Macurco RD-xx User Manual Trouble –the display will display the “t” Error code (t01 for example). If the Trouble Fan Setting is enabled, the Fan relay will switch activating the relay. See Section 5.1.2 “t” Error Codes and Section 4.5.11 Trouble Fan Setting – “tFS”. -
Page 19: Selecting Default Configuration - "Def
Macurco RD-xx User Manual 4.4.1 Selecting Default Configuration – “dEF” To select the Default Configuration, in normal mode, push the Next button to get to “Con” or the Configuration menu. Then push the Enter button to enter the Con menu. The first selection is the “dEF” or Default setting. Push Enter. If it is already in Default configuration, there will be no action. -
Page 20: Trouble Fan Setting - "Tfs
Push Next until “End” is displayed then push Enter to get back to normal operation. NOTE: RD-xx will transmit information about calibration period to Macurco Control Panel (via 4-20 mA output) only when 4- 20mA output setting is set to ‘EnH’. -
Page 21: Troubleshooting
If the error mode repeats frequently, check for continuous power and proper voltage. If power is not the problem and a unit has repeating error conditions, it may need to be returned to Macurco for service, per these User Instructions. -
Page 22: Sensor Poisons
The detector’s performance should be tested regularly by using gas as detailed in the Gas Testing section. All maintenance and repair of products manufactured by Macurco are to be performed at the appropriate Macurco manufacturing facility. Macurco does not sanction any third-party repair facilities. -
Page 23: Cleaning
Check that the green RD-xx status indicator LED light is illuminated continuously. If not, do not proceed with the tests. If the unit is in error mode, contact your local representative or Macurco technical Support representative for information on resolving the problem. -
Page 24: Manual Operation Test
The RD-xx calibration can be calibrated and verified (or bump-tested) with the RD-FCK with R-134a refrigerant gas, regulator, and test hood, available through your local representative or from Macurco. Note: For optimum test results it is suggested that the unit be in clean air (green light on steady), in a low ambient air flow and have uninterrupted power for 7 days. -
Page 25: Gas Testing
Macurco RD-xx User Manual Note: Gas testing results can vary depending upon temperature, humidity, test duration and other variables. For optimum results, it is suggested that the unit be in continuous operation for a minimum of 7 days, in a stable environment and at standard conditions before proceeding with testing. -
Page 26: Testing The Alarm Relay
Macurco RD-xx User Manual Figure 7-1 Calibration Connection 4. Turn on the regulator to start the gas flow and wait with the gas applied continuously. When the gas concentration reaches 1000ppm the display will flash back and forth between “FAn” and ALr (if both Alarm Relay and Fan Relay are activated). - Page 27 Macurco RD-xx User Manual Follow the procedure below for field calibration. 1. Remove the Philips screw on the front of the RD-xx. Pull the front cover of the unit off. 2. Assemble the 1000-ppm gas cylinder, regulator together, tygon tubing and nafion tubing together.
-
Page 28: Appendix A - Table Of Figures
Macurco RD-xx User Manual 8 Appendix A – Table of Figures Figure 3-2 6-Series Rear View ................................8 Figure 3-3 6-Series Garage Diagram ..............................8 Figure 3-4 6-Series Multiple Device Diagram............................9 Figure 3-5 6-Series Alarm Control Panel Diagram ..........................10 Figure 3-6 6-Series DVP-120 Control Panel Diagram ........................ -
Page 29: Macurco Gas Detection Product Limited Warranty
9 Macurco Gas Detection Product limited warranty Macurco warrants the RD-6, RD-12 gas detector will be free from defective materials and workmanship for a period of two (2) years from the date of manufacture (indicated on the inside cover of the RD-6, RD-12), provided it is maintained and used in accordance with Macurco instructions and/or recommendations. - Page 31 Macurco™ RD-6/RD-12 Détecteur de réfrigérant, contrôleur et transducteur Instructions de l’utilisateur IMPORTANT : Conservez ces instructions d’utilisateur pour référence.
- Page 32 Macurco RD-xx User Manual Table des matières • Informations générales sur la sécurité ............................4 Liste des avertissements ..............................4 Utiliser les instructions et les limitations ........................... 5 Utilisation pour .................................. 5 Ne pas utiliser pour ................................5 fonctionnalités .................................. 6 Spécifications ..................................
- Page 33 Test de la boucle 4-20mA ............................28 Procédure d’étalonnage sur le terrain ..........................29 Annexe A – Tableau des chiffres .............................. 30 Garantie limitée du produit de détection de gaz Macurco ...................... 31 Coordonnées du support technique ............................31 Informations générales sur les contacts ............................. 31 REV –...
-
Page 34: Informations Générales Sur La Sécurité
Les instructions suivantes sont destinées à servir de ligne directrice générale pour l’utilisation du détecteur réfrigérant Macurco RD-6 et RD-12. Ce manuel se référera à ces appareils comme RD-xx à moins que le contenu soit spécifique au modèle de la série 6 ou 12. -
Page 35: Utiliser Les Instructions Et Les Limitations
2.1 Utilisation pour Le Macurco RD-xx est un détecteur de réfrigerant à double relais (REF) pour applications industrielles. Le RD-xxxx a une sortie sélectionnable de 4-20 mA, et buzzer. Le RD-xx dispose d’un capteur à l’état solide à longue durée de vie (durée de vie prévue de 7+ ans). -
Page 36: Fonctionnalités
Macurco RD-xx User Manual 2.3 fonctionnalités • ETL Inscrit à UL 61010-1 et CSA C22.2 no 61010-1 • Compteur de niveau bas avec alarme non réglable réglée à 1 000 ppm de gaz réfrigérant • Activation du ventilateur et du relais d’alarme à 1000 ppm 5 Un relais de ventilateur SPDT contrôle les démarreurs des ventilateurs d’échappement... -
Page 37: Instructions D'installation Et D'exploitation
3.2 Installation 3.2.1 Basse tension de série 6 La RD-6 monte sur une boîte électrique carrée de 4 po (ou 4x4) fournie par l’entrepreneur. Ne montez pas le RD-6 à • l’intérieur d’une autre boîte, à moins qu’il n’y ait un bon flux d’air à travers elle. - Page 38 Macurco RD-xx User Manual • Le contact sec, relais de ventilateur SPDT a trois terminaux. Le contact commun (COM.), normalement ouvert (N.O.) et le contact normalement fermé (N.C.). Le relais de ventilateur peut passer jusqu’à 5.0 A jusqu’à 240 VAC. Voir la section OPERATION de ces instructions utilisateur pour plus de détails sur les paramètres du relais.
- Page 39 Figure 3-4 Diagramme de périphériques multiples de la série 6 • Un capteur par 900 pieds carrés (environ) Montez la RD-6 à environ un pied au-dessus du sol. • • Consultez le code du bâtiment de l’application pour la taille des ventilateurs et les changements d’air par période de temps.
- Page 40 • • Le relais de contact sec RD-6 peut utiliser la puissance du panneau ou la puissance du ventilateur (voir évaluations). • Associez les contacts de relais de ventilateur à la taille du ventilateur et la tension de bobine à une source d’alimentation.
- Page 41 Le RD-6 surveille toutes les fonctions critiques de l’unité grâce à des diagnostics logiciels qui testent et vérifient continuellement ses opérations. Si un problème est constaté, l’appareil passera à un mode de panne/erreur ou à un problème. Dans ce mode d’erreur, les relais Fan* et Alarme seront activés indiquant l’état de difficulté...
-
Page 42: Tension De Ligne De 12 Séries
Macurco RD-xx User Manual Figure 3-8 6-Series Horn & Strobe Combo Wiring 3.2.2 Tension de ligne de 12 séries • Le RD-12 monte sur une boîte électrique carrée de 4 pouces (ou 4x4) fournie par l’entrepreneur. Ne montez pas le RD- 12 à... - Page 43 Macurco RD-xx User Manual Figure 3-10 Vue arrière de la série 12 Figure 3-11 Mise en page autonome de la série 12 13 | REV – 2.1 [34-2900-0511-7 ] P a g e...
- Page 44 Macurco RD-xx User Manual Figure 3-12 Diagramme de périphériques multiples de la série 3-12 Figure 3-13 Diagramme du panneau de configuration d’alarme de la série 3-13 14 | REV – 2.1 [34-2900-0511-7 ] P a g e...
- Page 45 Macurco RD-xx User Manual Figure 3-14 Diagramme du panneau de configuration DVP-120 de la série 120 Figure 3-15 Panneau d’alarme de rechange de la série 12 Dans cette application (ci-dessus), le ventilateur ou le relais principal est utilisé comme relais d’alarme de bas niveau. Le relais d’alarme ou secondaire est utilisé...
- Page 46 Macurco RD-xx User Manual Le RD-12 surveille toutes les fonctions critiques de l’unité grâce à des diagnostics logiciels qui testent et vérifient continuellement ses opérations. Si un problème est constaté, l’appareil passera à un mode de panne/erreur ou à un problème.
-
Page 47: Connexion Terminal
Connectez la RD-6 à l’alimentation de classe 2 uniquement. Il est suggéré d’utiliser un transformateur distinct pour alimenter l’unité ou les unités en raison des interférences possibles d’autres appareils sur la même alimentation. Connectez le RD-6 aux câbles de commande avec des prises terminales. Lorsque vous faites des connexions, assurez-vous que le courant est coupé. Il y a deux terminaux pour Power : 12 à... -
Page 48: Opérations
Remarque: Les sorties de boucles actuelles 4-20mA peuvent être utilisées avec le panneau de commande Macurco DVP-120 ou d’autres systèmes. Les connexions de signal 4-20mA aux détecteurs doivent être de taille AWG18 (minimum) pour les courses courtes. -
Page 49: Boucle 4-20Ma
Macurco RD-xx User Manual Niveau du ventilateur – Lorsque la concentration de réfrigérant atteint le réglage du relais des ventilateurs (1000 ppm), l’écran affiche « FAn » en continu tant que le relais de ventilateur est activé. Alarm Level –will show “ALr” when the Alarm relay is activated. -
Page 50: Sélection De Configuration Par Défaut - " Def
Macurco RD-xx User Manual Figure 3-17 Vue du conseil 4.4.1 Sélection de configuration par défaut – « DEF » Pour sélectionner la configuration par défaut, en mode normal, appuyez sur le bouton Suivant pour obtenir de « Con » ou le menu Configuration. -
Page 51: Configuration Du Relais D'alarme - " Arc
Macurco RD-xx User Manual 4.4.4 Configuration du relais d’alarme – « arc » Pour sélectionner la configuration du relais d’alarme, en mode normal, appuyez sur le bouton Suivant pour obtenir de « Con » ou du menu Configuration. Appuyez ensuite sur le bouton Entrée pour entrer dans le menu Con. La quatrième sélection est la configuration «... -
Page 52: Paramètres De La Période D'étalonnage - " Cal
Macurco RD-xx User Manual REMARQUE : RD-xx transmettra des informations sur la période d’étalonnage au Panneau de configuration Macurco (via une sortie de 4 à 20 mA) uniquement lorsque le paramètre de sortie 4-20mA est défini sur 'EnH'. 4.5.13 Paramètres de la période d’étalonnage – « CAL »... -
Page 53: Dépannage
Si le mode d’erreur se répète fréquemment, vérifiez la puissance continue et la tension appropriée. Si l’alimentation n’est pas le problème et qu’une unité a des conditions d’erreur répétitives, il peut être nécessaire de le retourner à Macurco pour le service, selon ces instructions utilisateur. -
Page 54: Poisons De Capteur
(dans des conditions normales). Les performances du détecteur doivent être testées régulièrement en utilisant du gaz comme indiqué dans la section Des essais de gaz. Tous les travaux d’entretien et de réparation des produits fabriqués par Macurco doivent être effectués à l’usine de fabrication de Macurco appropriée. Macurco ne sanctionne aucune installation de réparation par des tiers. -
Page 55: Nettoyage
Macurco RD-xx User Manual 2. Pour réinitialiser la durée de vie du capteur (rSt), à partir du mode normal ou d’échauffement, appuyez quatre fois sur le bouton Suivant pour passer au mode « SEn » ou au mode Capteur. 3. Appuyez ensuite sur le bouton Entrée pour accéder au mode Capteur « RSt » - Réinitialiser le capteur. -
Page 56: Test D'opération
Vérifiez que le voyant LED vert de l’indicateur d’état RD-xx est éclairé en continu. Si ce n’est pas le cas, ne procédez pas aux tests. Si l’unité est en mode erreur, contactez votre représentant local ou le représentant du support technique Macurco pour obtenir des informations sur la résolution du problème. -
Page 57: Kits D'étalonnage Et D'essai
L’étalonnage RD-xx peut être calibré et vérifié (ou testé par bosse) avec le RD-FCK avec gaz réfrigérant R-134a, régulateur et capot d’essai, disponible par l’intermédiaire de votre représentant local ou de Macurco. Remarque : Pour obtenir des résultats optimaux, il est suggéré que l’appareil soit en air pur (feu vert sur stable), dans un faible débit d’air ambiant et qu’il ait une puissance ininterrompue pendant 7 jours. -
Page 58: Test Du Relais D'alarme
Macurco RD-xx User Manual Figure 7-1 Connexion d’étalonnage • Allumez le régulateur pour démarrer le flux de gaz et attendez avec le gaz appliqué en continu. • Lorsque la concentration de gaz atteint 1000 ppm, l’écran clignote entre « » et ALr (si les deux relais d’alarme et relais de ventilateur sont activés). -
Page 59: Procédure D'étalonnage Sur Le Terrain
Macurco RD-xx User Manual • Le relais d’alarme doit s’activer si la lecture est supérieure à 1000ppm. La sortie 4-20 mA devrait produire 4mA dans l’air pur et 20mA lors de l’alarme. • Remarque : Si la sortie 4-20mA ne change pas en 5 minutes, il y a trois possibilités : La bouteille de gaz est vide, vérifiez la jauge de pression. -
Page 60: Annexe A - Tableau Des Chiffres
Macurco RD-xx User Manual 8 Annexe A – Tableau des chiffres Figure 3-2 Vue arrière de la série 6 ..............................8 Figure 3-3 Diagramme de garage de la série 6 ........................... 9 Figure 3-4 Diagramme de périphériques multiples de la série 6 ......................9 Figure 3-5 Diagramme du panneau de configuration de l’alarme de série 3-5 ................ -
Page 61: Garantie Limitée Du Produit De Détection De Gaz Macurco
Macurco garantit que le détecteur de gazRD-6, RD-12 sera exempt de matériaux défectueux et de fabrication pendant une période de deux (2) ans à partir de la date de fabrication (indiqué sur la couverture intérieure de la RD-6,RD-12),à condition qu’il soit entretenu et utilisé... - Page 63 Macurco™ RD-6/RD-12 Refrigerant Detector, Controller and Transducer User Instructions IMPORTANT: Keep these user instructions for reference.
- Page 64 Macurco RD-xx User Manual Table of Contents General Safety Information ................................ 4 List of warnings ................................. 4 Use Instructions and Limitations ..............................5 Use For ....................................5 Do NOT use for .................................. 5 Features ..................................... 6 Specifications ..................................6 2.4.1 6-Series Low Voltage ..............................
- Page 65 Testing the 4-20mA loop ............................. 26 Field Calibration Procedure ............................. 26 Appendix A – Table of Figures ..............................28 Macurco Gas Detection Product limited warranty ........................29 Technical Support Contact Information ............................29 General Contact Information ................................29 REV – 2.1...
-
Page 66: General Safety Information
1 General Safety Information The following instructions are intended to serve as a general guideline for the use of the Macurco RD-6 and RD-12 refrigerant detector. This manual will refer to these devices as RD-xx unless content is specific to the 6-series or 12-series model. This manual is not to be considered all-inclusive, nor is it intended to replace the policy and procedures for each facility. -
Page 67: Use Instructions And Limitations
2.1 Use For The Macurco RD-xx is a dual relay Refrigerant (REF) detector for industrial applications. The RD-xx has selectable 4-20 mA output, and buzzer. The RD-xx has a long-life solid-state sensor (expected lifespan of 7+ years). The RD-xx is a low-level meter with alarm point set to 1000ppm of refrigerant gas. -
Page 68: Features
Macurco RD-xx User Manual 2.3 Features • ETL Listed to UL 61010-1 and CSA C22.2 No 61010-1 • Low level meter with non-adjustable alarm set to 1,000 ppm refrigerant gas • Fan and alarm relay activation set at 1000 ppm 5 A SPDT fan relay controls starters of exhaust fans •... -
Page 69: Installation And Operating Instructions
2. Connect the RD-6 to Class 2 power supply only. It is suggested to use a separate transformer for powering the unit or units because of possible interferences from other devices on the same power supply. - Page 70 Macurco RD-xx User Manual 9. The Fan Relay will engage if the refrigerant concentration is greater than 1000ppm for longer than the Fan Relay Delay time. Unless it is configured for latching, the fan relay will disengage once both of these conditions have been met: •...
- Page 71 Figure 3-4 6-Series Multiple Device Diagram 1. One sensor per 900 square feet (approximately) 2. Mount the RD-6 about one foot above the floor. 3. See application building code for fan size and air changes per period of time. 4. Make sure that there are air inlets to provide adequate airflow throughout the building.
- Page 72 2. Alarm panel provides battery backup power to the RD-6. 3. The RD-6 dry contact relay can use panel power or fan power (See Ratings). 4. Match fan relay contacts to fan size and coil voltage to a power source.
- Page 73 In this application (above) the Fan or primary relay is used as a low-level alarm relay. The Alarm or secondary relay is used as a supervisory relay when utilized in the normally closed configuration. The RD-6 monitors all critical functions of the unit through software diagnostics that continually test and verify its operations.
-
Page 74: 12-Series Line Voltage
Macurco RD-xx User Manual 3.2.2 12-Series Line Voltage 1. The RD-12 mounts on a 4” square (or 4x4) electrical box supplied by the contractor. Do not mount the RD-12 inside another box, unless it has good air flow through it. - Page 75 Macurco RD-xx User Manual Figure 3-11 12-Series Stand Alone Layout Figure 3-12 12-Series Multiple Device Diagram 13 | REV – 2.1 [34-2900-0511-7 ] P a g e...
- Page 76 Macurco RD-xx User Manual Figure 3-13 12-Series Alarm Control Panel Diagram Figure 3-14 12-Series DVP-120 Control Panel Diagram 14 | REV – 2.1 [34-2900-0511-7 ] P a g e...
- Page 77 Macurco RD-xx User Manual Figure 3-15 12-Series Alternate Alarm Panel In this application (above) the Fan or primary relay is used as a low-level alarm relay. The Alarm or secondary relay is used as a supervisory relay when utilized in the normally closed configuration. The RD-12 monitors all critical functions of the unit through software diagnostics that continually test and verify its operations.
-
Page 78: Terminal Connection
Mains Power Connection Connect the RD-6 to Class 2 power supply only. It is suggested to use a separate transformer for powering the unit or units because of possible interferences from other devices on the same power supply. Connect the RD-6 to the control cables with terminal plugs. -
Page 79: Operations
Note: The 4-20mA current loop outputs may be used with the Macurco DVP-120 control panel or other systems. The 4-20mA signal connections to detectors should be size AWG18 (minimum) for short runs. Refer to the table for recommended wire gauges. -
Page 80: 4-20Ma Loop
Macurco RD-xx User Manual Trouble –the display will display the “t” Error code (t01 for example). If the Trouble Fan Setting is enabled, the Fan relay will switch activating the relay. See Section 5.1.2 “t” Error Codes and Section 4.5.11 Trouble Fan Setting – “tFS”. -
Page 81: Selecting Default Configuration - "Def
Macurco RD-xx User Manual 4.4.1 Selecting Default Configuration – “dEF” To select the Default Configuration, in normal mode, push the Next button to get to “Con” or the Configuration menu. Then push the Enter button to enter the Con menu. The first selection is the “dEF” or Default setting. Push Enter. If it is already in Default configuration, there will be no action. -
Page 82: Trouble Fan Setting - "Tfs
Push Next until “End” is displayed then push Enter to get back to normal operation. NOTE: RD-xx will transmit information about calibration period to Macurco Control Panel (via 4-20 mA output) only when 4- 20mA output setting is set to ‘EnH’. -
Page 83: Troubleshooting
If the error mode repeats frequently, check for continuous power and proper voltage. If power is not the problem and a unit has repeating error conditions, it may need to be returned to Macurco for service, per these User Instructions. -
Page 84: Sensor Poisons
The detector’s performance should be tested regularly by using gas as detailed in the Gas Testing section. All maintenance and repair of products manufactured by Macurco are to be performed at the appropriate Macurco manufacturing facility. Macurco does not sanction any third-party repair facilities. -
Page 85: Cleaning
Check that the green RD-xx status indicator LED light is illuminated continuously. If not, do not proceed with the tests. If the unit is in error mode, contact your local representative or Macurco technical Support representative for information on resolving the problem. -
Page 86: Manual Operation Test
The RD-xx calibration can be calibrated and verified (or bump-tested) with the RD-FCK with R-134a refrigerant gas, regulator, and test hood, available through your local representative or from Macurco. Note: For optimum test results it is suggested that the unit be in clean air (green light on steady), in a low ambient air flow and have uninterrupted power for 7 days. -
Page 87: Gas Testing
Macurco RD-xx User Manual Note: Gas testing results can vary depending upon temperature, humidity, test duration and other variables. For optimum results, it is suggested that the unit be in continuous operation for a minimum of 7 days, in a stable environment and at standard conditions before proceeding with testing. -
Page 88: Testing The Alarm Relay
Macurco RD-xx User Manual Figure 7-1 Calibration Connection 4. Turn on the regulator to start the gas flow and wait with the gas applied continuously. When the gas concentration reaches 1000ppm the display will flash back and forth between “FAn” and ALr (if both Alarm Relay and Fan Relay are activated). - Page 89 Macurco RD-xx User Manual Follow the procedure below for field calibration. 1. Remove the Philips screw on the front of the RD-xx. Pull the front cover of the unit off. 2. Assemble the 1000-ppm gas cylinder, regulator together, tygon tubing and nafion tubing together.
-
Page 90: Appendix A - Table Of Figures
Macurco RD-xx User Manual 8 Appendix A – Table of Figures Figure 3-2 6-Series Rear View ................................8 Figure 3-3 6-Series Garage Diagram ..............................8 Figure 3-4 6-Series Multiple Device Diagram............................9 Figure 3-5 6-Series Alarm Control Panel Diagram ..........................10 Figure 3-6 6-Series DVP-120 Control Panel Diagram ........................ -
Page 92: Macurco Gas Detection Product Limited Warranty
9 Macurco Gas Detection Product limited warranty Macurco warrants the RD-6, RD-12 gas detector will be free from defective materials and workmanship for a period of two (2) years from the date of manufacture (indicated on the inside cover of the RD-6, RD-12), provided it is maintained and used in accordance with Macurco instructions and/or recommendations.
Need help?
Do you have a question about the RD-6 and is the answer not in the manual?
Questions and answers