Table of Contents
Advertisement
IF YOU CANNOT READ OR UNDERSTAND THESE INSTALLATION INSTRUCTIONS DO NOT ATTEMPT
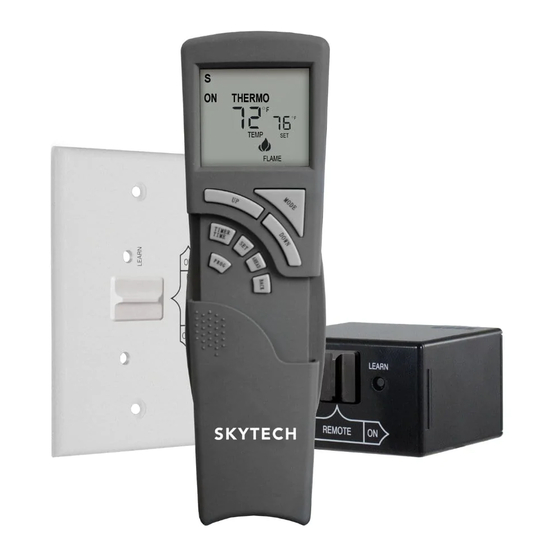
INTRODUCTION
This remote control system was developed to provide a safe, reliable, and user-friendly remote control system for gas heating appli-
ance. The system can be operated thermostatically, manually or with the built-in factory program inside the transmitter. The built-in pro-
gram will control the appliance (7) days a week with (4) continuous time periods for each day. SEE PROGRAM SEQUENCE BELOW.
Custom programming may be achieved after the initial set has been performed.
This system operates on radio frequencies (RF) within a 20-foot range using non-directional signals. The system operates one of
1,048,576 security codes that are programmed into the transmitter at the factory; the remote receiver's code must be matched to that of
the transmitter prior to initial use.
MORN
6:00AM
70°
Review COMMUNICATION SAFETY under the TRANSMITTER SECTION and THERMO SAFETY under the REMOTE RECEIVER
SECTION. These signal/temperature safety features shut down the appliance when a potentially unsafe condition exists.
The transmitter operates on (2) AAA 1.5V batteries. It is recommended that ALKALINE batteries always be used for longer battery life
and maximum operational performance. IMPORTANT: New batteries are essential for proper operation of the multi-function transmit-
ter.
COVER CLOSED
Fig. 1 Transmitter Front and Back Views
Model: 3003P
Model: 3003P
INSTALLATION AND OPERATING INSTRUCTIONS
TO INSTALL OR OPERATE
Built-in Factory Program
DAY
8:30AM
60°
SMALL
BUTTON
+
-
SLIDE COVER
BACK OF
OPEN
TRANSMITTER
EVE
3:00PM
70°
INITIAL SET-UP OF TRANSMITTER
The initial set-up of the transmitter is IMPERATIVE to ensure
the following:
•
Current Time - Hours and Minutes / AM/PM
•
Current Day of the Week - S, M, T, W, T, F, S
•
Proper Temperature Scale - F° (Fahrenheit) or
°C (Celsius)
To begin the initial set-up proceed with the follow-
ing steps:
-
1. Remove the battery cover on the back of the transmitter.
Insert (2) ALKALINE AAA size 1.5 DCV batteries into the
battery compartment, positioning the (+) and (-) ends of the
+
batteries as indicated on the casing. When the batteries are
inserted properly, the LCD screen will display.
2. Note the small button at the upper left side of the battery
compartment (Fig. 1). This button is used to perform the
initial transmitter set-up.
NIGHT
11:00PM
63°
REV. 12-7-12 Page 1
6:00AM
Advertisement
Table of Contents

Subscribe to Our Youtube Channel
Related Manuals for Skytech 3003P


Summary of Contents for Skytech 3003P
- Page 1 Model: 3003P INSTALLATION AND OPERATING INSTRUCTIONS IF YOU CANNOT READ OR UNDERSTAND THESE INSTALLATION INSTRUCTIONS DO NOT ATTEMPT TO INSTALL OR OPERATE INTRODUCTION This remote control system was developed to provide a safe, reliable, and user-friendly remote control system for gas heating appli- ance.
- Page 2 NOTE: If at any point in time you need to restart the initial set-up process simply push the setting button on back of the transmitter inside the battery compartment by following steps 1 - 6. Model: 3003P REV. 12-7-12 Page 2...
-
Page 3: Lcd Display Functions
Step 4: Press the MODE button a fourth time to turn the appliance back OFF again as show in Fig. 8. Fig. 8 OFF Mode Fig. 9 Manual ON Fig. 11 Program Mode Fig. 10 Thermo Mode Model: 3003P REV. 12-7-12 Page 3... -
Page 4: Installation Instructions
LEARNED the transmitter’s Remote Receiver security code (see LEARNING TRANSMITTER TO Cover Plate Plastic Switch Box RECEIVER). Fig. 14 Install Cover Plate into Box Model: 3003P REV. 12-7-12 Page 4... -
Page 5: Wiring Instructions
Con- nect another wire (not included) between the other receiver wire terminal and the TH (thermostat) terminal on the ELECTRONIC MODULE (Fig. 17). Fig. 17 Electronic Spark Wiring Model: 3003P REV. 12-7-12 Page 5... -
Page 6: Learning Transmitter To Receiver
ON and OFF thermostatically approximately every two minutes as the ROOM temperature changes, but only when the temperature differential between ROOM and SET temperatures differ at least 2°F (1°C). (The 2°F differen- tial is the factory setting.) Model: 3003P REV. 12-7-12 Page 6... -
Page 7: General Information
THERMO and PROGRAM MODES: The transmitter normally reads the ROOM temperature every 2 minutes; checking the ROOM temperature against the SET temperature by sending a signal to the receiver. Model: 3003P REV. 12-7-12 Page 7... -
Page 8: Built-In Program
When you have reached the correct DAY and PERIOD OF DAY push the PROG button and the TIME will blink on the LCD screen (Fig. 21). Fig. 20 Setting Day and Period of Day Model: 3003P REV. 12-7-12 Page 8... - Page 9 STEP 4: Push the SET button to return the normal LCD screen or wait 10 seconds and it will return automatically. PERIOD MORN NIGHT TIME TEMP TIME TEMP TIME TEMP TIME TEMP (Sunday) (Monday) (Tuesday) (Wednesday) (Thursday) (Friday) (Saturday) Fig. 24 Blank table to record custom programming Model: 3003P REV. 12-7-12 Page 9...
-
Page 10: Program Period
UP and DOWN buttons “at the same time” to activate the HOLD function. The word HOLD will appear over the SET frame and the word OVERRIDE will disappear. 3. To cancel OVERRIDE or HOLD, press the SET button. REV. 12-7-12 Page 10 Model: 3003P... -
Page 11: Time Of Day Display
“swing number” is 2. This represents a temperature variation of +/- 2°F (1°C) between SET temperature and ROOM temperature which determines when the fireplace will be activate. The “SWING” number values are: 1= +/- 1°F (.5°C), 2= +/- 2°F (1°C), 3 = +/-3°F (1.6°C). Model: 3003P REV. 12-7-12 Page 11... - Page 12 MITTER. If in the auto modes, the THERMO and/or PROGRAM operation will continue to operate normally. To totally “LOCK-OUT” the operation of the TRANSMITTER’S operating signals, the transmitter’s MODE must be set to OFF. Model: 3003P REV. 12-7-12 Page 12...
-
Page 13: Specifications
NOTE: THE MANUFACTURER IS NOT RESPONSIBLE FOR ANY RADIO OR TV INTERFERENCE CAUSED BY UNAUTHORIZED MODIFICATIONS TO THIS EQUIPMENT. SUCH MODIFICATIONS COULD VOID THE USER’S AUTHORITY TO OPERATE THE EQUIPMENT. For warranty information please contact the gas appliance supplier for this product. REV. 12-7-12 Page 13 Model: 3003P... - Page 14 QUICK SET-UP GUIDE FOR Model 3003P PROGRAMMABLE TRANSMITTER This guide is a “short cut” method to SETUP and OPERATE the programmable transmitter. For detailed instructions for each feature and function, see OWNER”S MANUAL. INITIAL SET-UPSET FUNCTIONS USING BUTTONS ON FRONT OFTRANSMITTER ...
- Page 15 QUICK PROGRAMMABLE GUIDE FOR Model 3003P PROGRAMMABLE TRANSMITTER This guide is a “short cut” method to SETUP and OPERATE the programmable transmitter. For detailed instructions for each feature and function, see OWNER”S MANUAL. The transmitter has a built-in factory program, (7) days a week with (4) continuous time periods for each day. Each time period has it’s own starting time and temperature.
Need help?
Do you have a question about the 3003P and is the answer not in the manual?
Questions and answers