Advertisement
Quick Links
Advertisement

Related Manuals for Ricoh Pro 8300 Series


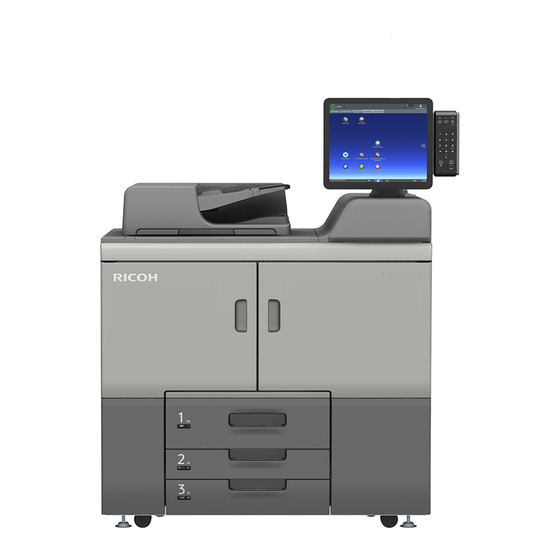
Summary of Contents for Ricoh Pro 8300 Series
- Page 1 CIP Training Pro 8300 Series Misfeed...
-
Page 3: Locating Jammed Paper
CIP Training 8300 Series Misfeed How do I clear a misfeed? Locating Jammed Paper If a misfeed occurs, remove the jammed paper by following the procedures indicated in the animation that appears on the screen and the sticker or sheet inside the front cover. A misfeed has occurred in the place corresponding to the letter displayed on the control panel. - Page 4 CIP Training 8300 Series Misfeed • Multiple paper misfeed locations may be indicated at the same time. When this happens, check all the areas indicated. • If there is no misfed paper in the area you check first, see the other areas that are indicated. •...
-
Page 5: Removing Jammed Paper
CIP Training 8300 SeriesS Misfeed Removing Jammed Paper Removing jammed paper when the procedure is not displayed on the control panel • (Note: Screenshots are provided for reference purpose only. Your display may vary depending on your operating system and device.) •... - Page 6 CIP Training 8300 Series Misfeed • The inside of the device could be very hot. Do not touch the parts with a label indicating the "hot surface." Otherwise, an injury might occur. • Some of this device's internal components get very hot. For this reason, take care when removing misfed paper.
- Page 7 CIP Training 8300 SeriesS Misfeed A Misfeed: When A is displayed How do I clear a misfeed when A is displayed? Follow the procedure below to remove the jammed paper. 2. Lower lever A1, and then open the guide panel. 1.
- Page 8 CIP Training 8300 Series Misfeed B Misfeed: When B is displayed How do I clear a misfeed when B is displayed? Follow the procedure below to remove the jammed paper. 2. Turn the lever C1 to the left and lever 1.
- Page 9 CIP Training 8300 Series Misfeed B 8. Raise the lever C1 and C2 to their original 9. Close the front left and right covers of positions. the main unit. Misfeed: When B1 is displayed 2. Turn the knob B1 and B2 1.
- Page 10 CIP Training 8300 SeriesS Misfeed B1 8. Raise the knob B3 to its original position. 7. Remove the misfed paper. 9. Slide the unit to its original position. 10. Raise the lever C1 and C2 to their original positions. 11. Close the front left and right covers of the main unit.
- Page 11 CIP Training 8300 Series Misfeed B2 Large Capacity Tray (LCT) 1. Open the Large Capacity Tray (LCT) 2. Lower the lever U1 and U3. front cover. 3. Turn the knob U6 to counterclockwise. 4. Open the front left and right covers of the main unit.
- Page 12 CIP Training 8300 Series Misfeed B2 Large Capacity Tray (LCT) 8. Turn the knobs B4 and B5 to 7. Pull out the unit. counterclockwise at the same time. 9. Remove the misfed paper. 10. Open the cover B6 and B7, and then check there is no misfed paper in the unit.
- Page 13 CIP Training 8300 Series Misfeed B2 Three-tray wide LCT 2. Lower the lever U1 and U5. 1.Open the Three-tray wide LCT front cover. 3. Lower the lever U3, and then turn the 4. Open the front left and right covers of knob U7 to clockwise.
- Page 14 CIP Training 8300 SeriesSSeries Misfeed B2 Three-tray wide LCT 7. Pull out the unit. 6. Turn the levers C1 to the left and lever C2 to the right. 8. Turn the knobs B4 and B5 to 9. Remove the misfed paper. counterclockwise at the same time.
- Page 15 CIP Training 8300 SeriesS Misfeed B2 Three-tray wide LCT 15. Raise the lever U1, U3 and U5. 14. Close the front left and right covers of the main unit. 16. Close the Three-tray wide LCT front cover. Misfeed: When B2 is displayed Two-tray wide LCT 2.
- Page 16 CIP Training 8300 Series Misfeed B2 is displayed Two-tray wide LCT 4. Open the front left and right covers of 3. Raise the lever U9, and then turn the the main unit. knob U7 to counterclockwise. 6. Turn the levers C1 to the left and 5.
- Page 17 CIP Training 8300 Series Misfeed B2 is displayed Two-tray wide LCT 9. Remove the misfed paper. 8. Turn the knobs B4 and B5 to counterclockwise at the same time. 11. Close the cover B6 and B7. 10. Open the cover B6 and B7, and then check there is no misfed paper in the unit.
- Page 18 CIP Training 8300 SeriesS Misfeed C Misfeed: When C is displayed How do I clear a misfeed when C is displayed? Follow the procedure below to remove the jammed paper. 2. Turn the lever C1 to the left and 1. Open the front left and right covers of the main unit.
- Page 19 CIP Training 8300 SeriesS Misfeed D1 Misfeed: When D1 is displayed How do I clear a misfeed when D1 is displayed? Follow the procedure below to remove the jammed paper. 2. Open the front left and right covers 1. Open the finisher front cover and guide panel.
- Page 20 CIP Training 8300 SeriesS Misfeed D1 5. Turn the lever C1 to the left and lever 6. Pull out the unit. C2 to the right. 8. Remove the misfed paper. 7. Open the cover D3. 10. Slide the unit to its original position. 9.
- Page 21 CIP Training 8300 SeriesS Misfeed D2 1. Open the front left and right covers 2. Turn the lever C1 to the left and lever C2 to the right. of the main unit. 4. Open the cover D2 and D3. 3. Pull out the unit. 3.
- Page 22 CIP Training 8300 Series Misfeed D2 9. Slide the unit to its original position. 10. Raise the levers C1 and C2 to their original positions. 11. Close the front left and right covers of the main unit. Misfeed: When D3 is displayed 1.
- Page 23 CIP Training 8300 Series Misfeed D3 5. Turn the knob D5 to 6. Close the cover D4. counterclockwise to remove the paper from the finisher. 7. . Slide the unit to its original position. 8. . Raise the levers C1 and C2 to their original positions.
- Page 24 CIP Training 8300 Series Misfeed E Misfeed: When E is displayed How do I clear a misfeed when E is displayed? Follow the procedure below to remove the jammed paper. 2. . Remove the misfed paper from paper 1. Open the left and right front covers. feed.
- Page 25 CIP Training 8300 SeriesS Misfeed Kc1 - Kc9 1. Open the buffer pass unit front 2. Turn the knob Kc1 to cover. counterclockwise for 20 to 22 times. 4. Remove the misfed paper. 3. 3. Lower the guide panel Kc2. 6.
- Page 26 CIP Training 8300 Series Misfeed Kc1 - Kc9 8. Open the cover Kc6 and Kc7 at 9. Remove the misfed paper, and then the unit right side. close the cover Kc6 and Kc7. 11. Remove the misfed paper, and then 10.
- Page 27 CIP Training 8300 SeriesS Misfeed Kc1 - Kc9 13. Raise the lever Kc5 to its original 12. Slide the unit to its original position. position. 14. Close the buffer pass unit front cover.
- Page 28 CIP Training 8300 Series Misfeed L Misfeed: When L is displayed How do I clear a misfeed when L is displayed? Follow the procedure below to remove the jammed paper. 1. Open the stacker control panel cover. 2. Press the button that is lit in red. 3.
- Page 29 CIP Training 8300 SeriesS Misfeed L1 - L5 1. Open the high capacity stacker upper 2. Open the L1 guide panel, and then cover. remove misfed paper. 3. 3. If you cannot remove misfeed paper 4. Remove the misfeed paper. open the L2 guide panel.
- Page 30 CIP Training 8300 Series Misfeed L1 - L5 6. Open the L5 guide panel, and then 7. Close all L1, L2, L3, and L5 guide remove misfed paper. panels. 3. 8. Close the upper cover of the high capacity stacker.
- Page 31 CIP Training 8300 SeriesS Misfeed Mc Misfeed: When Mc is displayed How do I clear a misfeed when Mc is displayed?Follow the procedure below to remove the jammed paper. 1. Open the ring binder front cover. 2. Remove the booklets from the paper exit.
- Page 32 CIP Training 8300 SeriesS Misfeed Mc1 2. Raise lever Mc1, and then remove misfed paper. 3. Return lever Mc1 to its original position. 4. Close the ring binder front cover. Misfeed: When Mc2 - Mc6 is displayed 1. Open the ring binder front cover. 2.
- Page 33 CIP Training 8300 Series Misfeed Mc2 - Mc6 4. Press the button Mc6 to release the 5. Remove the misfeed paper. lock and raise the lever. If you release the lock, the lever will automatically rise. 6. Lock by pushing down the return lever 7.
- Page 34 CIP Training 8300 Series Misfeed Mc7 - Mc8 1. Open the ring binder front cover. 2. Pull down lever Mc7. 3. Hold the handle and pull out the unit 4. Remove the misfeed paper from the Mc8. unit. 5. Slide the unit Mc8 in to the device. 6.
- Page 35 CIP Training 8300 Series Misfeed Mc7 - Mc8 8. Remove any stuck rings from the bottom of the cartridge. 9. Remove any jammed rings. 10. Return the ring cartridge to its original position. 11. Close the cartridge cover. 12. Close the ring binder front cover.
- Page 36 CIP Training 8300 SeriesS Misfeeds Mk1 or Mk2 Misfeed: When Mk1 or Mk2 is displayed 2. Hold the lever Mk1, and then open 1. Open the perfect binder cover. the guide panel. 3. . Open the Mk2 guide panel, and then remove misfed paper. 5.
- Page 37 CIP Training 8300 Series Misfeed Mk3 - Mk5 Misfeed: When Mk3 - Mk5 is displayed 2. Pull up the Mk3 handle, and then 1. Open the perfect binder cover. open the cover. 3. . Open the Mk4 guide panel to the left, and then Mk5 lever to the right. 4.
- Page 38 CIP Training 8300 Series Misfeed Mk6 1. Open the front cover of the unit (to the right of the perfect binder). 2. Raise the lever Mk6, and then remove misfed paper. 3. Return the lever Mk6 to its original 4. Close the front cover of the unit. position.
- Page 39 CIP Training 8300 Series Misfeed Mk7 - Mk11 3. Raise the lever Mk7, and then open the guide panel. 4. Raise the lever Mk8 counterclockwise, and then remove misfed paper. 5. Return the lever Mk8 and Mk7 to their original positions. 6.
- Page 40 CIP Training 8300 Series Misfeed Mk7 - Mk11 9. Remove misfeed paper. 8. Lower the lever Mk11, and then open the guide panel. 10. Return the levers Mk11 and Mk9 to their original positions. 11. Close the front left and front right covers of the perfect binder. Misfeed: When Mk12 - Mk14 is displayed 1.
- Page 41 CIP Training 8300 Series Misfeed Mk12 - Mk14 3. Raise the lever Mk12 , and then open the guide panel. 4. Remove the misfed paper, and then return lever Mk12 to its original position. 6. Turn the knob Mk14 counterclockwise 5.
- Page 42 CIP Training 8300 Series Misfeed N1 - N5 1. Open the multi-folding unit front cover. 2. Open the N1 guide panel (which brings up N2 guide panel, as well), and then remove the misfeed paper. 4. Open the N4 guide panel, and then 3.
- Page 43 CIP Training 8300 Series Misfeed N1 - N5 6. Return the N1, N2 and N4 guide panel to their original positions. 7. Close the multi-folding unit front cover. Misfeed: When N6 - N22 is displayed 1. Open the multi-folding unit front cover, and then turn the knob N6 to the clockwise for 15 to 16 times.
- Page 44 CIP Training 8300 Series Misfeed N6 - N22 4. Remove the misfed paper. 5. Turn the knob N8 clockwise for 21 to 22 times, and then remove the misfed paper. 7. Hold the handle N9, and then pull out 6. Return the lever N7 to its original position.
- Page 45 CIP Training 8300 Series Misfeed N6 - N22 10. Turn the knob N11 counterclockwise, and then open the cover N12. 11. Remove the misfeed paper. 12. Close the N10 and N12 guide panel. 13. Hold down the lever N13, and then lower the N14 guide panel. 14.
- Page 46 CIP Training 8300 Series Misfeed N6 - N22 16. Close the N14 and N15 guide panel, and then hold up the lever N13. 17. Open the N17 and N18 guide panels. 18. Remove the misfeed paper, and then close the N17 and N18 guide panels. 19.
- Page 47 CIP Training 8300 Series Misfeed N6 - N22 21. Open the N21 guide panel, and then remove the misfed paper. 22. Open the cover N22, and then turn the knob N8 clockwise for 21 to 22 times. 23. Close the cover N22, and then N21, 24.
- Page 48 CIP Training 8300 Series Misfeed P Misfeed: When P is displayed How do I clear a misfeed when P is displayed? Follow the procedure below to remove the jammed paper. 1. Remove the misfed originals from the 2. Open the ADF cover. Auto Document Feeder (ADF).
- Page 49 CIP Training 8300 SeriesS Misfeed P 5. If you cannot remove the misfed 6. Slide lever P. original, open the ADF. 8. Remove the misfed original. 7. Open the cover. 9. Close the cover and ADF.
- Page 50 CIP Training 8300 SeriesS Misfeed Q1 Misfeed: When Q1 is displayed How do I clear a misfeed when Q1 is displayed?Follow the procedure below to remove the jammed paper. 1. Remove the misfed paper from the 2. Open the interposer main cover and interposer upper tray.
- Page 51 CIP Training 8300 Series Misfeed Q2 - Q3 3. Turn the knob Q2 to counterclockwise. 4. Open the interposer front cover. 5. Press Q3, and then open the guide panel. 6. Remove the misfed paper. 7. Slide the guide panel to its original position. 8.
- Page 52 CIP Training 8300 SeriesS Misfeed Q3 - Q6 Misfeed: When Q3 - Q6 is displayed How do I clear a misfeed when Q3 - Q6 is displayed? Follow the procedure below to remove the jammed paper. 2. Press Q3, and then open the guide 1.
- Page 53 CIP Training 8300 SeriesS Misfeed Q3 - Q6 6. Close the interposer front cover. Misfeed: When Q4 - Q5 is displayed 1. Open the interposer front cover. 2. Hold the lever Q4, and then lower the guide panel. 3. Press Q5, and then open the guide panel.
- Page 54 CIP Training 8300 Series Misfeed R 1. Open the shift tray upper cover. 2. Remove the misfed paper. 3. Close the shift tray upper cover. Misfeed: When R1 is displayed 1. Open the finisher front cover and R1 guide panel. 2.
- Page 55 CIP Training 8300 Series Misfeed R1 - R3 4. Return R1 to its original position. 5. Close the finisher front cover. Misfeed: When R3 is displayed 1. Open the finisher front cover and R3 guide panel. 2. Turn the knob R2 clockwise. 3.
- Page 56 CIP Training 8300 Series Misfeed R3 - R4 2. Open the R3 and R4 guide panels. 1. Open the finisher front cover. 3. Turn the knob R2 clockwise. 4. Remove the misfed paper. 5. Return the R3 and R4 to their original 6.
- Page 57 CIP Training 8300 SeriesS Misfeed R4 2. Turn the knob R2 clockwise. 3. Remove the misfed paper. 4. If you cannot remove misfed paper, 5. Remove the misfed paper. turn the knob R5 counterclockwise. 6. Close the finisher front cover. Misfeed: When R6 is displayed 2.
- Page 58 CIP Training 8300 SeriesS Misfeed R6 3. Turn the knob R6 clockwise for three 4. Hold the handle R7, and then pull out times. the unit. 5. Pinch R8, and then open the cover. 6. Turn the knob R9 counterclockwise. 7.
- Page 59 CIP Training 8300 SeriesS Misfeed R10 Misfeed: When R10 is displayed 2. Turn the knob R10 counterclockwise. 1. Open the finisher front cover. 3. Remove the misfed paper from finisher 4. Turn the knob R11 clockwise. booklet tray. 6. Turn the knob R9 counterclockwise. 5.
- Page 60 CIP Training 8300 Series Misfeed R10 9. Remove the misfed paper. 8. Turn the knob R10 clockwise. 10. Close the cover and then slide the unit into the device. 11. Close the finisher front cover.
- Page 61 CIP Training 8300 Series Misfeed Rt1 - Rt2 1. Open the trimmer front cover. 2. Turn Rt1 lever to the right, and then remove misfed paper. 3. Return lever Rt1 to its original position. 4. Turn the lever Rt2 counterclockwise, and then open the guide panel.
- Page 62 CIP Training 8300 Series Misfeed U Misfeed: When U is displayed How do I clear a misfeed when U is displayed? Follow the procedure below to remove the jammed paper. 1. Open the two-tray wide LCT front 2. Check the LED lights are flashing. cover.
- Page 63 CIP Training 8300 Series Misfeed U 7. Turn knob U6 clockwise. 8. Remove the misfed paper, and then check the LED light is off. 9. Turn knob U7 clockwise until the 10. Remove the misfed paper, and paper stops moving. then check the LED light is off.
- Page 64 CIP Training 8300 SeriesS Misfeed U2 1. Open the two-tray wide 2. Check the LED lights are flashing. LCT front cover. 3. Lower lever U1. 4. Move lever U2 up and down for 5 to 6 times. 5. Turn knob U3 counterclockwise. 6.
- Page 65 CIP Training 8300 SeriesS Misfeed U2 - U5 7. Raise lever U1 to its original position. 8. Close the two-tray wide LCT front cover. 9. Pull the two-tray wide LCT paper tray, 10. Slide the two-tray wide LCT tray and then remove the misfed paper. to its original position.
- Page 66 CIP Training 8300 Series Misfeed U5 3. Lower lever U4. 4. Move lever U5 up and down for 5 to 6 times. 5. Turn knob U6 clockwise. 6. Remove the misfed paper, and then check the LED light is off. 7.
- Page 67 CIP Training 8300 SeriesS Misfeed U5 9. If you cannot remove the misfed 10. Remove the misfed paper. paper, pull out the two-tray wide LCT lower paper tray. 11. Slide the two-tray wide LCT lower paper tray in to the device. Misfeed: When U8 is displayed How do I clear a misfeed when U8 is displayed? Follow the procedure below to remove the jammed paper.
- Page 68 CIP Training 8300 SeriesS Misfeed U8 3. Open the two-tray wide LCT front 4. Lower lever U1. cover. 5. Turn knob U8 counterclockwise. 6. Remove the misfed paper. 7. Raise lever U1 to its original position. 8. Close the two-tray wide LCT front cover.
- Page 69 CIP Training 8300 Series Misfeed U10 1. Open the two-tray wide LCT 2. Raise lever U9. front cover. 3. Turn knob U10 clockwise until LED 4. Remove the misfed paper. light is off. 5. Lower lever U9 to its original position. 6.
- Page 70 CIP Training 8300 Series Misfeed U10 7. If you cannot remove the misfed 8. Open the cover. paper, pull out the two-tray wide LCT tray. 9. Remove the misfed paper. 10. Close the cover. 11. Slide the two-tray wide LCT tray in to the device.
- Page 71 CIP Training 8300 Series Misfeed U11 1. Open the bridge unit of two-tray 2. Raise lever U11. wide LCT front cover. 3. Turn knob U12 clockwise. 4. Remove the misfed paper. 5. Lower lever U11 to its original position. 6. Close the bridge unit of two-tray wide LCT front cover.
- Page 72 CIP Training 8300 Series Misfeed U Three-tray wide LCT 1. Open the Three-tray wide LCT front 2. When the LED in the illustrations cover and check for lighting LEDs lights up, lower the lever U1. indicating the misfed paper. 3. Turn knob U2 clockwise. 4.
- Page 73 CIP Training 8300 Series Misfeed U Three-tray wide LCT 6. Turn the knob U4 to counterclockwise. 7. Remove the misfed paper, and then check LED light is off. 8. When the LED in the illustrations lights up, lower the lever U5. 9.
- Page 74 CIP Training 8300 Series Misfeed U Three-tray wide LCT 10. Check the LED light is off. 11. When the LED in the illustrations lights up, turn the knob U7 to clockwise. 12. Remove the misfed paper, and then check LED light is off. 13.
- Page 75 CIP Training 8300 Series Misfeed U Three-tray wide LCT 15. Raise the levers U1, U3 and U5 to 14. Slide the paper tray into the device. their original positions. 16. Close the three-tray wide LCT front cover. Misfeed: When U is displayed using Three-tray wide LCT RT5130. 1.
- Page 76 CIP Training 8300 Series Misfeed U Three-tray wide LCT RT5130 3. Turn knob U2 clockwise. 4. Remove the misfed paper, and then check LED light is off. If you cannot remove the misfed paper, proceed to the next steps. 5. When the LED in the illustrations lights up, lower the lever U3. 6.
- Page 77 CIP Training 8300 SeriesS Misfeed U Three-tray wide LCT RT5130 8. When the LED in the illustrations lights up, lower the lever U5. 9. Remove the misfed paper, and then check the LED light is off. 10. When the LED in the illustrations lights up, turn the knob U6 to counterclockwise 11.
- Page 78 CIP Training 8300 Series Misfeed U Three-tray wide LCT RT5130 12. Pull one of the paper tray out that is currently used in the LCT, and then remove the misfed paper. 14. Raise the levers U1 and U3 to their 13.
- Page 79 CIP Training 8300 SeriesS Misfeed V 1. Slide the multi bypass tray unit to 2. Remove the misfed paper. the right. 3. Slide the multi bypass tray unit to its original position. Misfeed: When Z1 is displayed. 1. Open the left and right front covers. 2.
- Page 80 CIP Training 8300 Series Misfeed Z1 4. Pull out the unit. 3. Turn the levers C1 to the left and lever C2 to the right. 5. Press down the Z2, and then lower 6. Remove the misfed paper. the guide panel. 8.
- Page 81 CIP Training 8300 SeriesS Misfeed Z3 2. Turn the lever C1 to the left and lever 1. Open the left and right front covers. C2 to the right. 3. Pull out the unit. 4. Press down the Z3, and then lower the guide panel.
- Page 82 __________________________________________________________________________________ __________________________________________________________________________________ __________________________________________________________________________________ __________________________________________________________________________________ __________________________________________________________________________________ __________________________________________________________________________________ __________________________________________________________________________________ __________________________________________________________________________________ __________________________________________________________________________________ __________________________________________________________________________________ __________________________________________________________________________________ __________________________________________________________________________________ __________________________________________________________________________________ __________________________________________________________________________________ __________________________________________________________________________________ __________________________________________________________________________________ __________________________________________________________________________________ __________________________________________________________________________________ __________________________________________________________________________________ __________________________________________________________________________________ __________________________________________________________________________________ __________________________________________________________________________________ __________________________________________________________________________________ __________________________________________________________________________________ __________________________________________________________________________________ __________________________________________________________________________________ __________________________________________________________________________________ __________________________________________________________________________________ __________________________________________________________________________________ __________________________________________________________________________________ __________________________________________________________________________________ __________________________________________________________________________________ __________________________________________________________________________________ __________________________________________________________________________________ __________________________________________________________________________________ __________________________________________________________________________________ __________________________________________________________________________________ __________________________________________________________________________________ __________________________________________________________________________________ __________________________________________________________________________________ __________________________________________________________________________________ __________________________________________________________________________________ __________________________________________________________________________________...
- Page 83 __________________________________________________________________________________ __________________________________________________________________________________ __________________________________________________________________________________ __________________________________________________________________________________ __________________________________________________________________________________ __________________________________________________________________________________ __________________________________________________________________________________ __________________________________________________________________________________ __________________________________________________________________________________ __________________________________________________________________________________ __________________________________________________________________________________ __________________________________________________________________________________ __________________________________________________________________________________ __________________________________________________________________________________ __________________________________________________________________________________ __________________________________________________________________________________ __________________________________________________________________________________ __________________________________________________________________________________ __________________________________________________________________________________ __________________________________________________________________________________ __________________________________________________________________________________ __________________________________________________________________________________ __________________________________________________________________________________ __________________________________________________________________________________ __________________________________________________________________________________ __________________________________________________________________________________ __________________________________________________________________________________ __________________________________________________________________________________ __________________________________________________________________________________ __________________________________________________________________________________ __________________________________________________________________________________ __________________________________________________________________________________ __________________________________________________________________________________ __________________________________________________________________________________ __________________________________________________________________________________ __________________________________________________________________________________ __________________________________________________________________________________ __________________________________________________________________________________ __________________________________________________________________________________ __________________________________________________________________________________ __________________________________________________________________________________ __________________________________________________________________________________ __________________________________________________________________________________...
Need help?
Do you have a question about the Pro 8300 Series and is the answer not in the manual?
Questions and answers