Table of Contents
Advertisement
Quick Links
• ASSEMBLY
• INSTALLATION
• OPERATION
• REPAIR PARTS
Conforms To:
UL STD 1482;
ULC STD S627
If this heater is not properly installed, a house fire may result. To reduce the risk of fire, follow
the installation instructions. Contact local building or fire officials about permits, restrictions
Please read this entire manual before you install and use your new room heater. Failure to
follow instructions may result in property damage, bodily injury, or even death.
DO NOT USE THIS HEATER IN A MOBILE HOME OR TRAILER
United States Stove Company
227 Industrial Park Rd. Pittsburg, TN 37380
(800) 750-2723 www.usstove.com
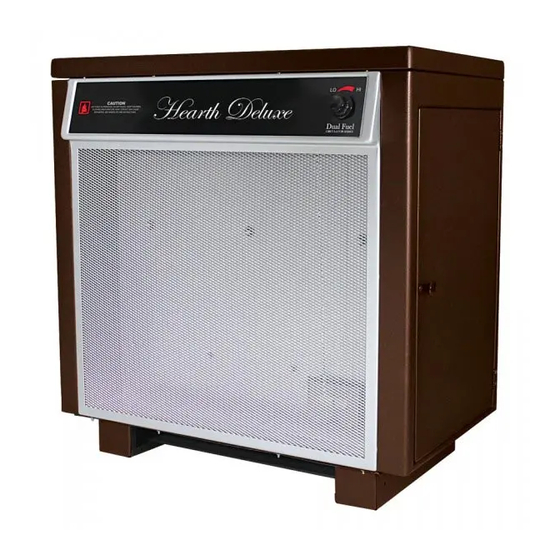
Model VG900
THERMOSTAT CONTROLLED CIRCULATOR SERIES
COAL ONLY
SAFETY NOTICE:
and inspection requirements in your area.
CAUTION:
852083B-0703G
Advertisement
Table of Contents

Related Manuals for United States Stove VOGELZANG VG900


Summary of Contents for United States Stove VOGELZANG VG900
- Page 1 Please read this entire manual before you install and use your new room heater. Failure to follow instructions may result in property damage, bodily injury, or even death. DO NOT USE THIS HEATER IN A MOBILE HOME OR TRAILER United States Stove Company 227 Industrial Park Rd. Pittsburg, TN 37380 (800) 750-2723 www.usstove.com...
-
Page 2: Tools And Materials Needed
Tools And Materials Needed Tools Materials • Pencil • Chimney Connection- 6” Diameter Black Steel • Measuring Tape or 6 foot rule pipe (24 gauge minimum) and elbow(s) either • Tin Snips adjustable1 or corrugated as necessary • Drill and 1/8” dia. bit •... - Page 3 Installation And Operation SAVE THESE INSTRUCTIONS! READ THESE RULES AND THE INSTRUCTIONS CAREFULLY 1. Check local codes. The installation must comply 11. CAUTION: The special paints used on your heater with their rulings. Do not install this heater in a may give off some smoke while they are curing mobile home or trailer.
- Page 4 Clearances To Combustible Minimum clearances to unprotected combustible walls and ceilings as noted by figures 2 through 4 must be maintained. Drapes, curtains, furniture and other combustible materials should be kept much further away from the heater to avoid fire. If you choose to, you may install the heater and chimney connector closer to combustible surfaces than indicated by Figures 2 through 4 IF a clearance reduction system is also installed to protect combustible ceilings and walls near the heater and chimney connector.
-
Page 5: Locating The Heater
Locating The Heater AS A LOCATION IS SELECTED, KEEP THE FOLLOWING MIND 1. The chimney connection should be as airtight as possible. The heater must have its own chimney flue. Do not connect this unit to a chimney flue serving another appliance. If there is no chimney near where you wish to place the heater, you can use a UL 103HT Residential Type and Building Heating Appliance Chimney. -
Page 6: Chimney Connection
Chimney Connection Two basic types of chimneys are approved for use with solid fuel: Factory-built and masonry. Factory-built chimney must comply with UL 103 type “HT” standard. Do not expect your stove or furnace to create draft. Draft is not a function of the appliance. It is purely a function of the chimney. - Page 7 Chimney Your stove may be hooked up with a 6” factory built or masonry chimney. If you are using a factory built chimney, it must comply with UL 103 standard; therefore it must be a Type HT (2100°F). It is extremely important that it be installed according to the manufacturer’s specifications.
-
Page 8: Factory Built Chimney
Factory Built Chimney When a metal prefabricated chimney is used, the manufacturer’s installation instructions must be followed. You must also purchase (from the same manufacturer) and install the ceiling support package or wall pass-through and “T” section package, firestops (where needed), insulation shield, roof flashing, chimney cap, etc. Maintain proper clearance to the structure as recommended by the manufacturer. - Page 9 Venting Into A Fireplace Many people may wish to convert an existing fireplace to heater use. Usually, safe connection of stovepipe to a masonry chimney requires more effort than connection to a prefabricated chimney. The fireplace must be closed and sealed at the damper in the flue. Good sealants are high temperature caulking, ceramic wool, and furnace cement.
-
Page 10: Masonry Chimney
Masonry Chimney Masonry Chimneys have several positive attributes: If properly built, they are quite durable, and most homeowners consider them more attractive perhaps than a non-enclosed factory built chimney. And, if the chimney is located within the confines of the house (that is, not attached to an exterior wall), its mass alone will store heat longer and continue to release the heat long after the fire has died. - Page 11 Masonry Chimney Ensure that a masonry chimney meets the minimum standards of the National Fire Protection Association (NFPA) by having it inspected by a professional. Make sure there are no cracks, loose mortar or other signs of deterioration and blockage. Have the chimney cleaned before the stove is installed and operated. When connecting the stove through a combustible wall to a masonry chimney, special methods are needed.
-
Page 12: Combustible Wall Chimney Connector Pass-Throughs
COMBUSTIBLE WALL CHIMNEY CONNECTOR PASS-THROUGHS Method A. 12” (304.8 mm) Clearance to Combustible Wall Member: Using a minimum thickness 3.5” (89 mm) brick and a 5/8” (15.9 mm) minimum wall thickness clay liner, construct a wall pass-through. The clay liner must conform to ASTM C315 (Standard Specification for Clay Fire Linings) or its equivalent. -
Page 13: Installation
Assembly CABINET DOOR KNOB ASSEMBLY The cabinet door knob is mounted on the inside of the cabinet door to facilitate shipping and must be MACHINE SCREW removed and re-installed for proper usage. To get the cabinet door open, place your hand under the cabinet frame (right hand side of the cabinet door) and push door out. - Page 14 Assembly INSTRUCTIONS FOR TWO-STEP LATCH OPERATION Follow these instructions to operate you unit safely when operating the feed door. 1. Turn handle clockwise to the 12 o’clock position (A), pull the door open until you engage the second step (B). 2.
-
Page 15: Fuel Recommendations
Operating Instructions FUEL RECOMMENDATIONS Coal - Most sizes of bituminous coal will work in your heater; for best results we recommend large nut coal to small egg coal (1-3/4” diameter to 4” diameter). When burning anthracite, use egg or broken with sizes between 2-5/16”... -
Page 16: Stove Operation
Bulletin RC454 A guide to burning coal in your heater. Heaters that are capable of burning coal usually will burn both Bituminous and Anthracite coal. Anthracite is perhaps the best coal fuel because of its long even burn time, high heat output, and cleanliness which make it a good choice for the home. - Page 17 Barometric draft regulators are generally available where you purchased your stove or may be ordered directly from United States Stove Company at a nominal charge. B36TK - THERMODISC KIT FOR B36 BLOWER - OPTIONAL Wish your blower would turn ON and OFF as the heater gets warm and cold? It can with this optional kit from U.S.
-
Page 18: Maintenance
Maintenance DISPOSAL OF ASHES Ashes should be removed from the stove every few days or when ashes get to 2 to 3 inches deep. Always empty the stove when it is cold, such as in the morning. Ashes should be placed in a metal container with a tight fitting lid. - Page 19 Internal Parts Diagram 20 21 -19-...
-
Page 20: Parts List
Parts List Key Part No. Description Qty. 67859 Weldment, Base 22030 Shield, Second Heat (Included w/ 67859) 22110 Shield, Heat (Included w/ 67859) 68619 Assy., Heat Jacket 88032 Gasket, Flue Collar 40246 Collar, Flue 22090 Curtain, Smoke 22171 Clip, Smoke Curtain 40075 Frame, Draft Damper 67132... - Page 21 External Parts Diagram/List Key Part No. Description Qty. 67725P Panel, Cabinet Front - Pewter 23477 Shield, Top Thermo 67967B Cabinet, Left 67968B Frame, Door 67969B Door, Cabinet 89065 Hinge, Door 89062 Knob, Door 83093 Latch, Spring 83005 #10-24 x 1/2 Machine Screw, PH HD 69557B Back, Cabinet 21063...
- Page 22 Parts and/or service replacements made under the terms of this warranty are warranted only for the remaining period of the original heater warranty. Without specifi c written exclusionary waivers, no one has authority to add to or vary this limited warranty, or to create for United States Stove Company any further obligation of liability in connection with this heater or any other applicable accessory.
- Page 23 Notes -23-...
- Page 24 Notes -24-...
- Page 25 Before installing your heater, fill in the serial number of your heater in the space provided above. Avant d’installer votre appareil de chauffage, remplissez le numéro de série de votre appareil de chauffage dans l’espace prévu ci-dessus. United States Stove Company 227 Industrial Park Rd. Pittsburg, TN 37380 (800) 750-2723 www.usstove.com...
Need help?
Do you have a question about the VOGELZANG VG900 and is the answer not in the manual?
Questions and answers