Table of Contents
Advertisement
Quick Links
Advertisement
Table of Contents

Related Manuals for GeoVision GV-QR1352


Summary of Contents for GeoVision GV-QR1352
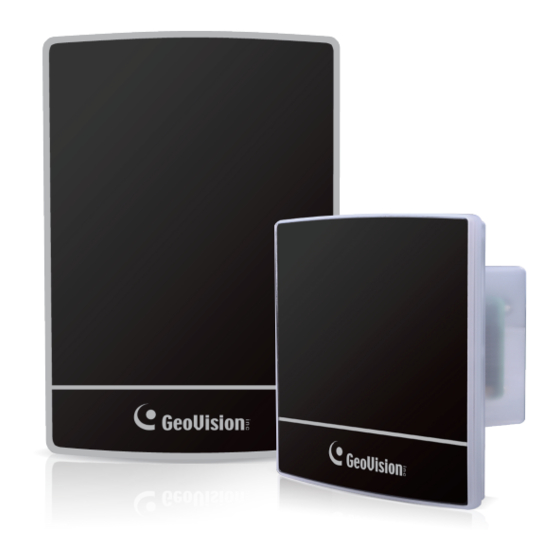
- Page 1 GV-QR1352 / DES1352 Reader & Mobile Access Control User’s Manual GV-QR1352 / DES1352 Reader GV-Mobile Card GV-Mobile Access App Before attempting to connect or operate this product, please read these instructions carefully and save this manual for future use. QR1352-A...
- Page 2 GeoVision. Every effort has been made to ensure that the information in this manual is accurate. GeoVision, Inc. makes no expressed or implied warranty of any kind and assumes no responsibility for errors or omissions. No liability is assumed for incidental or consequential damages arising from the use of the information or products contained herein.
-
Page 3: Preface
Preface Welcome to the GV-QR1352 / DES1352 & Mobile Access Control User’s Manual. This Manual covers the following three topics: GV-QR1352, GV-DES1352 reader. GV-Mobile Card GV-Mobile Access App... -
Page 4: Table Of Contents
Contents Preface....................1 Contents ....................2 Chapter 1 GV-QR1352 / DES1352............4 1.1 Packing List......................5 1.2 Compatible Products ....................6 1.3 Terminal Blocks and Switches................. 7 1.4 Installation ....................... 8 1.5 Connect the Reader to GV-AS Controller ............9 ... - Page 5 2.5.1 Edit the Card ....................27 2.5.2 Backup and Restore ..................28 Chapter 3 Single-Use QR Codes for Visitors ........29 Differences of Dynamic and Single-Use QR Codes......29 Troubleshooting..................30 ...
-
Page 6: Chapter 1 Gv-Qr1352 / Des1352
GV-QR1352 / DES1352 Chapter 1 GV-QR1352 / DES1352 GV-QR1352 is a QR code and RFID card reader; GV-DES1352 is a RFID card reader. The two readers support dual-band frequency access cards (125 kHZ EM and 13.56 MHz Mirfare), and their Weigand interfaces allow for integration with any standard access control systems. -
Page 7: Packing List
1.1 Packing List 1. GV-QR1352/ GV-DES1352 (US / 2. Bottom Cover 3. Hex Socket Flat Head Cap Screw (M3 x 8) x 2 4. Allen Key (2 mm, 48 x 15 mm) 5. Terminal Cable x 2 6. Mounting Plate (US / EU) -
Page 8: Compatible Products
GV-QR1352 / DES1352 1.2 Compatible Products GV-DES1352 GV-ASManager GV-AS Controllers: GV-AS210 / 2110 / 2120, GV-AS810 / 8110 / 8111, GV-AS410 / 4110 / 4111, GV-1620 Note: To connect GV-DES1352 to GV-AS Controllers via RS-485, it is required to use the following products and versions: GV-AS210 / 2110 / 2120 / 410 / 4110 / 4111 V2.40 (or... -
Page 9: Terminal Blocks And Switches
Beeper DC 12V Black Ground Switches for DESfire Card Support By default, GV-QR1352 / GV-DES1352 support dual-band frequency. To only support DESFire 13.56MHz cards, turn ON on the switch No 1. ON/OFF Note ON: Enable the support Every time when the setting is changed, the... -
Page 10: Installation
GV-QR1352 / DES1352 1.4 Installation Pull the terminal cables from the square holes of the mounting plate B. Secure B onto the wall with self-prepared Flat Head Cap Philips Tapping Screws. For users of US gang boxes, mount B with the heightening mount bracket before the following steps. -
Page 11: Connect The Reader To Gv-As Controller
To see how many readers can be connected to a GV-AS Controller, refer to 1.7 The Number of Readers Supported by Controllers. Note: Each GV-QR1352 / DES1352 consumes 85mA of power. The total power consumption of the output devices and readers connected to GV-AS Controller must be under 3A (for GV-AS210 / 2110 / 2120), 3.5A (for GV-AS410 / 4110 / 4111), 5A (for GV-... -
Page 12: Connect Through Rs-485 Interface
GV-QR1352 / DES1352 1.5.2 Connect through RS-485 Interface The following diagrams use GV-AS410 Controller as an example. Up to eight readers can be connected together to a single RS-485 interface on GV-AS410. Connecting four or less readers to GV-AS410 Controller: ... -
Page 13: Define Readers On Gv-As Controller Web Interface
1.5.3 Define Readers on GV-AS Controller Web Interface When multiple readers connect to GV-AS Controller, you need to specify which door each reader controls. This section explains how to define readers on the Web interface of GV-AS Controller. Note that the Web interface of different GV-AS Controller models varies. Here we use GV-AS410 Web interface as an example. - Page 14 AS410 / 4110 / 4111, all readers connected through RS-485 interfaces will reboot. For GV-QR1352 / GV-DES1352, the Read Mode for UID and DES ID is set up using the switch on the reader. See 1.3 Terminal Blocks and Switches.
-
Page 15: Set Up The Id, Beeper Or Led
/ LED. The program can be downloaded from our website. You can connect up to 8 GV-QR1352 readers to a single RS-485 interface on the controller. For connecting multiple readers together, you need to set up a unique ID number for each reader in order for the controller to recognize them. - Page 16 GV-QR1352 / DES1352 1. Run the setup AP. 2. Select the COM port that is connected to the reader and click Open COM. The red square next to the COM port box should change to blue to indicate the COM port is correct.
-
Page 17: Activate Beeper Or Led Upon Controller's Output Trigger
GV-QR1352 / DES1352 Note: 1. If the COM port is incorrect, an “Error opening serial port” message will appear. To verify the COM port connected to the reader, go to Windows Device Manager. In the Ports (COM & LPT) field, you should see the entry for Prolific USB-to-Serial Comm Port and the COM number currently in use. -
Page 18: Wiring
GV-QR1352 / DES1352 1.7.1 Wiring By the wiring, you can change the following default settings of beeper and LED reactions upon access granted and denied. With RS-485 connection to the controller, One beep when a card / QR code approaches ... -
Page 19: Define Output Conditions
Note: The beeper and LED cables can be wired onto the same output. In this case, the reader will beep along with a flashing LED according to access conditions. 1.7.2 Define Output Conditions After wiring the beeper or LED, specify the conditions to trigger the beeper or LED on the GV-AS Controller’s Web interface. -
Page 20: The Number Of Readers Supported By Controllers
ASManager to trigger the outputs on the controller. In the Controller Setup dialog box of GV-ASManager, select the door the reader is associated to > the Advanced tab, and select corresponding alarm conditions. 1.8 The Number of Readers Supported by Controllers Number of GV-QR1352 Readers Supported GV-AS Controller Model Wiegand RS-485... -
Page 21: Chapter 2 Mobile Cards And Mobile App
GV-ASManager. First of all, you need to purchase the mobile cards from GeoVision, and download them to GV-ASManager through Internet. Then GV-ASManager administrator sends verification e- mails to users for activating the assigned mobile cards on smartphones. -
Page 22: Download Mobile Cards
Mobile Cards and Mobile App 2.1 Download Mobile Cards You will receive a serial key for the mobile cards you purchased from GeoVision. Use the serial key to download the mobile cards to GV-ASManager. Note: To download mobile cards from GeoVision Cloud Server, your GV-ASManager server must have Internet access. -
Page 23: Assign Mobile Cards To Users
6. The Card List may look like this. The mobile cards downloaded display a “Non-Activated” status. Note: More than one GV-ASManager server can use the same serial key to download and dispatch mobile cards. Once a mobile card is downloaded, it cannot be downloaded by another GV-ASManager. - Page 24 Mobile Cards and Mobile App 2. On the Edit Card dialog box, click the User button > Assign a new user. 3. Under Employee ID, optionally type an ID which will be used as the verification code to open the mobile card on the mobile app. 4.
-
Page 25: Activate Mobile Cards
Note: For details on creating a User and an Access Group, see 4.5 Setting Access Groups and 4.6 Setting Users, respectively in GV-ASManager User’s Manual. 2.3 Activate Mobile Cards The user has two methods to activate the assigned mobile card. 1. -
Page 26: Scan A Qr Code On Gv-Asmanager
Mobile Cards and Mobile App 4. The mobile card has been added to the mobile app now. Double-click it to generate a dynamic QR code and use the QR code to gain access to its corresponding door. Once the mobile card is activated on a smartphone, the status of the mobile card on GV- ASManager will change from “Non-activated”... -
Page 27: Mobile Card Managements
5. The mobile card has been added to the mobile app now. Double-click it to generate a dynamic QR code and use the QR code to gain access to its corresponding door. Refer to the illustrations on Step 5, 2.3.1 Through E-Mail. Once the mobile card is activated on a smartphone, the status of the mobile card on GV- ASManager will also change from “Non-activated”... -
Page 28: Revoke Mobile Cards
Mobile Cards and Mobile App Combine Serial Keys 1. On the Mobile Card Management window, select Expand Mobile Card by Serial Key. 2. You are prompted to enter a new serial key. 3. Click OK. You will see the content of the new serial key is combined with that of the serial key already used on GV-ASManager. -
Page 29: Gv-Mobile Access App
2.5 GV-Mobile Access App GV-Mobile Access app contains the mobile cards, aka virtual cards, assigned to a user; then the user can use the smartphone with the app to unlock corresponding doors. System requirements and Specifications OS Supported iOS 11 or later Android 8 or later System Supported GV-ASManager V5.3.3 or later... -
Page 30: Backup And Restore
Mobile Cards and Mobile App 2.5.2 Backup and Restore You can transfer the mobile cards from one smartphone to another. Please note the transfer will delete all the mobile cards from a smartphone. 1. Open the mobile app, click on the top right. This page appears. 2. -
Page 31: Chapter 3 Single-Use Qr Codes For Visitors
The activated Mobile Card will be transformed into dynamic QR codes as an access pass. GV-QR1352 Only RS-485, with compatible GV-AS210 / RS-485 and Wiegand 2110 / 2120, GV-AS410 / 4110 / 4111, GV- Connection... -
Page 32: Troubleshooting
Troubleshooting Q1: What is the verification code on the mobile app? The verification code is the employee ID set for a user on GV-ASManager (see Step 3, 2.2 Assign Mobile Cards to Users). The employee ID is an optional setting. If the administrator does not set up an employee ID, just skip the request of verification code on the mobile app.
Need help?
Do you have a question about the GV-QR1352 and is the answer not in the manual?
Questions and answers