BFT LUX Installation And User Manual
Hide thumbs
Also See for LUX:
- Installation and user manual (29 pages) ,
- Installation manual (21 pages) ,
- Manual (8 pages)
Table of Contents
Advertisement
Available languages
Available languages
8
027908
1 1 1 7 4 6
AUTOMAZIONI A PISTONE PER CANCELLI A BATTENTE
PISTON AUTOMATIONS FOR SWING GATES
AUTOMATIONS A PISTON POUR PORTAILS BATTANTS
HYDRAULISCHER DREHTORANTRIEB
AUTOMATIZACIONES A PISTON PARA PORTONES CON BATIENTE
AUTOMATIZAÇÕES A PISTÃO PARA PORTÕES COM BATENTE
Attenzione! Leggere attentamente le "Avvertenze" all'interno! Caution! Read "Warnings" inside carefully! Attention! Veuillez lire attentivement les Avertissements qui se trouvent à l'intérieur!
Achtung! Bitte lesen Sie aufmerksam die „Hinweise" im Inneren! ¡Atención¡ Leer atentamente las "Advertencias" en el interior! Atenção! Ler atentamente as "Instruções " que se encontram no interior!
Advertisement
Table of Contents

Related Manuals for BFT LUX


Summary of Contents for BFT LUX
- Page 1 027908 1 1 1 7 4 6 AUTOMAZIONI A PISTONE PER CANCELLI A BATTENTE PISTON AUTOMATIONS FOR SWING GATES AUTOMATIONS A PISTON POUR PORTAILS BATTANTS HYDRAULISCHER DREHTORANTRIEB AUTOMATIZACIONES A PISTON PARA PORTONES CON BATIENTE AUTOMATIZAÇÕES A PISTÃO PARA PORTÕES COM BATENTE Attenzione! Leggere attentamente le “Avvertenze”...
-
Page 2: Avvertenze Per L'installatore
LE DICHIARAZIONI DI CONFORMITÀ SONO CONSULTABILI NEL SITO WEB: manuale dell’automazione e apporla vicino all’organo di manovra. http://www.bft-automation.com/CE - Assicurarsi che durante la manovra siano evitati o protetti i rischi meccanici ed LE ISTRUZIONI DI MONTAGGIO ED USO SONO CONSULTABILI NELLA SEZIONE in particolare l’impatto, lo schiacciamento, il convogliamento, il cesoiamento tra... -
Page 3: Installer Warnings
D811766_16 LUX -... - Page 4 - S’assurer que soient évités pendant la manœuvre les risques mécaniques et, en SITE INTERNET http://www.bft-automation.com/CE particulier, l’écrasement, l’entraînement et le cisaillement par la partie guidée LES INSTRUCTIONS DE MONTAGE ET D’UTILISATION PEUVENT ÊTRE CON- et les parties voisines.
-
Page 5: Hinweise Für Den Installateur
DIE KONFORMITÄTSERKLÄRUNGEN KÖNNEN AUF DER WEB-SITE http://www. Position an und befestigen Sie außerdem ein Schild Achtung an der Struktur. bft-automation.com/CE konsultiert werden. - Bringen Sie einen Aufkleber, der die Funktionsweise der manuellen Entsperrung DIE ANWEISUNGEN ZUR MONTAGE UND BENUTZUNG KÖNNEN IM DOWN- der Automatisierung angibt, in der Nähe des Manöverorgans an. -
Page 6: Advertencias Para La Instalación
LAS DECLARACIONES DE CONFORMIDAD SE PUEDE CONSULTAR EN EL SITIO - Asegurarse de que durante la maniobra se eviten y se proteja de los riesgos me- WEB http://www.bft-automation.com/CE cánicos y en particular el impacto, el aplastamiento, arrastre, corte entre la parte LAS INSTRUCCIONES DE MONTAJE Y USO SE PUEDEN CONSULTAR EN LA guiada y las partes jas alrededor. - Page 7 D811766_16 LUX -...
-
Page 8: Sicurezza Generale
- Non tentare di aprire manualmente il cancello se: esperienza o della necessaria conoscenza, purché Nel modello LUX-LUXL-LUXG-LUXGV non è stata sotto sorveglianza oppure dopo che le stesse sbloccata l’elettroserratura con l’apposita chiave. -
Page 9: Apertura Manuale
- Do not attempt to open the gate manually if: - Keep adults, children and property out of range of - In mod. LUX-LUXL-LUXG-LUXGV the electric lock has the automated system, especially while it is moving. not been released by means of the appropriate key. -
Page 10: Manual Opening
“P” is locked. nettoyage et d’entretien destinées à être faites par Versions without hydraulic lock (LUX-LUXL-LUXG- l’utilisateur. LUXGV) - Les enfants doivent être surveillés a n de s’assurer It is su cient to open the electric lock with qu’ils ne jouent pas avec l’appareil. -
Page 11: Ouverture Manuelle
être à l’origine de dangers. das Produkt begleiten, denn eine falsche Ben- - Ne pas tenter d’ouvrir manuellement le portail si : - dans le modèle LUX-LUXL-LUXG-LUXGV l’électro- utzung des Produkts kann zu Verletzungen von serrure n’a pas été débloquée avec la clé spéciale. - Page 12 - Versuchen Sie nicht, das Tor von Hand zu ö nen, werden. Kinder dürfen nicht mit dem gerät spielen. wenn: Die Reinigung und die Wartung durch den Ben- - Das Elektroschloss beim Modell LUX-LUXL-LUXG- utzer darf nicht von Kindern ohne Überwachung LUXGV nicht vorher mit dem passenden Schlüssel vorgenommen werden.
-
Page 13: Seguridad General
Modelle ohne hydraulische Selbsthemmung LUX- jugar con el aparato. La limpieza y el mantenimiento LUXL-LUXG-LUXGV destinados a ser realizados por el usuario no deben Es reicht aus, das Elektroschloß mit dem dazu- ser llevados a cabo por los niños sin vigilancia. -
Page 14: Apertura Manual
- No intentar abrir manualmente la cancela si antes: danos a pessoas, animais ou coisas. Guardar as - en el modelo LUX-LUXL-LUXG-LUXGV, no se ha instruções para consultas futuras e transmiti-las desbloqueado la electrocerradura con la llave a eventuais substitutos no uso da instalação. -
Page 15: Abertura Manual
(parte guiada) tais como por exemplo, ca- do relógio até ao bloqueio completo do pivô “P”. bos, molas, suportes, articulações, guias poderia Versão sem bloqueio hidráulico LUX-LUXL-LUXG- criar perigos. Fazer controlar periodicamente a LUXGV. instalação por pessoal quali cado e experiente É... - Page 16 Fig. 1 Fig. 2 1025 LUXG 850 1300 (mm) Fig. 5 α° 16 -...
- Page 17 Fig. 6 Fig. 7 Fig. 8 Fig. 9 Fig. 10 LUX -...
- Page 18 Fig. 12-13-14 Fig. 11 Fig. 15 Destra/Right Sinistra/Left Droite/Rechts Gauche/Links Derecha Izquierda Direita Esquerda Fig. 16 CLOSE LUX 276 mm LUX G 400 mm 312 mm 18 -...
- Page 19 Fig. 17 Fig. 18 Fig. 19 LUX -...
- Page 20 Fig. 20 Fig. 21 Fig. 22 Fig. 24 Fig. 23 20 -...
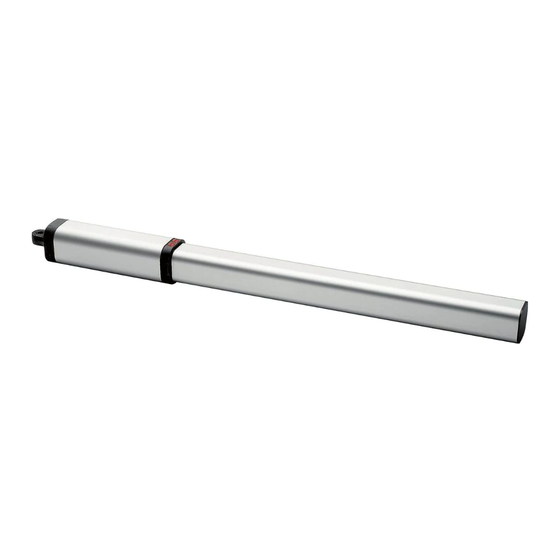
- Page 21 è utile in particolare per cancelli pesanti ed ante lunghe. Cilindro con pistone ATTENZIONE! Le versioni LUX con stelo dotato di occhiello di regolazione, Componenti in dotazione: attacchi al pilastro e al cancello - chiave di sblocco e consentono di allungare o accorciare lo stelo di circa 6 mm solo se prima dell’in- regolazione bypass - condensatore di marcia - manuale istruzione.
-
Page 22: Manutenzione
12) POSIZIONAMENTO COPERTURE di arrivare in battuta di chiusura sollevato senza opporre la minima resistenza; La copertura “C” di tutti i modelli LUX diventa destra o sinistra invertendo la tale proprietà permette di diminuire il carica di spinta in chiusura migliorando la posizione del tappo “T”... - Page 23 The LUX series includes special versions with slowdown in the closing phase (Mod. Distance from gate axis to the edge of the post “R”) while the LUX FC series is especially suited to areas prone to heavy snowfalls or always over 45 mm (b - X) where the central gate stop cannot be provided (see speci c instruction manual).
-
Page 24: Maintenance
“D” lifted until it reaches the closing end The “C” cover of all LUX models can be changed from right to left by inverting the of stroke without creating any friction. This characteristic enables the pushing position of the cap “T”... -
Page 25: Manuel D'installation
été xée aux mesures indiquées dans la g. 9; à la n de l’installation, ce réglage permet de corriger la course de la tige; la g. 10 montre 4) CARACTERISTIQUES TECHNIQUES l’oscillation par rapport à l’axe horizontal présentées par les mod. LUX dotés Alimentation ..................:220-230V 50/60(Hz*) d’articulation avant et arrière. -
Page 26: Entretien
La cache “C” de tous les modèles LUX devient droite ou gauche en inversant la position du bouchon «T» ( g. 23). 8) MONTAGE DU SERRE-CABLE ( g. 18) La protection des soupapes de dérivation ( g. - Page 27 Dies ist wichtig für die spätere Feinein-einstellung (+/-6mm). In Fig. 10 ist Mitgelieferte Bauteile: Pfosten- und Tor ansch – Entriegelungsschlüssel und die Abweichung zur waagerechten Achse angegeben, welche die Mod. LUX Schlüssel zur Bypass-Einstellung – Betriebskondensator – Bedienungsanleitung mit vorderem und hinterem Gelenk annehmen können.
-
Page 28: Wartung
12) MONTAGE DER KOLBENABDECKUNGEN bei der Schließung und damit einen größeren Schutz gegen die Quetschgefahr. Die Abdeckung “C” sämtlicher Modelle LUX kann durch drehen des Abschlussdeckel 8) MONTAGE DER KABELVERSCHRAUBUNGEN (Fig. 18) “T” rechts oder links angebracht werden (Fig. 23). -
Page 29: Manual De Instalación
“a” y “b” es igual al valor de la carrera útil “Cu” ( g.2). R) y el mod. LUX FC, ideal para zonas nevadas o cuando falta el tope central Si se utilizan valores de “a” y “b” demasiado diferentes entre sí, el movimiento de la de las hojas de la cancela (véase el manual de instrucciones especí... -
Page 30: Mantenimiento
12) COLOCACION CUBIERTAS La cubierta “C” de todos los modelos LUX se convierte en cubierta derecha o izquierda invirtiendo la posición del tapón “T” ( g.23). La protección de los by-pass ( g.24) debe colocarse en la posición adecuada y después encajarse debajo del cubrevástago “C”. - Page 31 São disponíveis versões especiais com desaceleração na fase de fecho (LUX R) e ATENÇÃO! As versões LUX com espigão equipado de olhal de regulação, consen- o modelo LUX FC ideal para zonas cobertas de neve ou quando faltar bloqueio tem de alongar ou encurtar o espigão de aproximadamente 6 mm somente se de paragem central das folhas do portão (veja manual de instruções especí...
- Page 32 12) POSICIONAMENTO DAS COBERTURAS Todos os dispositivos de comando e de segurança, no caso de avaria, podem A cobertura “C” de todos os modelos LUX torna-se direita ou esquerda inverten- provocar anomalias de funcionamento ou bloqueio da própria automatização. do a posição do tampão “T” ( g.23). A pro-tecção de by-pass ( g. 24), deve ser Se a central de comando estiver equipada de auto-diagnóstico, localize o defeito.
Need help?
Do you have a question about the LUX and is the answer not in the manual?
Questions and answers