
Related Manuals for Challenge SPARTAN 150 SA


Summary of Contents for Challenge SPARTAN 150 SA
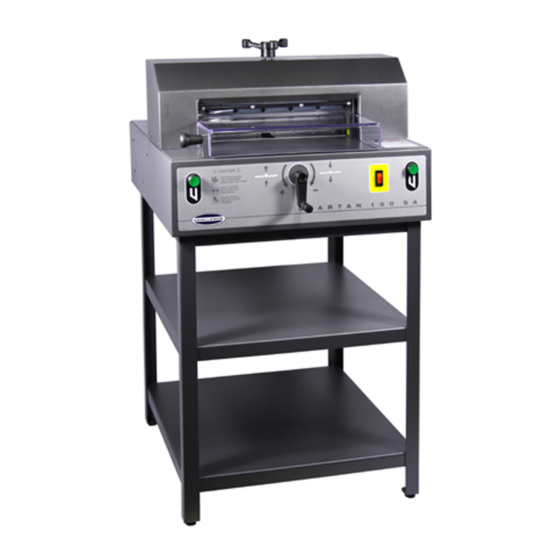
- Page 1 Challenge Spartan 150A 15.75" Automatic Electric Paper Cutter w/ Power Clamp Instruction Manual...
- Page 2 Products may be unsupported by The Challenge Machinery Company due to age or the unavailability of parts from their original manufacturer. No parts or product support will be available to repair or maintain unsupported products.
-
Page 3: Introduction
DIRECTLY TO CHALLENGE. If you bought a used machine, it is important to have the following information on record at Challenge. Copy this page, fill in the information and send it care of The Challenge Service Department, 6125 Norton Center Drive, Norton Shores MI. -
Page 4: Table Of Contents
1.0 Introduction TABLE OF CONTENTS 1.0 Introduction ............................2 2.0 Safety ..............................4 2.1 Precautions ...........................4 2.2 Power Lockout Procedure ......................4 2.3 Warning Label Definitions ......................5 3.0 Packing List ............................7 4.0 Specifications ............................8 5.0 Installation & Setup ...........................9 5.1 Inspecting Shipment ........................9 5.2 Uncrating ............................9 5.3 Cleaning ............................9 5.4 Power Hook-Up ......................... -
Page 5: Safety
2.0 Safety 2.0 Safety 2.1 Precautions This machine is designed for one-person operation. Never operate the machine with more than one person. Safe use of this machine is the responsibility of the operator. Use good judgment and common sense when working with and around this machine. -
Page 6: Warning Label Definitions
2.0 Safety 2.3 Warning Label Definitions The following warning labels are found at various locations on your machine. Read and understand the meaning of each symbol. If a label is lost from the machine, it should be replaced. HAZARDOUS AREA Disconnect power before cleaning, servicing, or making adjustments not requiring power. - Page 7 2.0 Safety !OJO! This Este simbolo de alerta de seguridad significa ¡ OJO ! - INSTRUCCIONES DE SEGURIDADPERSONAL. Lea las instrucciones porque se refieren a su seguridad personal. Fall de obedecer las instrucciones que siguen podria resultar en lesiones corporales. ...
-
Page 8: Packing List
3.0 Packing List 3.0 Packing List Part No. Description Qty. 15” Semi Automatic Paper Cutter Spartan 150 SA 5064 Cutting Stick Puller Knife – Standard (installed in machine) 60011 60057 Cutting Stick 60058 Jogging Aid 60061 Knife Lifter Assembly F.150-O Operator Manual 5/32”... -
Page 9: Specifications
A-weighted sound pressure level measured in an enclosed room at operator level (6 feet/183 cm): Machine cutting a full lift of paper: 78 dB or less Challenge reserves the right to make changes to any product or specification without notice and without incurring responsibility to existing units. -
Page 10: Installation & Setup
5.2 Uncrating The Spartan 150 SA weighs approximately 200 lbs (91 kg). DO NOT risk personal injury or damage by attempting to move machinery with makeshift equipment or inadequate help. This machine is shipped on a wooden skid and enclosed in a protective, wooden frame and corrugated carton. -
Page 11: Power Hook-Up
5.5 Optional Stand Assembly Using two or more people, carefully set the Spartan 150 SA onto the stand assembly, inserting the four corners of the machine into the four uprights of the stand (Figure 4). Attach the machine to the stand using the screws provided with the stand. -
Page 12: Operation
6.0 Operation 6.0 Operation IMPORTANT: DO NOT ATTEMPT TO OPERATE THE CUTTER UNTIL YOU HAVE THOROUGHLY READ AND UNDERSTAND ALL OF THE FOLLOWING INSTRUCTIONS. CALL YOUR AUTHORIZED CHALLENGE DEALER IF YOU STILL HAVE ANY QUESTIONS. Clamp Handle Front Shield Backgauge... -
Page 13: Backgauge Control
6.0 Operation If the knife is not at the “up” postion when the main power switch is turned on, the knife will automatically move to the “up” position. The main power switch is also an 8 Amp circuit breaker and will automatically switch off in the event of too much current running through the switch, such as from an electrical short. -
Page 14: Jogging Aid
6.4 Line Light The Spartan 150 SA comes standard with an LED line light. The line light comes on and stays on whenever the power is on. To use, simply align paper under clamp, and use the red light line as an... -
Page 15: Making A Cut
6.0 Operation Figure 11 – Line Light 6.5 Making a Cut Open the front shield and set the backgauge to the desired position. Place the paper square against the backgauge and either side guide. Clamp down on the paper using the clamp hand wheel located on top of the machine. -
Page 16: Operating Tips
6.0 Operation 6.7 Operating Tips Correct clamping pressure is important for getting good results. Insufficient clamping pressure may result in “draw”, where the top sheets are longer than the rest of the pile because they are drawn out from under the clamp during cutting. Excessive clamping pressure, however, may cause pile distortion and inaccurate cuts. -
Page 17: Knife Installation/Changing
7.0 Knife Installation/Changing 7.0 Knife Installation/Changing Changing knives can be very dangerous unless safety precautions are observed and extreme care is taken when handling knives. Make sure knife lifters are used properly, see instructions following. Keep handling of unprotected knives to an absolute minimum. ... -
Page 18: Knife Installation
7.0 Knife Installation/Changing 3. Remove the two knife bolts from the slotted knife bar holes ONLY and replace with the knife lifter assembly (Figure 14). Tighten the lifters to hold the knife in place, and then remove the remaining four knife bolts. Figure 14 4. -
Page 19: Knife Care Tips
7.0 Knife Installation/Changing View Hole View Hole Figure 15 5. Insert and tighten four knife bolts. 6. Remove the knife lifter assembly and replace with the remaining two knife bolts. 7. Place a few sheets of paper over the cut stick, covering the stick end-to-end. 8. -
Page 20: Cutting Stick
Each stick has 2 flat sides that can be used, after which it can be turned end to end, allowing the 2 flat sides to be used again, for a total of 4 positions per cut stick. 7.3.3 Bevel Angle Challenge recommends that bevel angles for the Spartan 150 knives be 20°. 7.3.4 Helpful Suggestions ... - Page 21 7.0 Knife Installation/Changing If a knife bolt is damaged, replace it. Always keep knife bolts securely tightened. Store knives in a dry environment to prevent corrosion. Never attempt to service a knife in any way.
- Page 22 7.0 Knife Installation/Changing NOTES...
-
Page 23: Maintenance And Troubleshooting
8.0 Maintenance and Troubleshooting 8.0 Maintenance and Troubleshooting 8.1 Maintenance All maintenance on this machine should be performed by trained service personnel. Attempting to perform repair and replacement procedures without proper training may cause machine damage or operator injury! 8.2 Troubleshooting Problem Possible Cause Solution... -
Page 24: Footprint
9.0 Footprint 9.0 Footprint... -
Page 25: Safety Systems Test
10.0 Safety Systems Test Machine manufacturer CHALLENGE Model SPARTAN 150 SA Serial Number __________________ Frequency of test: THESE TESTS SHOULD BE PERFORMED AT THE BEGINNING OF EACH WORK DAY. Turn the power on and make sure the knife and clamp are in the up position (if they are not, follow the instructions in this manual to send them up). - Page 26 10.0 Safety Systems Test Please enter date and initials for both tests. Date ______ ______ ______ ______ ______ ______ ______ ______ ______ ______ ______ Test 1 ______ ______ ______ ______ ______ ______ ______ ______ ______ ______ ______ Test 2 ______ ______ ______ ______ ______ ______ ______ ______ ______ ______ ______ Date ______ ______ ______ ______ ______ ______ ______ ______ ______ ______ ______ Test 1 ______ ______ ______ ______ ______ ______ ______ ______ ______ ______ ______...
- Page 27 F.150-O August 2015...