Table of Contents
Advertisement
Quick Links
Advertisement
Table of Contents
Troubleshooting

Related Manuals for Cabletron Systems 42T


Summary of Contents for Cabletron Systems 42T
- Page 1 MICROMMAC-22T/24T/42T/44T STACKABLE TOKEN RING INTELLIGENT HUBS USER’S GUIDE...
- Page 2 All Rights Reserved Printed in the United States of America Order Number: 9031320 March 1996 MicroMMAC-22T, 24T, 42T, 44T, BRIM, and TPIM are trademarks of Cabletron Systems, Inc. SPECTRUM, LANVIEW, and Remote LANVIEW are registered trademarks of Cabletron Systems, Inc.
-
Page 3: Fcc Notice
NOTICE This device complies with Part 15 of the FCC rules. Operation is subject to the following two conditions: (1) this device may not cause harmful interference, and (2) this device must accept any interference received, including interference that may cause undesired operation. -
Page 4: License Agreement
LICENSE AGREEMENT IMPORTANT: Before utilizing this product, carefully read this License Agreement. This document is an agreement between you, the end user, and Cabletron Systems, Inc. (“Cabletron”) that sets forth your rights and obligations with respect to the Cabletron software program (the “Program”) contained in this package. The Program may be contained in firmware, chips or other media. -
Page 5: United States Government Restricted Rights
52.227-7013 (c) (1) (ii) and its successors, and use, duplication, disclosure by the Government is subject to restrictions as set forth in subparagraph (c) (1) (ii) of the Rights in Technical Data and Computer Software clause at 252.227-7013. Cabletron Systems, Inc., 35 Industrial Way. Rochester, New Hampshire 03866... -
Page 6: Table Of Contents
CHAPTER 1 INTRODUCTION CONTENTS OVERVIEW ......1-1 MicroMMAC-T OVERVIEW ......1-2 MicroMMAC-T FEATURES . - Page 7 SETTING THE RING SPEED ..... . 3-6 SETTING THE NVRAM SWITCH ....3-7 CONNECTING LOBE PORT CABLING .
- Page 8 CONTENTS 5.2.4 Saved System Messages....5-6 VIEWING POWER UP DIAGNOSTIC TESTS ..5-7...
-
Page 9: Chapter 1 Introduction
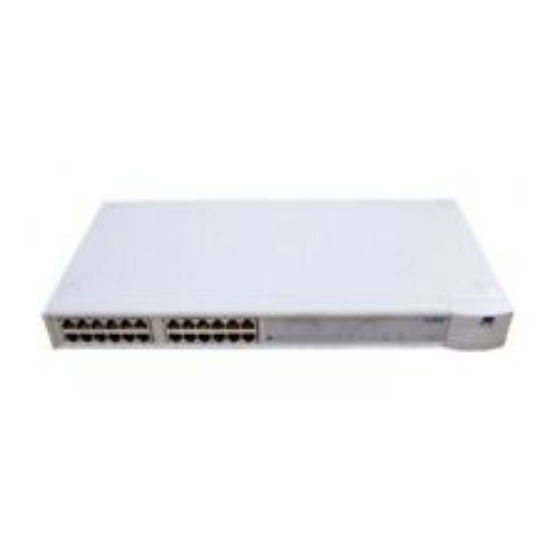
Welcome to the Cabletron Systems MicroMMAC-22T/-24T/-42T/ -44T Stackable Token Ring Intelligent Hub User’s Guide. This manual provides installation instructions, network requirements, reference information, and operating instructions for the MicroMMAC-T (Figure 1-1) family of stackable hubs. Installing the MicroMMAC-T requires familiarity with the physical layer components of Token Ring (IEEE 802.5) data communications networks. -
Page 10: Micrommac-T Overview
INTRODUCTION describes how to install a TPIM and concludes with installation check-out instructions. Chapter 4, Local Management, explains how to set up and use a management terminal and a modem to access Local Management. Chapter 5, Troubleshooting, explains how to monitor the operation performance of the MicroMMAC-T using LANVIEW®... -
Page 11: Token Ring
MicroMMAC 24T: twenty-four active RJ45 TCU lobe ports that support category 3, 4, and 5 UTP cabling. • MicroMMAC-42T: twelve active RJ45 TCU lobe ports that support IBM Type 1, 2, 6, and 9 STP cabling. • MicroMMAC-44T: twenty-four active RJ45 TCU lobe ports that support IBM Type 1, 2, 6, and 9 STP cabling. - Page 12 UTP lobe cable lengths of up to 120 meters and STP lobe cable lengths up to 150 meters at 16 Mbps ring speed. The MicroMMAC-22T and the MicroMMAC-42T can be upgraded in the field using the Cabletron UTP and STP 12-port upgrade kits.
-
Page 13: Flash Eeprom
LANVIEW/Windows version 2.3 or later, or via any server supporting BOOTP or TFTP protocols. LANVIEW LEDs Cabletron Systems’ LANVIEW LEDs, located on the face of the MicroMMAC-T, provide an effective monitoring and troubleshooting tool to help diagnose power failures, RI/RO status, cable faults, ring speed, link problems, and network activity. - Page 14 INTRODUCTION numerous management devices and serve as their management data representative. The network management station then has to query only one management device, the MicroMMAC-T in DLM mode, to access management data for all management devices on the network. Consult your network manager for DLM setup. COM Port Applications Both of the front panel COM ports are factory-configured to support Local Management connections.
- Page 15 • Token Ring FNB (Flexible Network Bus) • DOT 5 Logical and Physical • UPS (Uninterruptible Power Supply) • Device • DLM (Distributed LAN Monitor) • PIC MIB (Product Information Chip MIB) • Chassis MIB RMON MIB Support The MicroMMAC-T supports the RMON MIB RFC 1271/1513 Token Ring Extensions shown in Table 1-2.
-
Page 16: Stackable Capabilities
INTRODUCTION Table 1-2. RMON MIB RFC 1271/1513 Support (Cont.) Group Subgroup Event Event Table rmon 9 Log Table Token Ring Ring Station Control Table rmon 10 Ring Station Table Ring Station Order Table Ring Station Config Control Table Ring Station Config Table Source Routing Stats Table 1.4 STACKABLE CAPABILITIES The MicroMMAC-T can be stacked with up to four HubSTACK STH... -
Page 17: Bridging/Routing Capabilities
MicroMMAC Managing 4 Non-Intelligent Hubs HubSTACK STH-24 RESERVED STACK HubSTACK STH-24 RESERVED STACK HubSTACK STH-24 STACK RESERVED HubSTACK STH-24 RESERVED STACK MicroMMAC-24T TOKEN RING HUB Figure 1-3. Typical Stackable Configuration NOTE: Token Ring HubSTACK Interface cables, which are used to connect between the MicroMMAC-T and stacked STH hubs, are not included with the MicroMMAC-T. -
Page 18: Sna/Wan Integration
The MicroSNAC can operate in a converter mode or as a WAN concentrator. 1.6 REMOTE MANAGEMENT CAPABILITIES The MicroMMAC-T may be managed through any Simple Network Management Protocol (SNMP) software. Cabletron Systems offers the following remote management packages: • Cabletron Systems SPECTRUM •... -
Page 19: Recommended Reading
By BBS ....(603) 337-3750 By mail ....Cabletron Systems, Inc. -
Page 20: Requirements/Specifications
REQUIREMENTS/SPECIFICATIONS Read this chapter prior to installing the MicroMMAC-T. It contains operating specifications and requirements for power and cabling. To obtain satisfactory performance from this equipment, networks must meet the requirements and conditions specified in this chapter. Failure to follow these guidelines may result in poor network performance. -
Page 21: Utp Cable Specifications
REQUIREMENTS/SPECIFICATIONS 2.1.1 UTP Cable Specifications The MicroMMAC-22T and MicroMMAC-24T lobe ports and the TPIM-T2 support voice grade Unshielded Twisted Pair (UTP) cable, as described in specifications for EIA/TIA TSB 568 and IBM Type 3 cable. UTP consists of four pairs of 24 AWG solid wire for data or voice communication and is typically used to wire cable runs within building walls. - Page 22 A Type 3 Media Filter is required when connecting a UTP lobe segment from a MicroMMAC-22T or MicroMMAC-24T to a station supporting STP cabling. Cabletron Systems offers the following Type 3 Media Filters: • TRMF, RJ45 (UTP) connector to 10-inch DB9 (STP) cable with LANVIEW •...
-
Page 23: Stp Cable Specifications
REQUIREMENTS/SPECIFICATIONS 2.1.2 STP Cable Specifications MicroMMACs 42T and 44T and TPIMs T1 and T4 support IBM Type 1, 2, 6, and 9 STP cabling as described below: • IBM Type 1: Two STP lengths of 22 AWG solid wire for data. Used for the longest cable runs within building walls of buildings. - Page 24 cable length for ring speeds of 4 and 16 Mbps. The cable lengths listed in Table 2-4 refer to total lengths made up of STP cable only Table 2-4. STP Maximum Lobe Lengths STP Cable Type IBM Types 1 & 2 IBM Types 6 &...
- Page 25 REQUIREMENTS/SPECIFICATIONS Mixed Cable Types If multiple cable types exist in network, compensations must be made for the different cable attenuations. Type 6 and Type 9 cables can run only 2/3 the distance of Type 1. Therefore 10 meters of Type 1 6.6 meters of Types 6 and 9.
-
Page 26: Single Mode Fiber Optic Cable Specifications
Fiber Optic Budget The fiber optic delay budget, which determines the fiber optic cable’s maximum length, should be calculated and taken into consideration in the network design stage. Fiber optic delay budget is determined by summing the optical signal loss due to fiber optic cable attenuation, in-line splices, and fiber optic connectors. -
Page 27: Cable Recommendations/Troubleshooting
REQUIREMENTS/SPECIFICATIONS Fiber Optic Budget The fiber optic delay budget, which determines the fiber optic cable’s maximum length, should be calculated and taken into consideration in the network design stage. Fiber optic delay budget is determined by summing the optical signal loss due to fiber optic cable attenuation, in-line splices, and fiber optic connectors. -
Page 28: Other Considerations
Other Considerations In addition to complying with the preceding cable specifications, the following recommendations should be followed to minimize errors and obtain optimum performance from the network: • UTP cabling should be free of splices, stubs, or bridged taps. • Maintain a two punch-down block limit between TCU ports and wall outlets. -
Page 29: Tpim Specifications
REQUIREMENTS/SPECIFICATIONS Local Management Both COM 1 and COM 2 ports are factory-configured to support Local Management access by an actual or emulated Digital Equipment Corporation VT 100™ terminal. Booting/Diagnostics Terminal display of POWER UP booting/diagnostic tests available only when terminal is connected to COM 2 (for information about Boot sequences, see Section 5.3 ). - Page 30 Figure 2-3. TPIM-T1 Pinouts TPIM-T2 TPIM-T2 provides an RJ45 connector that supports UTP cabling. Figure 2-4 shows pinouts for Ring Out and Ring In applications. Figure 2-4. TPIM-T2 Pinouts TPIM-T4 TPIM-T4 is an RJ45 connector that supports STP cabling. Figure 2-5 shows pinouts for Ring Out and Ring In applications.
- Page 31 REQUIREMENTS/SPECIFICATIONS Figure 2-5. TPIM-T4 Pinouts TPIM-F2 TPIM-F2, shown in Figure 2-6, provides an ST connector that supports Multimode fiber Optic cabling. NOTE: Transmitter power and receive sensitivity levels, shown in Table 2-8, are Peak Power Levels after optical overshoot. A Peak Power Meter must be used to correctly compare the values given to those measured on any particular port.
- Page 32 Table 2-8. TPIM-F2 Specifications. Typical Parameter Value Receive -30.5 dBm Sensitivity Peak Input -7.6 dBm Power Transmitter Power: 50/125 m -13.0 dBm 62.5/125 m -10.0 dBm 100/140 m -7.0 dBm Error Rate: Better than 10 TPIM-F3 TPIM-F3, shown in Figure 2-7, is an ST connector that supports Single Mode fiber Optic cabling.
- Page 33 REQUIREMENTS/SPECIFICATIONS Table 2-9. TPIM-F3 Specifications Parameter Fall Time Duty Cycle Bit Error Rate: Better than 10 NOTE: Transmitter Power decreases as temperatures rise and increases as temperatures fall. Use the Output Power Coefficient to calculate increased or decreased power output for an operating environment. For example, the typical power output at 25 C is -16.4 dBm.
-
Page 34: General Specifications
(i.e., -33.5 dBm average + 3 dB = -30.5 dBm peak). 2.5 GENERAL SPECIFICATIONS Cabletron Systems reserves the right to change the following operating specifications at any time without notice: • Data Buffer Memory (RAM): 8 MB (Upgradeable) •... -
Page 35: Safety
REQUIREMENTS/SPECIFICATIONS Non-operating Temperature: Operating Humidity: 2.5.3 Safety This unit meets the safety requirements of UL 1950, CSA C22.2 No. 950 and EN 60950; the EMI requirements of FCC Class A and EN 55022 Class A; and the EMC requirements of EN 50082-1. WARNING: It is the responsibility of the system vendor to ensure that the total system, including the MicroMMAC-T, meets allowed limits of conducted and radiated emissions. -
Page 36: Chapter 3 Installation
Unpack the module carefully. Preserve and save all packaging materials for possible storage or transport of the MicroMMAC-T. Thoroughly inspect the MicroMMAC-T immediately. If there are any signs of damage to the module, contact Cabletron Systems Technical Support immediately. 3.2 ATTACHING THE STRAIN RELIEF BRACKET... -
Page 37: Installing The Micrommac-T
INSTALLATION MicroMMAC-24T TOKEN RING HUB WITH SUPPORTING 100 OHM STP CABLE Figure 3-1. Attaching the Strain Relief Bracket 3.3 INSTALLING THE MicroMMAC-T The MicroMMAC-T can be rack-mounted, wall-mounted, or placed on any horizontal surface. Refer to the following subsections for the appropriate installation instructions. -
Page 38: Wall-Mounting The Micrommac-T
2. Using the four cover screws removed in step 1, attach the rack-mounting brackets to each end of the MicroMMAC-T. MicroMMAC-24T TOKEN RING HUB SUPPORTING 100 OHM STP CABLE Figure 3-2. Installing of Rack-Mount Brackets 3. With the mounting brackets installed, position the MicroMMAC-T between the vertical frame members of the 19-inch rack and fasten it securely with the mounting screws (see Figure 3-3). - Page 39 INSTALLATION Molly Screw Anchors Bracket Screws Figure 3-4. Wall-Mounting the MicroMMAC-T 2. Select a wall location within seven feet of a power outlet for the MicroMMAC-T. WARNING: When drilling pilot holes, any electrical wiring inside the wall may present a potential SHOCK HAZARD. Select a wall location accordingly.
-
Page 40: Free-Standing Installation
INSTALLATION 3.3.3 Free-Standing Installation For a free-standing shelf or table top installation, locate the MicroMMAC-T, as shown in Figure 3-5, within 7 feet of its power source on an unrestricted free surface area 21 inches wide, 18 inches deep, and 6 inches high. -
Page 41: Reset Button
Figure 3-6. The Reset Button 3.6 SETTING THE RING SPEED The ring speed switch is located on the front face of the MicroMMAC-T as shown in Figure 3-7. The MicroMMAC-T’s factory-default ring speed setting is 16 Mbps. -
Page 42: Setting The Nvram Switch
Figure 3-7. The Ring Speed Switch 3.7 SETTING THE NVRAM SWITCH Figure 3-8 shows the location of the NVRAM Reset Switch. It can be reached by a inserting a small screwdriver through the side vent. NVRAM (Non-Volatile Random Access Memory) stores user-entered parameters such as IP address and device name. -
Page 43: Connecting Lobe Port Cabling
STP cabling, a Type 3 Media Filter is required. The Cabletron Systems TRMF and TRMF-2 are available for this purpose. The MicroMMACs 42T and 44T have shielded RJ45 lobe ports that support STP cabling. Shielded patch cables that adapt a shielded RJ45 to a data connector (MIC) are available from Cabletron Systems (PN 9372057-8). - Page 44 RJ45 Plug RJ45 Plug (at TCU) Pin 3 (Receive -) ..to..Pin 3 (Transmit -) Pin 4 (Transmit +) ..to..Pin 4 (Receive +) Pin 5 (Transmit -).
- Page 45 INSTALLATION Token Ring Network Interface Card Token Ring Station STP to UTP Type 3 Media Filter OFFICE Figure 3-10. UTP Configuration Example 3-10 WALL MicroMMAC-24T Punchdown Block TRMF Wall Jack Lobe Cable WIRING CLOSET...
- Page 46 Token Ring Network Interface Card Token Ring Station OFFICE Figure 3-11. STP Configuration Example To attach a lobe segment to a MicroMMAC-T network port: 1. Insert the RJ45 connector from each twisted pair segment into an RJ45 network lobe port on the MicroMMAC-T, as shown in Figure 3-12. Figure 3-12.
-
Page 47: Installing Tpim Modules
Check that the twisted pair connection meets the dB loss limits and cable specifications outlined in Chapter 2. d. Check Local Management to ensure that the port is enabled. e. If a link still can not be established, contact Cabletron Systems Technical Support. 3.9 INSTALLING TPIM MODULES TPIMs provide specialized RI/RO ports for trunk connections. -
Page 48: Setting Phantom And Ri/Ro Switches
NOTE: If the switch locations on the TPIM do not match the locations illustrated in Figure 3-13, refer to the TPIM Reference Card included with the TPIM. The TPIM Reference Card outlines switch locations and settings. For additional help, call Cabletron Systems Technical Support. TPIM-T2/T4 TPIM-T1... -
Page 49: Tpim Installation
INSTALLATION (See Below For Settings) RI/RO TPIM-T1/TPIM-T2/TPIM-T4 Phantom Switch Settings 1 = Cabletron Device (Default) 0 = Non-Cabletron Device RI/RO Switch Settings RI/RO = Ring In/Ring Out (Default) S = Station (Not Functional) Figure 3-13. The Phantom and RI/RO Switches 3.9.2 TPIM Installation... -
Page 50: Connecting Stp Segments
INSTALLATION Figure 3-14. Installing a TPIM 3.9.3 Connecting STP Segments Use TPIM-T1 to connect STP segments. Before connecting a segment to the TPIM-T1, confirm proper pinouts at each end of the segment. To connect a TPIM-T1 to a Twisted Pair Segment: 1. -
Page 51: Connecting Twisted Pair Segments
Check that the twisted pair connection meets dB loss limits and cable specifications outlined in Chapter 2. d. Check that the port is enabled through the Local Management. e. If a link still cannot be established, contact Cabletron Systems Technical Support. 3.9.4 Connecting Twisted Pair Segments The TPIM-T2 supports UTP cabling and the TPIM-T4 supports STP cabling. -
Page 52: Connecting Fiber Optic Link Segments
Check that the twisted pair connection meets dB loss limits and cable specifications outlined in Chapter 2. d. Check that the port is enabled through Local Management. e. If a link still can not be established, contact Cabletron Systems Technical Support. 3.9.5 Connecting Fiber Optic Link Segments Use TPIMs -F2/ -F3 to connect Fiber Optic Link segments. - Page 53 (RX) port at the other end and vice versa. • Cabletron Systems labels its fiber optic cable to indicate which fiber is Receive and which is Transmit: one fiber is labeled 1, and the other fiber is labeled 2. If using a non-Cabletron cable, labeling in the above manner is recommended.
-
Page 54: Checking The Installation
Verify that the fiber connection meets the dB loss limit specifications outlined in Chapter 2. d. Check that the port is enabled through MicroMMAC-T Local Management. e. If a link still can not be established, contact Cabletron Systems Technical Support. 3.10 CHECKING THE INSTALLATION To check MicroMMAC-T installation: 1. -
Page 55: Chapter 4 Local Management
LOCAL MANAGEMENT This chapter explains how to set up a management terminal and a modem to access MicroMMAC-T’s Local Management (LM). It also explains how to use Local Management tools to manage the MicroMMAC-T, its components, and its attached segments (i.e., BRIMs, MicroSNAC). Use Local Management to Do the Following: •... -
Page 56: Attaching The Management Terminal
LOCAL MANAGEMENT Cabletron supplies an RJ45 Cable Kit with the MicroMMAC-T. This kit includes a UTP console cable with RJ45 connectors on each end. It also provides adapters for DB9 or DB25 connections. Refer to the RJ45 Cable Kit Instruction Sheet for adapter pinouts and additional instructions. The following sections explain how to attach the console cable to the management terminal. -
Page 57: Modem Cable Configuration And Setup
General Setup Communications Setup Keyboard Setup 4.1.3 Modem Cable Configuration and Setup To access Local Management from a modem, use an RS-232 cable available from Cabletron Systems. This cable connects the modem to the Function Selection Columns 80 Columns Controls... -
Page 58: Accessing Local Management
LOCAL MANAGEMENT MicroMMAC-T’s COM 2 port. Figure 4-2 shows the pinout for a cable with an RJ45 connector at the MicroMMAC-T end of the cable. RJ45 COM 2 Port TRANSMIT RECEIVE SIGNAL GROUND DATA CARRIER DETECT DATA TERMINAL READY Figure 4-2. Modem Cable Pinouts 4.2 ACCESSING LOCAL MANAGEMENT To access Local Management: 1. -
Page 59: Accessing Local Management Via Telnet
CABLETRON Systems, Incorporated Rochester, NH (c) Copyright CABLETRON Systems, Inc. 1995 Device Model Number: 00.00.01 Functionality Level: 00.00.01 Flash Image Version: 01.00.01 BOOTPROM Version: 01.00.01 Board Revision: 00.00.01 Enter Password: _________ Figure 4-3. MicroMMAC-T Local Management Screen 2. Enter the Password (the factory default password is the Return key) and then press the Return key. -
Page 60: Accessing Local Management From A Modem
LOCAL MANAGEMENT 4.2.2 Accessing Local Management from a Modem 1. Turn on the modem. The modem must be set for Auto Answer and Data Carrier Detect must be active. Refer to your modem’s user manual for operating instructions. 2. Call the modem. The MicroMMAC-T Local Management screen appears when you establish a connection (Figure 4-3). -
Page 61: Working With Local Management Screens
uMMAC-T Local Management Flash Image Version: 01.00.01 uMMAC-T Local Management STATUS MENU CHASSIS STATUS COMPONENT STATUS Figure 4-4. Local Management MENU Screens Hierarchy NOTE: Local Management automatically disconnects after 15 minutes of keyboard inactivity. To prevent disconnection, press any key during periods of inactivity. - Page 62 LOCAL MANAGEMENT (or other procedures where they are described) when working with LM screens: 1. Use the Tab key or arrow keys to highlight the parameter(s). 2. Use the spacebar to toggle through settings for fields offering selections; type settings over fields that you can edit or type over. 3.
-
Page 63: The System Level Screen
4.3.2 The SYSTEM LEVEL Screen The SYSTEM LEVEL Screen (Figure 4-5) displays and lets you set the following parameters: • IP Address, • Subnet Mask • System Date • System Time • Default Gateway • Beacon Recovery • COM Port Applications It also displays the Physical MAC device address and the Default Interface. -
Page 64: Setting The System Time
LOCAL MANAGEMENT 1. Highlight the System Date field. 2. Type the date into the field in a MM/DD/YY format and then press the Return key. 3. If the format is invalid, the message “INVALID DATE” appears. Re-type the date using the correct format. 4. - Page 65 3. Press the Return key. The new value appears in the IP Address field. 4. If the IP Address is correct, highlight the SAVE command and then press the Return key. The “SAVED” message appears on the screen indicating that your changes have been saved to memory.
- Page 66 LOCAL MANAGEMENT The “SAVED” message appears on the screen indicating that your changes have been saved to memory. The MicroMMAC-T will then do a soft reset. Setting the Default Gateway The Default Gateway is the IP address of the network connection (e.g., external router) used in forwarding management information from the MicroMMAC-T (e.g., SNMP traps) to a network management station.
- Page 67 ABRP locates the problem and corrects it, the MicroMMAC-T generates traps to provide the network’s designated remote management station with information regarding the incident, including: • The beaconing device’s address • The address of the beaconing device’s Nearest Active Upstream Neighbor (NAUN) •...
-
Page 68: The Snmp Community Names Screen
LOCAL MANAGEMENT 2. Toggle between ENABLED and DISABLED to make your selection. 3. Highlight the SAVE command and then press the Return key. The “SAVE” message appears on the screen indicating that your selection was saved to memory and the new value of the field takes effect. - Page 69 serve two purposes: they act as passwords to Local Management (LM) and control SNMP management access to the MicroMMAC-T. You control MicroMMAC-T access by establishing access policy privileges at three increasingly higher levels of security: • Read-Only: The user can view any LM fields not limited exclusively to Super-User privileges, but cannot make any changes.
-
Page 70: The Snmp Traps Screen
LOCAL MANAGEMENT Community Name This field displays designated user names. Access Policy This field displays the access privileges accorded to each community name. Editing the Community Name field 1. Highlight the Community Name field. 2. Type in the password, up to 32 characters in length, into the field. If you press the Return key without entering a password, the field defaults to Public. -
Page 71: The Snmp Traps Screen
uMMAC-T Local Management Trap Destination xxx.xxx.xxx.xxx xxx.xxx.xxx.xxx xxx.xxx.xxx.xxx xxx.xxx.xxx.xxx xxx.xxx.xxx.xxx xxx.xxx.xxx.xxx xxx.xxx.xxx.xxx xxx.xxx.xxx.xxx SAVE Figure 4-7. SNMP TRAPS Screen The following sections discuss the fields on the SNMP TRAPS Screen and provide instructions for using them. Trap Destination This field shows the IP Address of the workstation that receives traps from the MicroMMAC-T. -
Page 72: The Ring Security Screen
LOCAL MANAGEMENT 3. Press the Return key. If the format is invalid, the “INVALID IP FORMAT” message appears. Re-type the Trap Destination IP address using the correct format. 4. Highlight the Trap Community Name field. 5. Enter the community name of the device to receive traps and then press the Return key. - Page 73 uMMAC-T Local Management Stn Edit 00-00-00-00-00-00 SAVE/EXECUTE Figure 4-8. RING SECURITY Screen Only stations on the ring’s allowed list can enter the ring. The MicroMMAC-T retains this allowed list and automatically re-enables ring security whenever you power up or reset the unit. You can select from two modes of ring security: •...
-
Page 74: Station Address
LOCAL MANAGEMENT In Alarm/Remove mode, the MicroMMAC-T sends a “Remove MAC Frame Command” to new stations attempting to enter the ring. A trap sent to the NMS informs it of the action taken. If the Remove MAC Frame Command fails to remove the new station after three attempts, a trap to the NMS informs it that “the station could not be removed.”... - Page 75 it sends a trap to the NMS informing it that the station could not be removed. The station must then be physically removed from the ring. SAVE/EXECUTE Use this field to save changes made to ring security in the MicroMMAC-T’s NVRAM. You must use the SAVE/EXECUTE command for your changes to take effect.
- Page 76 LOCAL MANAGEMENT 2. Highlight the SAVE/EXECUTE command and then press the Return key. Viewing the Revised Allowed List 1. Highlight the RETURN command and then press the Return key. The SETUP MENU screen appears. 2. Highlight RING SECURITY and then press the Return key. The RING SECURITY screen appears, showing the revised Station Address allowed list.
-
Page 77: The Device Statistics Screen
4.3.6 The DEVICE STATISTICS Screen The DEVICE STATISTICS screen (Figure 4-9) displays ring information, isolating errors, and non-isolating errors. uMMAC-T Local Management Frames Received: 4572 KBytes Received: 10157 Errors Received: 0 Beacon States: 0 Ring Purges: 2 Active Monitor Changes: 1 ISOLATING ERRORS Line Errors: 0 Burst Errors: 0... - Page 78 LOCAL MANAGEMENT • TOTAL: This mode automatically displays statistics describing network performance since the last power-up. Selecting the Device Statistics Counter Mode 1. Highlight the current mode at the bottom of the screen and toggle to a counter mode selection. 2.
- Page 79 LOCAL MANAGEMENT KBytes Received This field displays the sum in kilobytes of frames received by the MicroMMAC-T. Errors Received This field displays the Isolating and Non-Isolating Errors (described below) detected on the ring. Beacon States This field displays the beacon conditions detected on the ring. Stations transmit beacons when they detect bit streaming or signal loss on the ring.
-
Page 80: Ring Information
LOCAL MANAGEMENT occurs when stations enter or leave the ring with the absence of phantom current. This error can also indicate a problem with the receiver of the reporting node, or the transmitter of its NAUN, or the cabling and hub hardware between them. - Page 81 • -- Indicates that the management station has closed the adapter Closed • -- Indicates the ring is running with no problems, and tokens Normal are being detected by the management station • -- Indicates that the active monitor has issued a ring purge Purge command.
-
Page 82: The Chassis Status View Screen
LOCAL MANAGEMENT Frame Copied Errors This field displays the total number of Frame Copied Errors. These errors occur when a station finds a frame with its address as the destination, but finds the address recognized indicator bits not set to zero. This indicates a possible duplicate address. -
Page 83: Administrative Mode
• OPERATIONAL (Figure 4-10) -- Lets you monitor the operational status of the Token Ring network • ADMINISTRATIVE (Figure 4-11) -- Lets you manage access to the Token Ring network • RING OUT ENABLE (Figure 4-12) -- Lets you enable all ports The following sections describe generic CHASSIS STATUS VIEW screen fields and control procedures. - Page 84 LOCAL MANAGEMENT VFNB screen configurations for Bypassed modules are described as follows: • Bypassed (|--B--|): The MicroMMAC-T is in the bypass mode and is not connected to an STH module. • Bypassed left (<--B--|): The MicroMMAC-T or the STH is in the bypass mode, but it is connected to the next module.
- Page 85 2. Toggle to a screen mode selection, or press a for ADMINISTRATIVE, o for Operational, or r for RING OUT ENABLE, and then press the Return key. The selected screen mode appears. Setting the REFRESH Field 1. Highlight the REFRESH3sec field. 2.
- Page 86 LOCAL MANAGEMENT • ENB (Enabled): The port is enabled and allows an attached station to enter the ring. • BYP (Bypassed): The port is disabled and the station is not on the ring. • LNK (Linked): The port is disabled and an attached station is trying (sending phantom current) to access the ring •...
- Page 87 Using the ADMINISTRATIVE Mode Screen In addition to displaying the operational status of ring ports, the ADMINISTRATIVE mode screen provides you with two methods for controlling access to them: • Bypassing ports. • Enabling and Disabling ports. When you bypass a module, or device, you not only remove it from the Token Ring to which it was previously attached, but you also establish a separate, or stand-alone, Token Ring composed only of the terminals attached to the ports on the bypassed module.
- Page 88 2. Toggle to the vertical dash character and then press the Return key. The module is now connected to the Token Ring. Using the RING OUT ENABLE Mode Screen Use the RING OUT ENABLE mode screen to switch ports from the default Station (STN) status to RING OUT (RO) enable status. 4-34...
-
Page 89: The Component Status Screen
CHASSIS STATUS VIEW ( RING OUT ENABLE NEXT Figure 4-12. CHASSIS STATUS VIEW (RING OUT ENABLE) Screen To switch to and from STN and RO: 1. Highlight the port-status field showing STN or RO. 2. Toggle between STN and RO, make selection and then press the Return key. -
Page 90: The Mib Navigator Screen
LOCAL MANAGEMENT uMMAC-T Local Management Component Name Chassis Mgr Local Mgmt SNMP Agent Protocol Stack Telnet RMON Network 1 Network 2 Figure 4-13. COMPONENT STATUS VIEW Screen 4.3.9 The MIB NAVIGATOR Screen The MIB NAVIGATOR screen (Figure 4-14) provides the MIB NAVIGATOR prompt where you can issue commands for navigating and modifying the Management Information Base (MIB) structure. - Page 91 Welcome to Cabletron MicroMMAC-T Revision 01.00.01 MIBNav-> help Figure 4-14. MIB Navigator Screen The following sections define MIB commands and describe how to get help on using them. To access a list of MIB commands: Type “help” or “?” at the MIB prompt and then press the Return key. The MIB NAVIGATOR screen appears showing the MIB Navigational and Built In commands listed in Table 4-2.
- Page 92 LOCAL MANAGEMENT Navigation bran ctro next show tree whoa Navigational commands Navigational commands allow you to access and manage MIB objects for the device. MIB Commands are described as follows: branch This command displays the object leaves of a specified directory tree. This command changes directories within a MIB sub-tree.
-
Page 93: Built-In Commands
LOCAL MANAGEMENT next This command shows the next leaf in a path. This command displays the full path name of the directory in which you are working. This command lets you set the value of a managed object. This command lets you change your community name. tree This command displays an entire MIB for a device. -
Page 94: The Flash Download Screen
LOCAL MANAGEMENT ping This command let you generate an outbound ping request. snmp branch This command lets you query another SNMP device. snmpget This command lets you query another SNMP device to obtain a value for an object. snmpset This command lets set the values of object in other devices. snmptree This command displays all objects and their values in a device. - Page 95 uMMAC-T Local Management Reboot after Download: [YES] Flash Image Server IP: xxx.xxx.xxx.xxx Flash Image File Name: c:\hex\micro_t.hex Download Server IP: xxx.xxx.xxx.xxx Download File Name: c:\hex\micro_t.fls EXECUTE Figure 4-15. The FLASH DOWNLOAD Screen The following sections discuss the fields on the FLASH DOWNLOAD screen and provide instructions for using them.
- Page 96 LOCAL MANAGEMENT The Reboot after Download field appears by default when the RUNTIME method is used. If YES is selected, the MicroMMAC-T will automatically reset after the image is downloaded into Flash to load the new image into the active system file. You can choose to use the BOOTPROM method also.
-
Page 97: Chapter 5 Troubleshooting
The chapter concludes with an overview of the POWER UP Diagnostic Test. 5.1 USING LANVIEW LEDs LANVIEW LEDs (located on the front panel) are Cabletron Systems’ built-in visual diagnostic and status monitoring system. Use the LEDs to monitor network status or diagnose physical-layer network problems. -
Page 98: Using The Lcd Display
TROUBLESHOOTING 5.2 USING THE LCD DISPLAY The MicroMMAC-T is equipped with an LCD and a LCD display button as shown in Figure 5-1. MicroMMAC-24T DISPLAY DISPLAY RESET SPEED COM 2 The LCD is a diagnostic tool for viewing the following important status information about the MicroMMAC-T: •... -
Page 99: Static System Messages
5.2.1 Static System Messages Static System messages (Table 5-2) display MicroMMAC-T configuration information. To view them, press and release the Display button (Figure 5-1). Press the Display button to scroll through each message. If the Display button is not pressed again within ten seconds, the display defaults back to the product name. -
Page 100: Alarm Messages
TROUBLESHOOTING 5.2.2 Alarm Messages Alarm messages (Table 5-3) describe events that occur within the MicroMMAC-T. To view the Alarm Messages queue, press the Display button (Figure 5-1) and hold for five seconds. Press the Display button to scroll through each message. If the Display button is not pressed again within ten seconds, the display defaults back to the product name. -
Page 101: Unsaved Initialization Messages
Table 5-3. Alarm Messages (Cont.) Displayed Messages Stack x Port xx Removed Ring Port xx wrapped Eagle Reinserting Fault Recovery Oscillation 5.2.3 Unsaved Initialization Messages Unsaved intialization messages appear on the LCD as the event occurs, but are not saved in a buffer for future recall. Table 5-4 lists unsaved failure or error messages (If Failure or Error Messages appear, call your Cabletron Technical Support representative.), and Table 5-5 lists normal unsaved initialization messages. -
Page 102: Saved System Messages
TROUBLESHOOTING Table 5-5. Normal Unsaved Initialization Messages Messages • Bit Swap Test • Boot Complete • Boot From Flash • BOOTP Discovery • Eagle Test • Erasing Flash • Flash Programmed • Hardware Init 5.2.4 Saved System Messages Saved System Message are device-related start-up or boot strap messages, BOOTP/TFTP host, or start-up error messages as shown in Table 5-6. -
Page 103: Responding To Error Messages
Do you wish to continue, retry, or loop (c, r, or l)? MicroMMAC-T Diagnostic/Boot Display Figure 5-2. POWER UP DIAGNOSTIC screen Responding to Error Messages Error messages provide you with three response options: • continue CABLETRON Systems, Incorporated P.O.Box 5005 Rochester, NH 03866-5005 TROUBLESHOOTING... - Page 104 TROUBLESHOOTING • retry • loop Choosing continue, or diagnostic test. Choosing retry, or the error message. Choosing loop, or that produced the error message until you decide to stop it by pressing the Delete key. NOTE: Call your Cabletron Technical Support representative whenever you discover a system-level error.
-
Page 105: Power Supply Cord
POWER SUPPLY CORD The main cord used with this equipment must be a 2 conductor plus ground type with minimum 0.75 mm square conductors and must incorporate a standard IEC appliance coupler on one end and a mains plug on the other end which is suitable for the use and application of the product and that is approved for use in the country of application.
Need help?
Do you have a question about the 42T and is the answer not in the manual?
Questions and answers