Table of Contents
Advertisement
Quick Links
Advertisement
Table of Contents

Related Manuals for Edimax BR-6476AC


Summary of Contents for Edimax BR-6476AC
- Page 1 BR-6476AC User Manual 06-2019 / v1.0...
-
Page 2: Table Of Contents
CONTENTS I. Product Information ................1 I-1. Package Contents ...................... 1 I-2. LED Status ........................2 I-3. Back Panel ......................... 3 II. Installation .................... 5 II-1. Wi-Fi Router Mode ....................8 II-2. WISP Mode ......................11 II-3. Universal Repeater Mode ..................14 II-4. - Page 3 IV-1-2-4. Mac ......................... 86 IV-1-3. How to Find Your Network Security Key ..............89 IV-1-3-1. Windows 7 & 8 ......................89 IV-1-3-2. Windows 10 ......................91 IV-1-3-3. Mac ......................... 93 IV-1-4. How to Find Your Router’s IP Address ..............95 IV-1-4-1.
-
Page 4: Product Information
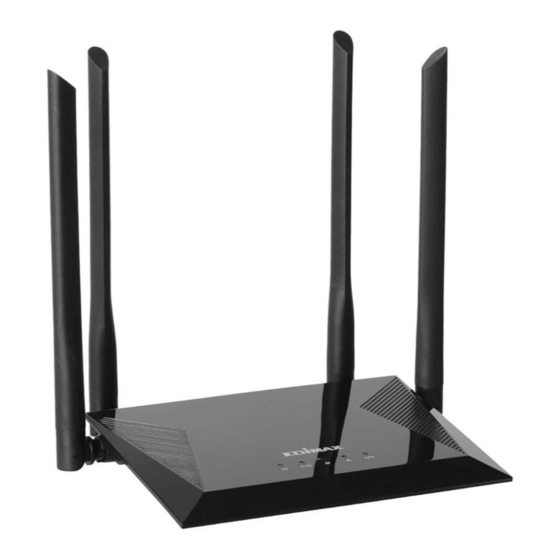
Before you start using this product, please check if there is anything missing in the package, and contact your dealer to claim the missing item(s): Quick Installation Guide BR-6476AC Power Adapter (5GHz Antennas x 2 + 2.4GHz Antenna x 2 with 5dBi) -
Page 5: I-2. Led Status
I-2. LED Status Names LED Status Description Flashing The 5G connection has been activated. Wi-Fi is not active. Flashing The 2.4G connection has been activated. 2.4G 2.4G Wi-Fi is not active. WAN activity. Flashing WAN port connected but inaccessible. WAN port not connected. Ethernet port is connected to a network device. -
Page 6: Back Panel
I-3. Back Panel WPS/Reset Button Power Port 10/100 Mbps 10/100Mbps LAN Ports 1–4 WAN Port BR 6476AC 5GHz Antennas x 2 + 2.4GHz Antenna x 2 with 5dBi... - Page 7 2. Do not place the device in or near hot/humid places, such as a kitchen or bathroom. 3. Do not pull any connected cable with force; carefully disconnect it from the BR-6476AC. 4. Handle the device with care. Accidental damage will void the warranty of the device.
-
Page 8: Ii. Installation
II. Installation Plug the included power adapter into the device’s 12V DC power port and the other end into an electrical socket. Ensure that the LED is lit. If not, the device is not properly connected. Use a Wi-Fi device (e.g. computer, tablet, smartphone) to search for a Wi-Fi network with the SSID “edimax_2.4G_xx or edimax_5G_xx(xx is the last two codes of MAC Address)”... - Page 9 Open a web browser and enter the URL http://192.168.2.1 and begin the setup process. If you cannot access http://192.168.2.1, please make sure your computer is set to use a dynamic IP address. Refer to IV-1. Configuring your IP address for more information. Enter new password, confirmed and click “NEXT’...
- Page 10 Select the mode for your BR-6476AC and click “NEXT” to continue. Wi-Fi Router The device connects to your modem and enables Internet (wireless and Ethernet) access on your network devices. WISP Mode The device connects wirelessly to your Wireless Internet Service Provider and provides 2.4GHz and/or 5GHz Internet...
-
Page 11: Ii-1. Wi-Fi Router Mode
Wi-Fi Router Mode Connect the blue WAN port of your BR-6476AC to the LAN port of your modem using an Ethernet cable, and then log on to http://192.168.2.1. Select “Router” mode and click “NEXT”. You can select “Dynamic IP”, “Static IP”, and “PPPOE” mode. - Page 12 Confirm the configuration details for your wireless network, then click “NEXT” to continue. Please click “Save” to reboot the device and activate the configuration.
- Page 13 Please wait a moment until the BR-6476AC is ready. When the setup is complete. Please close the browser window. The BR-6476AC is working and ready for use. You can now connect to the device’s new SSID. Please refer to IV-2. Connecting to a Wi-Fi network...
-
Page 14: Ii-2. Wisp Mode
II-2. WISP Mode Please ensure your BR-6476AC is within Wi-Fi range of your WISP network. Log on to http://192.168.2.1 to configure your device. Select WISP mode and click “NEXT”. Click “Site Survey” to scan the wireless signals and connect to desired... - Page 15 A summary of your wireless configuration will be displayed, as shown below. Check that all of the details are correct and then click “NEXT” to proceed. Please click “Save” to reboot the device and activate the configuration.
- Page 16 Please wait a moment until the BR-6476AC is ready. When the setup is complete, please close the browser window. The BR-6476AC is working and ready for use. You can now connect to the device’s new SSID. Please refer to IV-2. Connecting to a Wi-Fi network...
-
Page 17: Ii-3. Universal Repeater Mode
II-3. Universal Repeater Mode Please ensure your BR-6476AC is within Wi-Fi range of your existing wireless router. Log on to http://192.168.2.1 to configure your device. Select Repeater Mode and click “NEXT”. If the Wi-Fi network you wish to connect to does not appear, try... - Page 18 The device will search for nearby wireless networks to connect to. If you cannot find the access point you wish to connect to, click “Site Survey” to refresh the list of wireless networks. Select the wireless network you wish to connect to, and click “NEXT” to continue. A summary of your wireless configuration will be displayed, as shown below.
- Page 19 Please wait a moment until the BR-6476AC is ready. When the setup is complete. Please close the browser window. The BR-6476AC is working and ready for use. You can now connect to the device’s new SSID. Please refer to IV-2. Connecting to a Wi-Fi network...
-
Page 20: Ii-4. Access Point Mode
II-4. Access Point Mode Connect the yellow LAN port of your BR-6476AC to the LAN port of your existing router using an Ethernet cable, and then log on to http://192.168.2.1 Select “AP” mode and click “NEXT”. Confirm the configuration details for your wireless network, then click... - Page 21 Please click “Save” to reboot the device and activate the configuration. Please wait a moment until the BR-6476AC is ready.
- Page 22 When the setup is complete. Please close the browser window. The BR-6476AC is working and ready for use. You can now connect to the device’s new SSID. Please refer to IV-2. Connecting to a Wi-Fi network if you require more guidance.
-
Page 23: Ii-5. Wps Setup
Press and hold the WPS/Reset button found on the back panel for at least 10 seconds, until the LED begins to light out. Release the button when the all LED are off. Wait for the BR-6476AC to restart. The BR-6476AC is ready for setup when the LED displays on. -
Page 24: Iii. Browser Based Configuration Interface
III. Browser Based Configuration Interface After you have setup the BR-6476AC as detailed in II. Installation or the included Quick Installation Guide, you can use the browser based configuration interface to configure advanced settings. Please ensure that your computer is set to use a dynamic IP address. - Page 25 Then click on the “Status” tab shown below. Use the top menu to navigate. For more information, refer to following chapters.
-
Page 26: Iii-2. Main Menu
III-2. Main Menu Main menu is consisted of three areas. User can navigate and configure BR-6476AC via the main menu. Top menu User can easily Select functions in the navigation bar menu, Select the results displayed in the configuration section. -
Page 27: Commonly Used Web Elements
III-2-1. Commonly used web elements Common Description elements Click “Save” to save the current settings. Click “Cancel” to cancel the changes made. Click “Release” to release information and data. Click “Renew” to update the information. Click “Refresh” to update the information. Click “Clear”... -
Page 28: Setup Wizard
III-2-2. Setup Wizard You can run the setup wizard again to reconfigure the basic settings of the device, or you can run a wizard to help you switch the device to a different operating mode. Select “Wizard” then click on “Quick Configuration” to begin. The device connects to your modem and enables Wi-Fi Router Internet (wireless and Ethernet) access on your... - Page 29 Switch to Router/AP/Universal Repeater/WISP Follow the on-screen instructions to reset the device back to its factory default settings. Please wait for a few moments before the device is restarted. After the device has reset, the log in page will appear. Enter the log in information to proceed.
-
Page 30: Status
III-2-3. Status The “Status” page displays basic system information about the device, arranged into four categories: System, LAN, Wireless and WAN. Screenshots displayed are examples. The information shown on your screen will vary depending on your configuration. -
Page 31: System Status
III-2-3-1. System Status This page displays Connected Clients, Firmware Version, Running Time, System Time and operation mode. Connection status Displays the number of DHCP clients. Running time Displays the time duration indicating how long the router has been up since startup. Up time is recounted and renewed upon power off. -
Page 32: Wireless 2.4Ghz
III-2-3-3. Wireless 2.4GHz SSID Name The name of Wireless. SSID The MAC Address of Wireless. Channel The Channel of Wireless. Security Mode Encryption schemes. III-2-3-4. Wireless 5GHz SSID Name The name of Wireless. SSID The MAC Address of Wireless. Channel The Channel of Wireless. -
Page 33: Wan Status
III-2-3-5. WAN Status Connection Type It displays the current access mode of WAN port. Connection Status The network connection status. WAN MAC Address MAC address of your ISP's router to see. WAN IP IP address obtained from ISP. Subnet Mask Obtained from ISP. -
Page 34: Iii-3-1
III-3-1. WAN Settings WAN Settings configure the Internet access and support Static IP mode, Dynamic IP (DHCP), PPPOE. III-3-1-1. WAN Settings- Dynamic IP Click “Network”, select “WAN”, then select Connection Type to “Dynamic IP” and finally click “Save” to confirm. It displays the routers mode. - Page 35 III-3-1-2. WAN Settings- Static IP Click “Network”, Select “WAN”, Select Connection Type “Static IP”. Then enter IP, Subnet Mask, Gateway, MTU and DNS. Finally, click “Save” to confirm. Connection Type Specify a connection type: Static IP mode, Dynamic IP (DHCP), PPPOE IP Address Input the IP address assigned by your ISP here.
- Page 36 III-3-1-3. WAN Settings- PPPOE Click “Network”, select “WAN”, then select Connection Type “PPPOE”. Enter the ISP login User Name and the ISP login Password. Finally, click “Save” to confirm. To confirm the configuration details, click “System Status” > “WAN Status”. Connection Type Specify a connection type: Static IP mode, Dynamic IP (DHCP), PPPOE...
-
Page 37: Iii-3-2
III-3-2. WAN Speed Click “Network”, select “WAN Speed”, then select Speed Mode type. Finally, click “Save” to confirm. Set the value to match with the status. Modes Speed Mode include Auto, 10M half-duplex, 10M full-duplex, 100M half-duplex, 100M full-duplex III-3-3. MAC Cloning Some ISPs (Internet Service Providers) require end-user's MAC address to access their network. - Page 38 3.To manually enter the MAC address allowed by your ISP: a. Enter the MAC address allowed by your ISP. b. Click Save to save your settings. MAC Address The computer or broadband modem authorized by your ISP. Restore to Factory Reset the router’s WAN MAC to factory default.
- Page 39 Click “Network”, select “LAN Settings”. Enter IP Address, Subnet Mask. Then click “Save” and wait for the router reboot automatically. Displays the Router’s LAN MAC address. MAC Address Displays the Router’s LAN IP address. IP Address Displays the Router’s LAN subnet mask. Subnet Mask The router's LAN IP address and WAN IP address cannot be on the same IP segment.
- Page 40 III-3-5. DHCP DHCP (Dynamic Host Configuration Protocol) is a protocol used to provide quick, automatic, and central management for the distribution of IP addresses within a network. DHCP is also used to configure the proper subnet mask, default gateway, and DNS server information on the device. Click “Network” and select “DHCP”.
- Page 41 III-3-6. Address Reservation This function allows you to learn whether there are unauthorized accesses by viewing the client list. Also, you can specify a reserved IP address for a PC in the LAN. That PC will always receive the same IP address each time when it accesses the DHCP server.
- Page 42 III-4. Wireless The “Wireless” menu allows you to configure SSID and security settings for your Wi-Fi network along with a guest Wi-Fi network. Click “Wireless” to enter the configure page , here you can configure “Wireless Settings”, “Wireless Security”, “Multi SSID”, “WPS Settings”, “Wireless MAC Filtering”, “Wireless Statistics”.
- Page 43 Enable/Disable wireless connection Wireless Select 5G or 2.4G accordingly Select Band Set the power output of the wireless radio. You may Tx Power not require 100% output power. Setting a lower power output can enhance security since potentially malicious/unknown users in distant areas will not be able to access your signal.
- Page 44 III-4-2. Wireless Security The wireless security function can prevent others from connecting to your wireless network and using the network resources without your consent. Meanwhile, you can also block illegal users from intercepting or intruding your wireless network. Click “Wireless”, Select “Wireless Security” and choose security modes, Disable, WPA2 –...
- Page 45 III-4-3. WPS Settings Click “Wireless”, Select “WPS Settings”. Select 5G or 2.4G accordingly Select Band Displays the current WPS connection status WPS connect status Name of SSID. SSID Name Displays the security mode selected. Security Mode...
- Page 46 MAC Address (Each of the 2.4G & 5G bands can be set to 16 addresses). If a device which is not on the list of permitted MAC addresses attempts to connect to the BR-6476AC, it will be denied. Select “Off” to allow all wireless clients to join MAC Address Filter your wireless network.
- Page 47 III-4-5. Wireless Statistics This page shows the current wireless access list Click “Refresh” to update. Number of connected wireless clients MAC address The channel bandwidth instead of wireless Bandwidth connection rate. Refresh the current wireless station list Refresh III-5. Advanced Settings Click “Advanced Settings”...
- Page 48 III-5-2. Virtual Server You want to share resources on your PC with your friends who are not in your LAN. But, by default, the router's firewall blocks inbound traffic from the Internet to your computers except replies to your outbound traffic. You can use the Port Forwarding feature to create exceptions to this rule so that your friends can access these files from external networks.
- Page 49 Enter the IP address of the PC where you To IP address want to set the applications. Here in this example, enter 192.168.1.100. Select the protocol (TCP/UDP/Both) for the Protocol application. Enable the connection Enable Disable the connection Disable If your WAN IP address is 192.168.1.100 when accessing your FTP server from external network, your friends only need to enter ftp:// 192.168.1.100:21 in their browsers.
- Page 50 Check/uncheck the box to enable/disable the Enable DMZ device’s DMZ Host function. III-5-4. UPNP Check/uncheck the box to enable/disable the Enable DMZ device’s DMZ Host function.
- Page 51 III-5-5. DDNS Dynamic DNS (DDNS) is a service which provides a hostname-to-IP service for dynamic IP users. The changing nature of dynamic IPs means that it can be difficult to access a service provided by a dynamic IP user; a DDNS service though can map such dynamic IP addresses to a fixed hostname, for easier access.
- Page 52 Click the button to enable or disable the DDNS DDNS Service service. Select one from the drop-down list and click Service provider “Sign up” for registration. Enter the username that you use to register Username from the DDNS provider. Enter the password that you use to register Password from the DDNS provider.
- Page 53 III-5-6. Remote Management This section is to allow the network administrator to manage the router remotely. If you want to access the router remotely, please select “Enable”. Port The management port to be open to outside access. Management Check “Enable” to enable the remote access feature and then enter the appropriate values.
- Page 54 Remote Web Management Application Example: To access your router (WAN IP address: 172.16.87.160) at your home from the PC (210.16.87.154) at your office via the port number 6060. Set Steps: Management “Enable”. Enter the Port: 6060. Click “Save” to save your settings. In the PC 210.16.87.154 Type “http:// 172.16.87.160:6060”...
- Page 55 III-5-8. Static Routing Static routing is a method of configuring path selection of routers, characterized by the absence of communication between routers regarding the current topology of the network. The opposite of static routing is dynamic routing, sometimes also referred to as adaptive routing. You can configure static routing and manually add 5 routes to the routing table on this page.
- Page 56 Minimum or maximum bandwidth can be guaranteed for a specified application. Here you can configure 10 groups of “Bandwidth Control”. QoS can improve the BR-6476AC performance. QoS is recommended to optimize performance for online gaming.
- Page 57 III-6-1. Bandwidth Control Bandwidth control is used to limit communication speed in the LAN. Up to 20 entries can be supported with the capability for at most 254 PCs' speed control. Check the Enable box to enable the Bandwidth Enable Control feature.
- Page 58 Enable/Disable the filtering rules Filering Settings Enter a name for rule for reference/identification. Policy Name Up to 10 filter rules can be configured Access Policy Enter the start and End IP address IP Range Enter the URL or keyword to be blocked. URL String Specify the blocking time, it is expressed in 24 Time...
- Page 59 III-6-3. Client Filter Enable/Disable the filtering rules Filering Settings Enter a name for rule for reference/identification. Policy Name Up to 10 filter rules can be configured Policy Number Enter the start and End IP address IP Range Enter the port range to be blocked. Port Specify the blocking time, it is expressed in 24 Time...
- Page 60 Click “Tools” enter the configure page ,here you can set “Time Settings”, “Diagnostic Tool”, “Backup/Restore”, “Factory Default”, “Firmware Upgrade”, “Restart”, “Password”, “System Log”. III-7-1. Time Settings This function is to select the time zone for your location. Click “Tools”. Select “Time Settings”.
- Page 61 III-7-2. Backup/Restore Click “Tools”,select “Back/Restore”. Choose “Backup” to keep parameters. Click “Browse” to add an file, then click “Save” to save the settings. Click this button to back up the router's Backup configurations. Click this button to restore the router's Restore configurations.
- Page 62 III-7-3. Factory Default Click “Tools”,select “Factory Default”. Reset all configurations to the default values. It Restore means the device will lose all the settings you have set. So please note down the related settings if necessary. Default Password: 1234 ...
- Page 63 III-7-4. Firmware Upgrade The upgrade page allows you to upgrade the system firmware to a more recent version. You can download the latest firmware from the Edimax website. After the upgrade, the system will restart. Click “Tools”, Select “Firmware Upgrade”, click “Browse” and select the upgrade file.
- Page 64 III-7-6. Password You can change the password used to login to the browser-based configuration interface here. It is advised to do so for security purposes. Please make a note of the new password. In the event that you forget the password and are unable to login to the browser based configuration interface, see II-5.
- Page 65 III-7-7. System Log You can view the system log and security log. Use the page number key in the bottom left corner to select which page to view. Click “Tools”, Select “System Log”. Click “Refresh” to update the information Or click “Clear” to clear the screen. Clear Click “Clear”...
- Page 66 III-7-8. Anti Dos Attack Denial-of-Service (DoS) is a common form of malicious attack against a nextwork. The router’s firewall can protect against such attacks If you are not familiar with these functions, it is recommended you keep the defualt settings.
-
Page 67: Appendix
IP address. Static IP users can also temporarily modify your computer’s IP address to be in the same IP address subnet e.g. 192.168.2.x (x = 3 – 254) as the BR-6476AC in order to access http://192.168.2.1. -
Page 68: Iv-1-1. How To Check That Your Computer Uses A Dynamic Ip Address
IV-1-1. How to check that your computer uses a dynamic IP address Please follow the instructions appropriate for your operating system. IV-1-1-1. Windows 7 Click the “Start” button (it should be located in the lower-left corner of your computer), then click “Control Panel”. Click “Network and Internet”. - Page 69 Then click “Network and Sharing Center”. Click “Change adapter settings”.
- Page 70 Click “Local Area Connection” and select “Properties”. Select “Internet Protocol Version 4 (TCP/IPv4) and then click “Properties”.
- Page 71 “Obtain an IP address automatically” and “Obtain DNS server address automatically” should be selected. Click “OK” on the “Local Area Connection Properties” window to save your settings.
-
Page 72: Iv-1-1-2. Windows 8
IV-1-1-2. Windows 8 From the Windows 8 Start screen, you need to switch to desktop mode. Move your curser to the bottom left of the screen and click. In desktop mode, click the File Explorer icon in the bottom left of the screen, as shown below. - Page 73 Right click “Network” and then select “Properties”. In the window that opens, select “Change adapter settings” from the left side.
- Page 74 Choose your connection and right click, then select “Properties”. Select “Internet Protocol Version 4 (TCP/IPv4) and then click “Properties”.
- Page 75 Select “Obtain an IP address automatically” and “Obtain DNS server address automatically” should be selected.
-
Page 76: Iv-1-1-3. Windows 10
IV-1-1-3. Windows 10 From the Windows 10 Start screen, click on “Start” and select “Settings”. Choose “Network & Internet”, then select “Network sharing center, Click “Change adapter settings”. Choose “Ethernet”, click right mouse button and choose “Properties”. - Page 77 Right click the desired network connection and select “Properties”. Then Select the Internet Protocol Version 4 (TCP/IPv4) option. Click up “Properties”. Select “Obtain an IP address automatically” and “Obtain DNS server address automatically” should be selected.
-
Page 78: Iv-1-1-4. Mac Os
IV-1-1-4. Mac OS Have your Macintosh computer operate as usual, and click on “System Preferences”. In System Preferences, click on “Network”. Click on “Wi-Fi” in the left panel and then click “Advanced” in the lower right corner. - Page 79 Select “TCP/IP” from the top menu and “Using DHCP” in the drop down menu labeled “Configure IPv4” should be selected.
-
Page 80: Iv-1-2. How To Modify The Ip Address Of Your Computer
IV-1-2. How to modify the IP address of your computer Please follow the instructions appropriate for your operating system. In the following examples we use the IP address 192.168.2.10 though you can use any IP address in the range 192.168.2.x (x = 3 – 254) in order to access iQ Setup/browser based configuration interface. - Page 81 Under “Network and Internet” click “View network status and tasks”. Click “Local Area Connection”. Click “Properties”.
- Page 82 Select “Internet Protocol Version 4 (TCP/IPv4) and then click “Properties”. Select “Use the following IP address” and “Use the following DNS server addresses”, then input the following values: Your existing static IP address will be displayed in the “IP address” field before you replace it. Please make a note of this IP address, subnet mask, default gateway and DNS server addresses.
-
Page 83: Iv-1-2-2. Windows 8
IV-1-2-2. Windows 8 From the Windows 8 Start screen, you need to switch to desktop mode. Move your curser to the bottom left of the screen and click. In desktop mode, click the File Explorer icon in the bottom left of the screen, as shown below. - Page 84 Right click “Network” and then select “Properties”. In the window that opens, select “Change adapter settings” from the left side.
- Page 85 Choose your connection and right click, then select “Properties”. Select “Internet Protocol Version 4 (TCP/IPv4) and then click “Properties”.
- Page 86 Select “Use the following IP address” and “Use the following DNS server addresses”, then input the following values: Your existing static IP address will be displayed in the “IP address” field before you replace it. Please make a note of this IP address, subnet mask, default gateway and DNS server addresses.
-
Page 87: Iv-1-2-3. Windows 10
IV-1-2-3. Windows 10 From the Windows 10 Start screen, click on “Start” and select “Settings”. Choose “Network & Internet”, then select “Network sharing center, Click “Change adapter settings”. Choose “Ethernet”, click right mouse button and choose “Properties”. - Page 88 Right click the desired network connection and select “Properties”. Then Select the Internet Protocol Version 4 (TCP/IPv4) option. Click up “Properties”. Select “Use the following IP address” and “Use the following DNS server addresses”, then input the following values: Your existing static IP address will be displayed in the “IP address”...
-
Page 89: Iv-1-2-4. Mac
IV-1-2-4. Mac Have your Macintosh computer operate as usual, and click on “System Preferences” In System Preferences, click on “Network”. Click on “Wi-Fi” in the left panel and then click “Advanced” in the lower right corner. Select “TCP/IP” from the top menu and select “Manually” from the drop down menu labeled “Configure IPv4”, then click “OK”. - Page 90 Your existing static IP address will be displayed in the “IP address” field before you replace it. Please make a note of this IP address, subnet mask, default gateway and DNS server addresses. In the “IPv4 Address” and “Subnet Mask” field enter IP address 192.168.2.10 and subnet mask 255.255.255.0.
- Page 91 Click “Apply” to save the changes.
-
Page 92: Iv-1-3. How To Find Your Network Security Key
IV-1-3. How to Find Your Network Security Key To find your network security key, please follow the instructions appropriate for your operating system. If you are using Windows XP or earlier, please contact your ISP or router manufacturer to find your network security key. IV-1-3-1. - Page 93 Click on “Manage wireless networks” in the left menu. You should see the profile of your Wi-Fi network in the list. Right click on your Wi-Fi network and then click on “Properties”. Click on the “Security” tab, and then check the box labeled “Show characters”.
-
Page 94: Iv-1-3-2. Windows 10
IV-1-3-2. Windows 10 Click on “Start” button, select “Settings” and click on “Network and Internet”, “Status” then “Network and Sharing Center”. Now click on “Change adapter settings” on the left hand menu. You should see the profile of your Wi-Fi network in the list. Right click on your Wi-Fi network and then click on “Status”. - Page 95 The Wi-Fi Status window pop up and click on “Wireless Properties”. Click on the “Security” Tab in the pop-up window that appears and check the “Show characters” checkbox. This will show your network security key. Click the “Cancel” button to close the window.
-
Page 96: Iv-1-3-3. Mac
IV-1-3-3. Mac Open a new Finder window, and select “Applications” from the menu on the left side. Open the folder labeled “Utilities” and then opens the application “Keychain Access”. Select “Passwords” from the sub-menu labeled “Category” on the left side, as shown below. Then search the list in the main panel for the SSID of your network. - Page 97 Double click the SSID of your network and you will see the following window. Check the box labeled “Show password” and you will be asked to enter your administrative password, which you use to log into your Mac. Enter your password and click “Allow”.
-
Page 98: Iv-1-4. How To Find Your Router's Ip Address
Your network security password will now be displayed in the field next to the box labeled “Show password”. In the example below, the network security password is “edimax1234”. Please make a note of your network security password. IV-1-4. How to Find Your Router’s IP Address To find your router’s IP address, please follow the instructions appropriate for your operating system. - Page 99 A new window will open, type “ipconfig” and press Enter.
- Page 100 Your router’s IP address will be displayed next to “Default Gateway”.
-
Page 101: Iv-1-4-2. Windows 8
IV-1-4-2. Windows 8 From the Windows 8 Start screen, move your curser to the top right corner of the screen to display the Charms bar. Click “Search” and enter “cmd” into the search bar. Click the “Command Prompt” app which be displayed on the left side. - Page 102 A new window will open, type “ipconfig” and press Enter.
- Page 103 Your router’s IP address will be displayed next to “Default Gateway”.
-
Page 104: Iv-1-4-3. Window 10
IV-1-4-3. Window 10 Right click on “Start” button and select “Command Prompt”. On the Command Prompt window, enter “ipconfig” and press the Enter key. - Page 105 Your router’s IP address will be displayed next to “Default Gateway”.
-
Page 106: Iv-1-4-4. Mac
IV-1-4-4. Launch “System Preferences” and click on “Network”. If you are using an Ethernet cable to connect to your network, your router’s IP address will be displayed next to “Router”. If you are using Wi-Fi, click “Wi-Fi” in the left panel, and then “Advanced” in the bottom right corner. - Page 107 Click the “TCP/IP” tab and your router’s IP address will be displayed next to “Router”.
-
Page 108: Iv-2. Connecting To A Wi-Fi Network
) in the system tray and a window with available network connections will open. Search for the SSID of your BR-6476AC and then click “Connect”. If you set a password for your network, you will then be prompted to enter it. -
Page 109: Iv-3. Troubleshooting
IV-3. Troubleshooting If you are experiencing problems with your BR-6476AC, please check below before contacting your dealer of purchase for help. If you are experiencing problems immediately after a firmware upgrade, please contact your dealer of purchase for help. The System LED does not light up. - Page 110 My network is configured to use static IP addresses. How can I assign a static IP address to my BR-6476AC? If your ISP gives you a fixed or static IP address for Internet connection, you will need to gather the following information: a.
- Page 111 Windows 7 Step 1: Right-click the Network icon and select Properties. Step 2: Select Manage Wireless Networks. Step 3: Select the wireless network and click Remove network.
- Page 112 COPYRIGHT Copyright Edimax Technology Co., Ltd. all rights reserved. No part of this publication may be reproduced, transmitted, transcribed, stored in a retrieval system, or translated into any language or computer language, in any form or by any means, electronic, mechanical, magnetic, optical, chemical, manual or otherwise, without the prior written permission from Edimax Technology Co., Ltd.
- Page 113 5150-5240 19.09 dBm A simplified DoC shall be provided as follows: Article 10(9) Hereby, Edimax Technology Co., Ltd. declares that the radio equipment type 1200M wireless Router in compliance with Directive 2014/53/EU The full text of the EU declaration of conformity is available at the following internet address: http://www.edimax.com/edimax/global/...
- Page 114 EU Countries Intended for Use The ETSI version of this device is intended for home and office use in Austria, Belgium, Bulgaria, Cyprus, Czech, Denmark, Estonia, Finland, France, Germany, Greece, Hungary, Ireland, Italy, Latvia, Lithuania, Luxembourg, Malta, Netherlands, Poland, Portugal, Romania, Slovakia, Slovenia, Spain, Sweden, Turkey, and United Kingdom. The ETSI version of this device is also authorized for use in EFTA member states: Iceland, Liechtenstein, Norway, and Switzerland.
- Page 115 EU Declaration of Conformity English: This equipment is in compliance with the essential requirements and other relevant provisions of Directive 2014/53/EU, 2014/35/EU. Français: Cet équipement est conforme aux exigences essentielles et autres dispositions de la directive 2014/53/EU, 2014/35/EU. Čeština: Toto zařízení je v souladu se základními požadavky a ostatními příslušnými ustanoveními směrnic 2014/53/EU, 2014/35/EU.
- Page 116 Declaration of Conformity We, Edimax Technology Co., Ltd., declare under our sole responsibility, that the equipment described below complies with the requirements of the European Radio Equipment directives. Equipment: 1200M wireless router Model No.: BR-6476AC The following European standards for essential requirements have been followed:...
- Page 117 Notice According to GNU General Public License Version 2 This product includes software that is subject to the GNU General Public License version 2. The program is free software and distributed without any warranty of the author. We offer, valid for at least three years, to give you, for a charge no more than the costs of physically performing source distribution, a complete machine-readable copy of the corresponding source code.
- Page 118 intact all the notices that refer to this License and to the absence of any warranty; and give any other recipients of the Program a copy of this License along with the Program. You may charge a fee for the physical act of transferring a copy, and you may at your option offer warranty protection in exchange for a fee.
- Page 119 6. Each time you redistribute the Program (or any work based on the Program), the recipient automatically receives a license from the original licensor to copy, distribute or modify the Program subject to these terms and conditions. You may not impose any further restrictions on the recipients’...
Need help?
Do you have a question about the BR-6476AC and is the answer not in the manual?
Questions and answers