Edimax BR-6478AC User Manual
Ac1200 wireless concurrent dual-band gigabit router
Hide thumbs
Also See for BR-6478AC:
- User manual (145 pages) ,
- Quick installation manual (18 pages) ,
- Brochure & specs (3 pages)
Table of Contents
Advertisement
Quick Links
Download this manual
See also:
User Manual
Advertisement
Table of Contents

Related Manuals for Edimax BR-6478AC


Summary of Contents for Edimax BR-6478AC
-
Page 1: User Manual
BR-6478AC User Manual 02-2013 / v1.0... - Page 2 COPYRIGHT Copyright Edimax Technology Co., Ltd. all rights reserved. No part of this publication may be reproduced, transmitted, transcribed, stored in a retrieval system, or translated into any language or computer language, in any form or by any means, electronic, mechanical, magnetic, optical, chemical, manual or otherwise, without the prior written permission from Edimax Technology Co., Ltd.
-
Page 3: Table Of Contents
CONTENTS PRODUCT INFORMATION .................... 5 I-1. Package Contents ..................5 I-2. Hardware ....................6 I-3. LED Status ....................6 I-4. Safety Information ..................8 I-5. Features ...................... 8 II. HARDWARE INSTALLATION & NETWORK SETTINGS ........... 9 II-1. Hardware Installation.................. 9 II-2. - Page 4 IV-7-2. Access Control..................... 51 IV-8. QoS (Quality of Service) ................. 52 IV-8-1. QoS ......................52 IV-8-2. iQoS ......................55 IV-9. Advanced ....................... 56 IV-9-1. Static Routing ....................56 IV-9-2. Port Forwarding ..................57 IV-9-3. Virtual Server ....................57 IV-9-4. 2.4GHz Wireless ..................58 IV-9-5.
-
Page 5: Product Information
I. PRODUCT INFORMATION Thank you for purchasing an Edimax BR-6478AC AC1200 wireless concurrent dual-band gigabit router. I-1. Package Contents Before you start using this product, please check if there is anything missing in the package, and contact your dealer to claim the missing item(s):... -
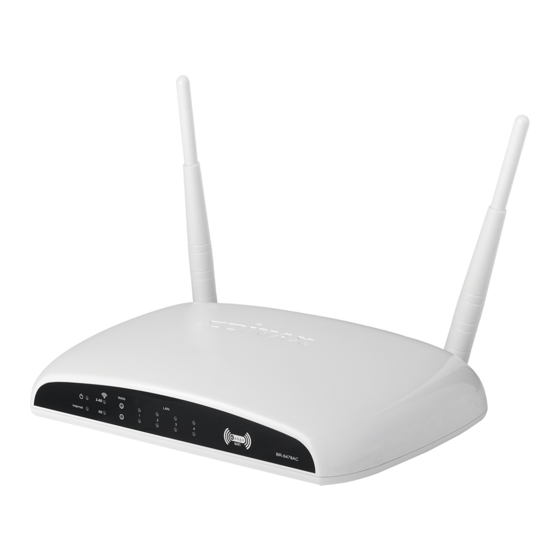
Page 6: Hardware
I-2. Hardware Item Name Description Antenna Connects the supplied 3dBi antennas. Radio ON/OFF Switch Switch the wireless signal on/off accordingly. Reset / WPS Button Resets the router to factory default settings (clears all settings) or starts the WPS function. Reset: Press and hold for 12 seconds to restore all settings to factory defaults. - Page 7 LED Status Description Power Router is on. Router is off. Internet connection is active. Flashing Router is connecting to internet. Internet No internet connection. 2.4GHz wireless is active. 2.4GHz LAN activity 2.4 GHz Flashing (transferring/receiving data). 2.4GHz wireless is not active. 5GHz wireless is active.
-
Page 8: Safety Information
I-4. Safety Information In order to ensure the safe operation of the device and its users, please read and act in accordance with the following safety instructions. 1. The router is designed for indoor use only; do not place the router outdoors. -
Page 9: Ii. Hardware Installation & Network Settings
Please setup your router, computer, modem and other network devices as shown below. Before using the BR-6478AC, please make sure your computer is set to use a dynamic IP address. This means your computer can obtain an IP address automatically from a DHCP server. Please refer to instructions appropriate for your operating system. - Page 10 2. Double click the “Network Connections” icon and the “Network Connections” window will appear. 3. Right click “Local Area Connection” on the mouse. When the “Local Area Connection Properties” window appears, click “Properties”.
- Page 11 4. Select “TCP/IP” and click “Properties”. 5. Select “Obtain an IP address automatically” and “Obtain DNS server...
- Page 12 address automatically”, then click “OK”.
-
Page 13: Ii-2-2. Windows Vista
II-2-2. Windows Vista 1. Click the “Start” button (it should be located in the lower-left corner of your computer), then click “Control Panel”. Click “View Network Status and Tasks”, then click “Manage Network Connections”. Right-click “Local Area Network”, then select “Properties”. The “Local Area Connection Properties” window will then appear, select “Internet Protocol Version 4 (TCP / IPv4)”, and then click “Properties”. -
Page 14: Ii-2-3. Windows 7
II-2-3. Windows 7 1. Click the “Start” button (it should be located in the lower-left corner of your computer), then click “Control Panel”. - Page 15 2. Under “Network and Internet” click “View network status and tasks”. 3. Click “Local Area Connection”.
- Page 16 4. Click “Properties”. 5. Select “Internet Protocol Version 4 (TCP/IPv6) and then click “Properties”.
-
Page 17: Ii-2-4. Windows 8
6. Select “Obtain an IP address automatically” and “Obtain DNS server address automatically”, then click “OK”. II-2-4. Windows 8 1. From the Windows 8 Start screen, you need to switch to desktop mode. Move your curser to the bottom left of the screen and click. - Page 18 2. In desktop mode, click the File Explorer icon in the bottom left of the screen, as shown below. 3. Right click “Network” and then select “Properties”.
- Page 19 4. In the window that opens, select “Change adapter settings” from the left side. 5. Choose your connection and right click, then select “Properties”.
- Page 20 6. Select “Internet Protocol Version 4 (TCP/IPv6) and then click “Properties”. 7. Select “Obtain an IP address automatically” and “Obtain DNS server address automatically”, then click “OK”.
-
Page 21: Iii. Setting Up
1. Use a Wi-Fi device (e.g. computer, tablet, smartphone) to search for a Wi-Fi network with the SSID “edimax.setup” and connect to it. 2. Open a web browser and if you do not automatically arrive at the “Get Started”... - Page 22 Note: If you cannot access http://edimax.setup , please make sure your computer is set to use a dynamic IP address. See II. NETWORK SETTINGS 3. Ensure that your router is properly connected to your modem as shown on the screen, and click “Next” to continue.
- Page 23 4. Please wait a moment while the BR-6478AC detects your WAN connection type. 5. The BR-6478AC will display the next screen depending on your WAN connection type. For Dynamic IP users please click “Next” to continue:...
- Page 24 For PPPoE users please enter the username and password provided by your ISP and click “Next” to continue: For other users please select your WAN connection type manually from the drop down menu, click “Next” to continue and follow the on-screen instructions.
- Page 25 6. Please enter a network name (SSID) and Wi-Fi Password for each of the BR-6478AC’s 2.4GHz and 5GHz Wi-Fi networks and click “Next” to continue. Note: Please remember these details. For your convenience, you can write them down at the end of this QIG in “Wi-Fi Settings”.
-
Page 26: Iii-2. Manual Setup Via Web Browser
8. You will see a final “Congratulations” screen and configuration is now complete. Please close your browser window. III-2. Manual Setup via Web Browser 1. Enter “192.168.2.1” in the web browser’s address bar and press “Enter”. 2. Input the username “admin” and the password “1234” and click “OK”.. - Page 27 3. Input the username “admin” and the password “1234” and click “OK”. You will arrive the at Status page, use the menu on the left side of the screen to navigate. You can also change the language using the drop down menu in the top right corner.
-
Page 28: Iv. Browser Based Configuration Interface
IV. BROWSER BASED CONFIGURATION INTERFACE Once you have setup the router as detailed in III-1. iQ Setup or the included QIG, you can further configure the settings of the router or run iQ Setup again using the browser based configuration interface. If you prefer, you can also skip iQ Setup and configure the router manually. -
Page 29: Iv-3. Internet
You will see the screen below. Please refer back to III-I iQ Setup onwards for guidance on iQ Setup. IV-3. Internet IV-3-1. WAN Setup Select a Wide Area Network (WAN) connection mode from the drop down menu. After you select your connection mode and complete the configuration, the router will restart for the changes to take effect. - Page 30 Dynamic IP Select “Dynamic IP” if your Internet Service Provider assigns an IP address to you automatically using DHCP (Dynamic Host Configuration Protocol) (e.g. cable internet providers). Static IP Select “Static IP” if your ISP provides you with a fixed IP address.
-
Page 31: Iv-3-1-1. Dynamic Ip
IV-3-1-1. Dynamic IP Host Name Input the host name of your computer (only required if your ISP instructs you to do so). MAC Address If your ISP only permits computers with certain MAC addresses to access the internet, input the MAC address of your computer here. -
Page 32: Iv-3-1-2. Static Ip
Most Dynamic IPs assigned to users by ISPs are configuration free IV-3-1-2. Static IP IP Address Input the static IP address assigned by your ISP. Subnet Mask Input the subnet mask assigned by your ISP. Default Gateway Address Input the default gateway address assigned by your ISP. -
Page 33: Iv-3-1-3. Pppoe
value of your network connection. The default value, which is typical for a dynamic IP or static IP, is 1500. Enable the “TTL” function if your ISP requires you to do so. IV-3-1-3. PPPoE User Name Enter the user name assigned by your ISP. Password Enter the password assigned by your ISP. -
Page 34: Iv-3-1-4. Pptp/L2Tp
DNS address Select “Obtain an IP address automatically” or “Use the following IP address”. If you choose “Use the following IP address”, you will need to complete the “DNS1 Address”, “DNS2 Address” and “DNS3 Address” fields below. DNS1 Input the address of DNS1 assigned by your ISP. DNS2 Input the address of DNS2 assigned by your ISP. - Page 35 Obtain an IP address automatically: Host Name Input the host name of your computer (only required if your ISP instructs you to do so). MAC Address If your ISP only permits computers with certain MAC...
- Page 36 addresses to access the internet, input the MAC address of your computer here. If your computer is connected to internet via cable modem, click “Clone Mac address” to enter the MAC address automatically. Use the following IP address: Static IP Address Input the static IP address assigned by your ISP.
-
Page 37: Iv-3-1-5. Wisp
“Continuous” – always connected. “Connect on Demand” – connect when required. “Manual” – connect and disconnect manually. Idle Time Out For ”Connect on Demand” connection type, specify the length of inactivity required to disconnect. BEZEQ-ISRAEL Check this box to enable use with the BEZEQ network in Israel. - Page 38 difficult to access a service provided by a dynamic IP user; a DDNS service though can map such dynamic IP addresses to a fixed hostname, for easier access. The router supports several DDNS service providers, for more details and to register for a DDNS account please visit the DDNS providers website(s), examples of which are listed below.
-
Page 39: Iv-4. Lan
IV-4. Here you can configure your Local Area Network (LAN). You can enable the router to dynamically allocate IP addresses to your LAN clients, and you can modify the IP address of the router. IP Address Specify an IP address here. This IP address will be assigned to your router and will replace the default IP address. -
Page 40: Iv-5. 2.4Ghz Wireless
a single active path between any two network nodes. DHCP Server Select “Enable” or “Disable” to enable/disable DCHP server accordingly. Lease Time Select a lease time for the DHCP leases here. The DHCP client will obtain a new IP address after the period expires. -
Page 41: Iv-5-1. Basic Settings
2.4GHz(b+g) Wireless Network name Specify a name for your router/wireless network for identification. The default ESSID is name “edimax.setup”. Broadcast ESSID Select “Enable” or Disable” to enable or disable ESSID broadcast accordingly. When enabled, the ESSID will be visible as an available Wi-Fi network. - Page 42 Channel Number Select a channel number or set to “Auto”. North America uses channels 1–11 and Europe uses channels 1–13. Wireless Clients Click the “Show List” button to show the list of all connected wireless clients. Click “Refresh” in the new window to refresh the list or click “Close”...
-
Page 43: Iv-5-1-1. Wireless Security
2432 2437 2442 2447 2452 2457 2462 2467 2472 Only 2484 802.11b IV-5-1-1. Wireless Security WPA Pre-shared key is the recommended and most secure encryption type. IV-5-1-1-1. WEP Key Length Select 64-bit or 128bit. Using 128-bit is more secure than 64-bit. Key Format Choose from ASCII or Hex. -
Page 44: Iv-5-1-1-3. Wpa Radius
wireless clients. Please make sure your wireless client supports your selection. WPA2 (AES) is recommended followed by WPA2 Mixed if your client does not support WPA2 (AES). Pre-shared key format Select the pre-shared key format from “Passphrase” (8 to 63 alphanumerical characters) or “Hex (64 characters 0 to 9 and a to f.) Pre-shared Key... -
Page 45: Iv-5-2. Guest Wireless Settings
Guest SSID” to enable this network, then enter the necessary information in the fields below. Wireless Guest Name Enter a name to identify the guest wireless network. The default value is “edimax.guest”. Wireless Clients Isolation Check the box to enable wireless clients isolation. Band This value is the same as for the main SSID and can not be modified. -
Page 46: Iv-5-3. Wps
WPS (Wi-Fi Protected Setup) provides an easy and secure way to establish the connection between BR-6478AC and wireless clients. Any WPS-compatible wireless clients can establish secure connection with BR-6478AC using simple push-button type configuration or Pin Code type configuration. We recommend you use WPA2 encryption with WPS. -
Page 47: Iv-5-5. Wireless Schedule
connect to the router, it will be denied. To enable this function, check the box labeled “Enable Access Control”. IV-5-5. Wireless Schedule Check the box “Enable Schedule Settings” to enable a wireless schedule. A wireless schedule enables you to automate the wireless network on or off at specified times. -
Page 48: Iv-6. 5Ghz Wireless
IV-6. 5GHz Wireless 2.5GHz and 5GHz are different frequency bands for your concurrent Wi-Fi networks. The configuration settings for 5GHz are the same as 2.4GHz - for more detailed guidance, please refer back to IV-5. 2.4G Wireless. When... - Page 49 selecting which wireless standard to use under “Band”, 5 GHz (A+N+AC) is recommended for best performance. Note: It is recommended to assign different SSIDs to your 2.4GHz & 5GHz Wi-Fi networks for identification purposes. The table below is intended as guidance if you wish to manually set a channel number for the 5GHz Wi-Fi network.
-
Page 50: Iv-7. Security
4960 4980 IV-7. Security The BR-6478AC’s security features provide two functions, “URL Blocking” and “Access Control”. “URL Blocking” allows Internet content to be blocked by URL or keyword, while “Access Control” enables you to specify which computer’s can or cannot access your network, identified by IP or MAC address. -
Page 51: Iv-7-2. Access Control
IV-7-2. Access Control Access Control is a security feature that can help to prevent unauthorized users from connecting to your wireless router. This function allows you to define a list of wireless devices permitted or not permitted to connect to the router, identified by their unique MAC address or IP address. -
Page 52: Iv-8. Qos (Quality Of Service)
Enable MAC Filtering Table: Choose “Deny” or “Allow” next to “Enable MAC Filtering”, to deny or allow a specific MAC address accordingly, then enter the required information. Enable IP Filtering Table: Choose “Deny” or “Allow” next to “Enable MAC Filtering”, to deny or allow a specific IP address accordingly, then enter the required information. - Page 53 Check the “Enable QoS” box to enable this function and then enter the desired values. Total Download Bandwidth Set the limit of total download bandwidth in kbits. To disable download bandwidth limitation, input “0” here. Total Upload Bandwidth Set the limit of total upload bandwidth in kbits.
- Page 54 Rule Name Input a unique name for this QoS rule for reference. Bandwidth Download/upload bandwidth (guarantee or maximum). Local IP Address Set the IP address range that will be affected by this QoS rule. If only one IP address is involved, input the IP address in the left field only.
-
Page 55: Iv-8-2. Iqos
IV-8-2. iQoS iQoS is a more intuitive and automated tool to manage internet bandwidth than manually configuring the settings using QoS. For online gamers, or users with bandwidth requirements for audio/video, iQoS is useful and effective function. iQoS cannot be used in conjunction with QoS and vice-versa. When one is enabled, the other is automatically disabled. -
Page 56: Iv-9. Advanced
Internet P2P/ BT Multimedia Online Browsing Download Transmission Gaming The priority table (large icons) is ordered from left to right, high to low priority. Double click a large icon to remove it from the priority table, and the other large icons will move left. Double click a small icon to insert the icon to the highest priority vacancy in the table. -
Page 57: Iv-9-2. Port Forwarding
IV-9-2. Port Forwarding This function allows you to redirect a single port or consecutive ports of an internet IP address to the same port of a local IP address. The port number(s) of the internet IP address and local IP address must be the same. If the port number of the internet IP address and local IP address is different, please use the “Virtual Server”... -
Page 58: Iv-9-4. 2.4Ghz Wireless
Private IP Specify the IP address of the computer on your local network. Computer Name Select the name of a Windows computer from the drop-down menu and click to auto-input its IP address in the “Private IP” field. Private Port Specify the private port you wish to use on the computer in your local network. - Page 59 Fragment Set the Fragment threshold of the wireless radio. Threshold (Default: 2346) RTS Threshold Set the RTS threshold of the wireless radio. (Default: 2347) Beacon Interval Set the beacon interval of the wireless radio. (Default: 100ms) DTIM Period Set the DTIM period of wireless radio. (Default: 3) Data Rate Set the wireless data transfer rate.
-
Page 60: Iv-9-5. 5Ghz Wireless
IV-9-5. 5GHz Wireless These settings are for experienced users only. Please do not change any of the values on this page unless you are already familiar with these functions. Please refer back to IV-9-4. 2.4GHz Wireless. IV-9-6. ALG Application Layer Gateway (ALG) is a network security gateway which supports specific network applications such as gaming and instant messaging. -
Page 61: Iv-9-7. Igmp
IV-9-7. IGMP IV-9-8. DMZ A Demilitarized Zone (DMZ) is an isolated area in your local network where private IP addresses are mapped to specified internet IP addresses, allowing unrestricted access to the private IP addresses but not to the wider local network. -
Page 62: Iv-9-9. Firewall
Public IP Address You can select ‘Dynamic IP’ or ‘Static IP’ here. If you select ‘Dynamic IP’, you have to select an Internet connection session from dropdown menu; if you select ‘Static IP’, please input the IP address that you want to map to a specific private IP address. -
Page 63: Iv-9-10. Upnp
Ping of Death Specify the frequency of ping of death packets which will trigger the router’s DoS protection function. Discard Ping from Check this box and the router will not answer ping requests from the internet. Port Scan Intruders use “port scanners” to detect open internet IP address ports. -
Page 64: Iv-10. Administration
IV-10. Administration IV-10-1. Time Zone Set Time Zone Select the time zone of your country or region. Time Server Address The travel router supports NTP (Network Time Protocol) for automatic time and date setup. Input the host name or IP address of the IP server manually. -
Page 65: Iv-10-3. Remote Access
Current Password Enter your current password. New Password Enter your new password. Confirmed Password Confirm your new password. IV-10-3. Remote Access Check “Enabled” to enable the remote access feature and then input the required values. Host IP Address Specify the IP address allowed remote access. Port Specify a port number (0–65535) used for remote access. -
Page 66: Iv-10-5. Upgrade
“Ok”. See below for more information. IV-10-5. Upgrade This page allows you to upgrade the firmware for the BR-6478AC. After the upgrade, the system will restart. IV-10-6. Restart In the event that the router malfunctions or is not responding, then it is... -
Page 67: Iv-10-7. Logs
IV-10-7. Logs Here you can view the system status/system log and security log. IV-10-8. Active DHCP Client Displays the DHCP Server assigned IP address, MAC address and time for each computer or device on the local network. -
Page 68: Iv-10-9. Statistics
IV-10-9. Statistics Displays sent and received packet network statistics. -
Page 69: Troubleshooting
2 minutes and try again. b. Make sure you are using the full, correct URL: http://edimax.setup c. If you are using a MAC or IP address filter, try to connect the router using a different computer. -
Page 70: Vi. Glossary
c. Change channel number. The router is a. It is normal for the router to heat up during extremely hot. frequent use. If you can safely place your hand on the router, the temperature of the device is at a normal level. - Page 71 your home network is the location of the DNS server your ISP has assigned to you. DSL Modem: DSL stands for Digital Subscriber Line. A DSL modem uses your existing phone lines to transmit data at high speeds. Ethernet: A standard for computer networks. Ethernet networks are connected by special cables and hubs, and move data around at up to 10/100 million bits per second (Mbps).
- Page 72 ISP: Internet Service Provider. An ISP is a business that provides connectivity to the Internet for individuals and other businesses or organizations. LAN: Local Area Network. A LAN is a group of computers and devices connected together in a relatively small area (such as a house or an office). Your home network is considered a LAN.
- Page 73 Access point: A access point is an intelligent network device that forwards packets between different networks based on network layer address information such as IP addresses. Subnet Mask: A subnet mask, which may be a part of the TCP/IP information provided by your ISP, is a set of four numbers (e.g.
Need help?
Do you have a question about the BR-6478AC and is the answer not in the manual?
Questions and answers