Table of Contents
Advertisement
Quick Links
Download this manual
See also:
User Manual
Advertisement
Chapters
Table of Contents

Related Manuals for Edimax BR-6424n


Summary of Contents for Edimax BR-6424n
- Page 1 www.edimax.com...
- Page 3 Copyright@ by Edimax Technology Co, LTD. all rights reserved. No part of this publication may be reproduced, transmitted, transcribed, stored in a retrieval system, or translated into any language or computer language, in any form or by any means, electronic, mechanical, magnetic, optical, chemical, manual or otherwise, without the prior written permission of this Company .
- Page 4 「低功率射頻電機」警告聲明 感謝您購買本公司訊舟科技(EDIMAX)所生產的低功率射頻電機,使用時請詳讀下列警語: 「經型式認證合格之低功率射頻電機,非經許可,公司、商號或使用者均不得擅自變更頻率、 加大功率或變更原設計之特性及功能」 。 「低功率射頻電機之使用不得影響飛航安全及干擾合法通信;經發現有干擾現象時,應立即停 用,並改善至無干擾時方得繼續使用。前項合法通信,指依電信法規作業之無線電通信。低功 率射頻電機須忍受合法通信或工業、科學及醫療用電波輻射性電機設備之干擾」 。 FCC 警告聲明 本設備已通過測試並符合 FCC 規則第 15 部分有關數位裝置的規定。這些限制的主要目的是在 保護商業區中運作此種設備時,提供合理程度的保護,避免有害干擾。本設備會產生、使用並 放射射頻能源,若不按指示手冊安裝和使用,會對無線通訊造成有害干擾。在住宅區中運作本 設備亦可能造成有害干擾,在這種情況下,使用者會被要求採用以下一種或多種方法來改善干 擾的情形: 1. 調整接收天線的方向或移動其位置。 2. 將設備與接收天線的距離增加。 3. 諮詢經銷商或有經驗的無線電/電視技術員的協助。 FCC 聲明 這個設備遵照 FCC 規則第 15 節,操作程序受限於以下二個條件: (1) 這個設備不能導致有害的干擾。 (2) 這個設備必須可接受任一種干擾,包括可能導致非預期操作的干擾。 FCC 輻射暴露聲明: 本設備完全符合美國聯邦通訊委員會針對非控制環境所提出之輻射暴露限制。用戶必須遵照所...
- Page 5 本設備之設計已針對安裝和使用上的安全性施以最大重視。然而, 仍需對電擊和靜電的危險給 予特別留意。 歐洲地區 EU Countries Intended for Use 本機器的 ETSI 版本可以用於下列國家,澳洲、比利時、丹麥、芬蘭、法國、德國、希臘、愛 爾蘭、義大利、盧森堡、荷蘭、西班牙、葡萄牙、瑞典及聯合王國之家庭及一般辦公室內。並 已被下列國家授權准予使用冰島、列之敦斯敦、挪威、瑞士。請檢查您所使用的通道,歐洲標 準限定最大幅射功率為 100mW EIRP,範圍為 2.4GHz ~ 2.4835GHz 。 N2037 各地支援 (Local Support) 台灣地區 客服專線: 0800-200-115 ,E-mail客服信箱:service@edimax.com.tw 。 中国地区 客服专线: 400-676-5988 , 客服信箱:service@edimax.com.cn 。 Other http://www.edimax.com 。 本手冊所提及之其他公司商標及產品名稱為所屬相關公司所有。...
-
Page 6: Table Of Contents
目 錄 1. 產品介紹 ..................1 1.1.檢查產品型號.................1 1.2.包裝內容物 ................1 1.3.前置面板 ................1 1.4.後置面板 ................2 2. 自動安裝光碟................2 2.1.網際網路設定.................2 2.2.無線網路設定.................4... -
Page 7: 產品介紹
1. 產品介紹 1.1. 檢查產品型號 本安裝指南適用於 Wireless 802.11n 無線網路寬頻分享器 請檢查產品型號是否 符合描述。 1.2. 包裝內容物 Wireless 802.11n 無線網路寬頻分享器(含高功率天線) EZmax Setup Wizard 光碟片(內含詳細使用手冊) 安裝指南 電源供應器 網路線 直立底座 1.3. 前置面板 Wireless 802.11n 前置面板(範例) 燈號 描 述 亮 表示分享器電源與設備已經被啟用。 亮 無線網路已被啟用。 暗 無線網路尚未被啟用。 閃爍 無線網路埠有資料傳輸中。 啟動 WPS 模式。 恆亮... -
Page 8: 後置面板
1.4. 後置面板 ※ 後置面板(範例)採用 1WAN+4LAN 設計,請參考實際產品 名 稱 描 述 使用 12V DC 直流電源供應。 WPS: 按下該按鈕 5 秒內即可與無線網路卡進行配對,詳細設定 WPS / Reset 請參考各機種使用手冊。 (該按鍵有兩種功能) Reset: 按下該按鈕約 10 秒以上,可將寬頻分享器恢復到原廠設 定值,所有您對機器的設定將會全部消失。 1, 2, 3, 4 埠都可以用來連接您的個人電腦、印表機伺服 1 - 4 器、交換器等網路裝置,將您的網路裝置架構成一個區域 網路。 直接連線到您的 xDSL 或 Cable 數據機,讓您的電腦上網 連上... - Page 9 • 完成硬體安裝 • WAN 的連線模式...
-
Page 10: 無線網路設定
• WAN 的連線偵測 • 成功連線 Internet 2.2. 無線網路設定 無線網路設定請直接點選畫面最上面的圖形選項,依照步驟設定。 與『無線網路設定』相關的圖形選項是【ESSID】與【設定加密】 。... - Page 11 • ESSID:出廠設定是 default,若有更改,記得要按【儲存】鈕。 • 設定加密:Wizard CD 所提供的加密方式採用 WAP Pre-Share Key。 注意:更多的設定方法,請參考 CD 光碟內容中提供的使用手冊...
- Page 12 目 录 1. 產品介紹 ..................1 1.1.檢查產品型號.................1 1.2.包裝內容物 ................1 1.3.前置面板 ................1 1.4.後置面板 ................2 2. 自動安裝光碟................2 2.1.網際網路設定.................2 2.2.無線網路設定.................4...
- Page 13 3. 产品介绍 3.1. 检查产品型号 本安装指南适用于 Wireless 802.11n 无线网络宽带分享器 请检查产品型号是否 符合描述。 3.2. 包装内容物 Wireless 802.11n 无线网络宽带分享器(含高功率天线) EZmax Setup Wizard 光盘片(内含详细使用手册) 安装指南 电源供应器 网络线 直立底座 3.3. 前置面板 Wireless 802.11n 前置面板(范例) 灯号 描 述 亮 表示分享器电源与设备已经被启用。 亮 无线网络已被启用。 暗 无线网络尚未被启用。 闪烁 无线网络端口有数据传输中。 启动 WPS 模式。 恒亮...
- Page 14 3.4. 后置面板 ※ 後置面板(範例)採用 1WAN+4LAN 設計,請參考實際產品 名 称 描 述 使用 12V DC 直流电源供应。 WPS: 按下该按钮 5 秒内即可与无线网络卡进行配对,详细设定 WPS / Reset 请参考各机种使用手册。 (该按键有两种功能) Reset: 按下该按钮约 10 秒以上,可将宽带分享器恢复到原厂设 定值,所有您对机器的设定将会全部消失。 1, 2, 3, 4 埠都可以用来连接您的个人计算机、 打印机服务 1 - 4 器、交换器等网络装置,将您的网络装置架构成一个局域 网络。 直接联机到您的 xDSL 或 Cable 调制解调器, 让您的计算 机上网连上...
- Page 15 • 完成硬件安装 • WAN 的联机模式...
- Page 16 • WAN 的联机侦测 • 成功联机 Internet 4.2. 无线网络设定 无线网络设定请直接点选画面最上面的图形选项,依照步骤设定。 与『无线网络设定』相关的图形选项是【ESSID】与【设定加密】 。...
- Page 17 • ESSID:出厂设定是 default,若有更改,记得要按【储存】钮。 • 设定加密:Wizard CD 所提供的加密方式采用 WAP Pre-Share Key。 注意:更多的设定方法,请参考 CD 光盘内容中提供的使用手册...
- Page 19 Contents 1 Product Introduction ..............1 1-1 Package Contents..............2 1-2 Front Panel ................2 1-3 Back Panel ................3 2 Network Setup ................4 2.1 Router Configuration – PPPoE ..........7 2.2 Router Configuration - Cable Modem ........9 3 Advanced Setup ................10 3-1 Change management password .........10 3-2 Firmware Upgrade ..............
-
Page 21: Product Introduction
1 Product Introduction Thank you for purchasing Edimax broadband router! This high cost-efficiency router is the best choice for Small office / Home office users, all computers and network devices can share a single xDSL / cable modem internet connection at high speed. Easy install procedures allows any computer users to setup a network environment in very short time - within minutes, even inexperienced. -
Page 22: Package Contents
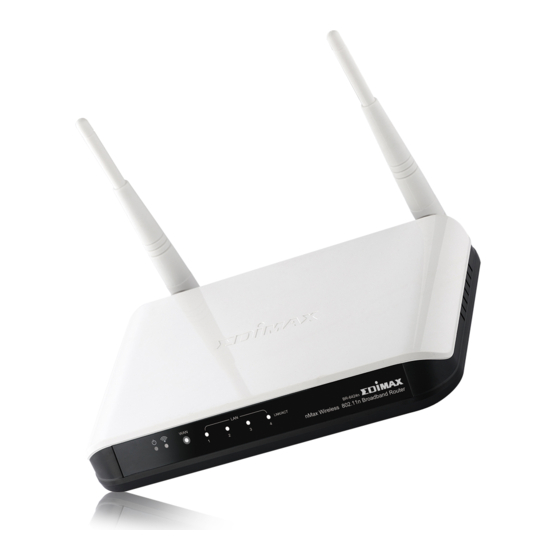
□ Quick installation guide (1 pcs) □ One CD-ROM □ 12V power adapter (1 pcs) □ Ethernet Cable □ 3dBi Antenna (2 pcs for BR-6424n V2 only ) □ Accessories and Holding Base 1-2 Front Panel BR-6225n BR-6424n V2 (WISP) -
Page 23: Back Panel
1-3 Back Panel BR-6424n V2(WISP) BR-6225n Item Name Description Power Power connector, connects to 12V power adapter ON/OFF Enable / Disable wireless signal You can not connect the router via wireless adapter, when you disable the wireless signal. Reset the router to factory default settings Reset / (clear all settings) or start WPS function. -
Page 24: Network Setup
Instructions for using the router to share the Internet with multiple PCs. (Power on the Modem and the Router.) Connect the Ethernet cable from the router’s WAN port to the LAN port of the modem. Connect another Ethernet cable from the any LAN ports (1~4) on router to the Ethernet socket on the PC. - Page 25 Click “Start” in the task bar then select the “Control Panel” . Click “Switch to Classic View” on the left top to see more setting icons. Find an icon “Network Connection” then Double-Click to open the network connection setting. You will see an icon “Local Area Connection”, select the icon then Right-Click the mouse to open the sub-menu and select the “Properties”.
- Page 26 Select the “Internet Protocol (TCP/IP)” then click the “Properties” Ensure the parameter marked in blue are checked in “Obtain an IP address automatically” and “Obtain DNS server address automatically” then press “OK” to close.
-
Page 27: Router Configuration - Pppoe
– – Enter the router’s default IP address: “192.168.2.1” into your PC’s web browser and press “enter”. The login screen below will appear. Enter the “User Name” and “Password” and click “OK” to login. The default User name is “admin” and the Password is “1234”, The main page will appear, click “Quick Setup”... - Page 28 Select “PPPoE xDSL”, the system will move into next step Enter the “User Name” and “Password” that ISP provided and leave the others. (The “Service Name” can be blank) and click “OK” to save the setting then reboot the router After reboot, your router is now ready for Internet connection.
-
Page 29: Router Configuration - Cable Modem
The following example is for U.K. Click on “Quick Setup”. Select ‘(GMT) Greenwich Mean Time : “London”. Click “Next” button. Select “Cable Modem”, the system will move into next step Enter ”Host Name” and “MAC Address”. (The “Host Name” can be blank) The MAC Address is provided by ISP (e.g. -
Page 30: Advanced Setup
3 Advanced Setup 3-1 Change management password Default password of this router is 1234, and it’s displayed on the login prompt when accessed from web browser. There’s a security risk if you don’t change the default password, since everyone can see it. To change password, please follow the following instructions: Please click ‘General Setup’... -
Page 31: Firmware Upgrade
Here are descriptions of every setup items: Current Password Please input current password here. New Password Please input new password here. Confirm Password Please input new password here again. When you finish, click ‘Apply’; If you want to keep original password unchanged, click ‘Cancel’. -
Page 32: Restart And Reset To Default Setting
firmware upgrade file. Please download the latest firmware file from our website, and use it to upgrade your router. After a firmware upgrade file is selected, click ‘Apply’ button, and the router will start firmware upgrade procedure automatically. The procedure may take several minutes, please be patient. -
Page 33: Wireless Setup
Please click ‘Apply’ to reset your router, and it will be available again after few minutes, please be patient. 3-4 Wireless Setup Please click ‘General Setup’ \ ‘Wireless’ SSID is the name of the wireless router. You may change your SSID to a meaningful name so that you can identify your wireless router from others. - Page 34 It’s very important to set wireless security settings properly! If you don’t, hackers and malicious users can reach your network and valuable data without your consent and this will cause serious security problem. It’s recommended to use WPA to protect your wireless router from hackers. Select ‘Security Settings’...
- Page 36 EDIMAX Technology Co., Ltd. www.edimax.com...
Need help?
Do you have a question about the BR-6424n and is the answer not in the manual?
Questions and answers