Table of Contents

Related Manuals for E-Mon D-Mon


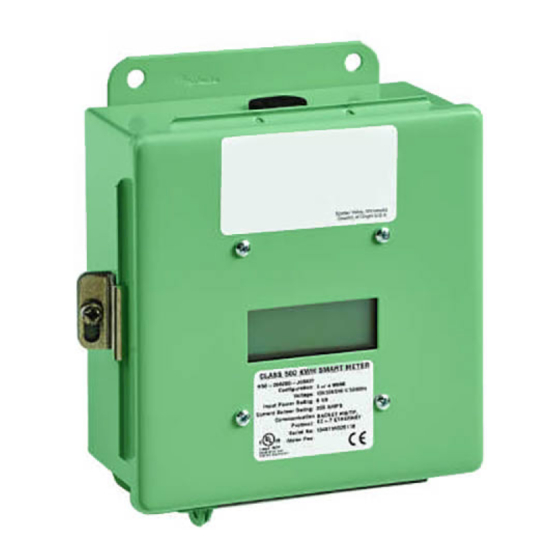
Summary of Contents for E-Mon D-Mon
- Page 1 99 Washington Street Melrose, MA 02176 Phone 781-665-1400 Toll Free 1-800-517-8431 Visit us at www.TestEquipmentDepot.com ® Energy Monitoring Products ® E-Mon D-Mon Installation Manual Green Class KWH/Demand Meter with Net Metering Capabilities...
- Page 2 Before installing your new E-Mon product, please read the information on the following pages carefully. We believe that you will fi nd the E-Mon D-Mon meters easy to install and to use for monitoring and evaluating your electrical usage.
-
Page 3: Table Of Contents
Main power & sensor wiring diagrams Section 5.5 Line voltage/current sensor diagnostics Section 5.6 RS-485 wiring Section 5.7 Modem wiring Section 6.0 Confi guring the meter using E-Mon Energy™ Section 7.0 Preventative/scheduled maintenance Section 8.0 Lithium battery replacement Section 9.0 Display screens Section 10.0 Stored data Section 11.0... -
Page 4: Introduction
CO2 and CO2 load, the Green Class Net Meter records 15 minute interval data that can be used by the E-Mon Energy automatic meter reading system to provide graphing and charts that detail energy usage and fl ow. - Page 5 1.0 Introduction (Continued) The E-Mon D-Mon Green Class Net Meter is a 3-element meter with communi- cations. The device is used to monitor electric power usage of individual loads after the utility meter and store kW and delivered kVAR data for automatic meter reading.
- Page 6 Introduction (continued) Internal Electronic Assemblies The unit is comprised of two or three major subassembly boards; main power board, optional modem board and display board. All three circuit cards are mounted inside either a NEMA 12/13 or NEMA 4X enclosure. NOTE: Units supplied in a NEMA 12/13 metal enclosure are suitable for indoor applications only.
-
Page 7: Meter Technical Specifi Cations
Meter Technical Specifi cations Ordering Information: Defi ne input voltage, current sensor rating, application GN 208 200 R Green Net Meter Input Voltage Current Sensor Rating Application (R=Outdoor, blank=indoor) Input Voltage Confi guration: 3-Wire (Delta) or 4-Wire (Wye) MAINS Voltage Input: Up to 480 VAC RMS Available Input Power: 6VA Maximum Rating... - Page 8 Meter Technical Specifi cations (continued) Standard Ranges: 4-Wire, Wye 120/208 VAC: 100, 200, 400, 800, 1600, 3200 Amp 4-Wire, Wye 277/480 VAC: 100, 200, 400, 800, 1600, 3200 Amp 3-Wire, Delta 220/240 VAC: 100, 200, 400, 800, 1600, 3200 Amp 3-Wire, Delta 480 VAC: 100, 200, 400, 800, 1600, 3200 Amp...
-
Page 9: Safety Label Defi Nitions
3.0 Safety Label Defi nitions and Information The E-Mon D-Mon® Green Class Net Meter may contain one or more of the follow- ing labels. Operator(s) should familiarize themselves with the meaning of each label to minimize risk. The presence of-this label is a cautionary indicator identifying a danger risk. The manual should be consulted prior to proceeding. -
Page 10: Precautionary And Safety Information
Warning: Failure to ground the enclosure creates a possible shock hazard. Do not operate the E-Mon D-Mon® Green Class Net Meter without a protective earth wire attached securely to the PE terminal screw. After installing Protective Earth wiring, secure the screw tightly (10 N-m Torque). -
Page 11: Meter Installation
5.0 Meter Installation Mounting the E-Mon Green Class Net Meter STEP 1: Using the appropriate sized mounting hardware, fasten the enclosure to the selected mounting surface. The four housing mounting holes are centered 6.75” H x 4” W. The mounting hole spacing is idential for either the NEMA 4X or NEMA 12/13 enclosures. - Page 12 STEP 3: Wire Entry (continued) Indoor application units are installed in the metallic NEMA 12/13 enclosures. The same principals outlined for the outdoor meter installation as defi ned in the aforementioned paragraph carry over and apply to indoor installations with one exception. This one exception is the conduit and fi...
- Page 13 STEP 6: Once the MAINS wiring is complete, close the enclosure front panel and secure the panel to the enclosure using the locking mechanism. Activate the external circuit breaker or equivalent switch to apply AC MAINS power to the unit. The Green Class Net Meter’s display should turn on and begin cycling through its multiple screens.
-
Page 14: Current Sensor Installation And Wiring
Current Sensor Installation and Wiring Once the AC voltages have been confi rmed to be within acceptable limits, you are ready to install the current sensors. The main power board contains three header connectors located at the bottom center of the board, TB2, TB3 and TB4. - Page 15 Once all the current sensors are installed onto their appropriate phase conductors, you can begin terminating the current sensors onto the E-Mon D-Mon® Green Class Net Meter Main Board. The current sensor leads can be extended up to 500 feet for remote monitoring applications.
-
Page 16: Main Power & Sensor Wiring Diagrams
5.4 MAINS Line Voltage and Current Sensor Wiring Diagrams Single Phase, 3-Wire Installation Diagram ∅A ∅B ∅ C ∅A ∅B ∅ C N Line Voltage Connections: # 14-22 AWG Sensor Connections: B = Black Lead W = White Lead * 1/10 A, 600 VAC inline fuse per conductor. Littlefuse part number KLDR 100. -
Page 17: Line Voltage/Current Sensor Diagnostics
An open circuit could exist at the plug terminals or at a splic- ing junction. Also verify a tight connection exists between the core halves. If the error is still appearing, contact E-Mon’s technical support department at (800) 334-3666 (PA) or (800) 810-3666 (CA) for futher assistance. -
Page 18: Rs-485 Wiring
Class 3000/E-Mon IDR to the telephone line to complete the installation. b. Option 2: Local Computer - If adding the Class 3000 or E-Mon IDR is not an option, a locally residing computer can communicate with the RS-485 network. -
Page 19: Modem Wiring
Class 3000/E-Mon IDR to the telephone line to complete the installation. B. Option 2: Local Computer - If adding the Class 3000 or E-Mon IDR is not an option, a locally residing computer can communicate with the RS-485 network. -
Page 20: Confi Guring The Meter Using E-Mon Energy
Confi guring the Green Class Net Meter using E-Mon Energy Software E-Mon Energy is a product of E-Mon, LLC. This software operates on a com- puter running Windows 2000, XP or Vista and is used to interface with a number of E-Mon products, including the Green Class Net Meter. -
Page 21: Lithium Battery Replacement
8.0 Lithium Battery Replacement Instructions The E-Mon D-Mon® Green Class Net Meter has a Lithium Battery Cell, which is used to retain the contents of SRAM and the RTC during power outages. The bat- tery has a life expectancy greater than 8 years. - Page 22 8.0 Lithium Battery Replacement Instructions (Continued) Step 1 : Disconnect power from the E-Mon D-Mon® Green Class Net Meter at the unit external circuit breaker. Step 2 : Remove the battery from its socket and place on a non-conductive surface.
-
Page 23: Display Screens
Display Screens The Green Class Net Meter cycles through eight (8) separate display screens. These screens are described in further detail below. Screen 1 - kWh Delivered This screen displays the amount of energy (kWh) delivered from the serving utility/energy provider. Screen 2 - kWh Received This screen displays the amount of energy (kWh) received by the serving... -
Page 24: Stored Data
The Green Class Net Meter stores up to 36 days of interval data in 15-minute segments. There are three (3) channels of data that can be accessed through E-Mon Energy, E-Mon’s automatic meter reading software. This data can then be utilized for billing and/or load analysis and graphics. -
Page 25: Frequently Asked Questions
I’ve gone through the troubleshooting guides and I still can’t get my meter to work, what should I do? Before removing the unit, contact E-Mon’s technical department at (800) 334-3666 (PA) or (800) 810-3666 (CA). E-Mon’s technical support team will assist you in detailed troubleshooting of the meter installation and assist you in getting the unit running without having to remove and return the unit. -
Page 26: Meter Limited Warranty
E-Mon must be notifi ed of the defect within ninety (90) days after the defect becomes apparent or known. Buyer’s remedies shall be limited to repair or replacement of the product or compo- nent which failed to conform to E-mon’s express warranty set forth above.
Need help?
Do you have a question about the D-Mon and is the answer not in the manual?
Questions and answers
display shows 3- 47 dash is up high--customer thinks unit is bad. I need explanation of display