Hamwells Blue 12 Installation Manual
Hide thumbs
Also See for Blue 12:
- Installation manual (30 pages) ,
- Calibration manual (4 pages) ,
- Installation manual (8 pages)

Related Manuals for Hamwells Blue 12


Summary of Contents for Hamwells Blue 12
- Page 1 Hamwells logo staand Blue Hamwells productlogo Installatiehandleiding Blue 12, 16, 21 & Blue HE Installation manual Blue 12, 16, 21 & Blue HE Hamwells logo liggend NL_EN V4.2...
- Page 2 Hamwells logo liggend Hamwells productlogo Hamwells Dark Gray PANTONE Black 7C #333333 Hamwells logo liggend © 2021 Hamwells Nederland B.V. Pelgrimsstraat 3, 3029 BH Rotterdam Nederland, The Netherlands T +31 (0)85 - 303 64 96 ells Dark Gray NE Black 7C E info@hamwells.com...
- Page 3 Hamwells Nederland B.V. Hamwells logo liggend van Hamwells Nederland B.V. De inhoud van dit document The contents of this document are subject to change without kan zonder voorafgaande kennisgeving worden gewijzigd.
- Page 4 Hamwells logo staand Hamwells productlogo Deze installatiehandleiding verwijst naar de Blue / Blue HE. In this installation manual you will find the assembly instructions Hierin vindt u overzichtelijk alle stappen die u moet doorlopen with all the information for correctly installing the Blue / Blue HE.
- Page 5 Hamwells logo staand Symbolen Symbols Hamwells productlogo In deze installatiehandleiding worden, om de aandacht te The following safety symbols are used in this manual. vestigen op bepaalde onderwerpen of acties, de volgende markeerconventies gebruikt. Hamwells logo liggend Hamwells Dark Gray...
- Page 6 Hamwells logo staand Blue 12 Blue 16 Hamwells productlogo Afmetingen verpakking Afmetingen verpakking Package dimensions Package dimensions Hamwells logo liggend 120 x 40 x 25 cm 220 x 40 x 25 cm of / or 220 x 40 x 25 cm...
- Page 7 Hamwells logo staand Blue 21 Blue HE Hamwells productlogo Afmetingen verpakking Afmetingen verpakking Package dimensions Package dimensions Hamwells logo liggend 220 x 40 x 25 cm 220 x 40 x 25 cm Hamwells Dark Gray PANTONE Black 7C #333333 Gewicht / Weight...
- Page 8 Hamwells logo staand 32 cm Blue 12 38 cm 15 cm Afvoeraansluiting / Hamwells productlogo drain connection 7 cm Hamwells logo liggend Hamwells Dark Gray PANTONE Black 7C Onderaanzicht #333333 Bottom view 38 cm Afwerkvloer / finishing floor 35 cm...
- Page 9 Hamwells logo staand 32 cm Blue 16 38 cm 15 cm Afvoeraansluiting / Hamwells productlogo drain connection 7 cm Hamwells logo liggend Hamwells Dark Gray PANTONE Black 7C Onderaanzicht #333333 Bottom view 38 cm Afwerkvloer / finishing floor 35 cm...
- Page 10 Hamwells logo staand 32 cm 15 cm Blue 21 Hamwells productlogo Afvoeraansluiting / drain connection 7 cm Hamwells logo liggend Hamwells Dark Gray PANTONE Black 7C #333333 Onderaanzicht Bottom view 38 cm Afwerkvloer / finishing floor 35 cm Vooraanzicht Achteraanzicht...
- Page 11 Hamwells logo staand 32 cm 15 cm Blue HE Hamwells productlogo Afvoeraansluiting / drain connection 7 cm Hamwells logo liggend Hamwells Dark Gray PANTONE Black 7C #333333 Onderaanzicht Bottom view 38 cm Afwerkvloer / finishing floor 35 cm Vooraanzicht Achteraanzicht...
- Page 12 Hamwells logo staand Checklist onderdelen Blue/Blue HE Parts checklist Blue / Blue HE Hamwells productlogo De volgende onderdelen van worden compleet The following components are supplied complete. aangeleverd. Deze dienen per onderdeel te worden Each component is to be installed at the relevant location.
- Page 13 Hamwells logo staand Blue 12 Hamwells productlogo De voedingskabel is ± 3 meter lang en heeft geen stekker The power cord is approx. 3 meters Hamwells logo liggend long and has no connector attached. Hamwells Dark Gray PANTONE Black 7C...
- Page 14 Hamwells logo staand Blue 16 Hamwells productlogo De voedingskabel is ± 3 meter lang en heeft geen stekker The power cord is approx. 3 meters long and has no connector attached. Hamwells logo liggend Voeding Hamwells Dark Gray PANTONE Black 7C...
- Page 15 Hamwells logo staand Blue 21 Hamwells productlogo De voedingskabel is ± 3 meter lang en heeft geen stekker The power cord is approx. 3 meters long and has no connector attached. Hamwells logo liggend Voeding Hamwells Dark Gray PANTONE Black 7C...
- Page 16 Hamwells logo staand Blue HE Hamwells productlogo De voedingskabel is ± 3 meter lang en heeft geen stekker The power cord is approx. 3 meters long and has no connector attached. Hamwells logo liggend Voeding Hamwells Dark Gray Power supply...
- Page 17 Hamwells logo staand 1x afvoerkit 1x drain set 1x zakje met bouten en ringen Hamwells productlogo 1x bag with bolts and rings 1x slang (100 cm, 1x slang (150 cm, sifon naar de pomp) hoofddouchekop naar Hamwells logo liggend 1x waterhose (100 cm,...
- Page 18 Hamwells logo staand Hamwells productlogo Hamwells logo liggend 1x set bedieningsknoppen 1x sensorunit 1x set of control knobs Hamwells Dark Gray PANTONE Black 7C #333333 1x sensorunit 1x hoofddouche 1x handdouche 1x thermostaatkraan 1x main shower head 1x handshower 1x thermostatic mixing valve...
-
Page 19: Installatie Instructies
Hamwells logo staand INSTALLATIE INSTRUCTIES Hamwells productlogo Volg de volgende stappen voor het installeren van de Blue. De installatiestappen voor alle Blue versies zijn hetzelfde behalve de afmetingen waaronder de Warmte Terug Win (WTW) module en glasplaat. Installatiestappen specifiek voor de Blue Hamwells logo liggend HE worden extra aangegeven. -
Page 20: Installation Instructions
Hamwells logo staand INSTALLATION INSTRUCTIONS Hamwells productlogo Follow the following steps to install the Blue. The installation steps for the Blue HE are the same except for the dimensions of the Waste Water Heat Recovery (WWHR) module and front panel. Specific installation steps for the Blue HE are Hamwells logo liggend additionally indicated. - Page 21 Hamwells logo staand 1. Hang het inbouwframe tijdelijk met twee schroeven tegen de muur 1.Mount the frame temporarily with two screws on the wall Hamwells productlogo Hamwells logo liggend Hamwells Dark Gray PANTONE Black 7C #333333 Hang het inbouwframe op de 2 grote gaten.
- Page 22 Hamwells logo staand 2. Het inbouwframe waterpas stellen, Hamwells productlogo gaten aftekenen en daarna vastschroeven 2. Level the frame, mark the holes and fasten with screws Hamwells logo liggend Hamwells Dark Gray PANTONE Black 7C #333333 Het frame moet geheel verticaal en waterpas hangen.
- Page 23 Hamwells logo staand 3. Monteer het frame van de voorzetwand Hamwells productlogo 3. Mounting the wall frame Hamwells logo liggend Hamwells Dark Gray PANTONE Black 7C #333333 Er zijn verschillende mogelijkheden zoals metalstud of houten regelwerk. Frame en voorzetwand worden niet meegeleverd.
- Page 24 Hamwells logo staand 4. Sluit de waterleidingen aan Hamwells productlogo 4. Connecting the water supply Hamwells logo liggend De warm- en koudwateraansluitingen moeten aan de linker- of rechterzijkant van de kolom zitten ter hoogte van de pomp. Hamwells Dark Gray...
- Page 25 Hamwells logo staand 5. De afvoerset op de Hamwells productlogo WTW buizen monteren 5. Mount the drain set on the tubes Hamwells logo liggend Hamwells Dark Gray PANTONE Black 7C #333333 Blue HE Blue HE Installatiehandleiding Blue | Installation manual Blue | V4.2...
- Page 26 Hamwells logo staand 6. Zaag de afvoerpijp op maat en deze passend maken op eigen riolering Hamwells productlogo 6. Cut the drain pipe to size and make this suitable for your own sewage system Hamwells logo liggend Hamwells Dark Gray...
- Page 27 Hamwells logo staand 7. Plaats de sensorunit en sluit daarop een sifon (40 mm) aan 7. Place the sensorunit and connect a siphon (40 mm) Hamwells productlogo Hamwells logo liggend Zorg dat de overloop lager ligt dan het doucheputje Wij adviseren geen beton te storten rondom de sensorunit en sifon...
- Page 28 Hamwells logo staand Hamwells productlogo 8. Sluit de slang tussen de sifon en pomp aan 8. Connect the hose between the siphon and pump Hamwells logo liggend Hamwells Dark Gray PANTONE Black 7C #333333 Controleer dat de slang voorzien is van een rubberen pakking.
- Page 29 Hamwells logo staand 9. Afvoertest en kalibratie Hamwells productlogo 9. Waste water test and calibration Hamwells logo liggend Hamwells Dark Gray PANTONE Black 7C #333333 Door water in de sifon te gieten test je of alle afvoer onderdelen waterdicht zijn afgewerkt. Kalibratie gebeurt wanneer je de voeding inschakeld.
- Page 30 Hamwells logo staand Hamwells productlogo 10. Sluit de kabelboom aan 10. Connecting the wire harness Hamwells logo liggend Hamwells Dark Gray PANTONE Black 7C #333333 Sluit de hoofdvoeding pas aan nadat alles Connect the main power supply after is aangesloten! Wanneer u de Blue voor het...
- Page 31 Hamwells logo staand 11. Monteer muurplaten (niet meegeleverd) en sluit de waterslangen van de hand- en hoofddouchekop aan Hamwells productlogo 11. Mounting wall plates (not included) and connect the water hoses of the handshower and main showerhead Hamwells logo liggend...
- Page 32 Hamwells logo staand 12 (Blue-12). Gaten in de waterdichte wand Hamwells productlogo markeren en uitzagen. Dit voor de hand- en hoofd-douchekop aansluitingen en de Frame opening voor het voorpaneel 28 cm Hamwells logo liggend 12. Mark and cut holes in the waterproof wall for...
- Page 33 Hamwells logo staand 28 cm 12 (Blue 16, 21, HE). Gaten in de waterdichte Frame Hamwells productlogo wand markeren en uitzagen. Dit voor de hand- en hoofd-douchekop aansluitingen en de opening voor het voorpaneel Hamwells logo liggend 12. Mark and cut holes in the waterproof wall for...
- Page 34 Hamwells logo staand Hamwells productlogo 13. Plaats de waterdichte wand 13. Mount the waterproof wall Hamwells logo liggend Hamwells Dark Gray PANTONE Black 7C #333333 De waterdichte wand wordt niet meegeleverd. The waterproof wall is not included. Installatiehandleiding Blue | Installation manual Blue | V4.2...
- Page 35 Hamwells logo staand Hamwells productlogo 14. Betegel de wand 14. Tile the wall Hamwells logo liggend Hamwells Dark Gray PANTONE Black 7C #333333 Installatiehandleiding Blue | Installation manual Blue | V4.2...
- Page 36 Hamwells logo staand 15. Plaats het frame en kit de buitenrand Hamwells productlogo tussen tegels en het frame 15. Place the frame and seal the outer edge Hamwells logo liggend between tiles and the frame Hamwells Dark Gray PANTONE Black 7C #333333 Gebruik hybride kit.
- Page 37 Hamwells logo staand Hamwells productlogo 16. Plaats de thermostaatkraan met de 3 schroeven 16. Use the 3 screws to secure the thermostatic mixing valve Hamwells logo liggend Hamwells Dark Gray PANTONE Black 7C #333333 De temperatuur stop moet gekalibreerd worden op 38 °C.
- Page 38 Hamwells logo staand Uitgang van WTW buis naar koud Slang naar hoofddouche water ingang thermostaatkraan Hose to main shower Exit from heat recovery module hose to Hamwells productlogo 17. Sluit de waterslangen op de inlet cold water thermostatic mixing valve thermostaatkraan aan 17.
- Page 39 Hamwells logo staand Hamwells productlogo 18. Als alle slangen zijn aangesloten Hamwells logo liggend moet de klep op de WTW module Hamwells Dark Gray PANTONE Black 7C #333333 worden opengezet (hendel in het verlengde met de klep) 18. When all hoses are connected, the...
- Page 40 Hamwells logo staand 19. Plaats het glaspaneel Hamwells productlogo 19. Mount the glass panel Hamwells logo liggend Hamwells Dark Gray PANTONE Black 7C #333333 De glaspaneel wordt vastgezet met magneten. Gebruik een glaszuiger voor het plaatsen van de glaspaneel. Click! The glass panel is mounted with magnets.
- Page 41 Hamwells logo staand Hamwells productlogo 20. Monteer de bedieningsknoppen 20. Mount the control knobs Hamwells logo liggend Hamwells Dark Gray PANTONE Black 7C #333333 Installatiehandleiding Blue | Installation manual Blue | V4.2...
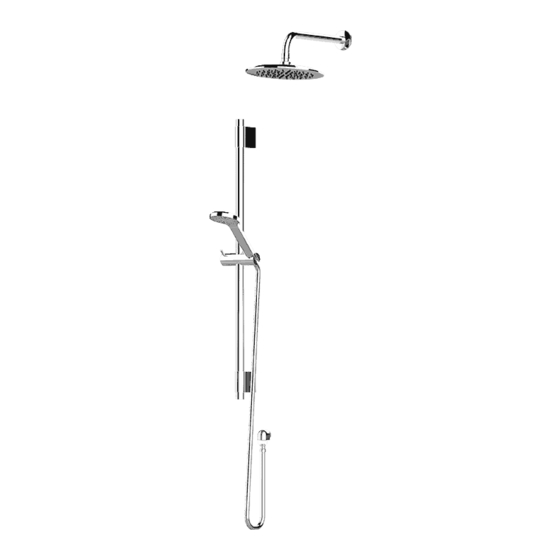
- Page 42 Hamwells logo staand Hamwells productlogo 21. Monteer de hoofddouche 21. Mount the main showerhead Hamwells logo liggend Hamwells Dark Gray PANTONE Black 7C #333333 Gebruik Teflon draad. Use Teflon thread. Installatiehandleiding Blue | Installation manual Blue | V4.2...
- Page 43 Hamwells logo staand 22. Monteer de handdouche Hamwells productlogo 22. Mount the handshower Hamwells logo liggend Hamwells Dark Gray PANTONE Black 7C #333333 Aansluitknie wordt niet meegeleverd. Elbow connection is not included. Installatiehandleiding Blue | Installation manual Blue | V4.2...
- Page 44 Hamwells logo staand 23. Controleer of de Blue (HE) naar behoren werkt (zie gebruikershandleiding) Hamwells productlogo 23. Check if the Blue (HE) works properly (see user manual) Hamwells logo liggend Hamwells Dark Gray PANTONE Black 7C #333333 Vul de sifon met ca. 2 liter water Fill the siphon with approx.
- Page 45 Hamwells logo staand Hamwells productlogo Hamwells logo liggend Wanneer u de Blue voor het eerst aanzet of wanneer The first time you switch on the Blue or when Hamwells Dark Gray PANTONE Black 7C #333333 de voeding opnieuw is aangesloten of ingeschakeld,...
-
Page 46: Maintenance
Hamwells logo staand Onderhoud Maintenance Hamwells productlogo Om de Blue in perfecte conditie te houden, is het raadzaam To keep the Blue in perfect condition, it is advisable to clean om de douche op regelmatige basis te reinigen. Dit hoofdstuk the shower on a regular basis. - Page 47 Hamwells Nederland B.V. Pelgrimsstraat 3, 3029 BH Rotterdam T +31 (0) 10 737 02 94 E info@hamwells.com, I www.hamwells.com Hamwells logo staand © 2021 Hamwells Nederland B.V. Alle rechten voorbehouden. All rights reserved. Hamwells productlogo Hamwells logo liggend White...
Need help?
Do you have a question about the Blue 12 and is the answer not in the manual?
Questions and answers