Table of Contents
Advertisement
Available languages
Available languages
Quick Links
Instruction Sheet
Important Safety Instructions
Indicates a hazardous situation which, if not avoided, could
result in death or serious injury.
a) SAVE THESE INSTRUCTIONS – To reduce the risks of fire or
explosion, electrical shock, and the injury to persons, read and
understand all instructions included in this manual. Be familiar
with the controls and the proper usage of the equipment.
b) WARNING - To reduce the risk of fire or
explosion:
1. Do not spray flammable or combustible materials
near an open flame, pilot lights or sources of ignition such as hot
objects, cigarettes, motors, electrical equipment and electrical
appliances. Avoid creating sparks from connecting and disconnecting
power cords.
2. Use extreme caution when using materials with a flashpoint below
70ºF (21ºC). Flashpoint is the temperature that a fluid can produce
enough vapors to ignite.
3. Paint or solvent flowing through the equipment is able to result in
static electricity. Static electricity creates a risk of fire or explosion in
the presence of paint or solvent fumes. All parts of the spray system,
including the pump, hose assembly, spray gun and objects in and
around the spray area shall be properly grounded to protect against
static discharge and sparks. Use only conductive or grounded high-
pressure airless paint sprayer hoses specified by the manufacturer.
4. Verify that all containers and collection systems are grounded to
prevent static discharge.
5. Connect to a grounded outlet and use grounded extension cords
(electric models only). Do not use a 3 to 2 adapter.
6. Do not use a paint or solvent containing halogenated hydrocarbons.
Such as chlorine, bleach mildewcide, methylene chloride and
trichloroethane. They are not compatible with aluminum. Contact the
coating supplier about compatibility of material with aluminum.
7. Keep spray area well ventilated. Keep a good supply of fresh air
moving through the area to keep the air within the spray area free
from accumulation of flammable vapors. Keep pump assembly in well
ventilated area. Do not spray pump assembly.
8. Do not smoke in the spray area.
9. Do not operate light switches, engines, or similar spark producing
products in the spray area.
10. Keep area clean and free of paint or solvent containers, rags, and
other flammable materials.
11. Know the contents of the paint and solvents being sprayed. Read
all Material Safety Data Sheets (MSDS) and container labels
provided with the paints and solvents. Follow the paint and solvent
manufacture's safety instructions.
12. Place pump at least 25 feet (7.62 meters) from the spray object in a
well ventilated area (add more hose if necessary). Flammable vapors
are often heavier than air. Floor area must be extremely well ventilated.
The pump contains arcing parts that emit sparks and can ignite vapors.
13. Plastic can cause static sparks. Never hang plastic to enclose spray
area. Do not use plastic drop cloths when spraying flammable
material.
14. Fire extinguisher equipment shall be present and working.
c)
WARNING - To reduce the risk of skin injection:
1. Do not aim the gun at, or spray any person or animal.
2. Keep hands and other body parts away from the discharge.
For example, do not try to stop leaks with any part of the body.
3. Always use the nozzle tip guard. Do not spray without the nozzle tip
guard in place.
4. Only use a nozzle tip specified by the manufacturer.
5. Use caution when cleaning and changing nozzle tips. In the case
where the nozzle tip clogs while spraying, ALWAYS lock gun trigger,
shut pump off, and release all pressure before servicing, cleaning tip
or guard, or changing tip. Pressure will not be released by turning off
the motor. The PRIME/SPRAY valve or pressure bleed valve must be
© Titan Tool Inc. All rights reserved.
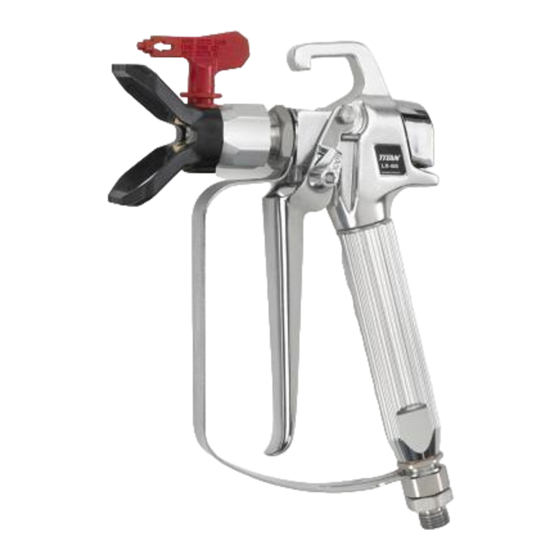
High Capacity Spray Gun
Form No. 0286751C
0811 •
LX-65
turned to their appropriate positions to relieve system pressure. Refer
to PRESSURE RELIEF PROCEDURE described in the pump manual.
6. Do not leave the unit energized or under pressure while unattended.
When the unit is not in use, turn off the unit and relieve the pressure in
accordance with the manufacturer's instructions.
7. High-pressure spray is able to inject toxins into the body and cause
serious bodily injury. In the event that injection occurs, seek medical
attention immediately.
8. Check hoses and parts for signs of damage, a leak can inject material
into the skin. Inspect hose before each use. Replace any damaged
hoses or parts.
9. This system is capable of producing 3600 PSI / 248 Bar. Only
use replacement parts or accessories that are specified by the
manufacturer and that are rated a minimum of 3600 PSI. This includes
spray tips, nozzle guards, guns, extensions, fittings, and hose.
10. Always engage the trigger lock when not spraying. Verify the trigger
lock is functioning properly.
11. Verify that all connections are secure before operating the unit.
12. Know how to stop the unit and bleed pressure quickly. Be thoroughly
familiar with the controls. Pressure will not be released by turning off
the motor. The PRIME/SPRAY valve or pressure bleed valve must be
turned to their appropriate positions to relieve system pressure. Refer
to PRESSURE RELIEF PROCEDURE described in the pump manual.
13. Always remove the spray tip before flushing or cleaning the system.
NOTE TO PHYSICIAN:
Injection into the skin is a traumatic injury. It is important to
treat the injury as soon as possible. DO NOT delay treatment
to research toxicity. Toxicity is a concern with some coatings
injected directly into the blood stream. Consultation with a plastic
surgeon or reconstructive hand surgeon may be advisable.
d)
WARNING - To reduce the risk of injury:
1. Always wear appropriate gloves, eye protection, clothing and a
respirator or mask when painting. Hazardous vapors – Paints,
solvents, insecticides, and other materials can be harmful if inhaled or
come in contact with body. Vapors can cause severe nausea, fainting
or poisoning.
2. Do not operate or spray near children. Keep children away from
equipment at all times.
3. Do not overreach or stand on an unstable support. Keep effective
footing and balance at all times.
4. Stay alert and watch what you are doing.
5. Do not operate the unit when fatigued or under the influence of drugs
or alcohol.
6. Do not kink or over-bend the hose. Airless hose can develop leaks
from wear, kinking and abuse. A leak can inject material into the skin.
7. Do not expose the hose to temperatures or pressures in excess of
those specified by manufacturer.
8. Do not use the hose as a strength member to pull or lift the equipment.
9. Use lowest possible pressure to flush equipment.
10. Follow all appropriate local, state and national codes governing
ventilation, fire prevention and operation.
11. The United States Government Safety Standards have been adopted
under the Occupational Safety and Health Act (OSHA). These
standards, particularly part 1910 of the General Standards and part
1926 of the Construction Standards should be consulted.
12. Before each use, check all hoses for cuts, leaks, abrasion or bulging
of cover. Check for damage or movement of couplings. Immediately
replace hose if any of those conditions exist. Never repair a paint hose.
Replace with a conductive high-pressure hose.
13. Do not spray outdoors on windy days.
14. Always unplug cord from outlet before working on equipment (electric
models only).
1
English
Advertisement
Table of Contents

Related Manuals for Titan LX-65


Summary of Contents for Titan LX-65
- Page 1 WARNING - To reduce the risk of skin injection: of cover. Check for damage or movement of couplings. Immediately 1. Do not aim the gun at, or spray any person or animal. replace hose if any of those conditions exist. Never repair a paint hose. Replace with a conductive high-pressure hose. 2. Keep hands and other body parts away from the discharge. For example, do not try to stop leaks with any part of the body. 13. Do not spray outdoors on windy days. 3. Always use the nozzle tip guard. Do not spray without the nozzle tip 14. Always unplug cord from outlet before working on equipment (electric guard in place. models only). 4. Only use a nozzle tip specified by the manufacturer. 5. Use caution when cleaning and changing nozzle tips. In the case where the nozzle tip clogs while spraying, ALWAYS lock gun trigger, shut pump off, and release all pressure before servicing, cleaning tip or guard, or changing tip. Pressure will not be released by turning off the motor. The PRIME/SPRAY valve or pressure bleed valve must be © Titan Tool Inc. All rights reserved. English Form No. 0286751C 0811 •...
-
Page 2: Operation
4. To clear a clogged tip: a. Rotate the tip 180º so that the arrow on the tip handle is pointing opposite the spray direction. b. Trigger the gun once so that the pressure can blow the clog out. IMPORTANT: Never pull the trigger more than once at time with the tip in the reverse position. c. Continue this procedure until the tip is clear of the clog. English © Titan Tool Inc. All rights reserved. -
Page 3: Maintenance
2. Loosen and remove the handle assembly from the gun head. 0296342 Handle ............1 0296343 Spring ............1 3. Pull the old filter out of the gun head. 0347706 Swivel ............1 4. Slide the new filter, tapered end first, into the gun head. 0296291 Trigger assembly, 2-finger gun ....1 5. Make sure the handle seal is in position and thread the handle 0279185 Collar assembly, 2-finger gun ....1 assembly into the gun head until secure. 6. Snap the trigger guard back onto the handle assembly. 0296345 Handle assembly (includes items 17–19) 0296294 Gun repair kit (includes items 5, 6, and 11) 0286747 Gun side label © Titan Tool Inc. All rights reserved. English... -
Page 4: Warranty
1-800-565-8665 Phone: 1-201-337-1240 Fax: 1-800-528-4826 Fax: 1-800-856-8496 Fax: 1-201-405-7449 1770 Fernbrook Lane 200 Trowers Road, Unit 7B 1770 Fernbrook Lane Minneapolis, MN 55447 Woodbridge, Ontario L4L 5Z8 Minneapolis, MN 55447 www.titantool.com English English © Titan Tool Inc. All rights reserved. - Page 5 AVERTISSEMENT – Pour réduire le risque de pénétration coupures, fuites, abrasion ou couvercle bombé. Vérifiez l’état ou le dans la peau : mouvement des accouplements. Changez immédiatement le tuyau si l’une de ces conditions est vérifiée. Ne réparez jamais un tuyau de peinture. 1. Ne dirigez pas le pistolet sur et ne pulvérisez pas les personnes Remplacez-le par un tuyau conducteur à haute pression. ou les animaux. 13. Ne pulvérisez pas à l’extérieur par temps venteux. 2. N’approchez pas les mains ni d’autres parties du corps de la sortie du 14. Débranchez toujours le cordon électrique de la prise avant de travailler sur produit. Par exemple, ne tentez pas d’arrêter une fuite avec une partie du l’équipement. corps. 3. Utilisez toujours le protège-embout de la buse. Ne pulvérisez pas sans que le protège-embout de la buse ne soit installé. 4. Utilisez exclusivement un embout de buse spécifié par le fabricant. © Titan Tool Inc. Tous droits réservés. Français...
-
Page 6: Montage
Appuyez une fois sur la détente afin que la pression puisse déboucher le pistolet. IMPORTANT : Ne jamais appuyer plus d’une fois sur la détente avec la buse dans la position renversée. c. Répétez ces étapes jusqu’à ce que la buse soit débloquée. Français © Titan Tool Inc. Tous droits réservés. -
Page 7: Entretien
Ressort ...............1 3. Retirez le vieux filtre du corps du pistolet. 19 0347706 Swivel ..............1 4. Remettez le nouveau filtre, l’extrémité amincie en premier, dans 20 0296291 Ensemble de détente, pistolet à deux doigts ..1 le corps du pistolet. 21 0279185 Ensemble de séparateur, pistolet à deux doigts 1 5. Assurez-vous que le joint d’étanchéité de la poignée est en place et vissez la poignée dans le corps du pistolet jusqu’à ce qu’il soit 0296345 Ensemble du poignée bien serré. (inclut les points 17 à 19 6. Réenclenchez le protège-doigts sur la poignée. 0296294 La trousse de réparation des pistolets (inclut les points 5, 6 et 11) 0286747 Étiquette de pistola © Titan Tool Inc. Tous droits réservés. Français... -
Page 8: Garantie
Phone: 1-800-565-8665 Phone: 1-201-337-1240 Fax: 1-800-528-4826 Fax: 1-800-856-8496 Fax: 1-201-405-7449 1770 Fernbrook Lane 200 Trowers Road, Unit 7B 1770 Fernbrook Lane Minneapolis, MN 55447 Woodbridge, Ontario L4L 5Z8 Minneapolis, MN 55447 www.titantool.com Français © Titan Tool Inc. Tous droits réservés. - Page 9 13. No pulverice al aire libre si hace viento. 14. Desenchufe siempre el cable antes de trabajar en el equipo. ADVERTENCIA – Para reducir el riesgo de daños en la piel: 1. No apunte con la pistola ni pulverice sobre ninguna persona ni animal. 2. Mantenga las manos y el resto del cuerpo lejos de la descarga. Por ejemplo, no trate de detener fugas con ninguna parte de su cuerpo. 3. Utilice siempre el protector de la boquilla. No pulverice sin el protector en su sitio. 4. Utilice solamente la boquilla especificada por el fabricante. 5. Tenga cuidado al limpiar y cambiar las boquillas. Si la boquilla se atasca durante la pulverización, ponga SIEMPRE el seguro del gatillo de la pistola, apague la bomba y libere toda la presión antes de reparar, limpiar el protector o la boquilla o cambiar la boquilla. La presión no se libera apagando el motor. Para liberar la presión hay que poner la manija de la © Titan Tool Inc. Todos los derechos reservados. Español...
-
Page 10: Montaje
Sostenga la pistola firmemente contra un contenedor de pueda limpiar la obstrucción. metal al enjuagar. IMPORTANTE: Nunca apriete el gatillo más de una vez cuando la boquilla esté en la posición de retroceso. c. Siga este procedimiento hasta que la punta quede libre de obstrucciones. Español © Titan Tool Inc. Todos los derechos reservados. -
Page 11: Mantenimiento
Giratoria ..............1 2. Suelte y retire el conjunto de la pieza de sujeción del cabezal de la pistola. 20 0296291 Ensamblaje del gatillo, pistola de dos dedos ..1 21 0279185 Ensemblaje de separador, pistola de dos dedos ..1 3. Tire del filtro antiguo hacia fuera del cabezal de la pistola. 4. Deslice el filtro nuevo en el cabezal de la pistola (primero el 0296345 Ensamblaje de mango (incluye artículos 17–19) extremo cónico). 0296294 Kit de reparación de la pistola (incluye artículos 5. Asegúrese de que la junta de la pieza de sujeción esté en 5, 6, y 11) posición y enrosque el conjunto de la pieza de sujeción en el 0286747 Etiqueta de pistola cabezal de la pistola hasta que esté fijo. 6. Fije el guardamonte de vuelta en el conjunto de la pieza de sujeción. © Titan Tool Inc. Todos los derechos reservados. Español... - Page 12 1-800-565-8665 Phone: 1-201-337-1240 Fax: 1-800-528-4826 Fax: 1-800-856-8496 Fax: 1-201-405-7449 1770 Fernbrook Lane 200 Trowers Road, Unit 7B 1770 Fernbrook Lane Minneapolis, MN 55447 Woodbridge, Ontario L4L 5Z8 Minneapolis, MN 55447 www.titantool.com Español © Titan Tool Inc. Todos los derechos reservados.
Need help?
Do you have a question about the LX-65 and is the answer not in the manual?
Questions and answers