Table of Contents
Advertisement
Quick Links
Advertisement
Table of Contents

Related Manuals for Oshkosh Corporation JLG 260MRT


Summary of Contents for Oshkosh Corporation JLG 260MRT
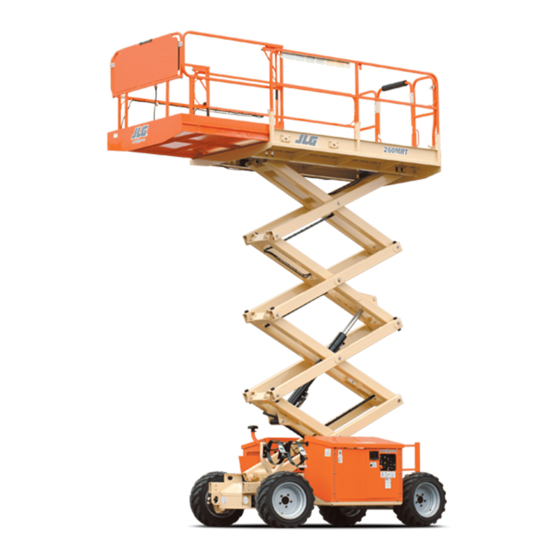
- Page 1 Service & Maintenance Manual Model 260MRT 3121801 April 19, 2013...
-
Page 3: Hydraulic System Safety
INTRODUCTION - MAINTENANCE SAFETY PRECAUTIONS SECTION A. INTRODUCTION - MAINTENANCE SAFETY PRECAUTIONS A GENERAL Relieve system pressure by cycling the applicable control several times with the engine stopped and This section contains the general safety precautions ignition on, to direct any line pressure back into the which must be observed during maintenance of the reservoir. - Page 4 INTRODUCTION - MAINTENANCE SAFETY PRECAUTIONS Original Issue - April 13, 2000 Revised - January 24, 2002 Revised - April 22, 2004 Revised - July 3, 2006 Revised - August 30, 2006 Revised - October 11, 2007 Revised - April 28, 2008 Revised - December 19, 2008 Revised - October 20, 2011 Revised - April 19, 2013...
-
Page 5: Table Of Contents
TABLE OF CONTENTS TABLE OF CONTENTS SUBJECT - SECTION, PARAGRAPH PAGE NO. SECTION A - INTRODUCTION - MAINTENANCE SAFETY PRECAUTIONS General ..............1-a Hydraulic System Safety . - Page 6 TABLE OF CONTENTS LIST OF FIGURES FIGURE NO. TITLE PAGE NO. 1-1. Serial Number Location............1-4 1-2.
- Page 7 TABLE OF CONTENTS 3-18. Electrical Schematic - Sheet 1 of 3 ..........3-22 3-19.
- Page 8 TABLE OF CONTENTS This page left blank intentionally. – JLG Lift – 3121801...
-
Page 9: Section 1 - Specifications
SECTION 1 - SPECIFICATIONS SECTION 1. SPECIFICATIONS 1.1 SPECIFICATIONS 1.2 CAPACITIES Table 1-2. Capacities Table 1-1. Operating Specifications Fuel Tank 27.2 L (7.2 gal) Machine Weight 3701 kg (8160 lbs) Hydraulic Oil Tank 56.8 L (15 gal) Machine Height: Hydraulic System (including tank) 68.1 L (18 gal) Fully Elevated 8 m (26 ft) -
Page 10: Lubrication
SECTION 1 - SPECIFICATIONS Tires 1.4 LUBRICATION Hydraulic Oil Table 1-6. Tire Specifications Description (Standard) (Non-Marking) NOTE: Hydraulic oils must have anti-wear qualities at least to API Service Classification GL-3, and sufficient Size 26x12-15 chemical stability for mobile hydraulic system ser- Load Range 8 Ply vice. -
Page 11: Cylinder Specifications
SECTION 1 - SPECIFICATIONS 1.6 CYLINDER SPECIFICATIONS 1.9 MAJOR COMPONENT WEIGHTS Table 1-10. Cylinder Specifications Table 1-12. Major Component Weights Description Bore Stroke Rod Dia. Component Weight 10.2 cm 119.4 cm 6.4 cm 295 kg Lift Cylinder Platform (4 in.) (47 in.) (2.5 in.) (650 lbs) -
Page 12: Serial Number Locations
SECTION 1 - SPECIFICATIONS 1.11 SERIAL NUMBER LOCATIONS For machine identification, a serial number plate is affixed to the machine. The plate is located on the rear center of the machine frame, just below the middle step of the lad- der. - Page 13 SECTION 1 - SPECIFICATIONS Figure 1-2. Lubrication Diagram Table 1-14. Lubrication Chart INTERVAL INDEX NO COMPONENT NUMBER/TYPE LUBE POINTS LUBE METHOD HOURS HO - Check HO Level Hydraulic Oil Reservoir Fill Cap/Drain Plug 10/500 HO - Change HO Hydraulic Filter Element Initial Change - 50 Hours Engine Crankcase, Fill Cap/Drain Plug,...
- Page 14 SECTION 1 - SPECIFICATIONS 4150548_E Figure 1-3. Operating Temperature Specifications - Kubota – JLG Lift – 3121801...
- Page 15 SECTION 1 - SPECIFICATIONS 1.12 TORQUE CHARTS Values for Zinc Yellow Chromate Fasteners (Ref 4150707) SAE GRADE 5 BOLTS & GRADE 2 NUTS Torque Torque Torque Torque (Loctite® 242 or 271 Tensile (Loctite® 262 or Vibra- Size Bolt Dia Clamp Load Stress Area (Dry) Lubricated...
- Page 16 SECTION 1 - SPECIFICATIONS SAE GRADE 8 (HEX HD) BOLTS & GRADE 8 NUTS* Torque Torque Torque Tensile (Loctite® 242 or 271 (Loctite® 262 or Vibra- (Dry or Loctite® 263) Size Bolt Dia Clamp Load Stress Area OR Vibra-TITE 111 or TITE 131) K= 0.20...
- Page 17 SECTION 1 - SPECIFICATIONS SOCKET HEAD CAP SCREWS Magni Coating (Ref 4150701)* Torque Torque (Loctite® 242 or 271 (Loctite® 262 Tensile Clamp Load Torque Size Bolt Dia OR Vibra-TITE 111 or (Dry) K = .17 or Vibra-TITE 131) Stress Area See Note 4 140 OR Precoat 85®...
- Page 18 SECTION 1 - SPECIFICATIONS SOCKET HEAD CAP SCREWS Zinc Yellow Chromate Fasteners (Ref 4150707)* Torque Torque Torque (Loctite® 242 or 271 (Loctite® 262 Tensile Clamp Load (Dry) Size Bolt Dia OR Vibra-TITE 111 or or Vibra-TITE 131) Stress Area See Note 4 K = .20 140 OR Precoat 85®...
- Page 19 SECTION 1 - SPECIFICATIONS CLASS 8.8 METRIC BOLTS CLASS 8 METRIC NUTS Torque Torque (Loctite® Torque Tensile Clamp Torque (Loctite® 262 or 271 (Dry or Loctite® Size PITCH Stress Load (Lub) OR Vibra- OR Vibra- Area TITE 131) TITE 111 or 140) Sq mm [N.m]...
- Page 20 SECTION 1 - SPECIFICATIONS CLASS 10.9 METRIC BOLTS CLASS 10 METRIC NUTS CLASS 12.9 SOCKET HEAD CAP SCREWS M3 - M5* Torque (Lub OR Loctite® Torque Torque Tensile (Dry or Loctite® Clamp or 271 (Loctite® 262 Size PITCH Stress Load Vibra-TITE 111 or Vibra-TITE...
- Page 21 SECTION 1 - SPECIFICATIONS Magni Coating (Ref 4150701)* CLASS 12.9 SOCKET HEAD CAP SCREWS M6 AND ABOVE* Torque Torque (Lub OR Loctite® Torque Tensile (Loctite® 262 (Dry or Loctite® Clamp Load or 271 Size PITCH Stress OR Vibra-TITE See Note 4 OR Vibra-TITE Area 131)
- Page 22 SECTION 1 - SPECIFICATIONS NOTES: 1-14 – JLG Lift – 3121801...
-
Page 23: Section 2. Procedures
SECTION 2 - PROCEDURES SECTION 2. PROCEDURES 2.1 GENERAL nent is disconnected, cap or cover all openings to prevent entry of foreign matter. This section provides information necessary to perform 3. Clean and inspect all parts during servicing or main- maintenance on the scissor lift. -
Page 24: Lubrication Information
SECTION 2 - PROCEDURES Lubrication and Servicing 4. Lubricate new or used serviceable bearings before installation. When pressing a bearing into a retainer or bore, apply pressure to the outer race. If the bear- Components and assemblies requiring lubrication and ing is to be installed on a shaft, apply pressure to the servicing are shown in Section 1. -
Page 25: Cylinders - Theory Of Operation
SECTION 2 - PROCEDURES 2.4 CYLINDERS - THEORY OF OPERATION density, 100VAC heater to a minimum temperature of -26°C (-15°F). Cylinders are of the double acting type. The Lift and Steer 3. The only exception to the above is to drain and fill systems incorporate double acting cylinders. -
Page 26: Component Functional Description
SECTION 2 - PROCEDURES valve. Integral actuator port relief valves, anti-cavitation ally opens the lift down port and allows the platform to be check valves, and load check valves are standard. lowered in the event hydraulic power is lost. Relief Valves 2.7 WEAR PADS Main relief valves are installed at various points within the Sliding Pads... -
Page 27: Lift Cylinder Removal And Installation
SECTION 2 - PROCEDURES Cylinders w/Single Counterbalance Valves - 2.9 LIFT CYLINDER REMOVAL AND Lift Cylinder INSTALLATION Removal OPERATE ALL FUNCTIONS FROM GROUND CONTROL STATION 1. Place the machine on a flat and level surface. Start ONLY. the motor and raise the platform. Shut down the engine and attach a suitable lifting device to the plat- 1. - Page 28 SECTION 2 - PROCEDURES Figure 2-1. Arms and Platform Positioning and Support, Cylinder Repair – JLG Lift – 3121801...
- Page 29 SECTION 2 - PROCEDURES 1. Barrel 6. Restrictor/Check Valve 11. O-Ring 16. Seal 2. Rod 7. Locknut 12. Spacer 17. O-Ring 3. Solenoid Valve 8. Wear Ring 13. O-Ring 18. Head 4. Cotter Pin 9. Seal 14. Back-Up Ring 19. Wiper 5.
-
Page 30: Cylinder Repair
SECTION 2 - PROCEDURES 2.10 CYLINDER REPAIR Disassembly DISASSEMBLY OF THE CYLINDER SHOULD BE PERFORMED ON A CLEAN WORK SURFACE IN A DIRT FREE WORK AREA. 1. Connect a suitable auxiliary hydraulic power source to the cylinder port block fitting. DO NOT FULLY EXTEND CYLINDER TO END OF STROKE. - Page 31 SECTION 2 - PROCEDURES 11. Insert the cap screw(s) in the threaded holes in the 8. Inspect seal and o-ring grooves in piston for burrs outer piece of the tapered bushing. Progressively and sharp edges. Dress applicable surfaces as nec- tighten the cap screw(s) until the bushing is loose essary.
- Page 32 SECTION 2 - PROCEDURES 1. A special tool is used to install a new rod seal into 3. Place a new o-ring and back-up seal in the applica- the applicable cylinder head gland groove. ble outside diameter groove of the cylinder head. Figure 2-9.
- Page 33 SECTION 2 - PROCEDURES 7. If applicable, correctly place new seals and guide screws) through the drilled holes in the bushing and lock rings in the outer piston diameter groove. (A into the tapped holes in the piston. tube, with I.D. slightly larger than the O.D. of the pis- ton is recommended to install the solid seal.) NOTE: The backup rings for the solid seal have a radius on one side.
- Page 34 SECTION 2 - PROCEDURES 16. Place new guide locks and seals in the applicable outside diameter grooves of the cylinder piston. (See Figure 2-10., Piston Seal Kit Installation ) IF THE CYLINDER IS TO BE TESTED PRIOR TO INSTALLATION ON THE MACHINE, EXTREME CARE SHOULD BE USED TO INSURE THAT THE OUTER END OF THE ROD IS SUPPORTED.
-
Page 35: Steer Cylinder Repair
SECTION 2 - PROCEDURES 2.11 STEER CYLINDER REPAIR 7. Carefully remove the head from the cylinder rod and remove and discard the wiper, rod seal, o-ring and wear ring. Removal 8. Carefully remove the spacers from the cylinder rod, Before beginning this procedure, ensure that the parking then remove the retaining rings securing the piston brake is engaged and the rear wheels are chocked. - Page 36 SECTION 2 - PROCEDURES Assembly 13. Install the remaining cylinder head retainer on the end of the cylinder barrel and tighten with a suitable chain wrench. NOTE: Prior to cylinder assembly, ensure that the proper cylinder seal kit is used. Installation Apply a light film of hydraulic oil to all components 1.
- Page 37 SECTION 2 - PROCEDURES 1. Barrel 2. Rod 3. Locknut 4. Seal 5. Piston 6. O-Ring 7. Back-Up Ring 8. Wear Ring 9. Guide 10. Wiper 11. O-Ring 12. Retaining Ring Figure 2-15. Steer Cylinder Assembly 3121801 – JLG Lift – 2-15...
- Page 38 SECTION 2 - PROCEDURES 1. Barrel 7. Flatwasher, 1 1/4" Narrow 13. O-Ring 19. Rod 2. Counter Balance Valve 8. Guidelock 14. Wear Ring 20. Plate 3. Check Valve 9. Polyseal 15. Head 21. Trailer Ball 4. Plug 10. Piston 16.
- Page 39 SECTION 2 - PROCEDURES 1. Barrel 7. Flatwasher, 1 1/4" Narrow 13. Wear Ring 19. Plate 2. Check Valve 8. Guidelock 14. Head 20. Screw, 1/2" 3. Counter Balance Valve 9. Polyseal 15. Hydrolock 21. Jack Pad 4. Plug 10. Piston 16.
- Page 40 SECTION 2 - PROCEDURES 1. Barrel 5. Wear Ring 9. Polyseal 13. Retaining Ring 2. Rod 6. O-Ring 10. Wiper Seal 14. Plate 3. Wear Ring 7. Back-Up Ring 11. Washer Ring 15. Screw, 1/2" 4. Seal 8. Head 12. Screw, 5/16" 16.
-
Page 41: Limit Switch Adjustment
SECTION 2 - PROCEDURES 2.12 LIMIT SWITCH ADJUSTMENT Steer Relief Adjustment 1. Install a pressure gauge at gauge port MP , located Platform Limit Switch on the lower right side of the valve body. The port is identified by a stamping on the valve body. The platform limit switch is located on the left side of the frame of the machine. - Page 42 SECTION 2 - PROCEDURES Main Valve Components 1. Tow Brake Release Acuator 5. Lift Relief 9. Steer Solenoid (Right) 2. Valve Knob 6. Steer Relief (Right) 10. Lift Solenoid 3. Brake Solenoid 7. Main Relief 11. Steer Solenoid (Left) 4. Dump Valve 8.
- Page 43 SECTION 2 - PROCEDURES Leveling Jacks Directional Valve Leveling Jacks - Pressure Relief Valve Location PA2 PB1 Figure 2-20. Leveling Jacks Directional Valve Table 2-3. Leveling Jacks Directional Valve Torque Specs Item Torque 54 Nm (40 lb-ft) 31 Nm (23 lb-ft) 54 Nm (40 lb-ft) 3121801 –...
-
Page 44: Drive Pump Start-Up Procedure
SECTION 2 - PROCEDURES 2.14 DRIVE PUMP START-UP PROCEDURE It is recommended that the external control input signal electrical connections be disconnected at the pump con- trol until after initial start-up. This will allow the pump to remain in its neutral position. THE FOLLOWING PROCEDURE SHOULD ALWAYS BE PER- “... -
Page 45: Automatic Choke - Field Adjustment (Df-750)
SECTION 2 - PROCEDURES 2.15 AUTOMATIC CHOKE - FIELD ADJUSTMENT (DF-750) Inspection NOTE: All automatic choke assemblies have been pre-set to operate between -7°C and 38°C (20°F and 100°F) with little or no adjustment. If the machine will be operated for prolong use outside these temperature ranges, adjustments could be made to improve per- formance of the engine. -
Page 46: Joystick Controller
SECTION 2 - PROCEDURES 2.16 JOYSTICK CONTROLLER Figure 2-22. Joystick Controller - (JLG P/N 1600308) Table 2-4. Joystick Specifications Table 2-5. Joystick Plug Loading Chart Input Voltage 4.3V (±0.1V) Terminal Color Function Centered Output Voltage 2.2V (±0.1V) Yellow Steer Right Full Positive (Rev) Deflection Output Voltage 4.0V (±0.1V) Green... - Page 47 SECTION 2 - PROCEDURES Figure 2-23. Joystick Controller - (JLG P/N 1600403) Table 2-6. Joystick Specifications Table 2-7. Joystick Plug Loading Chart Input Voltage Terminal Color Function Centered Output Voltage 4.25V to 2.60V Yellow Steer Right Reverse Voltage 4.60V to 4.80V Green Steer Left Forward Voltage...
-
Page 48: Tilt Sensor
SECTION 2 - PROCEDURES 2.17 TILT SENSOR Tilt Sensor, JLG P/N 4000006: 1. Ground Control Box 2. Tilt Sensor (JLG P/N 4000006) Figure 2-24. Tilt Sensor Location Tilt Sensor Removal: NOTE: Refer to Figure 2-24., Tilt Sensor Removal for num- bers in parenthesis. - Page 49 SECTION 2 - PROCEDURES Tilt Sensor, JLG P/N 4000021: 4. Ground Control Box 5. Tilt Sensor Assembly (JLG P/N 1810140) Figure 2-25. Tilt Sensor Location Tilt Sensor Removal: NOTE: Refer to Figure 2-26., Tilt Sensor Removal for num- bers in parenthesis. 1.
-
Page 50: Calibrations
SECTION 2 - PROCEDURES 2.18 CALIBRATIONS b. Tilt sensor mounting on machine or wedged crooked in control box: If the machine mounting/grade appears accept- Tilt Sensor Calibration: able, open the Ground Control box carefully. Observe whether the tilt sensor is properly 1. - Page 51 SECTION 2 - PROCEDURES Joystick Calibration e. The Ground Control Box, as mounted on the machine, does not allow the tilt sensor to be (Software 1.5 and Higher and Higher) level. Using the Analyzer, in Access Level 1, go to MENU: CALI- For the following troubleshooting steps, a bubble level BRATION: JOYSTICK and press ENTER.
-
Page 52: Electronic Control System
SECTION 2 - PROCEDURES 2.19 ELECTRONIC CONTROL SYSTEM Hand Held Analyzer m en u: Analyzer Display HELP: PRESS ENTER Enter Key Escape Key Stores and selects Top Level, Sub To return home or access Level, and item menus previous menu Left &... - Page 53 SECTION 2 - PROCEDURES Using the Analyzer If ENTER is pressed again, the display moves to the fol- lowing display: With the machine power on and the analyzer connected properly, the analyzer will display the following: l og: ( 211) M ENU: HELP:PRESS ENTER LOGGED HELP...
- Page 54 SECTION 2 - PROCEDURES while in access level 2. Remember, you may always can- The access level should display the following, if the pass- cel a selected menu item by pressing the ESC key. word was entered correctly: Changing the Access Level of the Hand Held Analyzer When the analyzer is first connected, you will be in access M ENU:...
- Page 55 SECTION 2 - PROCEDURES Adjusting Parameters Using the Hand Held Analyzer Once you have gained access to level 1, and a personality item is selected, press the UP or DOWN arrow keys to l evel i n g j ack s: 1=y es adjust its value, for example: PERSO NALITIES:...
-
Page 56: Flash Codes And Descriptions
SECTION 2 - PROCEDURES 2.20 FLASH CODES AND DESCRIPTIONS Table 2-10. Help Messages and Flash Codes - Software P1.X FLASH CODE HELP MESSAGES AND FLASH CODES No Flash Code EVERYTHING OK GROUND MODE OK ALARM SOUNDING - TILTED & ABOVE ELEVATION Platform is elevated and the chassis is not level. - Page 57 SECTION 2 - PROCEDURES Table 2-10. Help Messages and Flash Codes - Software P1.X FLASH CODE HELP MESSAGES AND FLASH CODES FUNCTION PROBLEM - TRIGGER PERMANENTLY CLOSED Trigger switch in the platform control box closed at start up. Release switch to clear fault. TRIGGER CLOSED TOO LONG WHILE IN NEUTRAL Trigger switch in the platform control box closed for more than ten seconds while the joystick is in the neutral position.
- Page 58 SECTION 2 - PROCEDURES 2-36 – JLG Lift – 3121801...
- Page 59 SECTION 2 - PROCEDURES 3121801 – JLG Lift – 2-37...
- Page 60 SECTION 2 - PROCEDURES 2-38 – JLG Lift – 3121801...
- Page 61 SECTION 2 - PROCEDURES 3121801 – JLG Lift – 2-39...
-
Page 62: Machine Model Adjustment
SECTION 2 - PROCEDURES 2.21 MACHINE MODEL ADJUSTMENT Table 2-11. Machine Model Adjustment Adjustment Adjustment range Default Values - Gas Default Values - Diesel DRIVE ACCEL 1.0 to 5.0 sec DECEL 1.0 to 5.0 sec FWD MIN 0 to 100% FWD MAX 0 to 100% FWD ELEV... -
Page 63: Machine Configuration Programming Information
SECTION 2 - PROCEDURES 2.22 MACHINE CONFIGURATION any personality settings can be changed. Changing the personality settings first and then changing the PROGRAMMING INFORMATION model number of the machine configuration will cause the personality settings to return to default val- NOTE: When configuring a MRT scissors machine, the machine configuration must be completed before ues. -
Page 64: Preventive Maintenance And Inspection Schedule
SECTION 2 - PROCEDURES 2.23 PREVENTIVE MAINTENANCE AND The inspection and maintenance code numbers are as fol- lows: INSPECTION SCHEDULE 1. Check for proper and secure installation. The preventive maintenance and inspection checks are 2. Check for visible damage and legibility. listed and defined in the following table. - Page 65 SECTION 2 - PROCEDURES Table 2-13. Preventive Maintenance and Safety Inspection AREA INTERVAL 10Hours 50 Hours 200 Hours 500 Hours 1000 Hours (Daily) (Weekly) (Monthly) (3 Month) (6 Month) PLATFORM 1. Controller 1,11 2. Switches 1,11 3. Placards and Decals 4.
- Page 66 SECTION 2 - PROCEDURES NOTES: 2-44 – JLG Lift – 3121801...
-
Page 67: Section 3 - General Electrical Information & Schematics
SECTION 3 - GENERAL ELECTRICAL INFORMATION & SCHEMATICS SECTION 3. GENERAL ELECTRICAL INFORMATION & SCHEMATICS 3.1 GENERAL This section contains schematics to be used for locating and correcting most of the operating problems which may develop. If a problem should develop which is not presented in this section or which is not corrected by listed corrective actions, tech- nically qualified guidance should be obtained before proceeding with any maintenance. - Page 68 SECTION 3 - GENERAL ELECTRICAL INFORMATION & SCHEMATICS Voltage Measurement Resistance Measurement Figure 3-1. Voltage Measurement (DC) Figure 3-2. Resistance Measurement • If meter is not auto ranging, set it to the correct range • First test meter and leads by touching leads together. (See multimeter’s operation manual) Resistance should read a short circuit (very low resis- tance)
- Page 69 SECTION 3 - GENERAL ELECTRICAL INFORMATION & SCHEMATICS Continuity Measurement Current Measurement Figure 3-3. Continuity Measurement Figure 3-4. Current Measurement (DC) • Some meters require a separate button press to • Set up the meter for the expected current range enable audible continuity testing •...
- Page 70 SECTION 3 - GENERAL ELECTRICAL INFORMATION & SCHEMATICS Continuity Measurement Over Long Distances When trying to determine continuity of a harness or wire, longer than the reach of standard instrument leads, is possible to perform the check without excessively long leads. Using the other wires in the harness one can determine the condition of a particular wire in the harness.
-
Page 71: Applying Silicone Dielectric Compound To Amp Connectors
SECTION 3 - GENERAL ELECTRICAL INFORMATION & SCHEMATICS 3.3 APPLYING SILICONE DIELECTRIC COMPOUND TO AMP CONNECTORS Silicone Dielectric Compound must be used on the AMP connections for the following reasons: • To prevent oxidation at the mechanical joint between male and female pins. •... - Page 72 SECTION 3 - GENERAL ELECTRICAL INFORMATION & SCHEMATICS Assembly Check to be sure the wedge lock is in the open, or as-shipped, position (See Figure 3-6. Connector Assembly (1 of 4)). Pro- ceed as follows: Figure 3-6. Connector Assembly (1 of 4) 1.
- Page 73 SECTION 3 - GENERAL ELECTRICAL INFORMATION & SCHEMATICS Figure 3-8. Connector Assembly (3 of 4) Figure 3-9. Connector Assembly (4 of 4) 3121801 – JLG Lift –...
- Page 74 SECTION 3 - GENERAL ELECTRICAL INFORMATION & SCHEMATICS Disassembly 5. Insert a 4.8 mm (3/16”) wide screwdriver blade between the mating seal and one of the red wedge lock tabs. 6. Pry open the wedge lock to the open position. 7.
- Page 75 SECTION 3 - GENERAL ELECTRICAL INFORMATION & SCHEMATICS Service - Voltage Reading DO NOT PIERCE WIRE INSULATION TO TAKE VOLTAGE READINGS. It has been common practice in electrical troubleshooting to probe wires by piercing the insulation with a sharp point. This practice should be discouraged when dealing with the AMPSEAL plug assembly, or any other sealed connector system.
-
Page 76: Working With Deutsch Connectors
SECTION 3 - GENERAL ELECTRICAL INFORMATION & SCHEMATICS 3.4 WORKING WITH DEUTSCH CONNECTORS DT/DTP Series Assembly Figure 3-12. DT/DTP Contact Installation 1. Grasp crimped contact about 25mm behind the contact barrel. 2. Hold connector with rear grommet facing you. 3. Push contact straight into connector grommet until a click is felt. A slight tug will confirm that it is properly locked in place. - Page 77 SECTION 3 - GENERAL ELECTRICAL INFORMATION & SCHEMATICS 10. Push contact straight into connector grommet until a positive stop is felt. A slight tug will confirm that it is properly locked in place. Figure 3-15. HD/HDP Locking Contacts Into Position NOTE: For unused wire cavities, insert sealing plugs for full environmental sealing HD30/HDP20 Series Disassembly Figure 3-16.
-
Page 78: Switches
SECTION 3 - GENERAL ELECTRICAL INFORMATION & SCHEMATICS 3.5 SWITCHES Basic check The following check determines if the switch is functioning properly, not the circuit in which the switch is placed. A switch is functioning properly when there is continuity between the correct terminals or contacts only when selected. 1. -
Page 79: Troubleshooting
SECTION 3 - GENERAL ELECTRICAL INFORMATION & SCHEMATICS 3. Operate system such that the switch actuates. This could be going over a certain pressure or temperature, for exam- ple. The state indicated in the control system should change. Switch Wiring - Low Side, High Side When controlling a load, a switch can be wired between the positive side of the power source and the load. - Page 80 SECTION 3 - GENERAL ELECTRICAL INFORMATION & SCHEMATICS Table 3-1. Elevation System Troubleshooting TROUBLE PROBABLE CAUSE REMEDY Platform Elevation System No Response to LIft Control Lift not performed within three seconds after lift Reselect lift function switch, then activate joystick function switch is selected.
- Page 81 SECTION 3 - GENERAL ELECTRICAL INFORMATION & SCHEMATICS Table 3-1. Elevation System Troubleshooting TROUBLE PROBABLE CAUSE REMEDY Platform raises and lowers erratically Hydraulic system oil low. Replenish oil as necessary. Restricted or broken hydraulic line or fit- Clean, repair or replace line. ting.
- Page 82 SECTION 3 - GENERAL ELECTRICAL INFORMATION & SCHEMATICS Table 3-2. Chassis Troubleshooting TROUBLE PROBABLE CAUSE REMEDY Drive System No response to drive controller Joystick not activated within three sec- Activate drive select switch, then activate onds after drive select switch is activated. joystick within three seconds.
- Page 83 SECTION 3 - GENERAL ELECTRICAL INFORMATION & SCHEMATICS Table 3-2. Chassis Troubleshooting TROUBLE PROBABLE CAUSE REMEDY High-Speed Drive function does not operate Loose or damaged wiring between drive Ensure proper connection of wires. Using controller and High Speed switch. suitable test meter, perform continuity test on wiring between switches.
- Page 84 SECTION 3 - GENERAL ELECTRICAL INFORMATION & SCHEMATICS Table 3-2. Chassis Troubleshooting TROUBLE PROBABLE CAUSE REMEDY Machine hard to steer or steering is erratic (cont.) Lack of lubrication on steer components. Lubricate steer components in accor- dance with Lubrication Chart. Restricted crossover relief valve.
- Page 85 SECTION 3 - GENERAL ELECTRICAL INFORMATION & SCHEMATICS Table 3-3. Hydraulic System Troubleshooting TROUBLE PROBABLE CAUSE REMEDY Hydraulic System - General Hydraulic Pump Noisy Air bubbles in oil. (Reservoir too low.) Replenish oil as necessary. Oil filter dirty. Clean and/or replace filter as necessary. Pump cavitating.
- Page 86 SECTION 3 - GENERAL ELECTRICAL INFORMATION & SCHEMATICS Table 3-4. Electrical System Troubleshooting TROUBLE PROBABLE CAUSE REMEDY Hand Controller Valve will not function when handle is moved in either direction. Enable switch not activated. Activate enable switch. Controller not activated within three sec- Activate enable switch, then activate con- onds after enable switch is activated.
- Page 87 SECTION 3 - GENERAL ELECTRICAL INFORMATION & SCHEMATICS Table 3-4. Electrical System Troubleshooting TROUBLE PROBABLE CAUSE REMEDY No response to a function control switch (cont.) No voltage present at applicable control Check applicable wire for proper con- valve coil. nection at terminal strip, valve harness plug pin, valve harness receptacle pin and engine start relay.
- Page 88 SECTION 3 - GENERAL ELECTRICAL INFORMATION & SCHEMATICS 1001106560_B Sheet-1 Figure 3-18. Electrical Schematic - Sheet 1 of 3 3-22 – JLG Lift – 3121801...
- Page 89 SECTION 3 - GENERAL ELECTRICAL INFORMATION & SCHEMATICS 1001106560_B Sheet-1 Figure 3-19. Electrical Schematic - Sheet 2 of 3 3121801 – JLG Lift – 3-23...
- Page 90 SECTION 3 - GENERAL ELECTRICAL INFORMATION & SCHEMATICS 1001109660_B Sheet-2 Figure 3-20. Electrical Schematic - Sheet 3 of 3 3-24 – JLG Lift – 3121801...
- Page 91 SECTION 3 - GENERAL ELECTRICAL INFORMATION & SCHEMATICS NOTES: 3121801 – JLG Lift – 3-25...
- Page 92 SECTION 3 - GENERAL ELECTRICAL INFORMATION & SCHEMATICS 1001109561_B Sheet-1 Figure 3-21. Electrical Schematic - (w/ Generator) - Sheet 1 of 3 3-26 – JLG Lift – 3121801...
- Page 93 SECTION 3 - GENERAL ELECTRICAL INFORMATION & SCHEMATICS 1001109561_B Sheet-1 Figure 3-22. Electrical Schematic - (w/ Generator) - Sheet 2 of 3 3121801 – JLG Lift – 3-27...
- Page 94 SECTION 3 - GENERAL ELECTRICAL INFORMATION & SCHEMATICS 1001109561_B Sheet-2 Figure 3-23. Electrical Schematic - (w/ Generator) - Sheet 3 of 3 3-28 – JLG Lift – 3121801...
- Page 95 SECTION 3 - GENERAL ELECTRICAL INFORMATION & SCHEMATICS NOTES: 3121801 – JLG Lift – 3-29...
- Page 96 SECTION 3 - GENERAL ELECTRICAL INFORMATION & SCHEMATICS M AIN VAL VE HIGH PRESSURE FIL TER O VERLOAD ENGINE COM PONENTS PLA TFORM CONTROL BO X PLA TFORM W ORK LIGHTS PISTON PUM P LEVELING JACK VAL VES LIFT CYLINDER RECEPTACLE A T PLA TFORM GENERATOR...
- Page 97 SECTION 3 - GENERAL ELECTRICAL INFORMATION & SCHEMATICS GROUND CONTROL BO X FUEL GAUGE SENDER BEACON LIGHT HORN ELEVA TION SW ITCH ALARM LEVELING JACK SW ITCHES Figure 3-25. Electrical Componants Installation - Prior to S/N 141689 - Sheet 2 3121801 –...
- Page 98 SECTION 3 - GENERAL ELECTRICAL INFORMATION & SCHEMATICS MAIN VALVE ENGINE COMPONENTS PLATFORM PLATFORM CONTROL WORK LIGHTS OVERLOAD PISTON PUMP LIFT CYLINDER RECEPTACLE AT PLATFORM (DESIGN MAY VARY) CIRCUIT BREAKER (CE SPEC ONLY) GENERATOR Figure 3-26. Electrical Componants Installation - S/N 141689 to Present - Sheet 1 3-32 –...
- Page 99 SECTION 3 - GENERAL ELECTRICAL INFORMATION & SCHEMATICS GROUND CONTROL FUEL GAUGE SENDER BEACON LIGHT HORN/ ALARM ELEVATION SWITCH PROXIMITY SWITCH ANALYZER CONTROLLER MODULE RESISTOR GROUND DIRECTIONAL SPLICE VALVE IGN. SPLICE GROUND SPLICE LEVELING JACK SWITCHES Figure 3-27. Electrical Componants Installation - S/N 141689 to Present - Sheet 2 3121801 –...
- Page 100 SECTION 3 - GENERAL ELECTRICAL INFORMATION & SCHEMATICS 2792402 T Figure 3-28. Hydraulic Schematic - Prior to S/N 141689 3-34 – JLG Lift – 3121801...
- Page 101 SECTION 3 - GENERAL ELECTRICAL INFORMATION & SCHEMATICS 2792717 D Figure 3-29. Hydraulic Schematic - S/N 141689 to Present 3121801 – JLG Lift – 3-35...
- Page 102 SECTION 3 - GENERAL ELECTRICAL INFORMATION & SCHEMATICS 2792448 B Figure 3-30. Hydraulic Diagram (Generator) 3-36 – JLG Lift – 3121801...
- Page 103 SECTION 3 - GENERAL ELECTRICAL INFORMATION & SCHEMATICS 2792686 C Figure 3-31. Hydraulic Diagram (Leveling Jacks) 3121801 – JLG Lift – 3-37...
- Page 104 SECTION 3 - GENERAL ELECTRICAL INFORMATION & SCHEMATICS NOTES: 3-38 – JLG Lift – 3121801...
- Page 106 3121801 Corporate Office JLG Industries, Inc. 1 JLG Drive McConnellsburg PA. 17233-9533 (717) 485-5161 (717) 485-6417 JLG Worldwide Locations JLG Industries (Australia) JLG Latino Americana Ltda. JLG Industries (UK) Ltd JLG France SAS P.O. Box 5119 Rua Eng. Carlos Stevenson, Bentley House Z.I.
Need help?
Do you have a question about the JLG 260MRT and is the answer not in the manual?
Questions and answers