Table of Contents
Advertisement
Quick Links
Advertisement
Table of Contents

Related Manuals for Doro 7000H


Summary of Contents for Doro 7000H
- Page 1 Doro 7000H English...
- Page 2 The items supplied with your phone might vary depending on the software and accessories available in your region or offered by your service provider. You can obtain additional accessories from your local Doro dealer. The supplied accessories provide the best performance with your phone. Selfie/video chat camera 10.
-
Page 3: Table Of Contents
English Contents Congratulations on your purchase................1 Getting started....................... 1 Unbox your new phone ..................1 Insert SIM card and battery.................. 1 Charge the phone ..................... 3 Save energy ....................4 Turn the phone on and off................... 4 Get to know your phone ................... 4 Start-up Wizard.................... - Page 4 English Storage......................28 Security & location ..................28 Start-up Wizard....................29 Tutorials ...................... 29 SIM Toolkit ....................29 System ......................29 Additional functions ....................31 Display status symbols..................31 Display main symbols..................31 Safety instructions ....................32 Network services and costs................32 Operating environment ..................
-
Page 5: Congratulations On Your Purchase
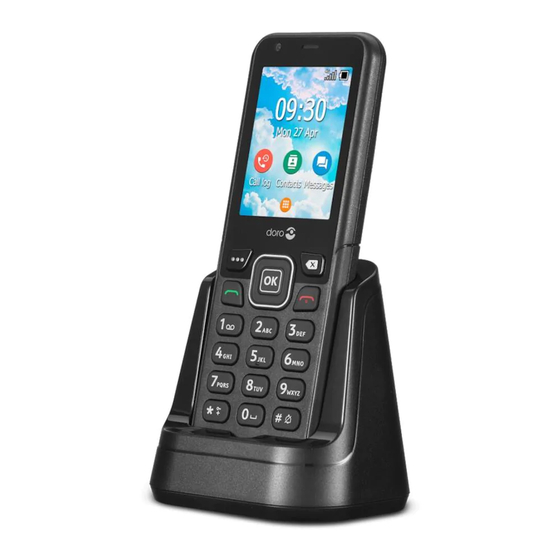
Congratulations on your purchase Doro 7000H is a new type of cordless phone for the home that does not require a fixed telephone line. Unlike conventional home phones, the handset is equipped with a SIM card for connecting to a high-speed 4G LTE cellular network. - Page 6 English Remove the battery cover IMPORTANT! Turn off the phone and disconnect the charger before removing the battery cover. Be careful not to damage your fingernails when you remove the battery cover. Do not bend or twist the battery cover excessively as it may get damaged.
-
Page 7: Charge The Phone
English Insert the battery Insert the battery by sliding it into the battery compartment. Replace the back cover. Charge the phone While it’s possible that your phone will already come with enough power to be turned on right out of the box, we recommend charging the device fully before using it. CAUTION Only use batteries, chargers and accessories that have been approved for use with this particular model. -
Page 8: Save Energy
English Note! This device has a Li-Ion type of battery, that can age faster if kept in the charger for a prolonged time after it’s fully charged. In order to ensure a longer lifetime for the battery, the device will stop charging shortly after it’s fully charged. Charging will resume when it has been discharged to 75 % of a full charge. -
Page 9: Notification Panel And Status Bar
English Tip: Launch the start-up wizard at any time. From standby mode, press Settings Start-up Wizard. Notification panel and status bar At the top of the main screen to the left you can see if there are any notifications. The number will show how many notifications you have. -
Page 10: Sharing Content
English Navigation keys (A) Use the Four-way navigation keys to navigate up, down, • left and right. • (B) Use the OK to open the Menu and to confirm actions. Standby (idle mode) When the phone is ready to use, and you have not keyed in any characters, the phone is in standby. •... -
Page 11: Enter Text
English Enter text Enter text manually Select character Press a numerical key repeatedly until the desired character is shown. Wait a few seconds be- • fore entering the next character. Press to erase characters. Special characters Press * for a list of special characters. Select the desired character using the Four-way navigation keys and press OK to enter it. -
Page 12: Call From The Phonebook
English Press to make a call. Press to end the call. Tip: For international calls, always use + before the country code for best operation. Press * twice for the international prefix +. Call from the phonebook Press Contacts. to scroll through the phonebook, or to do a quick search by pressing the key corre- sponding to the first letter of the entry. -
Page 13: Call History
English Call history Received, missed and dialed calls are saved in a combined call log. Press Calls are displayed as follows depending on call type: Incoming call Outgoing call Missed call Select wanted entry and press to dial, or... Select an entry and press OK to: •... - Page 14 English Press Phone Settings Calls Fixed dialling numbers: enter PIN2 to enable the feature. • Enable FDN Change PIN2 to change the PIN2 code. • to add and enter the first allowed number. • FDN list You can add more numbers or edit or delete existing. Note! You can save parts of phone numbers.
-
Page 15: Contacts
English • Show number to always show your number. Call waiting You can handle more than one call at a time, put the current call on hold and answer the incoming call. When activated, an alert tone is heard if there is an incoming call while talking. During a call, press to answer the second call. -
Page 16: Manage Phonebook Contacts
English Manage phonebook contacts Press Contacts. Select a contact and press OK, then press Add to favourites to set the entry as one of the first listed contacts in the phonebook. • Call to call the contact. • Edit to edit the contact. When done, press Save. •... -
Page 17: Messaging
English • Sort by to set in what order you sort and display your contacts. Select First name or Surname Import to copy contacts from/to phone, SIM card and shared memory. • Export to export contacts from the phone to the shared memory. •... -
Page 18: Read And Handle Messages
English Read and handle messages Messages are grouped into message threads by contact. A thread can contain both text and multi- media messages. Press Messaging. Select a message thread and press OK. Press for the same options as described above. Select an individual message and press for more options: •... - Page 19 English Select to save messages on Phone or SIM Card. Input mode With Input method you can select to write your text messages with special, distinguishing language specific characters (Unicode) or to write with more simple characters. Unicode or Automatic allows special characters.
-
Page 20: Whatsapp
English • Add Channel to add a new channel to receive broadcast messages on. Set name, channel number and mark Enable the channel to activate it. Channel list to review your current list of channels. • Note! Not all operators have the cell broadcast messaging function activated in their network. WAP Push messages A WAP Push service is basically a specially encoded message which includes a link to a WAP address. -
Page 21: Media
English Press Add new for a new alarm. Select and set the different options: • Set the time for the alarm. • Check Repeat to select what days the alarm should be active. Label to set a name for the alarm. •... -
Page 22: Organiser
English Press Menu Media Videos. Select a video and press OK to play it. Press for video options. Select video and then press for more options: • Share to share a picture/video. See more at Sharing content, p.6. Delete to delete the selected items. Press OK to confirm. •... -
Page 23: Notes
English Select a folder, e.g. DCIM and press OK to open it. Select a file and press OK to open the file. Press to see the available options. Notes Press Menu Organiser Notes. Press Add for a new note. Enter your note using the keypad, see Enter text, p.7. Press Save to save. - Page 24 English Note! Check Show password to see it in clear text. Press Advanced options if you need specific settings. Press Connect to connect. A connected Wi-Fi network is displayed in the top of the list. Select it and press OK for connection details.
- Page 25 English • 2G: for 2G service only. IMPORTANT! If you set your phone to use 2G or 3G, you will not be able to make any calls, including emergency calls, or use other features requiring a network connection, if the selected network type is unavailable.
- Page 26 English • Authentication type to select the type of authentication to be used. • APN type to enter the APN type. APN protocol to select the type of protocol to be used. • APN roaming protocol to select the type of protocol to be used when roaming. •...
- Page 27 English Enable/disable mobile data for services like software update, internet browser, Facebook, Weather and e-mail. Select off to avoid data charges. Press Menu Settings Network & Internet Data usage Mobile data. Set the switch to on to activate it or off to deactivate.
- Page 28 English Press Menu Settings Network & Internet Hotspot & tethering. Set the Bluetooth tethering switch to on to enable Internet sharing via a Bluetooth connection. Note! You must first establish the Bluetooth connection. See Bluetooth ® , p.25. Wi-Fi hotspot Share your phone’s Internet connection via Wi-Fi.
- Page 29 English Connected devices Here you can see and control your connected devices. ® Bluetooth IMPORTANT! If you are not using Bluetooth connectivity, switch it off to save power. Do not pair with an unknown device. Activate Bluetooth Press Menu Settings Connected devices Bluetooth.
-
Page 30: Display
English Wait for the search to display the wanted device to select it and press OK to connect. When connecting to another Bluetooth device you may need to enter a password or confirm a shared key. Bluetooth address Here you can see the Bluetooth address of your phone. Battery See your phone’s battery status and activate power saving mode. -
Page 31: Sound
English • Wallpapers for predefined available wallpapers. • Gallery for images available in your gallery. Sleep Select the delay time for the display backlight. Press Menu Settings Display Sleep. Select the how long time the display lit. Press OK to confirm. Font size You can adjust the text size for the menu and messages. -
Page 32: Storage
English Vibrate for calls Set to vibrate for incoming calls. Press Menu Settings Sound Also vibrate for calls. Set the switch to on to enable this feature. Ringtones and alerts Select various ringtones and alerts on your device. Press Menu Settings Sound. -
Page 33: Start-Up Wizard
English • Set the switch to activate the PIN code. You need to enter the PIN code every time the phone is started. • Set the switch to deactivate the PIN code. IMPORTANT! If you deactivate the PIN code and the SIM card is lost or stolen, it is unprotected and must be blocked by your service provider. - Page 34 English • Automatic date & time, set to off to manually set the date and time. Automatic time zone, set to off to manually set the time zone. • Set date to enter the date. • Set time to enter the time. •...
-
Page 35: Additional Functions
English Enter the phone code and press OK. Tip: The default phone code is 1234. Scheduled power on & off Here you can set how to turn on and turn off your phone without pressing the power button. Press Menu Settings System Reset options... -
Page 36: Safety Instructions
English Safety instructions CAUTION The unit and the accessories can contain small parts. Keep all of the equipment out of the reach of small children. The mains adapter is the disconnect device between the product and mains power. The mains socket outlet must be close to the equipment and easily accessible. -
Page 37: Li-Ion Battery
English Follow the restrictions that apply to the use of radio equipment near places where fuel is stored and sold, chemical factories and places where blasting is in progress. Areas with risk for explosion are often – but not always – clearly marked. This also applies to below decks on ships;... -
Page 38: Vehicles
English Vehicles Radio signals can affect electronic systems in motor vehicles (for example, electronic fuel injection, ABS brakes, automatic cruise control, air bag systems) that have been incorrectly installed or are in- adequately protected. Contact the manufacturer or its representative for more information about your vehicle or any additional equipment. -
Page 39: Care And Maintenance
English Care and maintenance Your unit is a technically advanced product and should be treated with the greatest care. Negligence may void the warranty. • Protect the unit from moisture. Rain, snow, humidity, and all types of liquids can contain sub- stances that corrode the electronic circuits. -
Page 40: Specifications
Doro reserves the right to revise this document or withdraw it at any time without prior notice. -
Page 41: Specific Absorption Rate (Sar)
(3) years from the date of the distribution of this product by Doro AB, or in the case of code licensed under the GPL v3 for as long as Doro AB offers spare parts or customer support for this product model. -
Page 42: Correct Disposal Of This Product
EU Declaration of Conformity Hereby, Doro declares that the radio equipment type DFB-0340 (Doro 7000H) is in compliance with Directives: 2014/53/EU and 2011/65/EU including delegated Directive (EU) 2015/863 amending An- nex II. - Page 43 English...
- Page 44 DFB-0340 (Doro 7000H) (V01) English Version 1.1 ©2020 Doro AB. All rights reserved. www.doro.com REV 19908 — STR 20200720...
Need help?
Do you have a question about the 7000H and is the answer not in the manual?
Questions and answers