Advertisement
Quick Links
- 1 Chapter 2: Assembly and Setting up the Dr Horizontal/Vertical Log Splitter
- 2 Chapter 3: Operating the Dr Horizontal/Vertical Log Splitter
- 3 Chapter 4: Maintaining the Dr Horizontal/Vertical Log Splitter
- 4 Chapter 5: Troubleshooting
- 5 Chapter 6: Parts Lists and Schematic Diagrams
- Download this manual
®
D R
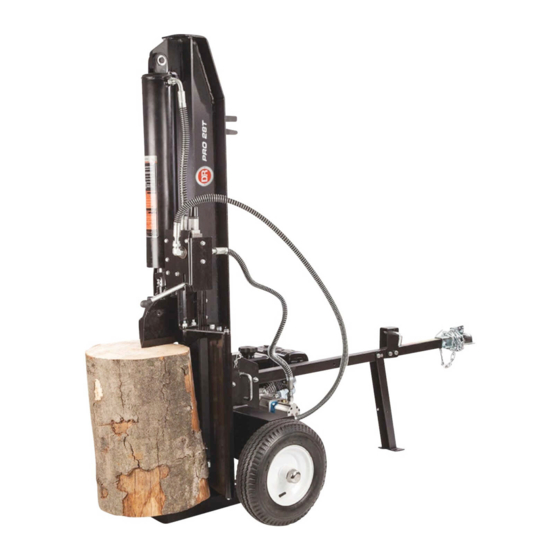
HORIZONTAL/VERTICAL LOG SPLITTER
SAFETY & OPERATING INSTRUCTIONS
Models: 22-Ton
28-Ton
34-Ton
Serial No.
Order No.
Read and understand this manual and all instructions before operating the DR Horizontal/Vertical Log Splitter.
Original Language
DR Power Equipment
Toll-free phone: 1-800-DR-OWNER (376-9637)
Fax: 1-802-877-1213
Website: www.DRpower.com
Advertisement

Subscribe to Our Youtube Channel
Related Manuals for DR 22-Ton


Summary of Contents for DR 22-Ton
- Page 1 SAFETY & OPERATING INSTRUCTIONS Models: 22-Ton 28-Ton 34-Ton DR Power Equipment Toll-free phone: 1-800-DR-OWNER (376-9637) Serial No. Fax: 1-802-877-1213 Original Language Order No. Website: www.DRpower.com Read and understand this manual and all instructions before operating the DR Horizontal/Vertical Log Splitter.
-
Page 2: Table Of Contents
Additional Information and Potential Changes DR Power Equipment reserves the right to discontinue, change, and improve its products at any time without notice or obligation to the purchaser. The descriptions and specifications contained in this manual were in effect at printing. Equipment described within this manual may be optional. -
Page 3: Chapter 1: General Safety Rules
If you have any questions or need assistance, please contact us at www.DRpower.com or call toll-free 1-800-DR-OWNER (376-9637) and one of our Technical Support Representatives will be happy to help you. - Page 4 Protecting Yourself and Those Around You This machine was built to be operated according to the safe operation practices in this manual. As with any type of power equipment, carelessness or error on the part of the operator can result in serious injury. This machine is capable of amputating hands and feet and throwing debris.
- Page 5 Safety with Gasoline - Powered Machines Gasoline is a highly flammable liquid. Gasoline also gives off flammable vapor that can be easily ignited and cause a fire or explosion. Never overlook the hazards of gasoline. Always follow these precautions: Never run the engine in an enclosed area or without proper ventilation as the exhaust from the engine contains carbon monoxide, which is an odorless, tasteless, and deadly poisonous gas.
- Page 6 Under California law, and the laws of some other states, you are not permitted to operate an internal combustion engine using hydrocarbon fuels without an engine spark arrester. This also applies to operation on US Forest Lands. All DR HORIZONTAL/VERTICAL LOG SPLITTERS shipped to California, New Mexico and Washington State are provided with spark arresters.
-
Page 7: Chapter 2: Assembly And Setting Up The Dr Horizontal/Vertical Log Splitter
Chapter 2: Assembly and Setting Up The DR HORIZONTAL/VERTICAL LOG SPLITTER It may be helpful to familiarize yourself with the controls and features of your DR HORIZONTAL/VERTICAL LOG SPLITTER as shown in Figure 2 before beginning these procedures. If you have any questions at all, please feel free to contact us at www.DRpower.com. - Page 8 Specifications Model 22 Ton 28 Ton 34 Ton Engine See engine manual See engine manual See engine manual Pump Two-Stage, 10 gpm Two-Stage, 10 gpm Two-Stage, 15 gpm Cylinder (Bore x Stroke) 4 in. x 24 in. 4.5 in. x 24 in. 5 in.
- Page 9 Compare the contents of the Hardware Kit #2 with the “Parts Supplied” list above. If you have any questions please contact us at www.DRpower.com or call 1-800-DR-OWNER (376-9637) for assistance. Figure 5 CONTACT US AT w w w .D Rpow e r .com...
- Page 10 Compare the contents of the Hardware Kit #3 with the “Parts Supplied” list above. If you have any questions please contact us at www.DRpower.com or call 1-800-DR-OWNER (376-9637) for assistance. Note: When installing the Bolts, Washers, and Locknuts, install the Washers so that one Washer is against the head of the Bolt, and the other Washer is against the Locknut.
- Page 11 If you have any questions please contact us at www.DRpower.com or call Figure 10 1-800-DR-OWNER (376-9637) for assistance. Note: The O-Rings (Item 5) in Hardware Kit #4 are to be used in the “Installing the Hydraulic Hoses” section in this Chapter. Set the O-Rings aside in a secure place until you reach this step.
- Page 12 Compare the contents of the Hardware Kit #5 with the “Parts Supplied” list above. If you have any questions please contact us at www.DRpower.com or call 1-800-DR-OWNER (376-9637) for assistance. Note: When installing the Bolts, Washers, and Locknuts, install the Washers so that...
- Page 13 Installing the Beam Assembly Pin and Hitch Clip Take extra care when raising and lowering the beam as it is very heavy. Having a second person assist with raising or lowering the beam is recommended to prevent injury. Be sure to keep hands away from any Beam Support Tabs Beam...
- Page 14 Compare the contents of the Hardware Kit #6 with the “Parts Supplied” list above. If you have any questions please contact us at www.DRpower.com or call 1-800-DR-OWNER (376-9637) for assistance. Note: When installing the Bolts, Washers, and Locknuts, install the Washers so that one Washer is against the head of the Bolt, and the other Washer is against the Locknut.
- Page 15 Assembling the Control Handle Control Handle Note: The control handle is shipped hanging from the valve on the handle link 1. Remove the Pin and Hitch Clip from the Control Valve (Figure 27). 2. Rotate the Control Handle up into the operating position and secure with the Pin and Hitch Clip.
- Page 16 Adding Hydraulic Fluid Supplies Needed: Paper Towels Hydraulic Fluid (see Figure 30) Note: Use the following instructions only when adding Fluid for the first time. Refer to the “Checking the Hydraulic Fluid Level” section in Chapter 4 for information on maintaining the Hydraulic Fluid level. ...
- Page 17 Lubricating the Beam Beam Supplies Needed: Fluid Film 1. Lubricate the Beam area (where the splitting wedge will slide) with Fluid Film (Figure 33). Do not use Grease. Check the Tire Pressure Tools Needed: Tire Pressure Gauge Air Compressor Figure 33 1.
-
Page 18: Chapter 3: Operating The Dr Horizontal/Vertical Log Splitter
Read and understand all instructions, safety precautions, and/or (Top View) warnings listed in “Chapter 1 General Safety Rules” before operating this DR HORIZONTAL/VERTICAL LOG SPLITTER. If any doubt or question arises about the correct or safe method of performing anything found in Operating... - Page 19 Handling Wood Note: All logs should be no longer than 24". Use the following photos for the correct and incorrect methods of splitting logs. Never split a log using an incorrect or unsafe method. Note: The Following Warnings and Instructions apply when Splitting Wood in both the Horizontal and Vertical Positions.
- Page 20 Splitting Wood The control handle has three positions: Control FORWARD — Move the control handle forward to the FORWARD position to Handle move wedge toward the log to split (Figure 42). Note: The control handle will return to the NEUTRAL position as soon as the handle is released (from the FORWARD position only).
- Page 21 Beam Operating Positions Horizontal Beam Lock Take extra care when raising and lowering the beam as it is fairly heavy. Having a second person assist with raising or lowering the beam is recommended. Be sure to keep hands away from any possible pinch points. ...
- Page 22 Transporting the Log Splitter Tow Bar 1. Lower the beam to its horizontal position. Make certain the beam is locked securely with the horizontal beam lock. 2. Change the Jack Stand to transporting position. a) Remove the Pin and Hitch Clip from the Jack Stand (Figure 50). Pin w/Hitch b) With the help of another person, Support the Tow Bar and pivot the Clip...
- Page 23 Locking Hitch Coupler Adjustment Check Trigger Pull 1. Place the proper size ball in the socket of the coupler and close the latch assembly (Figure 54). Verify that the locking trigger is properly engaged in its detent. 2. Pull on the ball and/or coupler, trying to remove the ball from the socket. If the ball moves more than 1/16"...
-
Page 24: Chapter 4: Maintaining The Dr Horizontal/Vertical Log Splitter
Chapter 4: Maintaining the DR HORIZONTAL/VERTICAL LOG SPLITTER Regular maintenance is the way to ensure the best performance and long life of your machine. Please refer to this manual and the engine manufacturer's owner's manual for maintenance procedures. Service intervals listed in the checklist below supersede those listed in the engine manufacturer's owner's manual. - Page 25 Checking the Hydraulic Fluid Level Never run the Log Splitter unless the hydraulic fluid tank is at the proper level or you will cause damage to the Hydraulic Pump. Tools and Supplies needed: Clean Rags Hydraulic Fluid Reservoir Note: To get an accurate reading when checking the Hydraulic Fluid Level, ensure Dipstick that the machine is on a level surface.
- Page 26 4. Refill the Hydraulic Tank. Initial Fill Line Note: Refer to Figure 30 in the “Adding Hydraulic Fluid” section in Chapter 2 for recommended Hydraulic Fluid Types. 1/4" Remove the Reservoir Dipstick and fill the tank with the recommended hydraulic fluid until it reaches the Initial Fill Line on Operating Level the Dipstick (Figure 61).
- Page 27 Replacing the Wheels Tools and Supplies needed: Channel Lock Pliers Clean Rags Adjustable Wrench Needle Nose Pliers Jack and Jack Stands Hammer and Wood Block Dust Cap Figure 64 The Splitter must be supported carefully so it does not tip over when jacking or it could cause Splitter damage or personal injury.
-
Page 28: Chapter 5: Troubleshooting
Most problems are easy to fix. Consult the Troubleshooting Table below for common problems and their solutions. If you continue to experience problems, contact us at www.DRpower.com or call toll-free 1-800-DR-OWNER (376-9637) for support. Before performing any maintenance procedure or inspection, stop the engine, wait five minutes to allow all parts to cool. - Page 29 Troubleshooting Table (Continued) Before performing any maintenance procedure or inspection, stop the engine, wait five minutes to allow all parts to cool. Disconnect the spark plug wire, keeping it away from the spark plug. YMPTOM OSSIBLE AUSE Broken drive shaft; See authorized service dealer. Leaking pump shaft seal ...
- Page 30 ® HORIZONTAL/VERTICAL LOG SPLITTER...
-
Page 31: Chapter 6: Parts Lists And Schematic Diagrams
Chapter 6: Parts Lists and Schematic Diagrams Parts List - DR HORIZONTAL/VERTICAL LOG SPLITTER NOTE: Part numbers listed are available through DR Power Equipment. Ref# Part# Description Ref# Part# Description 33727 Frame, Main (22 Ton) 27.2 33680 Coupling, Shaft, 1" Bore... - Page 32 Parts List – DR HORIZONTAL/VERTICAL LOG SPLITTER (continued) NOTE: Part numbers listed are available through DR Power Equipment. Ref# Part# Description Ref# Part# Description 33755 Pin, Cotter, 4 X 50mm 87.1 36087 Bolt, HCS, M10 X 30, CL8.8, ZP 33714 Cap, Dust, 87.2 30250...
- Page 33 Schematic – DR HORIZONTAL/VERTICAL LOG SPLITTER CONTACT US AT w w w .D Rpow e r .com...
- Page 34 Notes: ® HORIZONTAL/VERTICAL LOG SPLITTER...
- Page 35 Notes: CONTACT US AT w w w .D Rpow e r .com...
- Page 36 If your DR HORIZONTAL/VERTICAL LOG SPLITTER will be idle for more than 30 days, we recommend using a gas stabilizer. This will prevent sediment from gumming up the Carburetor. If there is dirt or moisture in the gas or Tank, remove it by draining the Tank.
Need help?
Do you have a question about the 22-Ton and is the answer not in the manual?
Questions and answers