Sundstrom SR 700 Operating Instruction
Hide thumbs
Also See for SR 700:
- User instructions (132 pages) ,
- Instructions for use manual (116 pages) ,
- Operating instructions manual (19 pages)

Related Manuals for Sundstrom SR 700


Summary of Contents for Sundstrom SR 700
- Page 1 Drawn up by: 2011-09-02/RK Revision: OI06H-7018 SR 700 Reviewed: 2017-02-13/PA Page: 1 of 23 Operating instruction SR 700...
-
Page 2: General Information
Shield 2/3, EN 5 together with helmet with visor SR 588-2/SR 580. SR 590 Welding shield The SR 700 can be used as an alternative to filter respirators in all situations for which these are recommended. This applies particularly to work that is hard, warm or of long duration. - Page 3 Check that the equipment is complete in accordance with the packing list and has not been damaged in transit. Packing list: • 1. Fan SR 700, bare • 2. Battery SR 701, 2,2 Ah • 3. Battery charger SR 713 •...
- Page 4 Drawn up by: 2011-09-02/RK Revision: OI06H-7018 SR 700 Reviewed: 2017-02-13/PA Page: 4 of 23 3.5 Assembly Battery Battery Remove and charge the battery. The charger carries out charging automatically in three stages. 1. Orange LED. 2. Yellow LED. 3. Green LED.
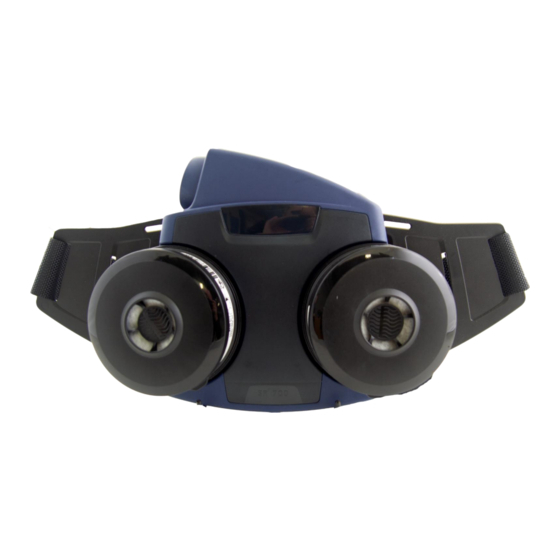
- Page 5 Drawn up by: 2011-09-02/RK Revision: OI06H-7018 SR 700 Reviewed: 2017-02-13/PA Page: 5 of 23 3.5 Mounting Belt Put the belt halves together by pressing the locking into each other. The belt is mounted into the fan unit with belt plate pointing upward.
- Page 6 Drawn up by: 2011-09-02/RK Revision: OI06H-7018 SR 700 Reviewed: 2017-02-13/PA Page: 6 of 23 All three tongues in place. Press the three small tongues locking the belt into the fan unit. Correct mounted belt.
-
Page 7: Breathing Hose
Drawn up by: 2011-09-02/RK Revision: OI06H-7018 SR 700 Reviewed: 2017-02-13/PA Page: 7 of 23 Breathing Hose Check that the O-ring at both ends of the hose is ok. Put hose connection into the fan unit. Turn it a quarter of a turn clockwise to lock it. -
Page 8: Particle Filters
Drawn up by: 2011-09-02/RK Revision: OI06H-7018 SR 700 Reviewed: 2017-02-13/PA Page: 8 of 23 Particle filters Two filters must always be used at the same time. • Check that the gaskets in the filter mounting of the fan unit are in place and are in good condition. - Page 9 Drawn up by: 2011-09-02/RK Revision: OI06H-7018 SR 700 Reviewed: 2017-02-13/PA Page: 9 of 23 Assemble the pre-filters. Press the pre-filter holders onto the particle filters. Mounted pre-filter holders onto the filters.
- Page 10 Drawn up by: 2011-09-02/RK Revision: OI06H-7018 SR 700 Reviewed: 2017-02-13/PA Page: 10 of 23 3.6 Start/Switch off Start the fan by pressing the control button once. The symbols on the display will light up and the sound signal will sound.
- Page 11 Drawn up by: 2011-09-02/RK Revision: OI06H-7018 SR 700 Reviewed: 2017-02-13/PA Page: 11 of 23 To switch off the fan unit, keep the control button depressed for about two seconds. 3.7 Performance check Check of the minimum flow – MMDF Check that the fan unit is complete, correctly mounted, thoroughly cleaned and undamaged.
- Page 12 Drawn up by: 2011-09-02/RK Revision: OI06H-7018 SR 700 Reviewed: 2017-02-13/PA Page: 12 of 23 Grip the flow meter tube with the other hand so that the tube points vertically upwards from the bag. Read the position of the ball in the tube.
- Page 13 Drawn up by: 2011-09-02/RK Revision: OI06H-7018 SR 700 Reviewed: 2017-02-13/PA Page: 13 of 23 3.6 Operation/performance Checking the alarms The equipment is designed to provide a warning if the air flow is obstructed. Provoke an air flow stoppage by gripping the top part of the bag or by shutting off the flow meter outlet.
- Page 14 Drawn up by: 2011-09-02/RK Revision: OI06H-7018 SR 700 Reviewed: 2017-02-13/PA Page: 14 of 23 If the battery capacity is lower than 5 % • A sound signal will be repeated twice at intervals of two seconds. • The yellow battery symbol of the display will flash.
- Page 15 Drawn up by: 2011-09-02/RK Revision: OI06H-7018 SR 700 Reviewed: 2017-02-13/PA Page: 15 of 23 Note that when a full face mask SR 200 is used, the hose should run along your waist and up along the chest. Make sure that the breathing hose runs...
- Page 16 Drawn up by: 2011-09-02/RK Revision: OI06H-7018 SR 700 Reviewed: 2017-02-13/PA Page: 16 of 23 3.9 Taking the Equipment off Leave the polluted area before taking the equipment off. • Take off the head top. • Switch off the fan. • Release the belt and remove the fan unit.
-
Page 17: Maintenance Schedule
Drawn up by: 2011-09-02/RK Revision: OI06H-7018 SR 700 Reviewed: 2017-02-13/PA Page: 17 of 23 After cleaning, store the equipment in a dry and clean place at room temperature. Avoid exposing it to direct sunlight. The flow meter can be turned inside out and can be used as a storage bag for the head top. - Page 18 Drawn up by: 2011-09-02/RK Revision: OI06H-7018 SR 700 Reviewed: 2017-02-13/PA Page: 18 of 23 4.4.1 To change the particle filters Bear in mind that both filters must be changed at the same time. • Unscrew the filters. Release the filter holders.
- Page 19 Drawn up by: 2011-09-02/RK Revision: OI06H-7018 SR 700 Reviewed: 2017-02-13/PA Page: 19 of 23 Change the pre-filters in its holders. Clean as necessary. Fit new filters.
- Page 20 Drawn up by: 2011-09-02/RK Revision: OI06H-7018 SR 700 Reviewed: 2017-02-13/PA Page: 20 of 23 4.4.1 To change gaskets Screw out the filters. • The gasket has a groove all round and is fitted on a flange below the threads in the filter mounting.
- Page 21 Drawn up by: 2011-09-02/RK Revision: OI06H-7018 SR 700 Reviewed: 2017-02-13/PA Page: 21 of 23 Turn in the threaded plugs into the filter inlet. Assemble the third plug with gasket into the air outlet of the fan unit. All three plugs in place.
- Page 22 Drawn up by: 2011-09-02/RK Revision: OI06H-7018 SR 700 Reviewed: 2017-02-13/PA Page: 22 of 23...
- Page 23 Drawn up by: 2011-09-02/RK Revision: OI06H-7018 SR 700 Reviewed: 2017-02-13/PA Page: 23 of 23...
Need help?
Do you have a question about the SR 700 and is the answer not in the manual?
Questions and answers