Table of Contents
Advertisement
Quick Links
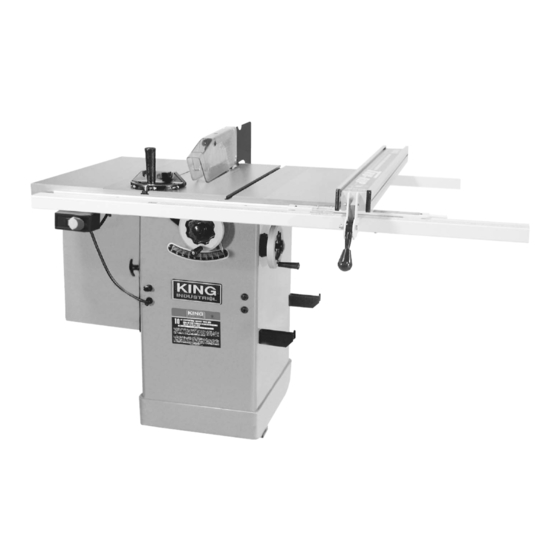
10" CONTRACTORS
CABINET TABLE SAW
*KC-10CCX illustrated above with optional 30" Rip Industrial Rip Fence System model: KRF-10/30L12.
52" Rip Industrial Rip Fence System model: KRF-10/52L12 also available.
MODEL: KC-10CCX
INSTRUCTION MANUAL
COPYRIGHT © 2009 ALL RIGHTS RESERVED BY KING CANADA TOOLS INC.
Advertisement
Table of Contents

Related Manuals for King Industrial KC-10CCX


Summary of Contents for King Industrial KC-10CCX
- Page 1 10” CONTRACTORS CABINET TABLE SAW *KC-10CCX illustrated above with optional 30” Rip Industrial Rip Fence System model: KRF-10/30L12. 52” Rip Industrial Rip Fence System model: KRF-10/52L12 also available. MODEL: KC-10CCX INSTRUCTION MANUAL COPYRIGHT © 2009 ALL RIGHTS RESERVED BY KING CANADA TOOLS INC.
-
Page 2: Warranty Information
LIMITED WARRANTY OFFERS A 2-YEAR LIMITED WARRANTY FOR THIS 10” CONTRACTORS CABINET TABLE SAW FOR INDUSTRIAL USE. 2-YEAR LIMITED WARRANTY FOR KING INDUSTRIAL MACHINERY PROOF OF PURCHASE Please keep your dated proof of purchase for warranty and servicing purposes. REPLACEMENT PARTS Replacement parts for this Table Saw with new blade guard are available at our authorized King Canada service centers across Canada. -
Page 3: General Safety Instructions For Power Tools
GENERAL SAFETY INSTRUCTIONS FOR POWER TOOLS 1. KNOW YOUR TOOL footwear is recommended. Wear protective hair covering to Read and understand the owners manual and labels affixed to contain long hair. Roll up long sleeves above the elbows. the tool. Learn its application and limitations as well as its 12. -
Page 4: Specifications
GETTING TO KNOW YOUR 10” TABLE SAW 1. Miter Gauge (lock handle) 5. Rip Fence Storage 2. Transparent blade guard 6. Blade tilting handwheel 3. Optional Industrial Rip Fence System 7. Motor cover lock handle 4. Blade raising handwheel 8. Switch w/ removeable key SPECIFICATIONS Horsepower . -
Page 5: Electrical Requirements
ELECTRICAL REQUIREMENTS WARNING! ALL ELECTRICAL CONNECTIONS MUST BE DONE BY A QUALIFIED ELECTRICIAN. FAILURE TO COMPLY MAY RESULT IN SERIOUS INJURY! ALL ADJUSTMENTS OR REPAIRS MUST BE DONE WITH THE TABLE SAW DISCONNECTED FROM THE POWER SOURCE. FAILURE TO COMPLY MAY RESULT IN SERIOUS INJURY! POWER SUPPLY PROPERLY GROUNDED OUTLET WARNING: THIS TABLE SAW CAME WIRED FOR 220V... - Page 6 ASSEMBLY ASSEMBLING EXTENSION WINGS Assemble the Table Extension Wings to your saw as follows: Fasten extension wings to the table (underneath the table and extension) using six hex. head bolts and lockwashers supplied. Use a straight edge to level the extension wings to the table surface as shown in fig.
- Page 7 ADJUSTMENTS ADJUSTING 45 AND 90 DEGREE POSITIVE STOPS The blade tilting mechanism of your saw is equipped with a positive stop at 45 and 90 degrees. To check and adjust these positive stops, proceed as follows: 1. Raise the saw blade to its maximum height. 2.
-
Page 8: Operation
OPERATION INSTALLING / CHANGING BLADES 1. Turn off saw and disconnect the electrical plug. 2. Raise the saw blade to its maximum height, hold the guard up and lock the saw at 0 degrees. Remove the table insert. 3. Jam a large piece of scrap wood into the blade teeth at the front. See Fig. - Page 9 OPERATION CROSSCUTTING Crosscutting requires the use of the miter gauge to position and guide the work. Place the work against the miter gauge and advance both the miter gauge and work toward the saw blade, as shown in Fig. 10. The miter gauge may be used in either table slot, however, most operators prefer the left groove for average work.
- Page 10 OPERATION USING ACCESSORY MOULDING CUTTERHEAD Moulding is cutting a shape on the edge of face of the work. Cutting moulding with a moulding cutterhead in the circular saw is a fast, safe and clean operation. The many different knife shapes available make it possible for the operator to produce almost any kind of moulding, such as various styles of corner moulds, picture frames, table edges, etc.
-
Page 11: Troubleshooting
TROUBLESHOOTING PROBLEM SOLUTION SAW WILL NOT START 1. Saw not plugged in. 1. Plug in saw. 2. Fuse blown or circuit breaker tripped. 2. Replace fuse or reset circuit breaker. 3. Cord damaged. 3. Have cord replaced by a certified electrician. OVERLOAD KICKS OUT FREQUENTLY 1.
Need help?
Do you have a question about the KC-10CCX and is the answer not in the manual?
Questions and answers