
Related Manuals for Slican VPS-2000P


Summary of Contents for Slican VPS-2000P
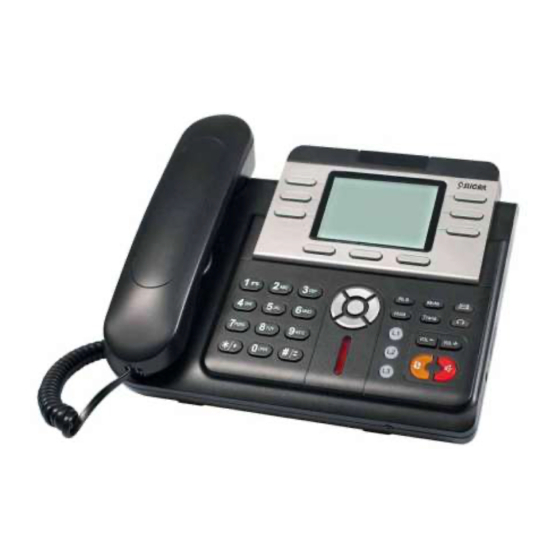
- Page 1 Slican VPS-2000P Business POE SIP Phone User Manual Slican sp.z o.o. www.slican.com User manual issue 1.0 Slican reserves the right to make changes to the product without prior notice. User manual issue 1.0...
-
Page 2: Table Of Contents
Table of Content 1. INTRODUCING SLICAN VPS-2000P VOIP PHONE ................4 1.1. T VPS-2000P ................4 HANK YOU FOR YOUR PURCHASING 1.2. D .........................4 ELIVERY ONTENT 1.3. K ............................4 EYPAD 1.4. P ........................5 ORT FOR CONNECTING 2. INITIAL CONNECTING AND SETTING ....................6 2.1. - Page 3 4.3.2.5. DHCP SERVER ......................25 4.3.2.6. SNTP ..........................26 4.3.3. VOIP............................. 27 4.3.3.1. SIP Config ........................27 4.3.3.2. IAX2 Config ........................30 4.3.3.3. Stun Config ........................31 4.3.3.4. DIAL PEER setting ...................... 32 4.3.4. Phone ..........................35 4.3.4.1. DSP Config ........................35 4.3.4.2.
-
Page 4: Introducing Slican Vps-2000P Voip Phone
1. Introducing VPS-2000P VoIP Phone 1.1. Thank you for your purchasing Slican VPS-2000P Thank you for your purchasing Slican VPS-2000P. VPS-2000P is a full-feature telephone that provides voice communication over the same data network that your computer uses. This phone functions not... -
Page 5: Port For Connecting
show call forward”. After this indication disappears, User can configure the forward phone no. of SIP1 or SIP2. Press Soft2 (ON) to enabled call forward function and set it to always mode; Press Soft1 (OFF) to close the function of forward HeadSet Place and receive calls through an optionally connected headset... -
Page 6: Initial Connecting And Setting
Port type: RJ-9 connector Headset Port type: 3.5mm jack VPS-2000P provide two Ethernet ports and a power adaptor. Also has two headset interfaces with RJ-9 port and 3.5mm jack. Please refer to safety notes of this manual carefully before power adaptor is connected. -
Page 7: Power Adaptor Connection
Make sure that the power you use is comply with the parameters of power adaptor. 1. Plug power adaptor to power socket. 2. Plug power adaptor’s AC output to the AC5V port of VPS-2000P to start up. 3. There will be displayed black line and “initializing... wait logon...” on the screen. After finishing startup, phone will show greeting, current date and time and so forth. - Page 8 twice, screen will show “Network”. Then press Soft2 (Enter) or 2. Press , and press "OK", the LCD screen will display “WAN”. 3. Press Soft2 (Enter), then press , choose PPPoE. 4. Press Soft1 (Edit), the screen will display “Account”. The screen will show the current account information.
-
Page 9: Vps-2000P's Basic Operation
DHCP mode takes effect. 3. VPS-2000P’s basic operation 3.1. Answer calls VPS-2000P will ring to indicate you when there is call incoming, below is ways to answer call: Answer with hook off Take handset, you can talk directly. -
Page 10: Place Calls
Hook off (screen will show the current using line, or you could press key L1-L3 to select), after getting dialing tone, you could begin to dial number. After finishing it, press # and VPS-2000P will send the number and call the number. When you hear a ring-back tone and screen shows the caller’s number, it shows that the person you called is ringing. -
Page 11: End Calls
Soft1 (Split); to end the call, please press Soft3 (Close) or press 3.7. Call records VPS-2000P supports 100 items of missed call, 100 items of incoming call, and 100 items of dialed call. User manual issue 1.0... -
Page 12: Special Keys
If the records are full, the newest will replace the oldest. If phone’s power cut or reboot, call records will be discarded. Missed call and screen displays “Missed Call” with the number and time of missed call. User can Press also use &... -
Page 13: Call Pickup
Note: 1. First 9 numbers corresponding digit key 1-9, 10 number corresponding digit key 0 2.The first 10 set of numbers in standby mode press the corresponding number key and then press softkey3-Dial or 【Speaker】 key to exhale, but the first 11 groups and 12 group numbers without the corresponding number key is required to enter SDial menu to find the set of numbers by Corresponds memory key or softkey3-Dial button to exhaled. -
Page 14: Click To Dial
B), then user A’s phone will ring, after A hooks off, the phone will dial to B. 4. Web configuration 4.1. Introduction of configuration 4.1.1. Ways to configure VPS-2000P has three different ways to different users. Use phone keypad. ... -
Page 15: Configuration Via Web
4.3. Configuration via WEB 4.3.1. BASIC 4.3.1.1. Status Status Field name Explanation Shows the configuration information on WAN and LAN port, including the connect Network mode of WAN port (Static, DHCP, PPPoE), MAC address, the IP address of WAN port and LAN port, ON or OFF of DHCP mode of LAN port. Phone Number Shows the phone numbers provided by the SIP LINE 1-3 servers and IAX2. - Page 16 Wizard Field Name Explanation Please select the proper network mode according to the network condition. VPS-2000P provide three different network settings: Static: If your ISP server provides you the static IP address, please select this mode, then finish Static Mode setting.
- Page 17 Server Address Input your SIP server address. Server Port Set your SIP server port. User Name Input your SIP register account name. Password Input your SIP register password. Phone Number Input the phone number assigned by your VOIP service provider. Enable Register Start to register or not by selecting it or not.
-
Page 18: Call Log
4.3.1.3. Call Log You can query all the outgoing through this page. Call Log Field name explanation Start Time Display the start time of the outgoing record. Last Time Display the conversation time of the outgoing record. Called Number Display the account/protocol/line of the outgoing record. 4.3.1.4. -
Page 19: Network
The current Gateway IP address. Get MAC Time Shows the time of getting MAC address Please select the proper network mode according to the network condition. VPS-2000P provide three different network settings: Static: If your ISP server provides you the static IP address, please select this mode, then finish Static Mode setting. -
Page 20: Lan Config
If you use static mode, you need set it. IP Address Input the IP address distributed to you. Netmask Input the Netmask distributed to you. Gateway Input the Gateway address distributed to you. Set DNS domain postfix. When the domain which you input can not be parsed, phone DNS Domain will automatically add this domain to the end of the domain which you input before and parse it again. -
Page 21: Qos Config
LAN Config Field name explanation LAN IP Specify LAN static IP. Netmask Specify LAN Netmask. Select the DHCP server of LAN port or not. After you modify the LAN IP address, phone DHCP Service will amend and adjust the DHCP Lease Table and save the result amended automatically according to the IP address and Netmask. - Page 22 In chart 1, there is a layer 2 switches without setting VLAN. Any broadcast frame will be transmitted to the other ports except the send port. For example, a broadcast information is sent out from port 1 then transmitted to port 2,3and 4. In chart 2, red and blue indicate two different VLANs in the switch, and port 1 and port 2 belong to red VLAN, port 3 and port 4 belong to blue VLAN.
- Page 23 QoS Configuration Field name explanation VLAN Enable Before select it to enable VLAN, you need enable Bridge mode in LAN config. Enable VLAN ID check by selecting it. After enable VLAN ID check, if VLAN ID of a data VLAN ID Check Enable package is not the same with the phone or a data package do not have VLAN ID, the data package will be discarded.
-
Page 24: Service Port
4.3.2.4. Service Port You can set the port of telnet/HTTP/RTP by this page. SERVICE PORT Field name explanation set web browse port, the default is 80 port, if you want to enhance system safety, you'd HTTP Port better change it into non-80 standard port; Example: The IP address is 192.168.1.70. -
Page 25: Dhcp Server
4.3.2.5. DHCP SERVER DHCP SERVER Field name explanation DHCP Leased Table IP-MAC mapping table. If the LAN port of the phone connects to a device, this table will show the IP and MAC address of this device. Shows the DHCP Lease Table, the unit of Lease time is Minute. Lease Table Name Specify the name of the lease table Start IP... -
Page 26: Sntp
Notice: 1)The size of lease table can not be larger than the quantity of C network IP address. We recommend you to use the default lease table and not modify it. 2)If you modifies the DHCP lease table, you need save the configuration and reboot. 4.3.2.6. -
Page 27: Voip
Notice: You need specify the above all items. 4.3.3. VOIP 4.3.3.1. SIP Config Set your SIP server in the following interface. SIP Config Field name explanation User manual issue 1.0... - Page 28 Choose line to set info about SIP, there are 3 lines to choose. You can switch by 【Load】 button. Register Status Shows if the phone has been registered the SIP server or not; or so, show Unapplied; Server Name Set the server name. Server Address Input your SIP server address.
- Page 29 Enable Via rport Enable/Disable system to support RFC3581. Via rport is special way to realize SIP NAT. Enable PRACK Enable or disable SIP PRACK function, suggest use the default config. Long Contact Set more parameters in contact field; connection with SEM server Enable URI Convert Convert # to %23 when send the URI.
-
Page 30: Iax2 Config
phone will use the source IP address, not the address in via field. Enable GRUU Set to support GRUU Enable Display name Set to make quotation mark to display name as the phone sends out signal, in Quote order to be compatible with server. 4.3.3.2. -
Page 31: Stun Config
4.3.3.3. Stun Config In this web page, you can config SIP STUN. STUN: By STUN server, the phone in private network could know the type of NAT and the NAT mapping IP and port of SIP. The phone might register itself to SIP server with global IP and port to realize the device both calling and being called in private network. -
Page 32: Dial Peer Setting
Choose line to set info about SIP, There are 3 lines to choose. You can switch by 【Load】 button. Use Stun Enable/Disable SIP STUN. Notice: SIP STUN is used to realize SIP penetration to NAT. If your phone configures STUN Server IP and Port (default is 3478), and enable SIP Stun, you can use the ordinary SIP Server to realize penetration to NAT. - Page 33 DIAL PEER Field name explanation There are two types of matching conditions: one is full matching, the other is prefix matching. In the Full matching, you need input your desired phone number in this blank, and then you need dial the phone number to realize calling to what the phone Phone number number is mapped.
- Page 34 the phone will delete the first 3 digits then send out the rest digits. You can refer to examples of different alias application to know how to set delete length. Introduction of how to set up dial-peer to implement switch between multi- SIP lines 9T mapping: If you have registered a SIP1 server and set dial-peer according to the above table, all calls will be sent via SIP1 server when you press the numeric key “9”...
-
Page 35: Phone
When you dial “8309“, the The phone will automatically send out alias number adding your dialed SIP1 server will receive “07558309” number, if your dialed number starts with your set phone number. You need set Phone Number, Alias When you dial “0106228”, and Delete Length. -
Page 36: Call Service
DSP Configuration Field name explanation First Codec The fist preferential DSP codec: G.711A/u, G.722, G.723, G.729,G.726,AMR Second Codec The second preferential DSP codec: G.711A/u, G.722, G.723, G.729,G.726 Third Codec The third preferential DSP codec: G.711A/u, G.722, G.723, G.729,G.726,AMR Forth Codec The forth preferential DSP codec: G.711A/u, G.722, G.723, G.729,G.726,AMR Fifth Codec The fifth preferential DSP codec: G.711A/u, G.722, G.723, G.729,G.726,AMR... - Page 37 Call Service Field name explanation Specify Hotline number. If you set the number, you can not dial any other Hotline numbers. No Answer Time Specify No Answer Time Set Prefix in peer to peer IP call. For example: what you want to dial is 192.168.1.119, If you define P2P IP Prefix as 192.168.1., you dial only #119 to reach 192.168.1.119.
-
Page 38: Digital Map Configuration
Set Add/Delete Limit List. Please input the prefix of those phone numbers which you forbid the phone to dial out. For example, if you want to forbid those phones of 001 as prefix to be dialed out, you need input 001 in the blank of limit list, and then you can not dial out any phone number whose prefix is 001. -
Page 39: Phone Book
Below is user-defined digital map rule: [] Specifies a range that will match digit. May be a range, a list of ranges separated by commas, or a list of digits. x Match any single digit that is dialed. . Match any arbitrary number of digits including none. Tn Indicates an additional time out period before digits are sent of n seconds in length. -
Page 40: Function Key
Phone Book Field name explanation Shows the detail of current phonebook. Name Shows the name corresponding to the phone number Number Shows the phone number Ring Type Shows the ring type of the incoming call. Click “Modify” to change the selected information and click the “Delete” to delete the selected record. Notice: the maximum capability of the phonebook is 500 items 4.3.4.5. - Page 41 Memory key Set the memory key's serial number Type Memory Key: settings can be stored in key storage for each number, the standby or off-hook, select the function keys on the keyboard can call this number. Line, set the dial mode (SIP1, SIP2, SIP3, Dialpeer, IAX2).Key Key Event functions, monitor state DTMF:In the call, send DTMF Value...
-
Page 42: Maintenance
4.3.5. Maintenance 4.3.5.1. Auto Provision Auto Provision Field name explanation Show the current config file’s version. Current Config Version Server Address Set FTP/TFTP/HTTP server IP address for auto update. The address can be IP address or Domain name with subdirectory. Username Set FTP server Username. -
Page 43: Config Setting
Level 5---notice: Your system works well in special condition, but you need to check its working environment and parameter. Level 6---info: the daily debugging info. Level 7---debug: the lowest debug info. Professional debugging info from R&D person. At present, the lowest level of debug information send to Syslog is info, debug level only can be displayed on telnet. -
Page 44: Update
4.3.5.4. Update You can update your configuration with your config file in this web page. Update Field name explanation Click the browse button, find out the config file saved before or provided by manufacturer, download it to the phone directly, press “Update” to save. You can Web Update also update downloaded update file, logo picture, ring, mmiset file by web. -
Page 45: Account Config
2. Config file export: Upload the config file to FTP/TFTP server, name and save it. 3. Config fie import: Download the config file to phone from FTP/TFTP server. The configuration will be effective after the phone is reset. 4. Phone book export (.vcf): Upload the phonebook file to FTP/TFTP server, name and save it. -
Page 46: Reboot
4.3.5.6. Reboot If you modified some configurations which need the phone’s reboot to be effective, you need click the Reboot, then the phone will reboot immediately. Notice: Before reboot, you need confirm that you have saved all configurations.. 4.3.6. Security 4.3.6.1. -
Page 47: Firewall
Set initial IP address in the Start IP column, Set end IP address in the End IP column, and click Add to add this IP segment. You can also click Delete to delete the selected IP segment. MMI Filter Select it or not to enable or disable MMI Filter. Click Apply to make it effective. Notice: Do not set your visiting IP outside the MMI filter range, otherwise, you can not logon through the web. -
Page 48: Nat Config
out access enable Select it to Enable out_ access rule Input/Output Specify current adding rule by selecting input rule or output rule. Deny/Permit Specify current adding rule by selecting Deny rule or Permit rule. Protocol Type Filter protocol type. You can select TCP, UDP, ICMP, or IP. Port Range Set the filter Port range Src Addr... - Page 49 DMZ config: In order to make some intranet equipments support better service for extranet, and make internal network security more effectively, these equipments open to extranet need be separated from the other equipments not open to extranet by the corresponding isolation method according to different demands. We can provide the different security level protection in terms of the different resources by building a DMZ region which can provide the network level protection for the equipments environment, reduce the risk which is caused by providing service to distrust customer, and is the best position to put public...
- Page 50 NAT Configuration Field name explanation IPSec ALG It is an encryption technology. Select it to enable IPSec ALG, the default is enable FTP is a service of connection layer which can transform intranet IP into FTP ALG extranet IP when intranet IP is sending out packet. Select it to enable FTP ALG, the default is enable PPTP ALG Select it enable PPTP ALG, the default is enable...
-
Page 51: Vpn Config
delete the selected mapping table. Shows the outside WAN port IP address and the inside LAN port IP address. Outside IP Set the outside Wan port IP address of DMZ. Inside IP Set the inside LAN port IP address of DMZ Click the Add button to add new table;... -
Page 52: Logout
VPN Configuration Field name explanation VPN IP Shows the current VPN IP address Select L2TP. You can choose only one for current state. After you select it, you’d better save configuration and reboot your phone. Enable VPN Select it or not to enable or disable VPN; VPN Server Addr Set VPN L2TP Server IP address VPN User Name... -
Page 53: Configuration Via Keypad
5. Configuration via Keypad 5.1. Keypad introduction User can browse, modify or cancel via screen menu by using Use need input password (default 123),when login the menu (system config) 5.2. Menu Tree Menu Tree List: System User Config Config Network Call Service Reboot... -
Page 54: Appendix
6. Appendix 6.1. Specification 6.1.1. Hardware Item VPS-2000P Adapter Input: 100-240V (Input /Output) Output: 5V 1A port 10/100Base- T RJ-45 for LAN 10/100Base- T RJ-45 for PC Power Consumption Idle: 2.5W/Active: 2.8W LCD Size 128x96 53.5 x 70mm Operation Temperature 0~40℃... -
Page 55: Network Features
Support path, gruu Support SIP Privacy Support SMS Support WMI Support Speed dial Support XML 6.1.3. Network features WAN/LAN: support bridge and router model Support PPPoE for xDSL Support basic NAT and NAPT ... -
Page 56: Digit-Character Map Table
6.2. Digit-character map table Keypad Character Keypad Character 7 P Q R S p q r s 2 A B C a b c 8 T U V t u v 3 D E F d e f 9 W X Y Z w x y z 4 G H I g h i 5 J K L j k l 6 M N O m n o...
Need help?
Do you have a question about the VPS-2000P and is the answer not in the manual?
Questions and answers