
Related Manuals for Sangean PR-D4VW


Summary of Contents for Sangean PR-D4VW
- Page 1 INSTRUCTION MANUAL PLEASE READ ALL THE INSTRUCTIONS COMPLETELY BEFORE USE AND SAVE MANUAL FOR FUTURE REFERENCE.
-
Page 2: Before Use
We recommend you keep the box in the unlikely event your radio will need servicing. Copyright © 2006 by C. Crane Company, Inc., Fortuna, CA 95540 Phone: 1-800-522-8863 All rights reserved. No part of this booklet may be reproduced, in any form or means whatsoever, without permission in writing from C. -
Page 3: Table Of Contents
Table of Contents Button Identification ………………………... Getting Started Powering your Radio ... 5 Installing the batteries …………………………... 6 Display Panel ……………………………………... Setting The Clock ………………………………... 8 Setting The Alarm ……………………………... Snooze Feature ……………………………... 10 Sleep Timer ………………………………………... 11 Radio Operation Tuning …………………………………………... -
Page 4: Button Identification
Button Identification 1) Power or • Sleep Timer 2) Band or • Tuning Steps 3) Radio Alarm Set 4) Beep Alarm Set 5) Display Clock/Frequency 6) Weather Alert (3 Modes) Note: When you see a • next to a button on the radio, it means you must press and hold the button down for two seconds to activate the function. -
Page 5: Getting Started
Getting Started POWERING YOUR RADIO Before powering your radio be sure to read the Safety Instructions on pages 22 and 23. The Sonido Radio will run on (4) “D” size NiMH or alkaline batter- ies or on 120V AC house current using the AC power adapter. Batteries are optional. -
Page 6: Installing The Batteries
Getting Started INSTALLING THE BATTERIES 1) Position the radio face down on a soft surface to protect it. 2) Open the battery compartment cover on the rear of the unit by pressing the catch. 3) Insert the (4) “D” cell batteries into the compartment as ind- icated in the drawing below. -
Page 7: Display Panel
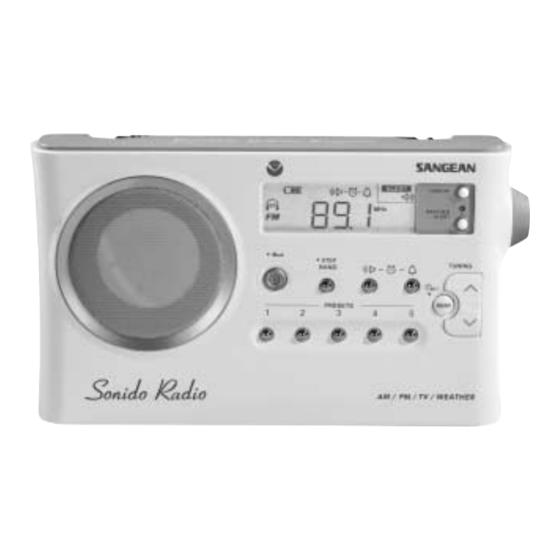
Getting Started DISPLAY PANEL 1) Time Set 2) Battery Status Symbol 3) Sleep Timer/Snooze Status 4) Radio Alarm 5) Beep Tone Alarm 6) Weather Alert Modes Sonido Radio 7) Preset stations (1 - 5) 8) Frequency Unit 9) Station Frequency / 10) AM / PM Indicator 11) Indicates Band In Use 12) Stereo Reception... -
Page 8: Setting The Clock
Getting Started SETTING THE CLOCK Please read this entire section carefully before you start. The clock can be set either while the radio is on or off. You will need to go through the steps listed below without stopping for more than 15 seconds at any given time or you will have to start over. - Page 9 Getting Started 2) Immediately press and hold the Scan/Set button for 3 seconds and you will hear a beep. The ALARM HOUR DIGIT and depending on which type of alarm is being set. 3) Using the Up/Down Tuning Buttons, select the appropriate hour digit and AM or PM.
-
Page 10: Snooze Feature
Getting Started BEEP TONE ALARM “HWS” (HUMANE WAKE SYSTEM) At the chosen alarm time a beep tone will sound and increase in volume every 15 seconds for one minute followed by one minute of silence before repeating the cycle. The HWS alarm will sound for one hour or until its turned off by pressing the power button. -
Page 11: Sleep Timer
Getting Started SLEEP TIMER FEATURE Your Sonido Radio is equipped with a Sleep Timer that enables the radio to continue playing for up to 120 minutes after activa- tion, then shuts the radio off. Selectable times are 60, 45, 30, 15, 120 and 90 minutes. -
Page 12: Radio Operation
Radio Operation TUNING The Sonido Radio features four bands: AM / FM / TV Audio 2-13 and Weather. Also the radio is equipped with three tuning methods: Manual tuning, Scan tuning, and Memory presets recall. Manual Tuning Refer to page 4 for Button Identification. 1) Press the Power Button to turn on the radio. -
Page 13: Weather Alert System
Radio Operation Memory Preset Tuning Five stations may be stored into memory in each of the four bands. 1) Tune to the station or channel you want to memorize. 2) Press and Hold the desired Memory Preset Button for two seconds or until you hear a beep. - Page 14 Radio Operation 1) To listen to the standard NOAA weather channels, turn the radio on, press the Band button until WX shows on the dis- play. The telescopic whip antenna may need to be fully extended and in the “up” position to receive a station clearly. 2) The channel number of the weather station is shown on the display.
- Page 15 Radio Operation 2) To access the second mode (WEATHER ALERT with flashing light and siren). Press and hold the WEATHER ALERT Button again for two seconds until you hear a long beep. The sym- bol shown at right will appear and the red light above the WEATHER ALERT Button comes on continuously.
-
Page 16: Tuning Steps
Radio Operation Notes on the Weather Alert 1) If you have the headphones plugged in and a weather alert is issued, the audio to the headphones will be cut-off and the siren will sound through the radio's speaker. 2) In any of the active WEATHER ALERT modes, the weather receiver stays on and listens for an emergency tone issued from NOAA in case of emergency. -
Page 17: Headphone And Audio Input Jacks
Radio Operation 2) By pressing Tuning Down, you may adjust the steps from 200kHz for U.S. or 100kHz per step for Europe. 3) After the FM step is selected, press the Step/Band button again to bring up the AM step selections. The display will show AM and flash 10 kHz tuning steps. -
Page 18: Specifications
Specifications FREQUENCY COVERAGE FM Band: 87.5 - 108 MHz Stereo AM Band: 520 - 1710 kHz TV Band: Channels 2-13 Audio Only WEATHER BAND Channel 1: 162.400 MHz Channel 2: 162.425 MHz Channel 3: 162.450 MHz Channel 4: 162.475 MHz POWER SOURCE AC 120 Volts 60Hz Batteries: (4) "D"... -
Page 19: Troubleshooting Guide
Troubleshooting Guide My radio shuts off after just a few seconds: Low batteries can cause this situation. Replace them with a new set of batteries. If the radio is operating on the power adapter, check for solid connections at the wall outlet and the side of the radio. -
Page 20: Radio Noise Troubleshooting
Radio Noise Troubleshooting AM RADIO NOISE PROBLEMS AND POSSIBLE SOLUTIONS If you hear an annoying buzz when listening to AM radio, it's most likely radio noise. Here are some of the usual culprits: Dimmer switch (even in an adjacent room). Lights: fluorescent light, “touch lamp”... -
Page 21: Listening Tips
AM Tuning & Listening Tips Most portable radios including the Sonido Radio have an internal AM antenna. Best performance is achieved when the radio is swiveled on its base for maximum signal pickup from the transmit- ting tower. This same technique can be used to help nullify unwanted signals or radio noise. -
Page 22: Safety Instructions
Safety Instructions READ BEFORE OPERATING EQUIPMENT SAVE THESE INSTRUCTIONS 1) Read and understand all safety and operating instructions before the radio is operated. 2) Retain Instructions: The safety and operating instructions should be retained for future reference. 3) Heed Warnings: All warnings on the appliance and in the operat- ing instructions should be followed. - Page 23 Model: PR-D4VW THIS DEVICE COMPLIES WITH PART 15 OF THE FCC RULES. OPERATION IS SUBJECT TO THE FOLLOWING TWO CONDITIONS. 1) THIS DEVICE MAY NOT CAUSE HARMFUL INTERFERENCE, AND...
- Page 24 381C15SA...
Need help?
Do you have a question about the PR-D4VW and is the answer not in the manual?
Questions and answers