Table of Contents
Advertisement
Advertisement
Table of Contents

Related Manuals for Sangean PR-D8


Summary of Contents for Sangean PR-D8
- Page 1 PR-D8 Revision 2...
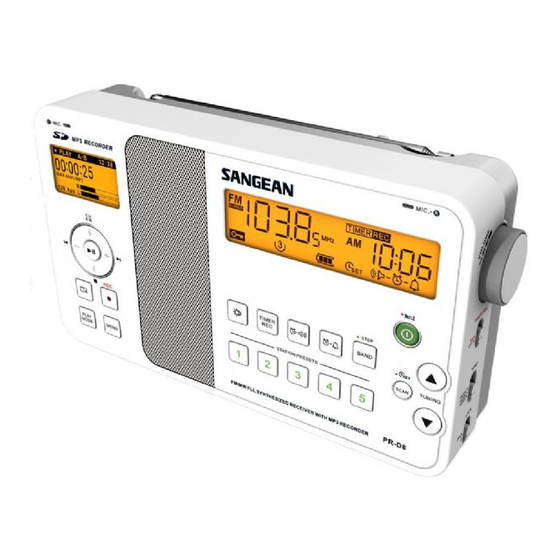
- Page 3 Controls Stereo Built-in Microphone (Left Channel) LCD Display LCD Display Stereo Built-in Microphone (Right channel) Power/Auto Shut Off Tuning Up Tuning Down Time Set and Station Scan Band Selection and Tuning Step Alarm (Buzzer) Alarm (Radio) Station Presets Timer Recording LCD Illumination Skip/Fast Forward Recording...
- Page 4 LCD Display for Radio and Clock Stereo Frequency Sleep and Snooze AM/PM Timer Recording (On & Off) Time Recording (On & Off) Clock Alarm Buzzer Alarm Radio Time Set Unit Battery Power Indicator Station Presets Key Lock FM/AM/MW Band...
- Page 5 LCD Symbol for MP3 player Status Play Pause Stop Fast Forward Fast Rewind Record File Format MP3 file WMA file Filename Folder name Play Mode Repeat one Repeat Folder Repeat All Random play Repeat A-B Volume label or Disk S/N Folder(File browse) File(File browse)
-
Page 6: Battery Operation Using Alkaline Batteries
Battery Operation using Alkaline Batteries 1. Remove the battery cover on the back of the unit by sliding the cover to the OPEN direction. 2. Insert 4 x UM-2 (C size) alkaline batteries into the battery compartment. Make sure the batteries are inserted with correct polarity as shown inside the battery compartment. -
Page 7: Battery Operation Using Rechargeable Batteries
Battery Operation using Rechargeable Batteries 1. Remove the battery cover on the back of the unit by sliding the cover to the OPEN direction. 2. Insert 4 x UM-2 (C size) rechargeable batteries into the battery compartment. Make sure all batteries are inserted with correct polarity as shown inside the battery compartment. -
Page 8: Setting The Clock
Using the Supplied AC Power Adapter The supplied AC adapter is 9 Volts DC output 700 mA center pin positive. 1. Insert the AC power adapter plug into the DC-In jack on the left hand side of the radio. 2. Plug in the AC power adapter into a standard 13A main socket outlet. -
Page 9: Operating The Radio
Operating the Radio This radio is equipped with three tuning methods- scanning tuning, manual tuning and preset recall. Scan Tuning 1. Press the power button to turn the radio on. 2. Select the required waveband by pressing the band button For FM band fully extend and rotate telescopic aerial antenna to get the best reception. -
Page 10: Storing Stations In Preset Memories
Manual Tuning/Station Searching 1. Press the power button to turn the radio on. 2. Select the required waveband by pressing the band button. Adjust the antenna as described above. 3. A single press on either the tuning up or down button will change the frequency in the following increments: FM: 50 or 100 kHz AM (MW): 9 or 10 kHz... -
Page 11: Setting The Radio Alarm
Recalling Stations from Preset Memories 1. Press the power button to turn on the radio. 2. Select the required waveband. 3. Momentarily press the required preset button, the preset number and station frequency will appear in the display. Setting the Radio Alarm When the radio alarm is selected, the radio will turn on and play the chosen radio station at the chosen alarm time. - Page 12 a. Setting Radio Alarm Time 1. The radio alarm can be set in both ways (radio on or off). 2. Press and release radio alarm button , the radio will show radio alarm symbol. 3. Press and hold button for more than 2 seconds followed by a beep.
- Page 13 Setting the HWS (Humane Wake System) Buzzer Alarm A beep will active when selecting the HWS buzzer alarm. The alarm beep will increase in volume every 15 seconds for one minute followed by one minute silence before repeating the cycle. The HWS alarm will sound for an hour until turning off by pressing the power button.
-
Page 14: Snooze Function
Snooze Function 1. While the alarm is active, press any buttons except the power button to activate the snooze function. The radio or HWS buzzer alarm will be silenced with interval of 5 minutes. 2. The display will flash both the snooze symbol and the alarm symbol. -
Page 15: Setting Tuning Step
Setting 12 hour/24 Hour Format Tuning Step While the radio is switched off, press and hold band/step button for approximately 5 seconds, display will show 12H, continue pressing tuning up/down button for another 5 seconds, display will flash 12H. By pressing tuning up/down button to select 24 hour format, complete the setting by pressing band/step button. -
Page 16: Operating The Radio - Aux In
Operating the Radio - Aux In 1. Connect a stereo or mono audio source (like CD walkman, MP3 player) to Aux In jack. 2. Press the band button to select AUX band. The display will show AUX. 3. Adjust the volume control for comfort listening. Operating the Radio –... -
Page 17: Lock Switch
Lock Switch The lock switch is used to prevent unintentional operation of the radio. Set the lock switch on the right side of the radio to the on position. The Lock Icon will appear in the display. The power and all other buttons will be disabled. This will prevent accidental operation when the radio is packed in a suitcase or carrying a pouch. -
Page 18: Timer Recording
Timer Recording The PR-D8 is capable of recording selected audio program into an SD card on an MP3 format at selectable recording on and off time. 1. Press power button to turn the radio on. 2. Make sure the real time is set before setting timer recording. - Page 19 10. Press and release timer REC button to complete the timer recording setting. 11. Recording will start from Timer Recording On time and will end at Timer Recording Off time. 12. The recording will be stored in the SD card in various folders. If the recording is from the radio (FM/AM), the recorded folder will show as Radio.
- Page 20 MP3 or WMA files. The PR-D8 can also be recorded to SD, SDHC in MP3 format. The PR-D8 has been tested with a range of SD cards. SD cards up to 2GB and SDHC card up to 32GB are supported. However, there are many different card variants available and not all cards can be guaranteed to work with the PR-D8.
-
Page 21: Selecting A File
You can skip to the desired file by pressing the fast-forward or rewind buttons and release the button when the desired track number is displayed. 3. Press the Play/Pause button to play the selected file. The PR-D8 will allow a maximum of 99 folders and 999 files. -
Page 22: Search Function
Search Function 1. When playing the files in your SD cards, press and hold the fast-forward/ Rewind buttons to search for the desired part of the current file. Press any buttons (except REC. PlayMode) to return to the normal playing. Skip to Another Folder 1. -
Page 23: Play Mode
Play Mode When playing the SD card, press and release PLAY MODE button to select. Repeat 1 - repeatedly play the file you are listening to. Repeat Folder - repeatedly play the files within the folder you are listening to. Repeat All - repeatedly play the folders in the SD card. - Page 24 Recording to SD The PR-D8 has been designed to allow you to make recordings to SD/SDHC cards memory devices. Recording is made on MP3 format at selectable 64k or 128k (initial setting) or192k bits per second. SD/SDHC must use the FAT or FAT 32 file system in order to operate with the PR-D8.
- Page 25 Recording 1. Select the desired source for the recording (MW/FM/AUX/SD – Microphone) by pressing the band button. Set the volume to the required listening level (the volume of the recording will not be affected by this). 2. Insert the SD card. 3.
-
Page 26: Playing The Recording
Playing the Recording 1. After recording is completed, press and release file browser button and then press folder up or down button to search RECORD file. 2. Press and release Play and Pause button, the display will show Radio (recording from radio), AUXIN (recording from Aux In) and MIC (recording from built-in microphone). - Page 27 Deleting WMA/MP3files PR-D8 is capable of deleting WMA/MP3 files (not the folders) from SD card. To delete files, 1. Inserting SD card into SD card slot, then switch the radio to SD band by pressing Band button. 2. After SD card reading is completed, press and release file browse button, LCD display will browse the folders in the SD card.
-
Page 28: Menu Button
Menu Button The menu button is to set up recording quality and also system setup. 1. When the Power is on and on SD mode, press and release the menu button, the display will show Record Setup and System Setup. Press up or down button to select Record Setup or System Setup. - Page 29 C) power saving – for power saving purpose, you may select radio auto power off time in SD band by entering power saving mode after pressing and releasing the Play and Pause button. In power saving mode, display will show OFF, 1 min, 3 mins (initial)………...
-
Page 30: Trouble Shooting/Reset Button
Trouble shooting/Reset Button If the radio fails to operate correctly or some digits on the display are missing or incomplete, perform the RESET procedure. 1. Turn the radio off and remove the batteries. 2. With the aid of a suitable implement (the end of a paper clip or a pen), press the RESET button located inside the battery compartment for at least 1 second, this will reset the microprocessor, clock time and clear all stations stored in the... - Page 31 Frequency Range: FM Band: 87.5~108MHz AM Band: 530~1620kHz (9kHz/step) or 520~1710kHz (10kHz/step) Electronic features: Speaker: 40x115mm 8 ohm 3W full range Output Power: 0.7W @alkaline battery, 1.5W by DC-IN 9V Output Power of Headphone: 5mW+5mW Rechargeable Current of Charger: 0.5A AUX-IN Level: 0.5Vrms (typical), 1Vrms (max.) LINE-OUT Level: 0.5Vrms, 1Vrms (max.) MP3/WMA Features:...
- Page 32 If at any time in the future you should need to dispose of this product please note that: Waste electrical products should not be disposed of with household waste. Please recycle where facilities exist. Check with your Local Authority or retailer for recycling advice.
Need help?
Do you have a question about the PR-D8 and is the answer not in the manual?
Questions and answers