Advertisement
CONVERT 2/3
CONVERT 2/3
PITCHING INSTRUCTIONS
PITCHING INSTRUCTIONS
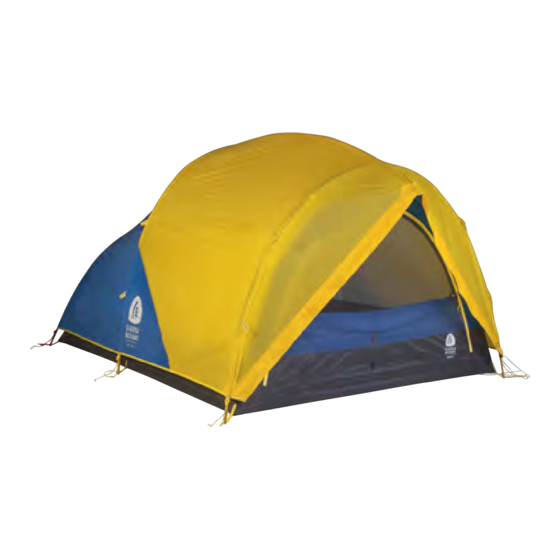
Congratulations on the purchase of your new Sierra Designs tent! In order to familiarize yourself with your new tent, we
Congratulations on the purchase of your new Sierra Designs tent! In order to familiarize yourself with your new tent, we
recommend you "test pitch" it before embarking on your wilderness adventure.
recommend you "test pitch" it before embarking on your wilderness adventure.
PACKAGE INCLUDES: Tent body, rain fy, 3 poles, guy cords, V-stakes, storage bag, and pole bag with stake pocket.
PACKAGE INCLUDES: Tent body, rain fly, 3 poles, guy cords, V-stakes, storage bag, and pole bag with stake pocket.
STEP 1:
STEP 1:
Find an even piece of ground; be sure area is clear of
Find an even piece of ground; be sure area is clear of
debris. Layout your tent as shown. Stake the 4 corners
debris. Layout your tent as shown. Stake the 4 corners
and 2 center loops (circled).
and 2 center loops (circled).
STEP 3:
STEP 3:
Assemble single yellow pole. Locate center of pole and clip it
Assemble single yellow pole. Locate center of pole and clip it
into Hybrid Hub. Insert pole tips into yellow SD Anchor.
into Hybrid Hub. Insert pole tips into yellow SD Anchor.
Hybrid Hub
Hybrid Hub
Note: Must be installed
Note: Must be installed
BELOW center pole.
BELOW center pole.
Lay the rain fy over the tent body matching the RED corner of the
Lay the rain fly over the tent body matching the RED corner of the
STEP 5:
STEP 5:
tent with the RED corner on the fy. On the UNDER side of the fy,
tent with the RED corner on the fly. On the UNDER side of the fly,
attach Tip Clips at front and rear of tent then wrap the 10 velcro
attach Tip Clips at front and rear of tent then wrap the 10 velcro
loops around tent poles at guyout points. NOTE: this will ensure
loops around tent poles at guyout points. NOTE: this will ensure
proper fy tensioning.
proper fly tensioning.
VL
VL
TC
TC
VL
VL
TC=Tip Clip
TC=Tip Clip
TC
TC
VL
VL
VL
VL
VL
VL
VL=Velcro Loop
VL=Velcro Loop
VL
VL
STEP 2:
STEP 2:
Assemble hubbed poles. Locate the YELLOW pole ends and insert into
Assemble hubbed poles. Locate the YELLOW pole ends and insert into
tent corners with YELLOW SD Anchors/webbing. Attach TIP CLIPS to
tent corners with YELLOW SD Anchors/webbing. Attach TIP CLIPS to
center pole tips. Make sure long center pole is on TOP.
center pole tips. Make sure long center pole is on TOP.
Yellow Pole
Yellow Pole
Yellow webbing &
Yellow webbing &
SD Anchor
SD Anchor
STEP 4:
STEP 4:
Yellow Pole
Yellow Pole
Yellow webbing &
Yellow webbing &
SD Anchor
SD Anchor
Attach fly cord loop around pole tip at all stake out points.
Attach fy cord loop around pole tip at all stake out points.
STEP 6:
STEP 6:
Adjust tension by pulling down on String Lock cord
Adjust tension by pulling down on String Lock cord
Pull down String Lock
Pull down String Lock
cord to tighten
cord to tighten
Attach fy cord loop around pole tip
Attach fly cord loop around pole tip
Connect Split Clip and Tent Lite hooks to tent poles.
Connect Split Clip and Tent Lite hooks to tent poles.
Tip Clip
Tip Clip
Center pole
Center pole
must be on top.
must be on top.
Split Clip
Split Clip
Tent Lite Hook
Tent Lite Hook
Advertisement
Table of Contents

Related Manuals for Sierra Designs CONVERT 2


Summary of Contents for Sierra Designs CONVERT 2
- Page 1 PITCHING INSTRUCTIONS Congratulations on the purchase of your new Sierra Designs tent! In order to familiarize yourself with your new tent, we Congratulations on the purchase of your new Sierra Designs tent! In order to familiarize yourself with your new tent, we recommend you “test pitch”...
- Page 2 BREATHABLE BODY FABRIC: The Convert 2/3 tents WATERPROOF DOOR: The Convert 2/3 tents feature a waterproof door so the feature breathable 20d polyester body fabric instead of front vestibule can be left behind to save weight. traditional mesh to keep the snow and dust out.
Need help?
Do you have a question about the CONVERT 2 and is the answer not in the manual?
Questions and answers