Advertisement
Quick Links
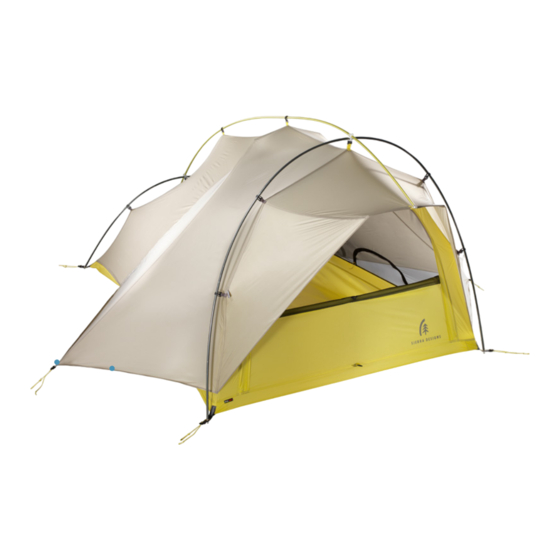
LIGHTNING 2
PITCHING INSTRUCTIONS
Congratulations on the purchase of you new Sierra Designs tent! In order to familiarize yourself with
your new tent, we recommend you "test pitch" it before embarking on your wilderness adventure.
PACKAGE INCLUDES: Tent body with attached Rain Fly, 3 Poles (hubbed together), Guy Cords, Stakes, 1 Pole/Stake Bag and Tent Stuff Sack.
STEP 1:
Find an even piece of ground; be sure area
is clear of debris. Layout your tent as shown. Stake
the 4 corners (circled).
STEP 3:
Insert pole tips into the grommets located at
the four corners of the tent.
STEP 5:
Attach all ultralight clips to the poles.
Attach Ball Cap connector on awning to ball end
of the ridge pole.
(STANDARD, UL & FL MODELS)
Ultralight Clips
Ball Cap Connector
STEP 2:
Assemble pole. Lay it on the tent as shown
with gray pole down the middle. The long yellow or
blue pole should be in the front, the short yellow or
blue pole in the rear. Make sure H-Clip is facing down.
STEP 4:
Attach H-Clips on the tent body to buttons on
bottom of Swivel Hubs (circled).
STEP 6:
Stake out the Gear Closet Wings and your tent
is completely set up.
Swivel Hub with H-Clip
must face down.
Gear closet wing
Advertisement

Related Manuals for Sierra Designs LIGHTNING 2


Summary of Contents for Sierra Designs LIGHTNING 2
- Page 1 (STANDARD, UL & FL MODELS) PITCHING INSTRUCTIONS Congratulations on the purchase of you new Sierra Designs tent! In order to familiarize yourself with your new tent, we recommend you “test pitch” it before embarking on your wilderness adventure. PACKAGE INCLUDES: Tent body with attached Rain Fly, 3 Poles (hubbed together), Guy Cords, Stakes, 1 Pole/Stake Bag and Tent Stuff Sack.
- Page 2 Call our warranty department for replacement. GUYING OUT YOUR TENT: Your tent includes 4 guy out Guy out your Lightning 2 tent where shown below points, guylines and stakes. It is good practice to to prevent pole rotation/breakage during high winds.
Need help?
Do you have a question about the LIGHTNING 2 and is the answer not in the manual?
Questions and answers