Table of Contents
Advertisement
Quick Links
S I E R R A D E S I G N S
Your Sierra Designs
ALPHA tent is very easy to
pitch and maintain. Follow
these instructions to pitch your
tent quickly, safely and easily.
ALPHA TENT CONTENTS
Tent Body & Rainfly:
1
Tent Poles:
3
Tent Stakes:
9*
Guy Cord:
6
* Sierra Designs tent s include stakes for pitching the body and fly under normal conditions.
Additional stakes may be required in severe conditons.
First Pitch
In order to familiarize yourself with your new tent, we
suggest that you "test pitch" it before embarking on a
wilderness trip.
Select a Site
Look for a level spot that is protected from the wind in
order to ensure sleeping comfort. Clear the area of debris
such as sharp stones and sticks which might abrade or
puncture the tent floor. Choose an area that will drain
well when it rains.
Unfurl the Tent and Assemble the Poles
Unfurl the tent and lay the tent floor flat on the ground
with the door unzipped. Carefully unfold the shock corded
pole sections and allow them to slide together. Do not al-
low the poles to snap together: This can lead to serious
pole damage. Make certain that the insert of each pole sec-
tion is fully inserted into the next pole section (Figure 1).
You will have two straight poles of equal length and one
pre-bent pole.
Stake out the Tent Floor
The Alpha is a completely freestanding tent. It is not nec-
essary to stake down the tent floor in order to pitch it.
However, we recommend that the tent be staked down at
points A, B, C and D for stability, especially in high
winds (Figure 2).
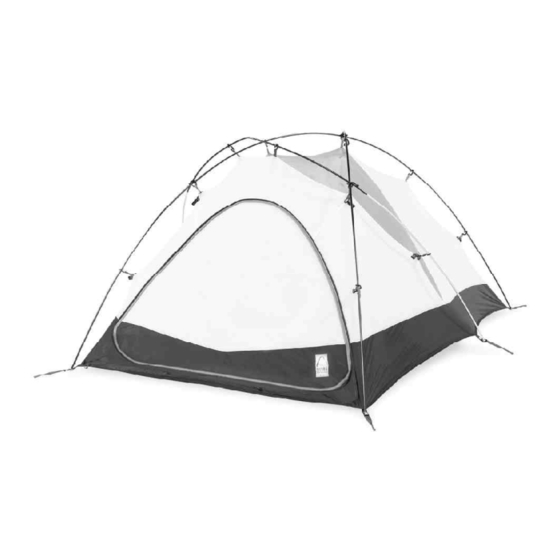
Figure 2: Tent Body (top view)
Erect the Tent
Insert the metal tips of one of the two long poles into the
grommets at points A and C (Figure 2). Insert the metal
tips of the other long pole into the grommets at points B
and D. Next hook the Clip-Loc
the cord yet). Following the tent seams between points A
and C, and B and D attach all of the Swift Clips
corresponding tent poles. Passing the arched pole over the
SIERRA DESIGNS 2011 Cherry Street, Unit 202 Louisville, CO 80027
Line Tighteners:
6
Pitching Instructions: 1
Stake Sack:
1
Pole Sack:
1
Figure 1: Correct Pole Assembly
™
at point E (do not attach
™
to their
Alpha
two long poles, place its ends into the grommets at
points F and G. Once the arched pole is in place, hook
the Clip-Locs at points H and I, with the open gate of
the clip pointing towards the rear of the tent. Now attach
the cord at points H, I & E, by wrapping the cord in the
direction crossing the open gate of the clip. Wrap the
cord around the pole intersection two to four times, de-
pending on desired firmness, then slide the cord into the
groove on the backside of the clip to hold it taut (Figure 3).
Fly Sheet
Drape the fly over the tent making sure the zippered, ves-
tibule end is over the front door (Figure 4). At points H,
I, J, K, L and M on the inside of the tent fly you will
find small side release buckles. Attach these points to
their mates on the tent body. At point N on the fly you
®
will find a Velcro
Figure 5: LadderLoc
the arched pole. Now at points A, B, C, D, G and F you
will find
" LadderLocs with adjustable grommeted web-
bing straps. Slip the grommets over the pole ends at these
points (Figure 5). Now working your way around the tent
a few times, slowly tighten these adjustable straps until
you have achieved the desired tautness. Point O may be
staked out to increase ventilation. Lastly stake out points
Q and R to form your vestibule.
Phone: 303-262-3050
Fax: 303-262-3051
Figure 3: Clip-Loc
attachment. Attach this to the apex of
Figure 4: Tent Fly (top view)
Toll Free: 800-635-0461
Advertisement
Table of Contents

Related Manuals for Sierra Designs Alpha


Summary of Contents for Sierra Designs Alpha
- Page 1 Pole Sack: two long poles, place its ends into the grommets at * Sierra Designs tent s include stakes for pitching the body and fly under normal conditions. points F and G. Once the arched pole is in place, hook Additional stakes may be required in severe conditons.
- Page 2 6 oz. In addition to a At 8 lbs. 1 oz. the Alpha is one of the lightest weight savings, there is a large ceiling panel which folds 4-Season tents on the market.
Need help?
Do you have a question about the Alpha and is the answer not in the manual?
Questions and answers