Table of Contents
Advertisement
Quick Links
OWNER'S MANUAL
MANUEL DU PROPRIÉTAIRE
USO E MANUTENZIONE
INSTRUKTIONSBOK
OMISTAJAN KÄSIKIRJA
EIERHÅNDBOK
E
Read this manual carefully before operating this vehicle.
F
Il convient de lire attentivement ce manuel avant la première utilisation du véhicule.
I
Leggere attentamente questo manuale prima di utilizzare questo veicolo.
S
Läs den här instruktionsboken noga innan snöskotern används.
SF
Lue tämä käsikirja huolellisesti ennen moottorikelkan käyttöä.
N
Les denne håndboken nøye før du tar kjøretøyet i bruk.
E
F
I
S
SF
N
SW1AML53J
SW1AML62J
SW1AXS41J
SW1AXS37J
SW1AXL41J
SW1ABL53J
8KC-F8199-S1
Advertisement
Table of Contents

Related Manuals for Yamaha SRS10ML53


Summary of Contents for Yamaha SRS10ML53
- Page 1 OWNER’S MANUAL MANUEL DU PROPRIÉTAIRE USO E MANUTENZIONE INSTRUKTIONSBOK OMISTAJAN KÄSIKIRJA EIERHÅNDBOK Read this manual carefully before operating this vehicle. Il convient de lire attentivement ce manuel avant la première utilisation du véhicule. Leggere attentamente questo manuale prima di utilizzare questo veicolo. Läs den här instruktionsboken noga innan snöskotern används.
- Page 2 Original instructions Notice originale Istruzioni originali Bruksanvisning i original Alkuperäiset ohjeet Opprinnelige instruksjoner PRINTED IN U.S.A.
- Page 3 OWNER’S MANUAL Read this manual carefully before operating this vehicle. SW1AML53J SW1AML62J SW1AXS41J SW1AXS37J SW1AXL41J SW1ABL53J 8KC-F8199-S1-E0...
- Page 4 Read this manual carefully before operating this vehicle. This manual should stay with this vehicle if it is sold. EC Declaration of Conformity conforming to Directive 2006/42/EC We, YAMAHA MOTOR CO., LTD. 2500 Shingai, Iwata, Japan, declare in sole responsibility, that the product SRS10ML53(SW1AML53) (4UF8MS20 JT000001-) SRS10XS37(SW1AXS37) (4UF8MM20 JT000001-)
-
Page 5: Table Of Contents
Table of Contents Foreword ............2 Maintenance ......... 21-43 General Information.........3-13 Periodic Maintenance Checklist ....21 Fuel System ..........22 Snowmobile Identification......3 Checking Engine Oil Level ......22 Control Locations.........3 Gasoline-Oil ..........3 Changing Engine Oil/Filter ......22 Coolant Level ..........24 Engine Break-In ...........4 Air Filter ............24 Drive Belt Break-In ........4 Cold Drive-Away Function ......5 Spark Plugs..........25... - Page 6 SAFETY OF YOURSELF AND OTHERS. Parts and Accessories When in need of replacement parts, oil, or accessories for your Yamaha Snowmo- bile, be sure to only use GENUINE YAMAHA PARTS, OIL, AND ACCESSO- RIES. Only genuine Yamaha parts, oil, and accessories are engineered to meet the standards and requirements of your Yamaha Snowmobile.
-
Page 7: Foreword
Snowmobile, to become thoroughly familiar with its basic operation, maintenance, and off-season storage procedures. Read this manual before operating the snowmo- bile to learn safe and proper use of your new Yamaha Snowmobile. Always operate the snowmobile within your level of skill and current terrain conditions. -
Page 8: General Information
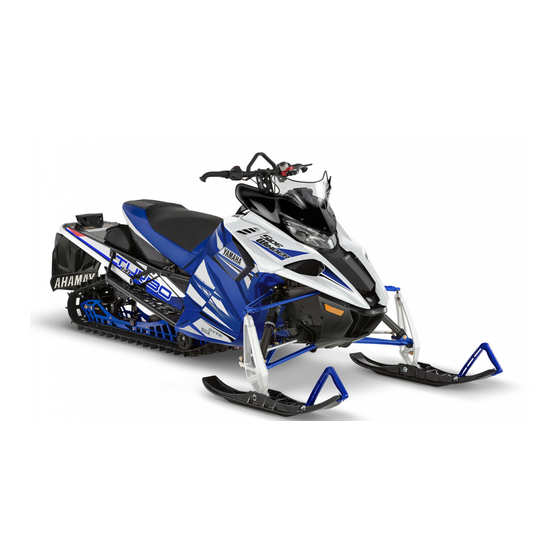
Yamaha Snowmobile dealer for stamped into the crankcase of the engine. parts, service, accessories, or warranty. If the complete engine must be replaced, ask the dealer to notify Yamaha for cor- rect registration information. Control Locations Shown are the typical control locations for Yamaha snowmobiles. -
Page 9: Engine Break-In
If any engine trouble should occur during the engine break-in period, immediately have a Yamaha dealer check the snowmobile. Drive Belt Break-In Drive belts require a break-in period of 40 km (25 miles). -
Page 10: Cold Drive-Away Function
If unable to either deter- mine or remedy the problem, take the CAUTION snowmobile to an authorized Yamaha Snowmobile dealer for service. If not It is extremely important that the under warranty, this service is at the... -
Page 11: Diagnostic Codes
With the clock mode selected by pressing engine does not start, take the snowmo- the Upper Right Button, press and hold bile to an authorized Yamaha Snowmo- the Upper Right Button to set the clock. bile dealer. If not under warranty, this... -
Page 12: Handlebar Tilt
Refer to the following chart for a list of 2. Adjust the handlebar to operator’s possible diagnostic codes. desired position, tighten the cap screws evenly to 2.0 kg-m (15 ft-lb), Code Trouble and check steering for maximum Shift Switch Abnormality right/left turning capabilities. -
Page 13: Cooling System
Cooling System Jump-Starting These snowmobiles are equipped with a NOTE: Yamaha does not recom- closed liquid cooling system for engine mend jump-starting a snowmobile cooling. The cooling system should be with a dead battery but rather to inspected daily for leakage and damage. -
Page 14: Drive Clutch And Driven Clutch
However, the drive clutch and driven black. clutch should be disassembled, cleaned, and inspected by an authorized Yamaha Snowmobile dealer after every 4000 km (2500 miles) or seasonally, whichever occurs first. This service is at the discre- tion and expense of the snowmobile owner. -
Page 15: Drive Clutch/Driven Clutch Alignment
If a fuel delivery installed to reduce wear strip wear problem is suspected, take the snowmo- and engine overheating. bile to an authorized Yamaha Snowmo- bile dealer. If not under warranty, this Reverse Operation service is at the discretion and expense of The electrical reverse function offers the the snowmobile owner. -
Page 16: Access Panel/Hood
2. After shifting from reverse to for- Shifting Into Reverse ward (or from forward to reverse), apply the throttle slowly and evenly Reverse Switch Button to allow the driven pulley to engage properly. CAUTION After reversing in deep powder snow conditions, make sure the snowflap does not become “caught up”... -
Page 17: Removable Seat
To install the hood and access panels, use the following procedure: 1. Position the hood onto the snowmo- bile and connect the hood harness connector and secure the two front quarter turns. 2. Install the access panel into the skid plate;... -
Page 18: Towing
WARNING People who are unable to feel pain to the skin because of advanced age, chronic illness, diabetes, spinal cord injury, medication, alcohol use, exhaustion, or other physical condi- tions, must exercise care when using the seat heater. The seat heater may cause burns even at low tempera- tures, especially if used for long peri- ods of time. -
Page 19: Operating Instructions
Operating Instructions 3. If the brake fluid is below the high Pre-Start brake fluid mark, add YAMAHA It is imperative that the brake system be approved DOT 4 brake fluid until checked for wear and proper operation. the fluid is at the recommended After the engine has been started, check level. -
Page 20: Starting And Stopping Engine
1. Move the emergency stop switch to snowmobile authorized the UP or RUN position. YAMAHA Snowmobile dealer for inspection and service. This ser- 2. Insert key into ignition switch; then vice is at the discretion and rotate key to the RUN position. -
Page 21: Emergency Stopping
WARNING of situations. Identified in the following Use only Yamaha approved DOT 4 chart are the ways a snowmobile may be brake fluid. Never substitute or mix brought to a stop and the effectiveness different types or grades of brake under normal conditions. - Page 22 Yamaha 1. Rotate the ignition key to the OFF Snowmobile dealer for service as position. soon as possible. If not under war- ranty, this service is at the discre- 2.
-
Page 23: Lubrication
If the owner does not feel qualified, take the snowmobile authorized Yamaha Snowmobile dealer for this YM-102 service. This service is at the dis- NOTE: To verify everything is... -
Page 24: Replacing Lubricant
If the 7. Fill the chain case with 355 ml (12 owner does not feel qualified, take oz) of Yamaha Snowmobile Chain the snowmobile to an authorized Case Lube. Yamaha Snowmobile dealer for this service. -
Page 25: Rear Suspension
This procedure should be done every 40 ing. This is only to aid in the instal- operating hours. lation of the actuator. NOTE: Yamaha recommends that low-temperature grease be used for this procedure. 1. Using Handlebar Stand or Steering Post Stand or a suitable substitute, lay the snowmobile on its left side. -
Page 26: Maintenance
Maintenance Periodic Maintenance Checklist Item Interval Page Remarks Brake System Daily Check for binding, leakage, and proper operation; lever firmness, travel, caliper, disc, and pads Cooling System - Liquid Daily 8,24 Check for leakage, damage, obstructions, cool- ant level Engine Oil Daily Check oil level and for signs of leakage Engine Oil - Initial... -
Page 27: Fuel System
“MAX to MIN” range, add the recommended Fuel de-icer can be used for all models. engine oil through the oil tank fill Yamaha Fuel Stabilizer should also be hole. added to the last tank of gasoline before storage. - Page 28 Tighten the screw time, take the snowmobile to and to 1.0 kg-m (7.2 ft-lb). authorized Yamaha Snowmobile 9. Install the rear access plate. Tighten dealer for service. the screws to 1.2 kg-m (9 ft-lb).
-
Page 29: Coolant Level
If leakage or damage is NOTE: Care must be taken not to detected, take the snowmobile to an authorized Yamaha Snowmobile over-fill the oil tank. dealer for service. If not under war- 17. Install the oil fill plug; then install ranty, this service is at the discre- the hood and access panels. -
Page 30: Spark Plugs
Damage Yamaha Snowmobile dealer for this to the plug may occur. service. This service is at the dis- cretion and expense of the snow- 1. Disconnect the main harness from the mobile owner. - Page 31 WARNING Lock Nuts Battery Bracket Improper handling or connecting of a battery may result in severe injury including acid burns, electrical burns, or blindness as a result of an explosion. Always remove rings and watches. Any time service is per- formed on a battery, the following must be observed: keep sparks, open flame, cigarettes, or any other...
- Page 32 B. When using a constant-current NOTE: If voltage in step 8 is below battery charger, use the follow- specifications, charge the battery ing Battery Charging Chart. an additional 1-5 hours; then retest. The battery is ready for service. CAUTION 9.
-
Page 33: Fuses
If electrical blow, take the snowmobile to an autho- parts in the snowmobile are not working, rized Yamaha Snowmobile dealer for ser- the system may have been overloaded and vice. If not under warranty, this service is caused a blown fuse. - Page 34 1. Remove the reservoir cover and (if necessary) fill the reservoir to the NOTE: Do not pump the brake high brake fluid mark with Yamaha lever as it will produce an inaccu- approved DOT 4 brake fluid. rate reading.
- Page 35 NOTE: Changing one pad at a snowmobile authorized time will prevent one piston from Yamaha Snowmobile dealer for this pushing out the other piston from service. This service is at the dis- the caliper. cretion and expense of the snow- mobile owner.
-
Page 36: Burnishing Brake Pads
1. Choose an area sufficiently large to safely accelerate to 50-65 km/h (30- 40 mph) and to brake to a stop. NOTE: This procedure can also be accomplished using a shielded jack stand. 2. Accelerate to 50-65 km/h (30-40 mph);... -
Page 37: Drive Belt
If any of the specifications or conditions are unsatisfactory, replace the drive belt. NOTE: Drive belts should be pur- chased from an authorized Yamaha Snowmobile dealer, as Yamaha drive belts are made to exact specifica- Jam Nut tions and of quality material. Belts... -
Page 38: Track Tension
If the owner does not feel qualified, take the snowmo- bile to an authorized Yamaha Snow- mobile dealer for this service. This service is at the discretion and expense of the snowmobile owner. - Page 39 Checking Track Tension Rear Idler Wheels WARNING Track Adjuster DO NOT attempt to check or adjust track tension with engine running. Turn ignition key to the OFF posi- tion. Personal injury could result from contact with a rotating track. Adjusting Bolt Axle Cap 1.
-
Page 40: Track Alignment
Idler Wheel Assembly wear to the idler wheels, drive lugs, and track will occur if the track is improperly aligned. Yamaha recommends that the track alignment be checked once a week or whenever the track tension is adjusted. Checking Track Alignment... -
Page 41: Suspension
Failure self. Take the shock absorber to to do so could cause the track to become extremely loose and, under a Yamaha dealer for any service. some operating conditions, allow Gas Shocks the idler wheels to climb over the... - Page 42 0745-159 replacement is necessary. Take the snow- Adjusting Fox Air Shocks mobile to an authorized Yamaha Snow- mobile dealer for this service. If not under NOTE: It is recommended to warranty, this service is at the discretion monitor the air pressure in the air and expense of the snowmobile owner.
- Page 43 To increase or decrease air pressure, use Choose from three specifically calibrated the following procedure. ride control settings, with the 3rd posi- tion calibrated specifically for technical NOTE: When adjusting air pres- Mountain riding, allowing increased sure, all weight must be removed climbing capabilities and limited transfer from the suspension, and the shock of the rear suspension.
-
Page 44: Adjusting Skid Frame Rear Shock (Fox Qs3)
Spring The skid frame front arm shock spring ten- sion and the limiter straps are adjust- able. However, Yamaha recommends that the shock spring be maintained at the fac- tory preset of 3.2-6.4 mm (1/8-1/4 in.) preload. Tightening the skid frame front... -
Page 45: Lights
To rotate an adjusting cam, use the spark plug wrench from the tool kit. Rotate the wrench until the cam is in the desired position. To stiffen the ride, rotate the cam so as to raise the spring end. Make the appropriate adjustment on the other cam. -
Page 46: Ski Wear Bars
To maintain positive steering characteris- tics, Yamaha recommends that the ski wear bars be checked before each use and replaced if worn beyond 1/2 of the original diameter. -
Page 47: Adjusting Ski Stance
Ski Damper Spindle Axle Spacer Cotter Pin Washer Washer Screw SNO-681A Insert Installing (Dual) 0750-103 1. Position the wear bars in the ski and 3. To increase ski stance, place ski loosely secure using the existing stance spacer to the outside of the spacers, washers and nuts. -
Page 48: Rail Wear Strips
Take the snowmobile to an authorized Yamaha Snowmobile dealer for this ser- NOTE: Install the cap screw so vice. This service is at the discretion and the slotted nut will be located to expense of the snowmobile owner. -
Page 49: Performance Tips
If the owner does not feel qualified, DRIVE CLUTCH/DRIVEN take the snowmobile to an autho- CLUTCH OFFSET rized Yamaha Snowmobile dealer If premature drive belt wear is experi- for this service. This service is at enced or if the drive belt turns over, off- the discretion and expense of the set must be checked. - Page 50 3. Adjust the position by removing or Spacer Part Numbers: adding a spacer on the mounting 8KC-RA446-00: 0.5 mm (0.02 in.) bolt. 8KC-RA447-00: 1.0 mm (0.04 in.) CAUTION 4. Once the correct belt position is reached, tighten the cap screw to 60 As the belt wears, adjustment may be necessary.
-
Page 51: Preparation For Storage
12. Clean and polish the hood, console, snowmobile owner. To prepare the snowmo- and chassis. DO NOT USE SOL- bile for storage, Yamaha recommends the VENTS. PROPELLANT following procedure: WILL DAMAGE THE FINISH. -
Page 52: Preparation After Storage
Noise level and vibration level and correctly preparing it for another sea- Noise level (77/311/EEC): son will assure many miles and hours of trouble-free snowmobiling. Yamaha rec- 96 dB(A)@4375 r/min ommends the following procedure: Uncertainty of measurement: 1. Clean the snowmobile thoroughly. -
Page 53: Snowmobile Safety Rules
Snowmobile Safety Rules... - Page 54 PRINTED IN U.S.A.
Need help?
Do you have a question about the SRS10ML53 and is the answer not in the manual?
Questions and answers